Oracle R12 – Receivables
Financials R12 – Accounts Receivables
Contents
Creating Accounts Receivables Responsibility 4
Overview of Accounts Receivables 7
Setup to Implement the Feature 7
Create a Profile Class (Required) 11
Create a Customer (Required) 16
Create a Customer Relationship (Required) 24
Submit Customer Related Reports (Optional) 27
Open Receivables Periods (Required) 31
Review a Transaction Source 33
Review AutoAccounting Setup (Required) 36
Enter an Invoice with Standard Memo Lines (Required) 42
Enter an Invoice with a Bill in Arrears Invoicing Rule 51
Enter an Invoice with Rules 52
Enter a Debit Memo for Missed Freight 55
Create a Write-Off Adjustment 58
Issue a Credit Memo against a Specific Invoice 66
Transaction Types in Receivables 69
Setup a Customer Bank Account 70
Accounts Receivables Report 72
Create an On-Account Credit 89
Auto Invoice Interface Tables 91
Types of Transaction Flexfields 91
Define a Credit Transaction Type 96
Define a Transaction Source 98
Enter a Manual Receipt Batch 101
Creating Accounts Receivables Responsibility
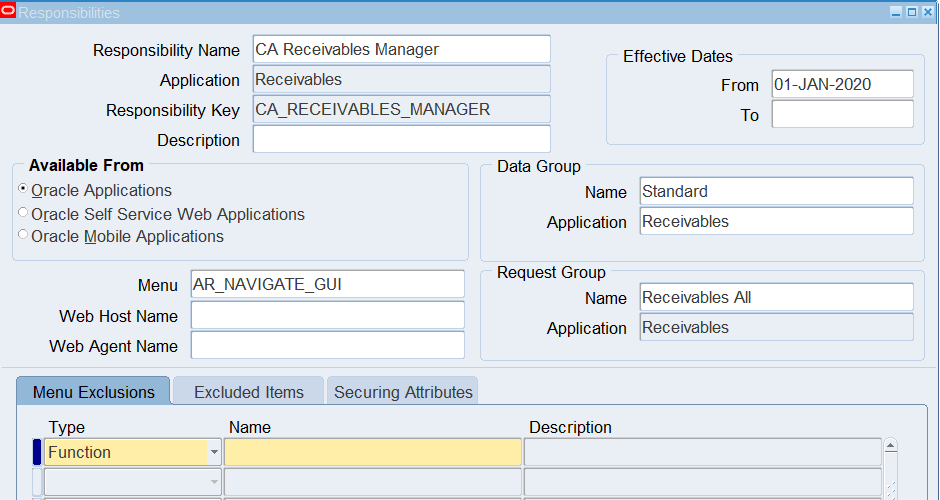
Responsibilities Window
Use this window to define a responsibility. Each application user is assigned at least one responsibility.
A responsibility determines whether the user accesses Oracle Applications or Oracle Mobile Applications; which applications functions a user can use; which reports and concurrent programs the user can run; and which data those reports and concurrent programs can access.
Responsibilities cannot be deleted. To prevent a responsibility from being used, set the Effective Date’s to field to a past date and restart Oracle Applications.
Before defining your responsibility, do the following:
- Use the Data Groups window to list the Oracle username your responsibility’s concurrent program reference on an application-by-application basis.
- Use the Request Groups window to define the Request Group you wish to make available with the responsibility
- Use the Menu window to view the predefined Menu you can assign to the responsibility.
Responsibilities Block
An application name and a responsibility name uniquely identify a responsibility.
Responsibility Name
If you have multiple responsibilities, a pop-up window includes this name after you sign on.
Application
The owning application for the responsibility.
This application name does not prevent the user of this responsibility from accessing other applications’ forms and functions if you define the menu to access other applications.
Responsibility Key
This is the internal key for the responsibility that is used by loader programs, (concurrent programs that load messages, user profiles, user profile values, and other information into Oracle Applications tables). The responsibility key is unique per application.
Effective Dates (From/To)
Enter the start/end dates on which the responsibility becomes active/inactive. The default value for the start date is the current date. If you do not enter an end date, the responsibility is valid indefinitely.
You cannot delete a responsibility, because its information helps to provide an audit trail. You can deactivate a responsibility at any time by setting the end date to the current date. If you wish to reactivate the responsibility later, either change the end date to a date after the current date, or clear the end date.
Available From
This is the navigator from which the responsibility will be available (Oracle Applications forms navigator, mobile navigator).
A responsibility may be associated with only one Applications system.
Data Group
Note: Data groups are used for backward compatibility only. Oracle Application Framework does not support the data groups feature.
The data group defines the pairing of application and ORACLE username.
Select the application whose ORACLE username forms connect to when you choose this responsibility. The ORACLE username determines the database tables and table privileges accessible by your responsibility. Transaction managers can only process requests from responsibilities assigned the same data group as the transaction manager.
Menu
The menu whose name you enter must already be defined with Oracle Applications.
Request Group – Name/Application
If you do not assign a request security group to this responsibility, a![]() user with this responsibility cannot run requests, request sets, or concurrent programs from the Submit Requests window, except for request sets owned by the user. The user can access requests from a Submit Requests window you customize with a request group code through menu parameters.
user with this responsibility cannot run requests, request sets, or concurrent programs from the Submit Requests window, except for request sets owned by the user. The user can access requests from a Submit Requests window you customize with a request group code through menu parameters.![]()
Menu Exclusions Block
Note: Menu exclusions should be used for backward compatibility only.
Define function and menu exclusion rules to restrict the application functionality accessible to a responsibility.
Type
Select either Function or Menu as the type of exclusion rule to apply against this responsibility.
When you exclude a function from a responsibility, all occurrences of that function throughout the responsibility’s menu structure are excluded.
When you exclude a menu, all of its menu entries, that is, all the functions and menus of functions that it selects are excluded.
Name
Select the name of the function or menu you wish to exclude from this responsibility. The function or menu you specify must already be defined in Oracle Applications.
HTML-Based Applications Security
Oracle HTML-based applications use columns, rows and values in database tables to define what information users can access. Table columns represent attributes that can be assigned to a responsibility as Securing Attributes or Excluded Attributes. These attributes are defined
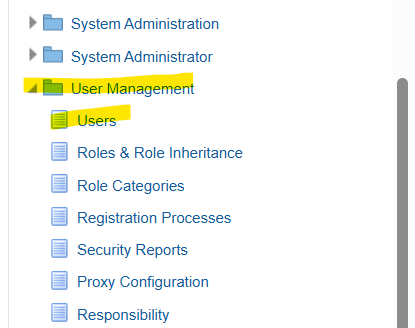
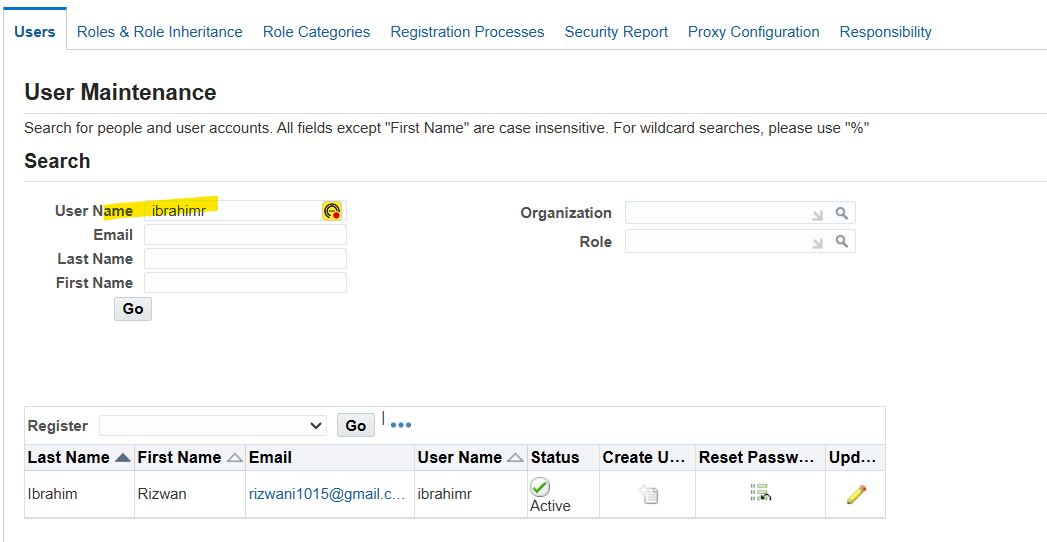
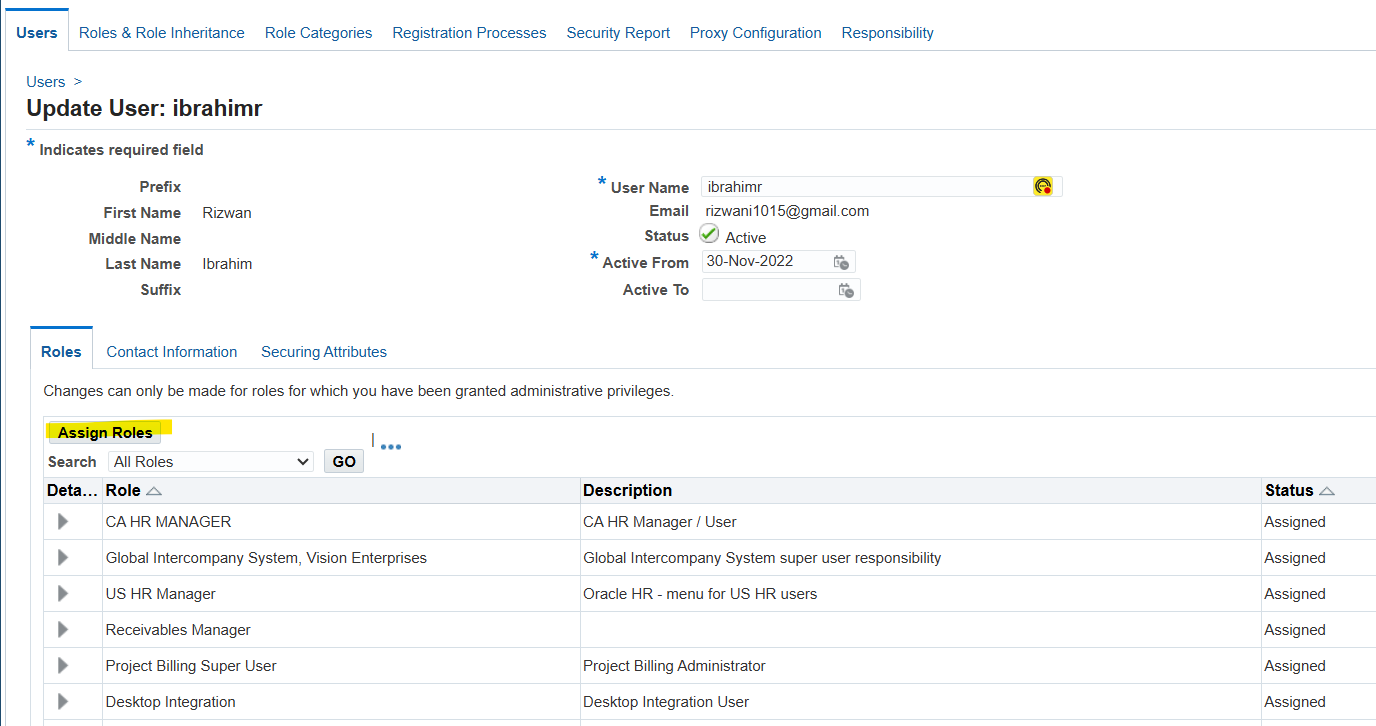
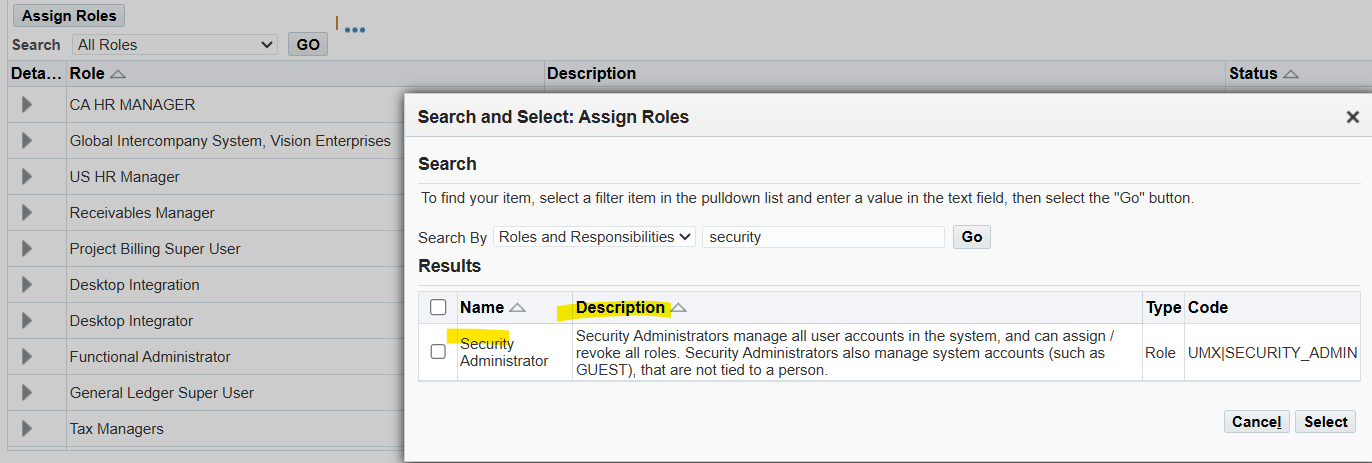
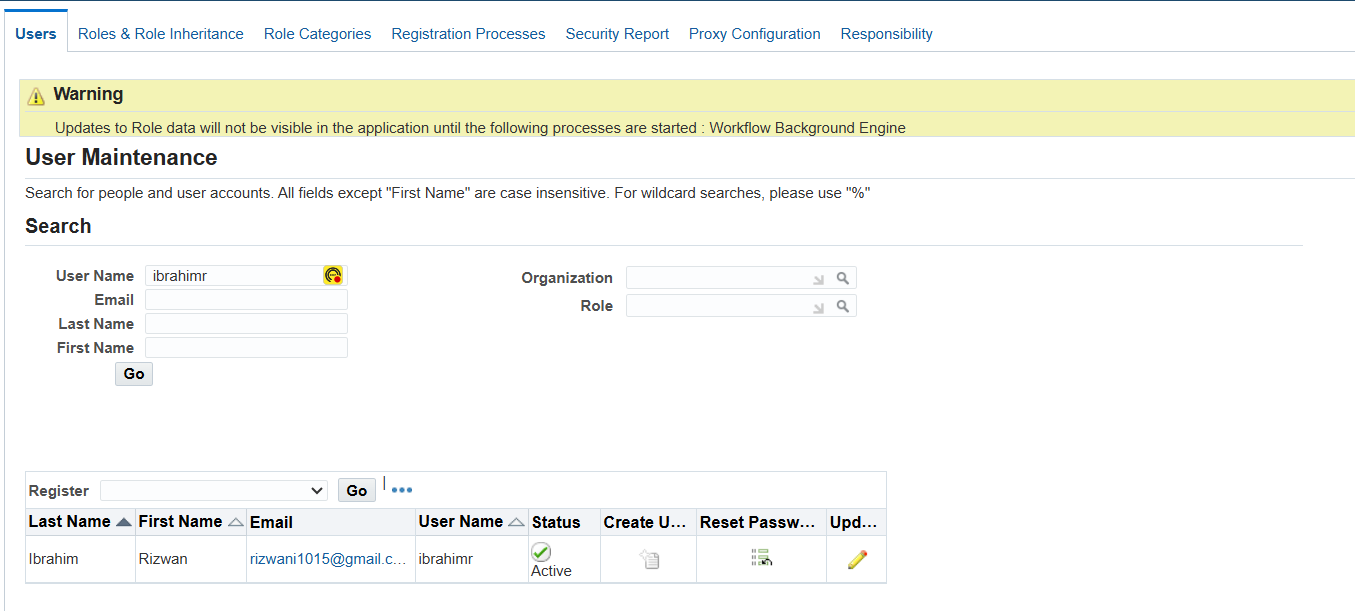
Assign Access to User Management
Log in as sysadmin
Go to User management responsibility
In users tab –> username –> Select your username
Assign role –> Security Administrator
Apply

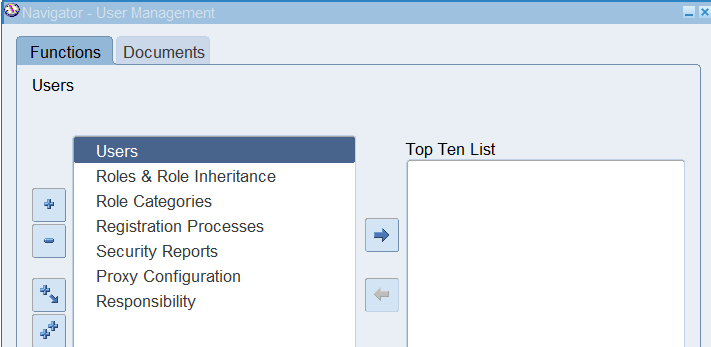
How to Add Bank Account Access to a Legal Entity
Responsibility: User Management
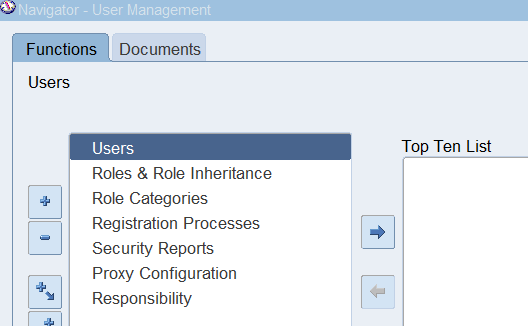
Select Users
Overview of Accounts Receivables
- Key Flex Fields, Sales Tax Location, Territory
- Statement Cycle, System Options
- Remittance to Address, Payment Terms
- Introduction to Dunning Letters, Collectors
- Customers
Setup to Implement the Feature
- Customers
- Currencies
- Calendar / Accounting Periods
- Payment Terms
- Transaction Types
- Auto Accounting
- Transaction Flexfields
- Line Ordering Rules
- Grouping Rules
- Batch Sources
- System Options
- Other Setups
Accounting in Receivables
- You create accounting entries for invoices and other transactions in Oracle Receivables using the Oracle Sub ledger accounting architecture.
- Oracle Sub ledger Accounting is a rule-based accounting engine, toolset, and repository that centralizes accounting across the E-Business Suite. Acting as an intermediate step between each of the Sub ledger applications and Oracle General Ledger, Oracle Sub ledger Accounting creates the final accounting for Sub ledger journal entries and transfers the accounting to Oracle General Ledger.
- Receivables includes a set of predefined accounting rules that Sub ledger Accounting uses to create accounting, but you can define your own detailed accounting rules using a centralized accounting setup in a common user interface.
- Leveraging this accounting architecture, Receivables lets you:
- Store a complete and balanced Sub ledger journal entry in a common data model for each business event that requires accounting
- Maintain multiple accounting representations for a single business event, resolving conflicts between corporate and local fiscal accounting requirements
- Retain the most granular level of detail in the Sub ledger, with different summarization options in the general ledger, allowing full audit ability and reconciliation because the link between transaction and accounting data is preserved.
Auto Cash Rules
There are five types of Auto Cash Rules:
- Clear the account
- Clear the past due invoices
- Clear the post due invoices grouped by Payment terms
- Match payment with invoice
- Apply to the oldest invoice first
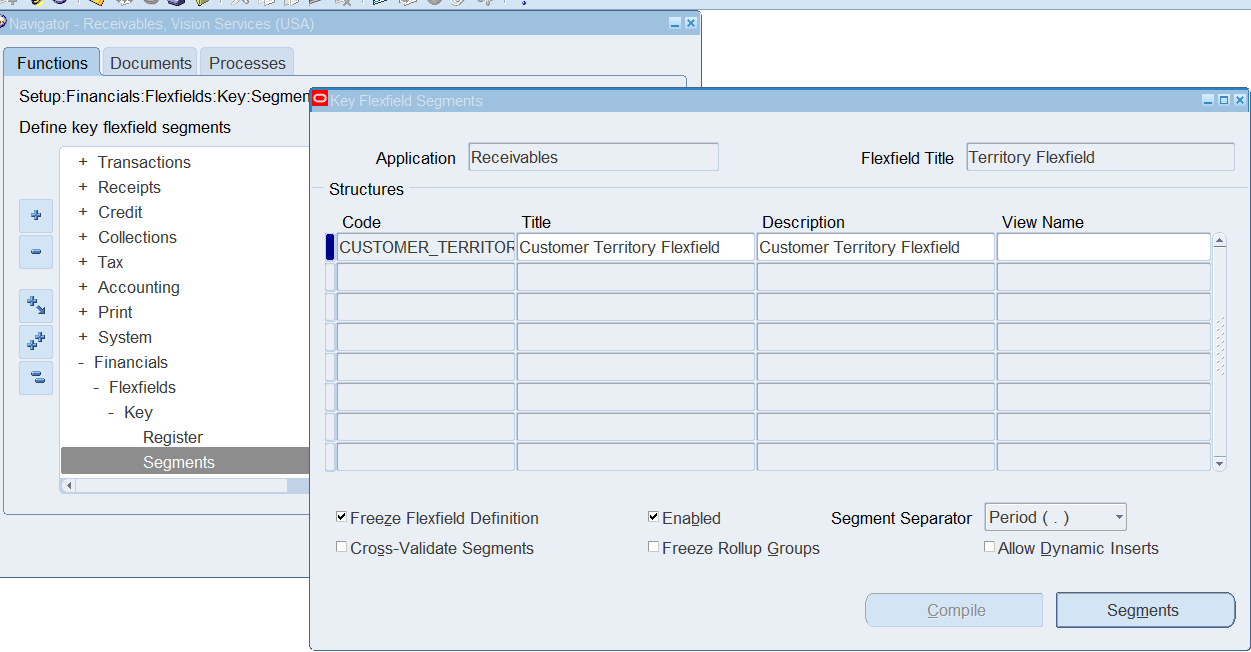
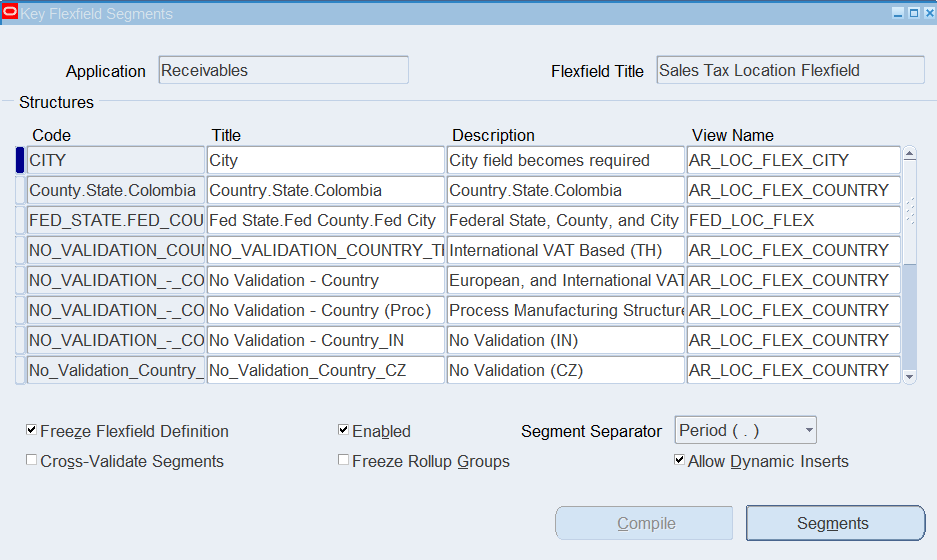
Receivables Flexfields
(N) Setup 🡪 Financials 🡪 Flexfields 🡪 Key 🡪 Segments
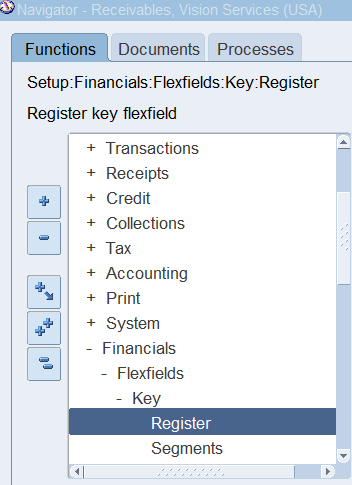
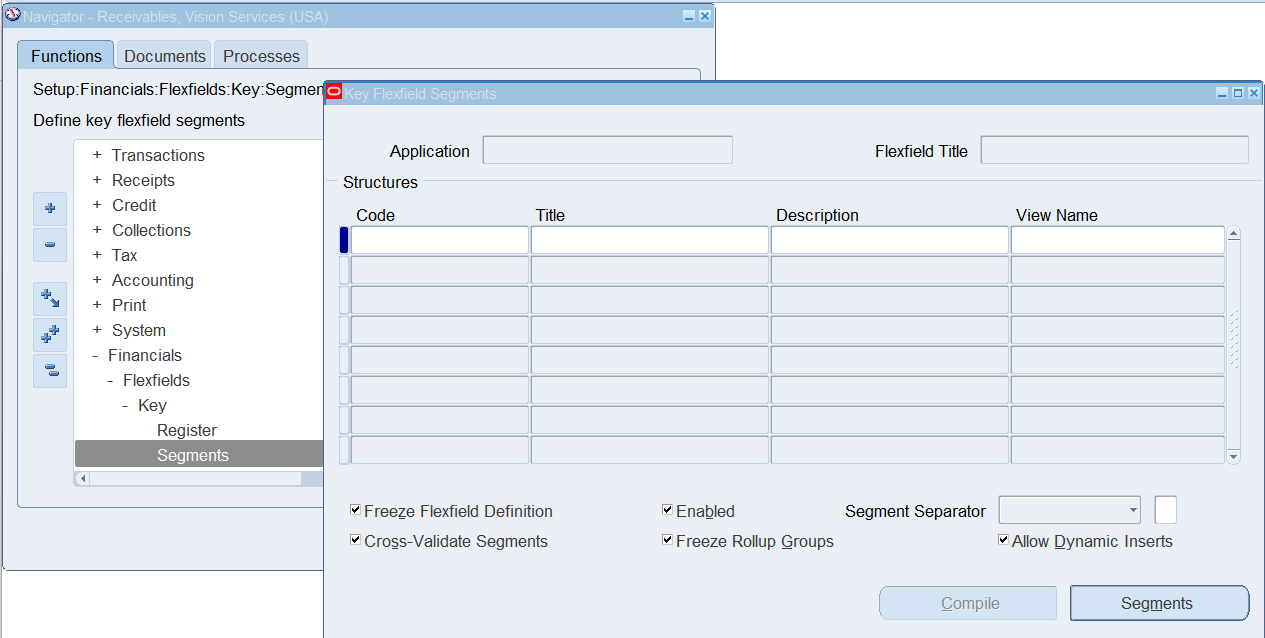
In Receivables there are two Filedfields
- Sales Tax Location Flexfield
- Territory Flexfield
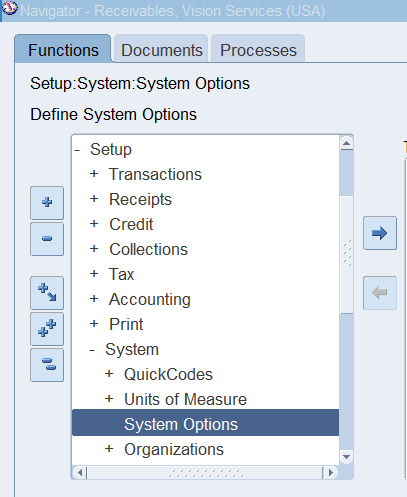
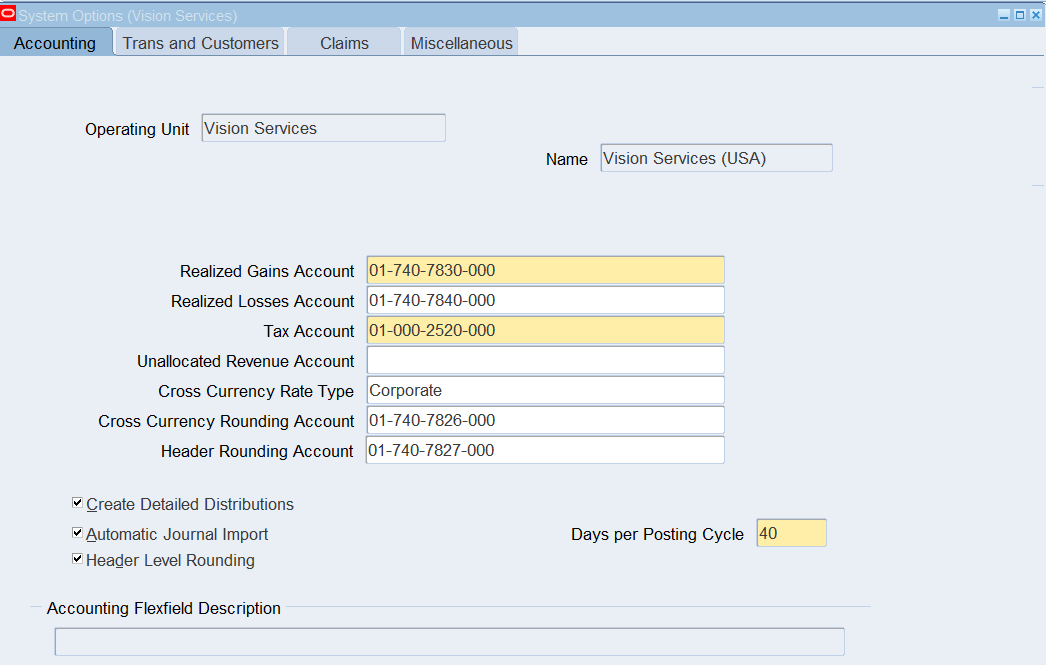
Receivables System Options
Create a Profile Class (Required)
Overview
In this practice you will create a customer profile class. Profile classes speeds up the creation of new customers by collecting default values that apply to similar classifications of customers (credit terms and invoicing requirements, for example).
Use Customer Profiles to group customer accounts with similar credit worthiness, business volume, and payment cycles. For each profile class, you can define information such as credit limits, payment terms, statement cycles, invoicing, and discount information. You can also define amount limits for your late charges, dunning, and statements for each currency in which you do business.
To determine the number of profile classes you will need, start by identifying groups of similar customers. For each group, specify characteristics that describe the group (credit requirements, payment terms, invoice and statement distributions and so on).
Create a Profile Class
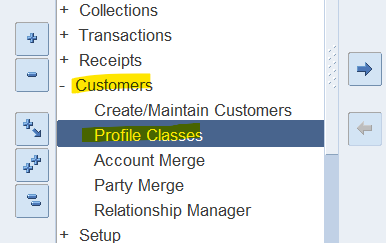
(N) Customers 🡪 Profile Classes
| Name | CA GOOD CREDIT |
| Description | CA Good Credit Rating |
| Payment Terms | 30 NET |
| Allow Discount | NO (Deselected) |
| Override Terms | Yes (Selected) |
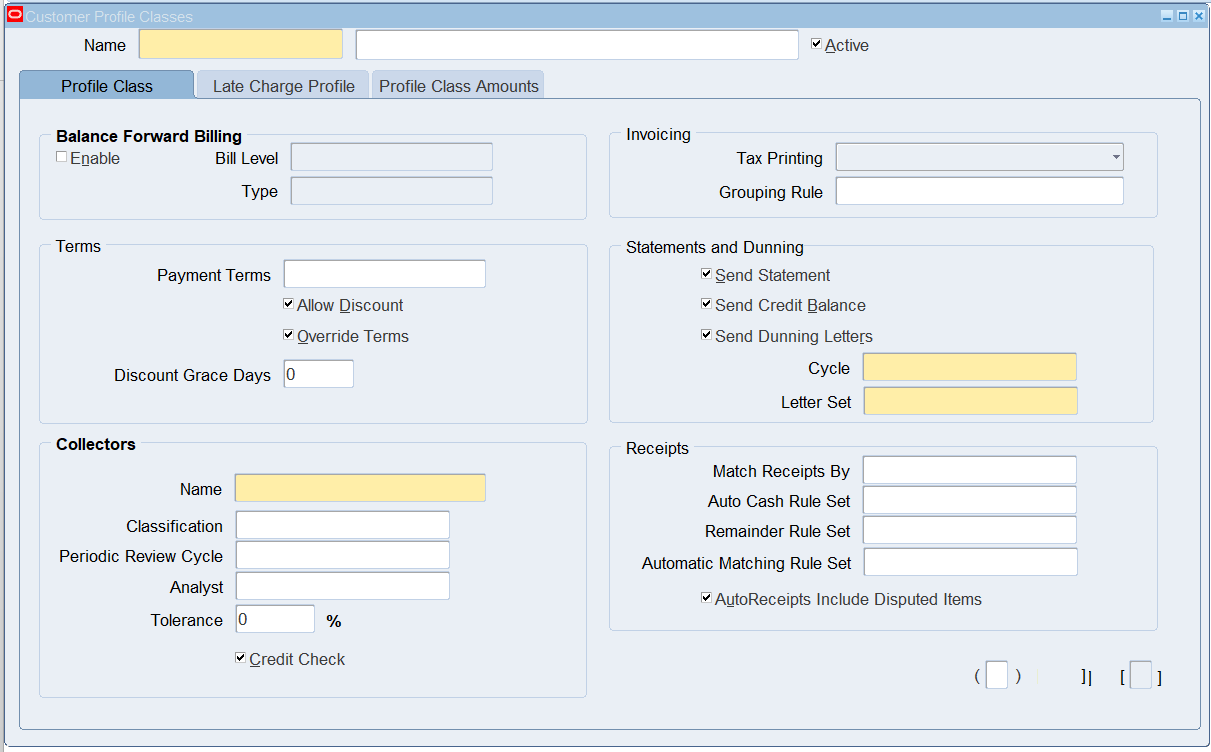
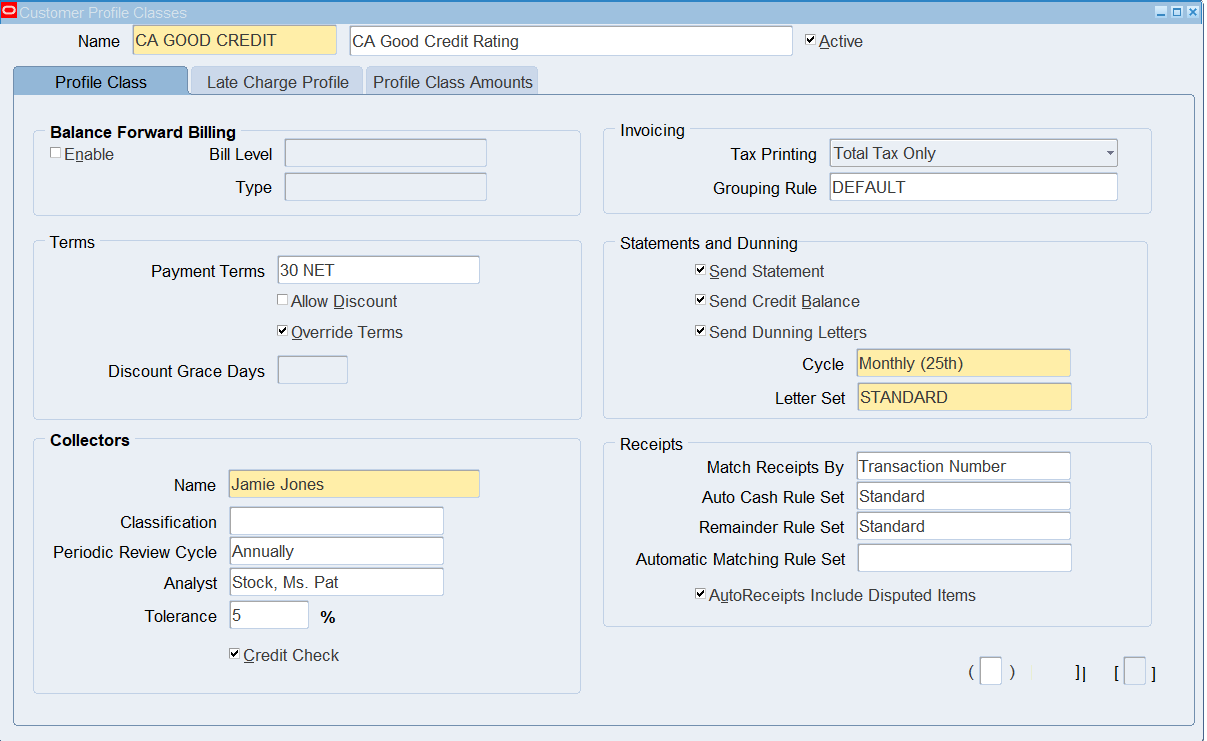
Note: You set up payment terms in (N) Setup > Transactions > Payment Terms. Here you can specify the default payment terms, determine if you can override on the invoice, determine if discounts are allowed (and if so, how many grace days are allowed when customers can pay late…but still take the discount) and grace days after the due date that are allowed prior to beginning to calculate finance charges.
Note: You must set up collectors prior to assigning them. (N) Setup > Collections > Collectors. If you don’t use a collector, set up one named “None.”
Note: Invoicing determines how to print tax on the invoice, for example, Total Tax Only. Grouping rules are used by AutoInvoice when importing invoices and determine how shipped items are grouped to create line items on an invoice. The Grouping Rule is created with a Line Ordering Rule. The bottom line is that we can determine how to group, and then in what order to place the lines on the invoice we create during invoice import
Note: Statement Cycles are QuickCodes. Statement cycles are set up in advance. They are defined using seeded intervals (Monthly, Quarterly, and Weekly) or specified intervals (exact day of each month, for example).
Note: Checking the Send Dunning Letters check box enables Oracle Advanced Collections to send dunning letters to customers with past due items.
Note: The Match Receipts By option is used during the Lockbox receipt application.
Note: The Auto Cash Rule sets determine the sequence of the rules that the Post Quick Cash program uses to apply cash receipts. For example, the one here applies receipts in the following order:
- Clear the account (if payment = account balance, then apply the receipt).
- Clear past due invoices (if payment = total of past due items, apply the receipt).
- Match Payment with invoice (if the remaining amount due for a single invoice matches the receipt, apply the receipt)
- Apply to the oldest invoice first (use the transaction due date to apply to the oldest invoice; partial receipts may or may not be allowed depending on system setup)
The AutoCash Rule set determines the definition of a balance (discounts, items in dispute, late charges) and where to put any remaining amounts (unapplied cash receipts or on account) and if partial receipt application is allowed. For example, the Standard Auto Cash Rule Set records any excess cash to Unapplied.
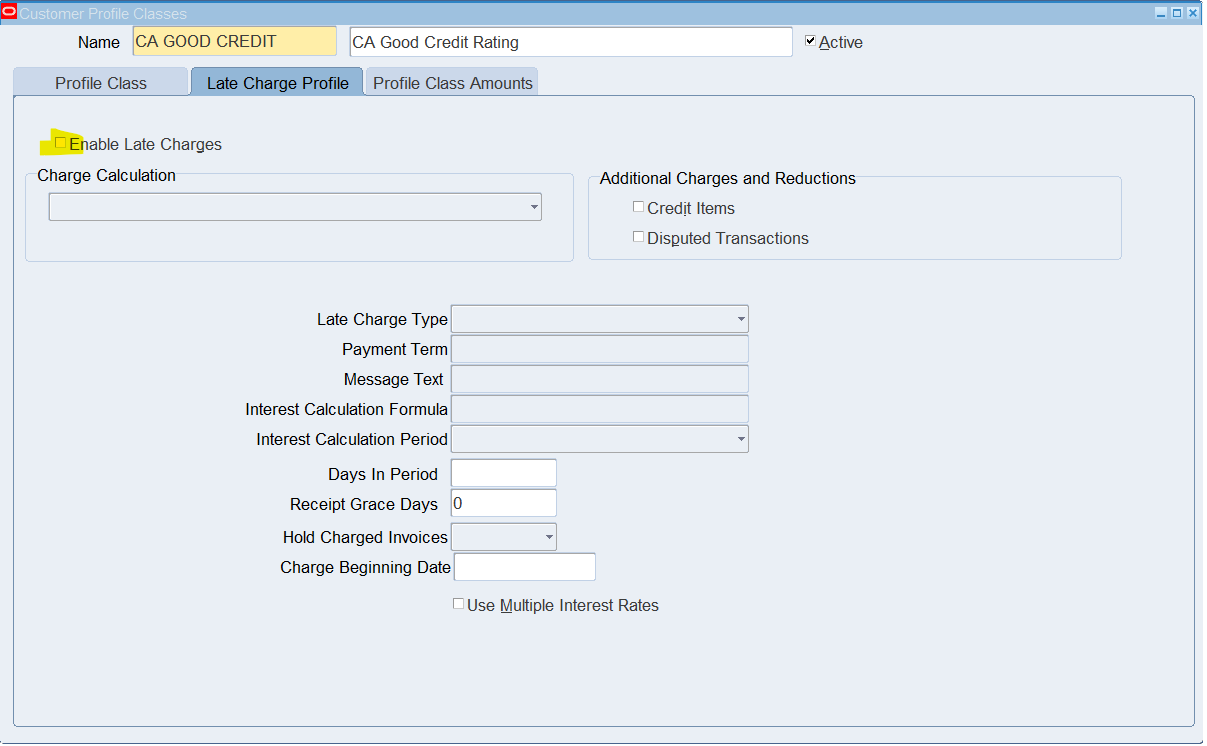
Click (T) Late Charge Profile and verify that Enable Late Charges = Deselected.
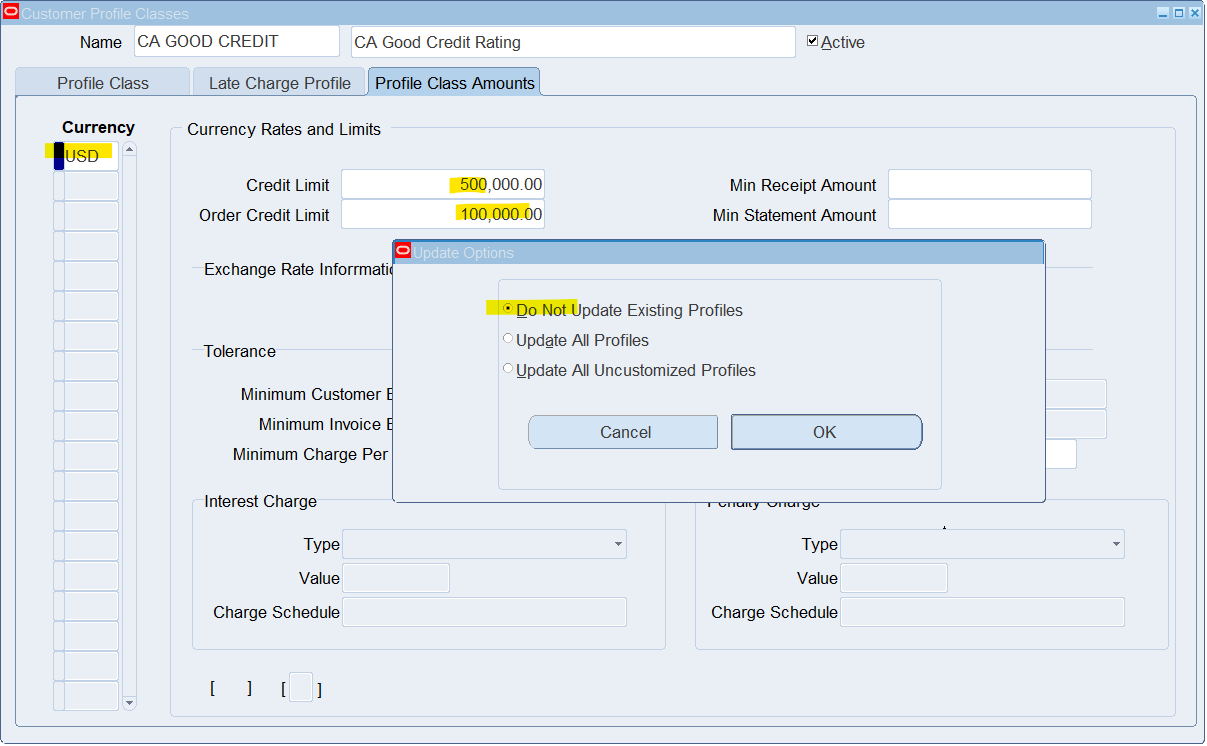
Click (T) Profile Class Amounts and enter the following information:
Currency = USD
Credit Limit = 500,000.00
Order Credit Limit = 100,000.00
Click (I) Save.
Select “Do not update existing profiles” and click OK.
Close all windows and return to the Navigator.
Create a Customer (Required)
Overview
Before creating a customer, use the Customer Search page to determine if the customer already exists and minimize the possibility of creating a duplicate.
The Create Customer page displays differently, depending upon your customer type selection, Organization, or Person on the Customer Search page.
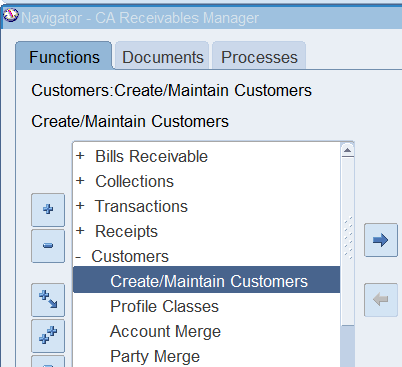
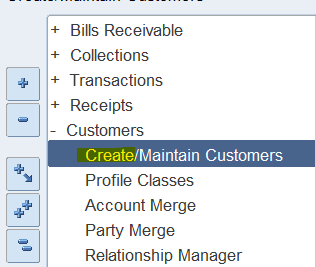
(N) Customers 🡪 Create/Maintain Customers
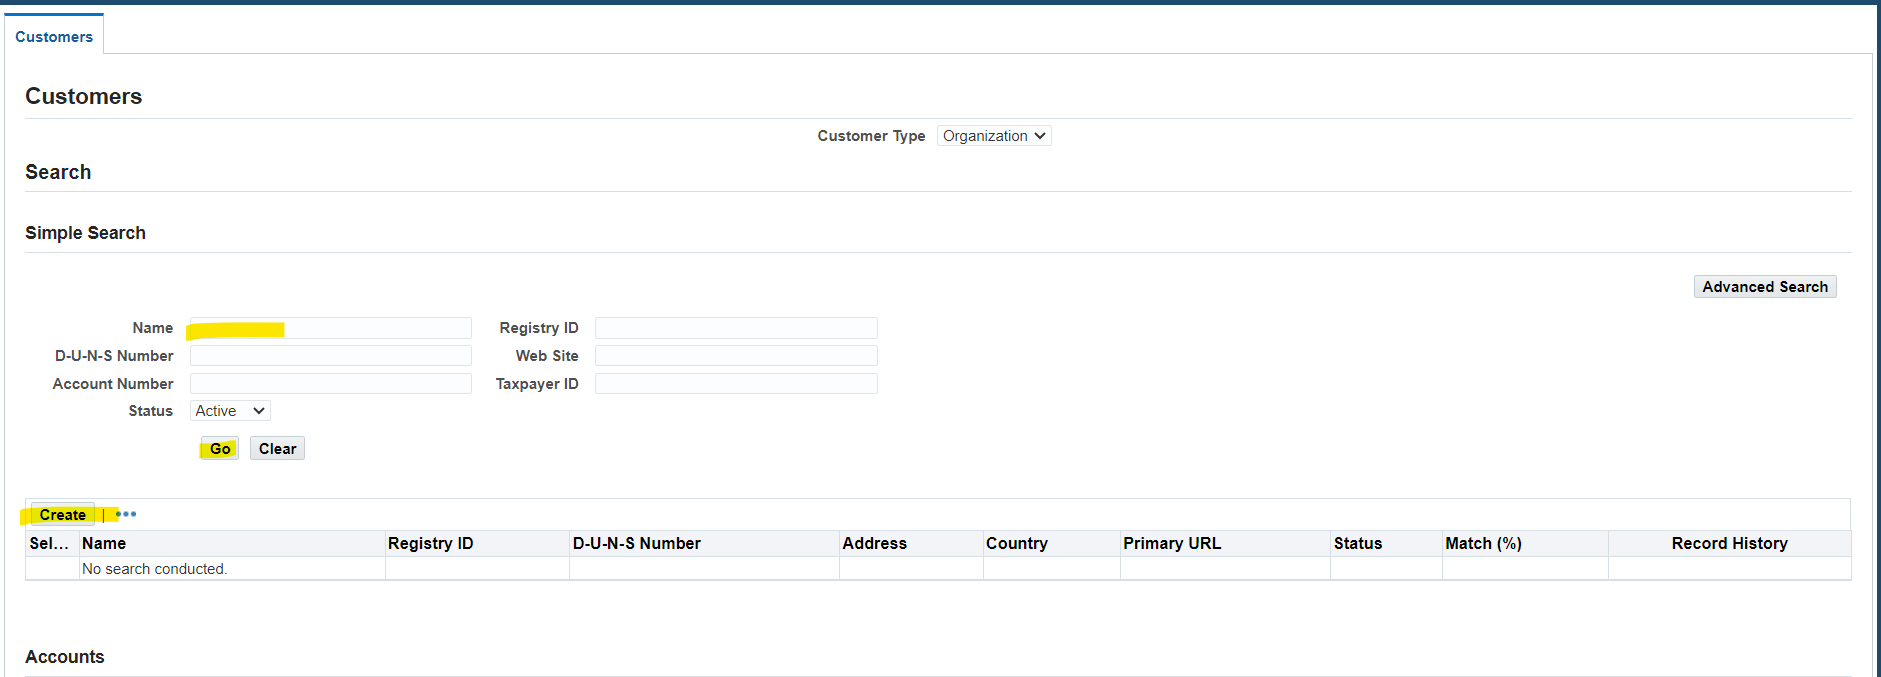
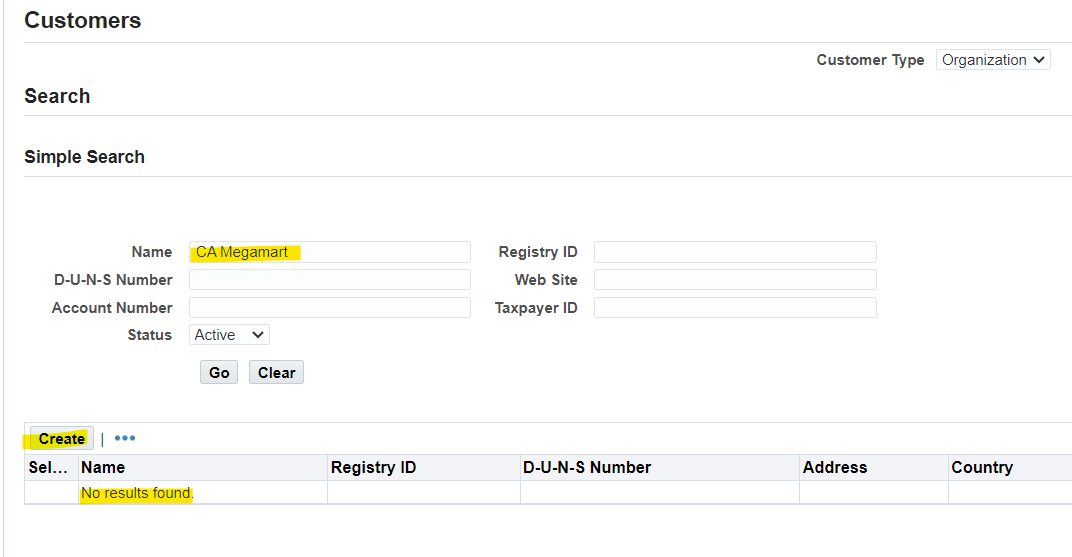
Search for the customer CA Megamart.
If the customer does not exist, click (B) Create.
| Organization Name | CA Megamart |
| Alias | Platinum |
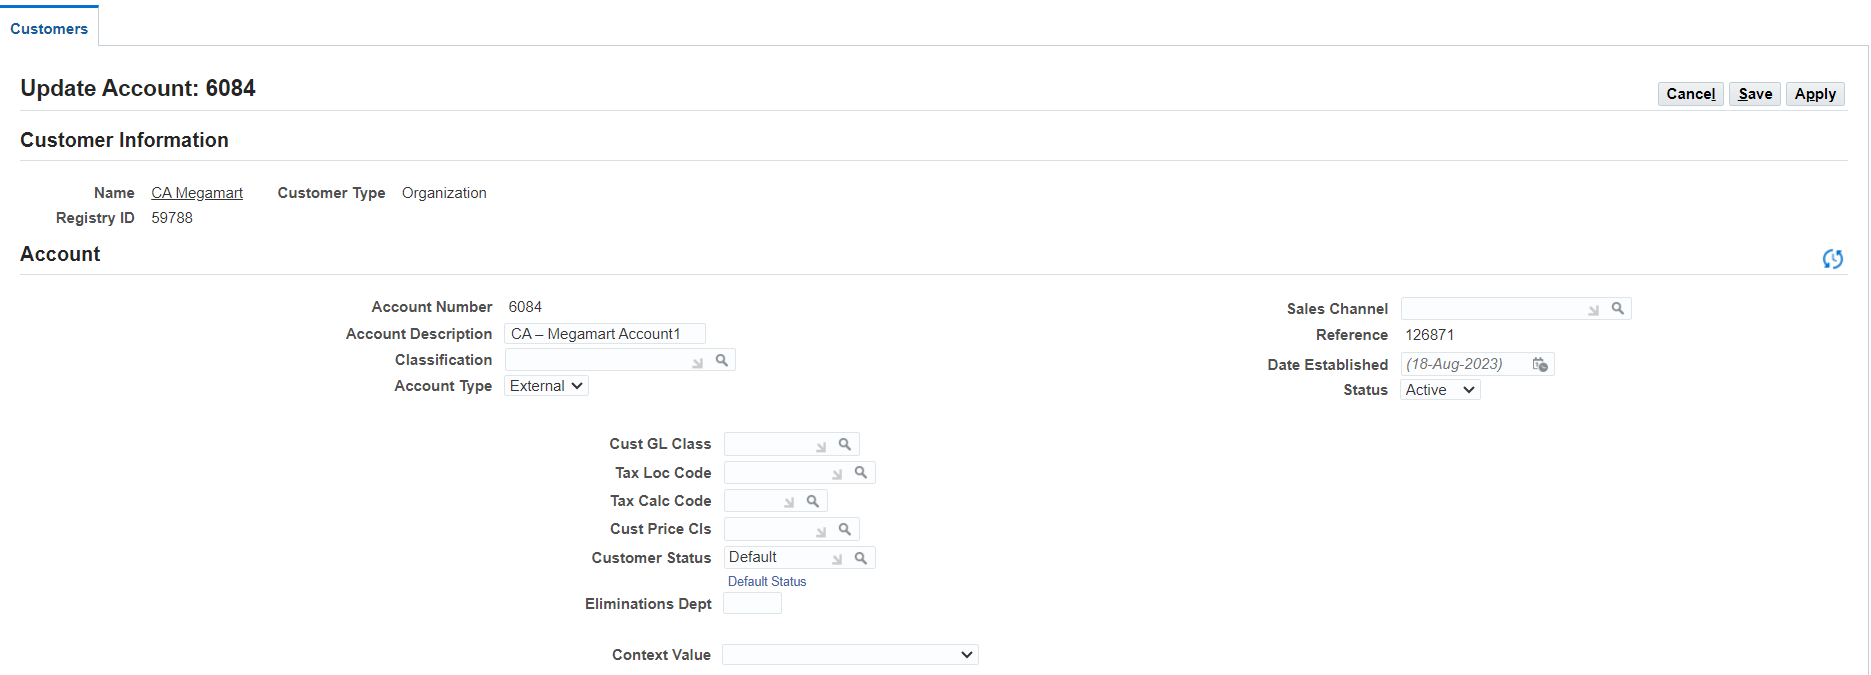
| Account Description | CA – Megamart Account1 |
| Reference | CA-7556 |
| Profile Class | CA GOOD CREDIT |
| Account Type | External |
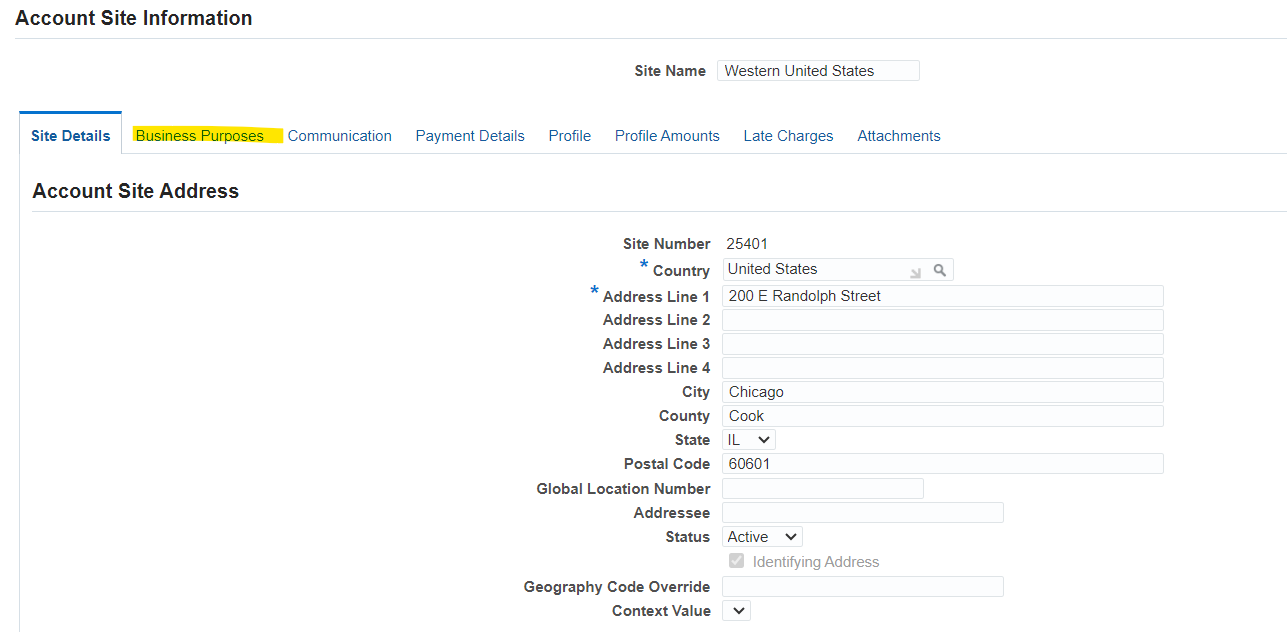
| Country | United States |
| Address Line 1 | 200 E Randolph Street |
| City | Chicago |
| County | Cook |
| State | IL |
| Postal Code | 60601 |
| Address Description | Western United States |
| Operating Unit | CA Operating Unit |
| Business Purpose | Bill To |
| Primary | Enable – Select the box |
Note: The Account Number must be unique. You need not enter a customer account number if the Automatic Customer Numbering System Option is enabled on the (T) Trans and Customers of the System Options window.
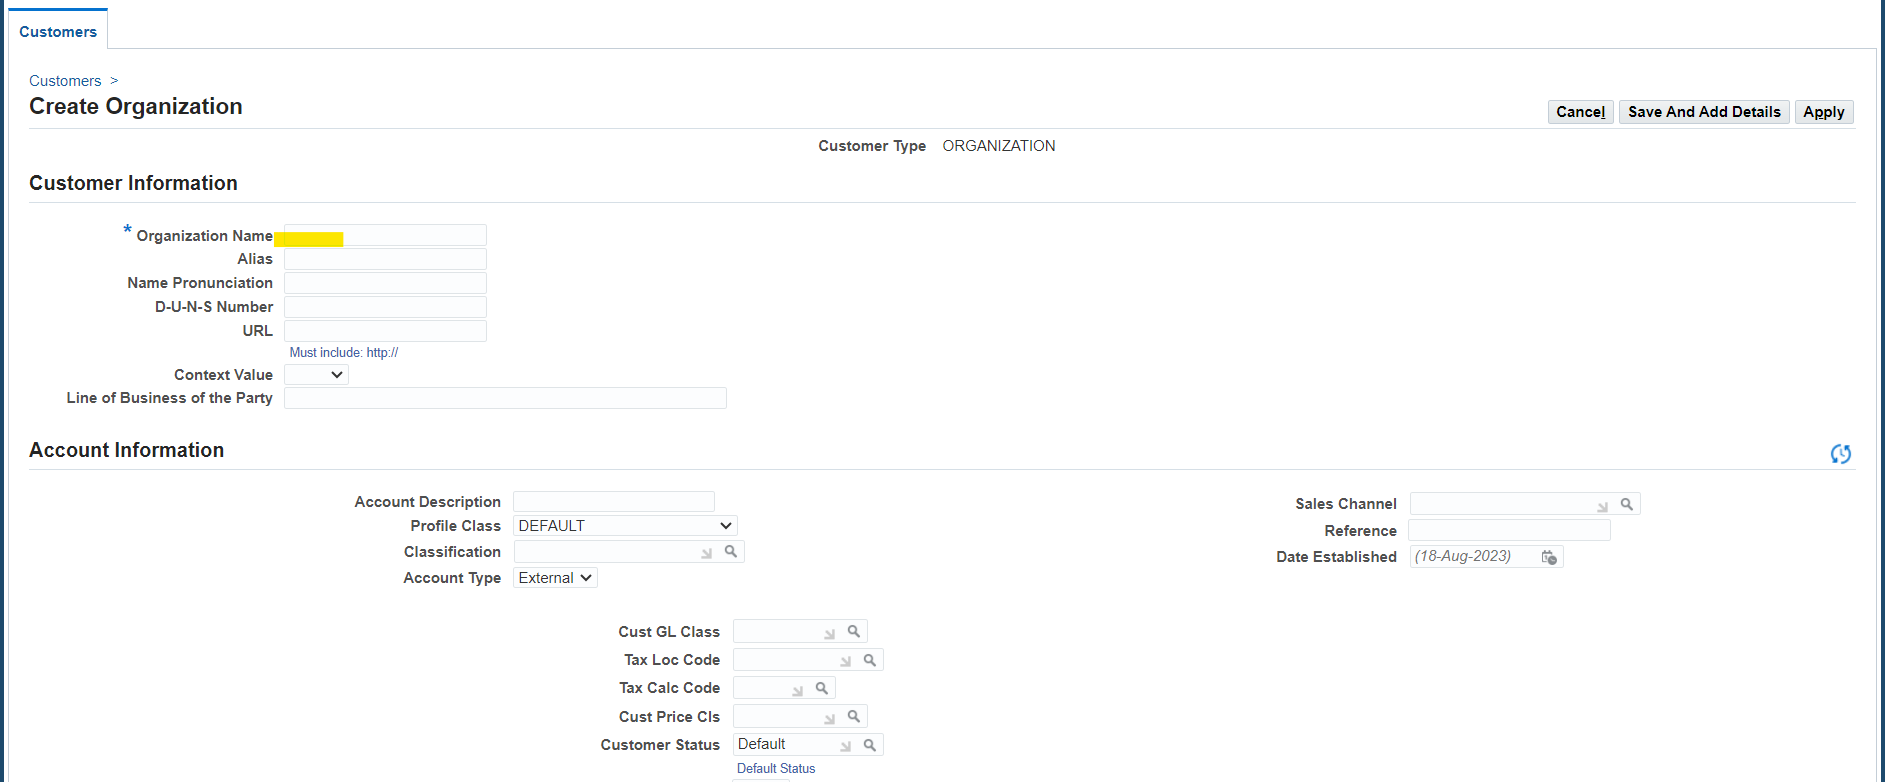


Save And Add Details to go to the Account Overview page


Details for the address site (bottom of the page, lower-right corner).
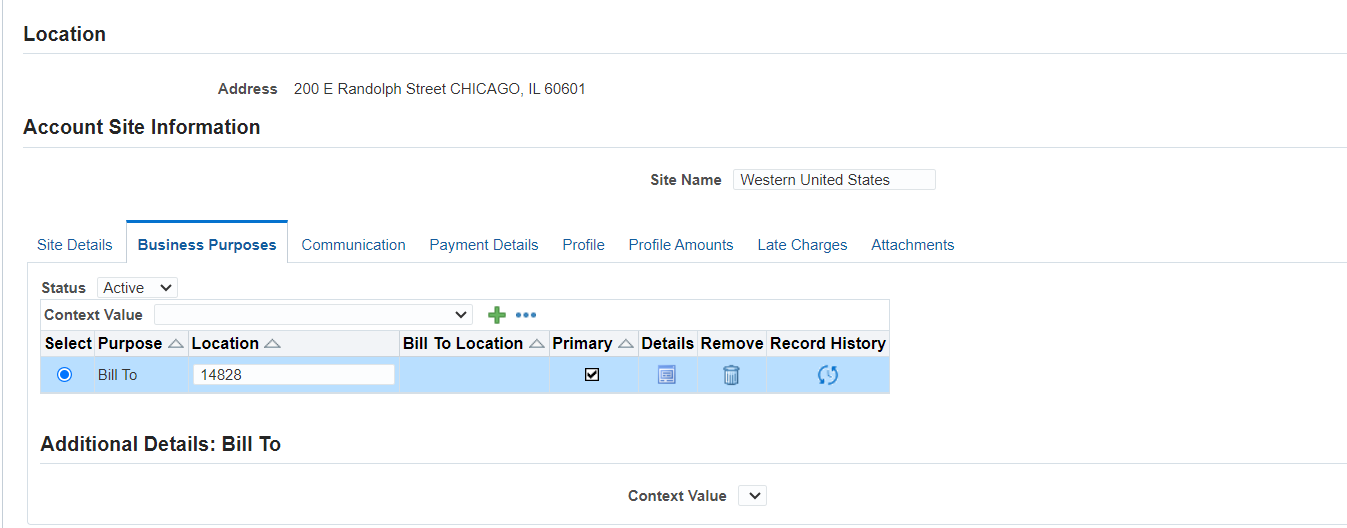
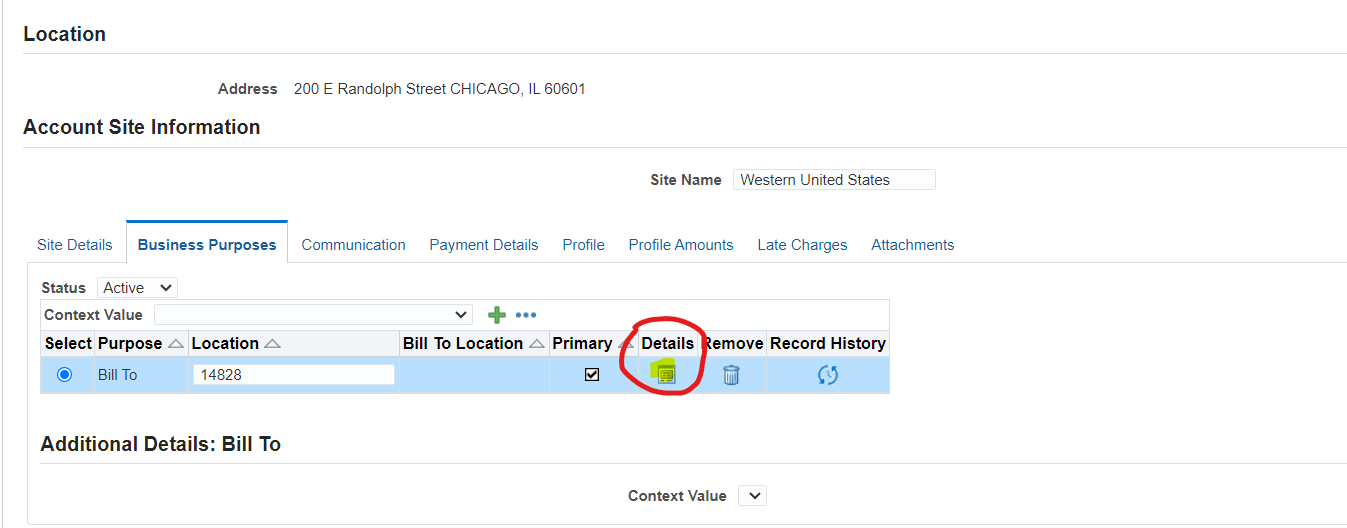
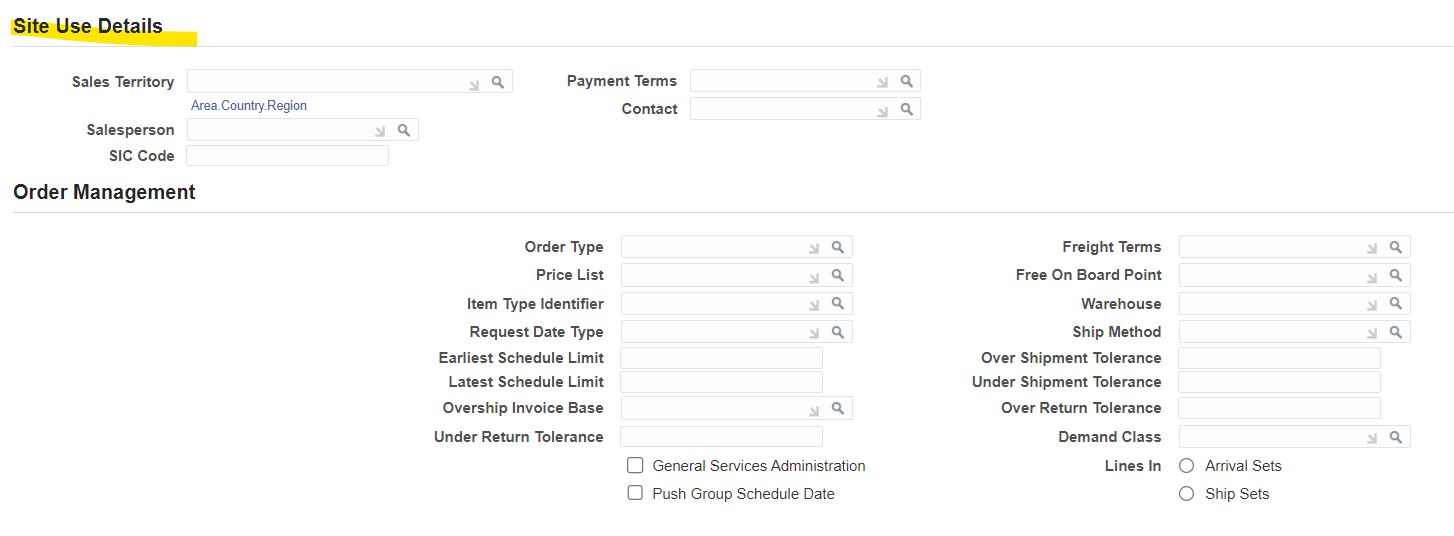
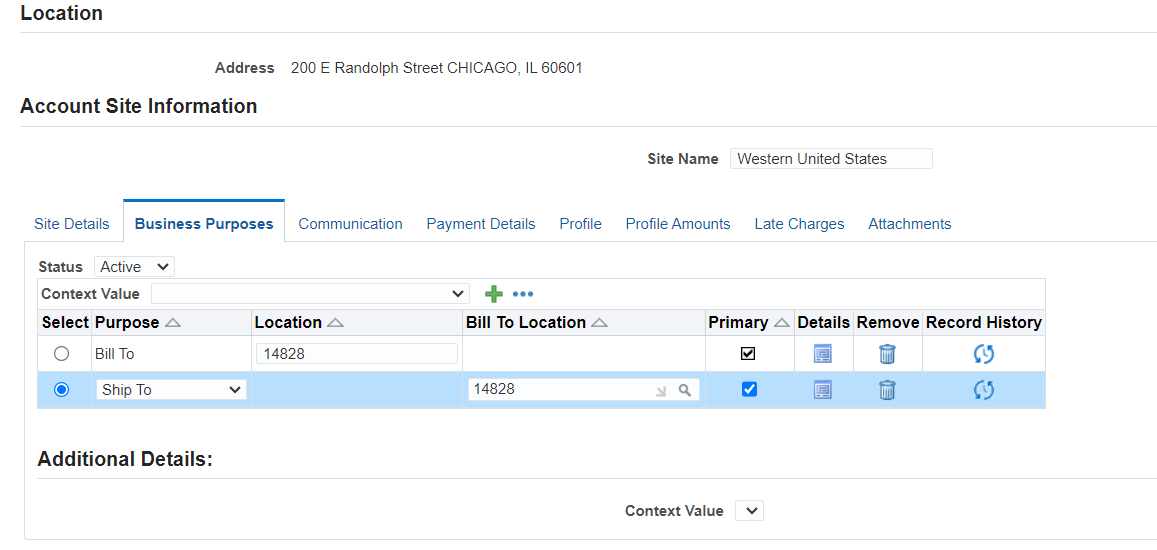
Add another Business Purpose by doing the following:
- Click (B) Add Another Row.
- Select “Ship To” from the drop down list.
- Enter Bill to Location = Use the Location Value from the prior line.
- Enter Primary = Selected.
- Click (B) Apply.
- Click (B) Apply.
- Repeat these steps 2-20 to create a second customer named XXGiant Distributors (change the reference number to “XX-8556).
Repeat these steps 2-20 to create a second customer named CA Giant Distributors (change the reference number to CA-8556).

Create a Customer Relationship (Required)
Overview
In this practice we will create a relationship between the customers CA Megamart and CA Giant Distributors.
Define relationships between customers to control the payment and commitment application.
You can create relationships between any two customers and indicate that the relationship is either one-way or reciprocal. Relationships are also for sharing Bill To and Ship To addresses and Pricing entitlements in Order Management.
When you apply receipts to an invoice in a one-way relationship, the parent customer can apply receipts to the related customer’s invoices but not the other way around. A reciprocal relationship works both ways.
Create a Reciprocal Customer Relationship
- Navigate to the Customer Search page.
- Search and select CA Megamart in the Name field.
- Select CA Megamart Account1 in the Account Description field. This displays the
Account Details for CA Megamart.
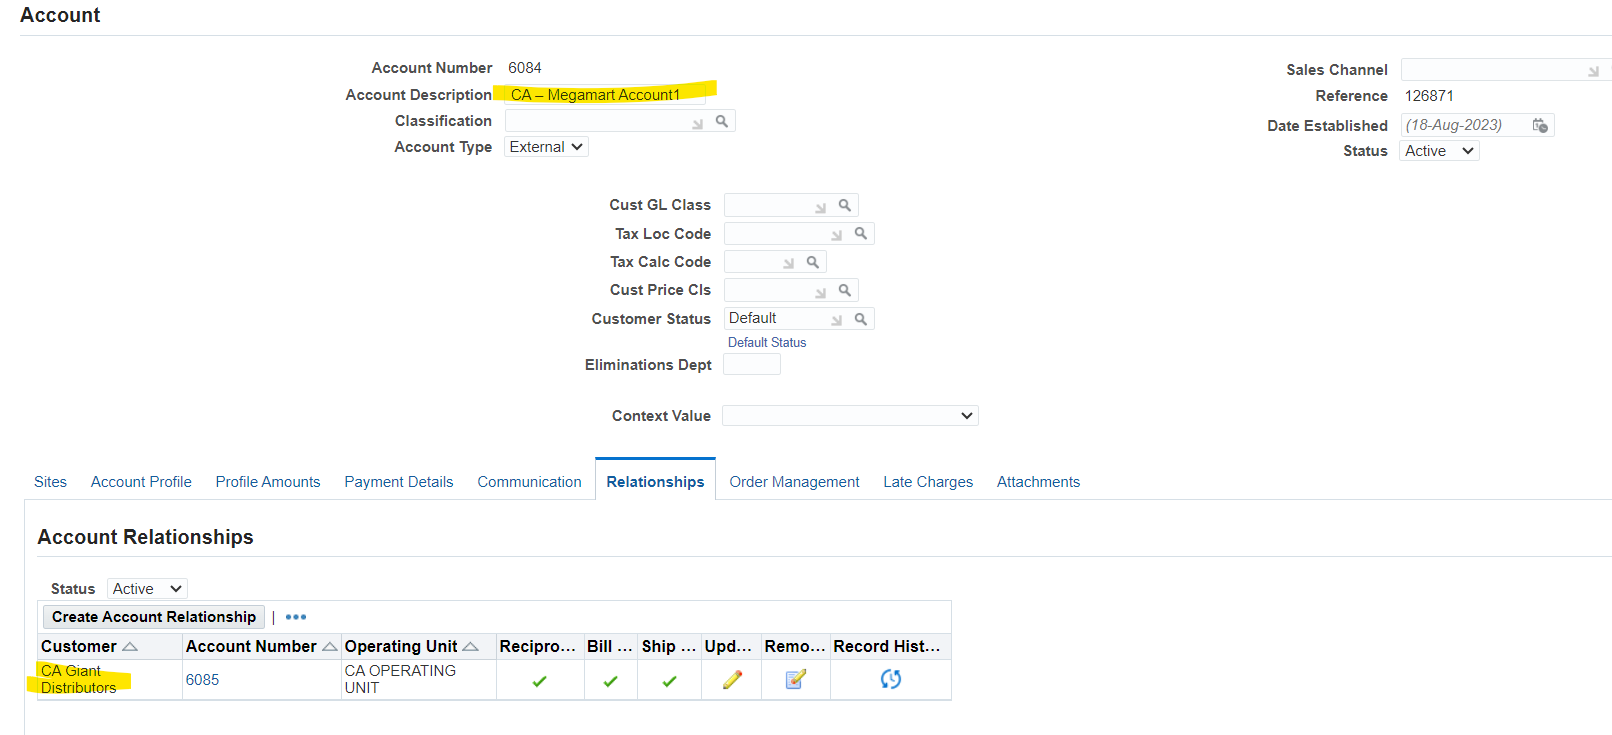
- Click the Relationships subtab; this displays the Account Relationships region.
- Click (B) Create Account Relationship.
- Search and select “XXGiant Distributors” as a related account.
- Select the CA Operating Unit.
- Select the Reciprocal relationship type.
- Click (B) Apply on the Create Account Relationship.
- Click (B) Save to return to the Account Overview page.
- Click (B) Apply to return to the Customer Search page.


Submit Customer Related Reports (Optional)
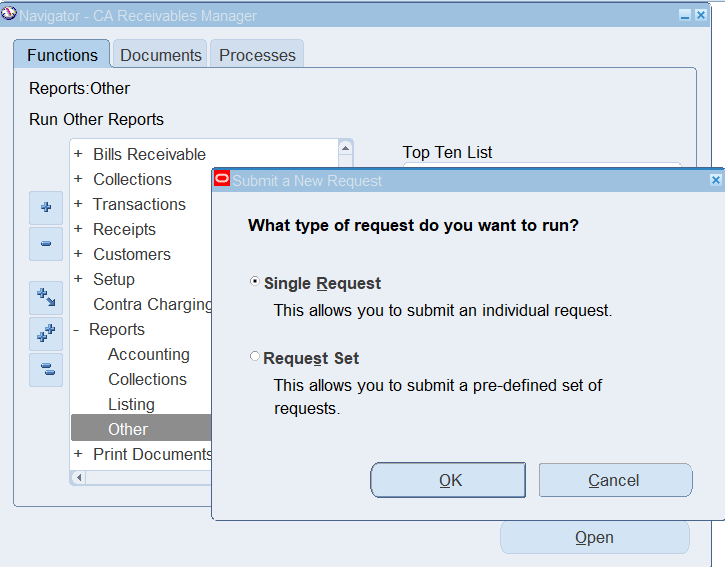
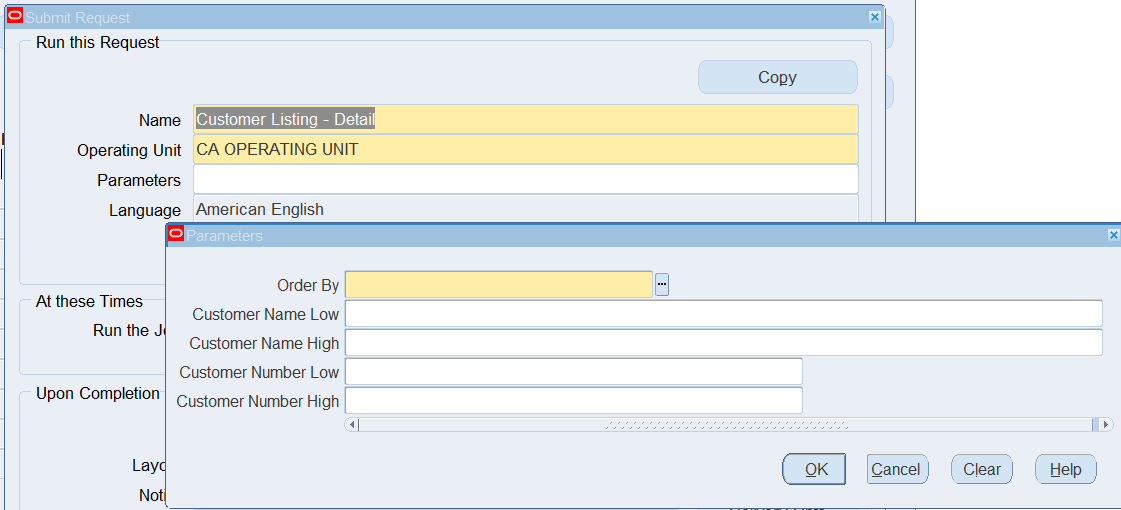
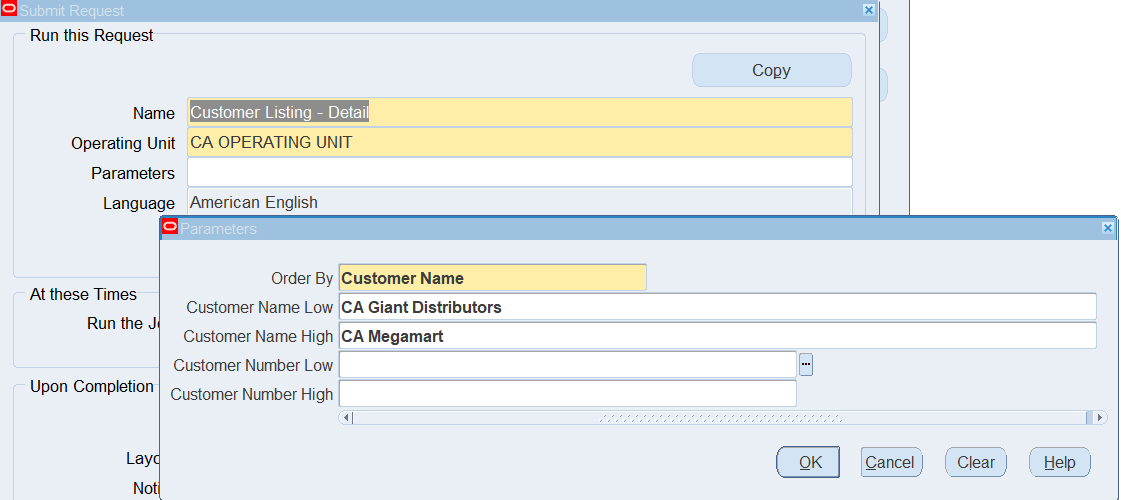
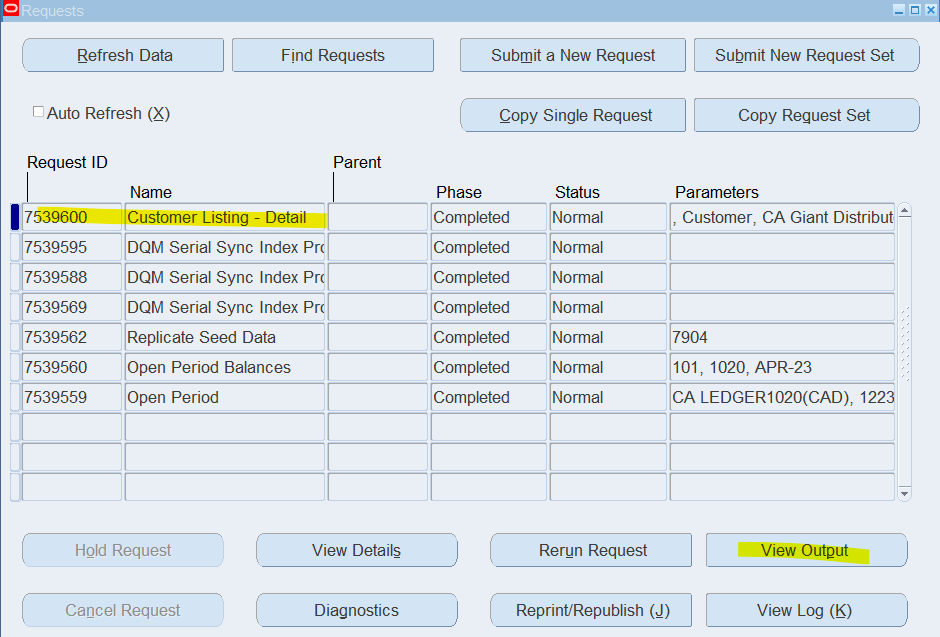
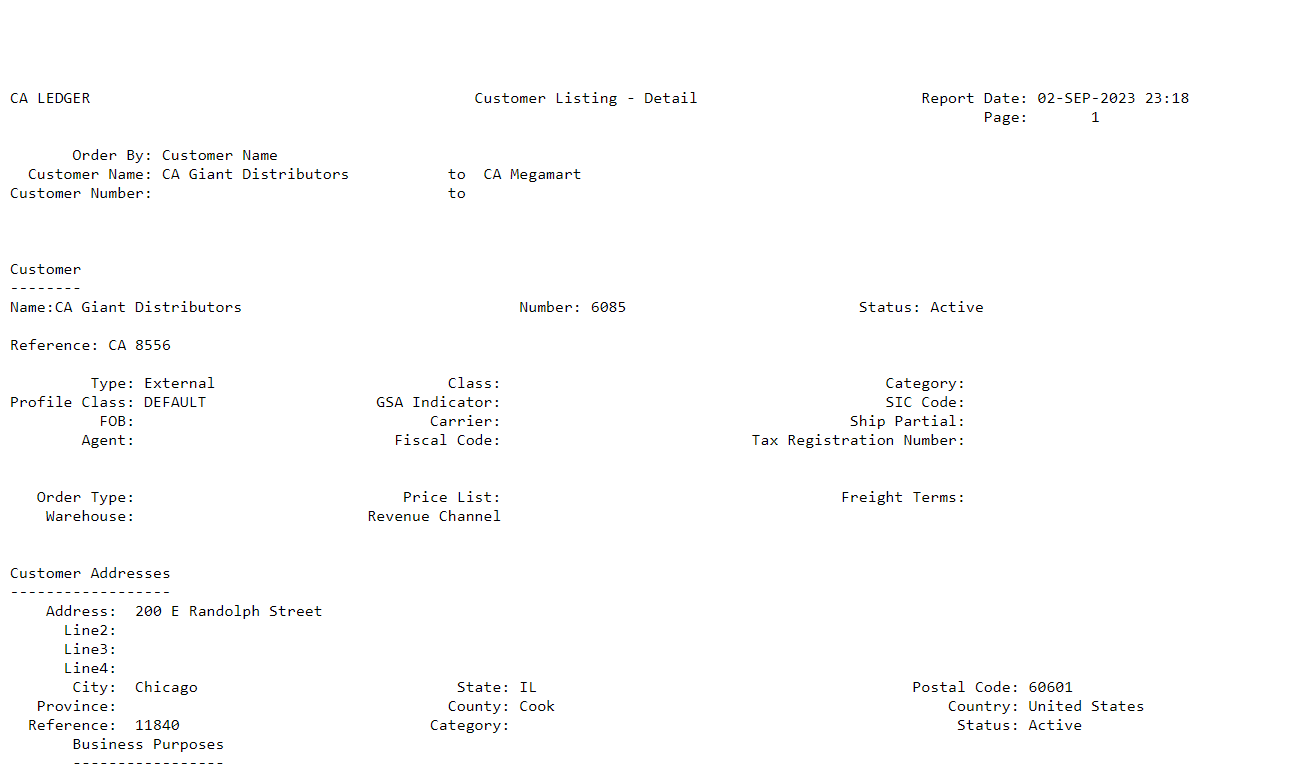
Submit the Customer Listing – Detail Report
(N) Reports > Listing

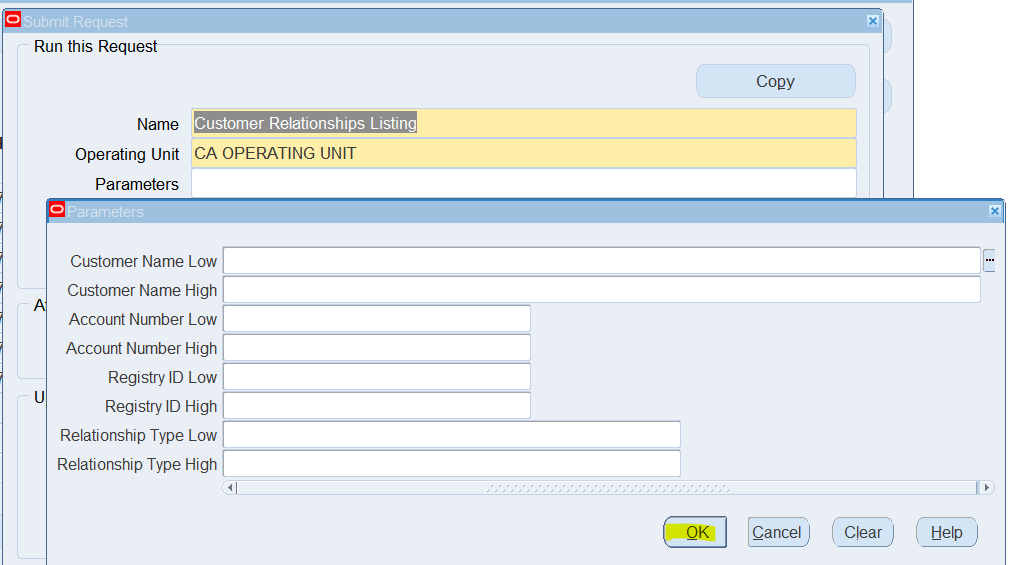
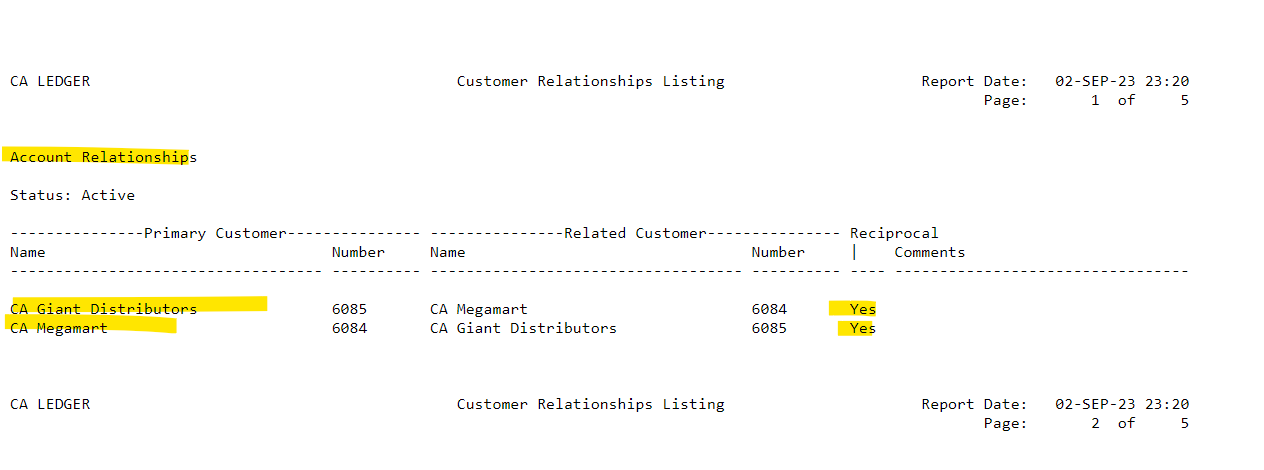
Submit the Customer Relationships Listing Report
(N) Reports > Listing
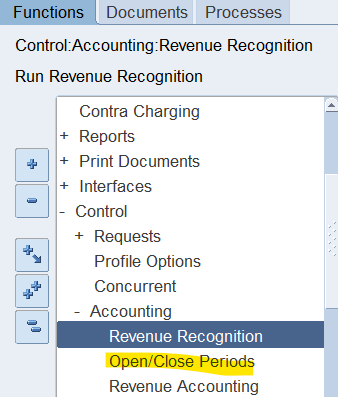
Open Receivables Periods (Required)
(N) Control > Accounting > Open/Close Periods
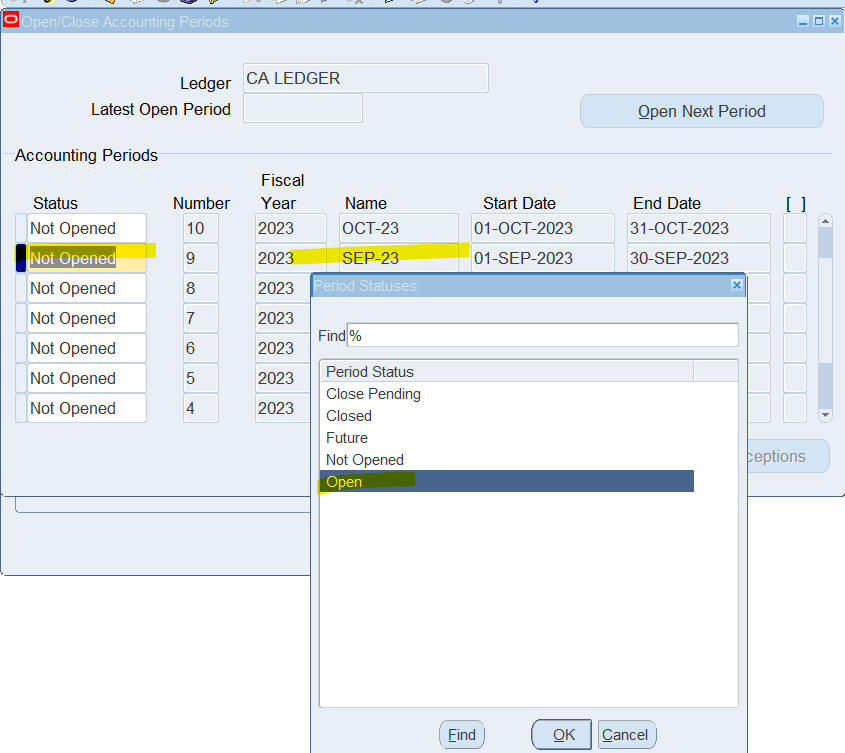
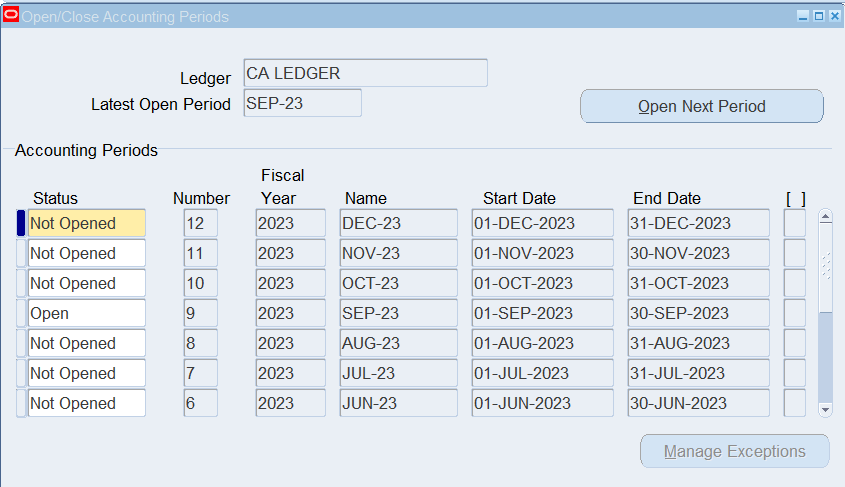
Make sure that the current period is open and at least the next two are future enterable
Review a Transaction Source
Navigate to the Transaction Sources window.
(N) Setup > Transactions > Sources
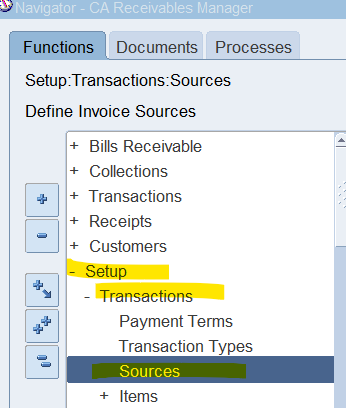
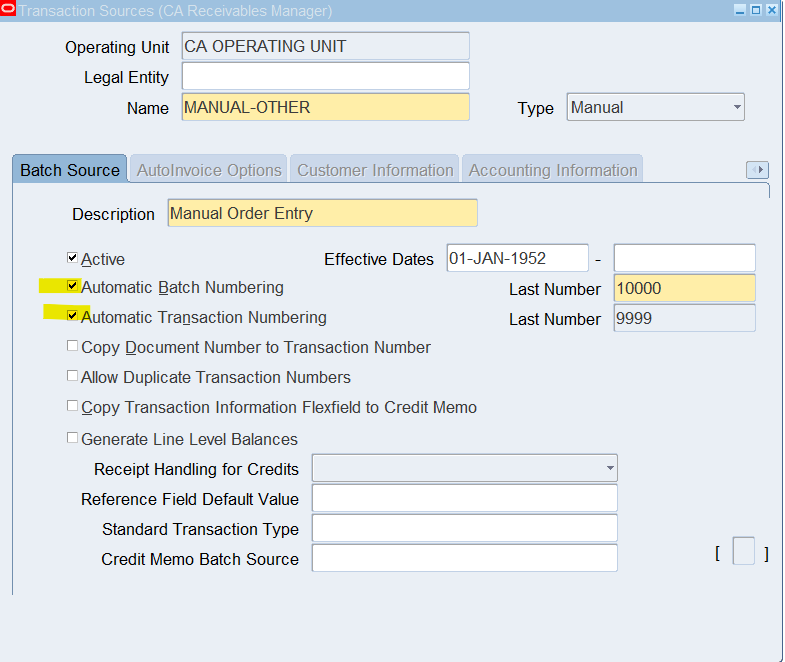
Enter Query Mode and enter the following information:
- Operating Unit = Vision Operations
- Name = Manual
Note: Automatic Transaction Numbering and Automatic Batch Numbering are turned on.
Note: The transaction type is the default value
Review a Transaction Type
Navigate to the Transaction Types window.
(N) Setup > Transactions > Transaction Types
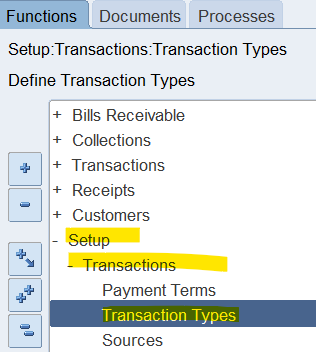
Enter Query Mode and enter the following information:
- Operating Unit = CA Operating Unit
- Name = Invoice
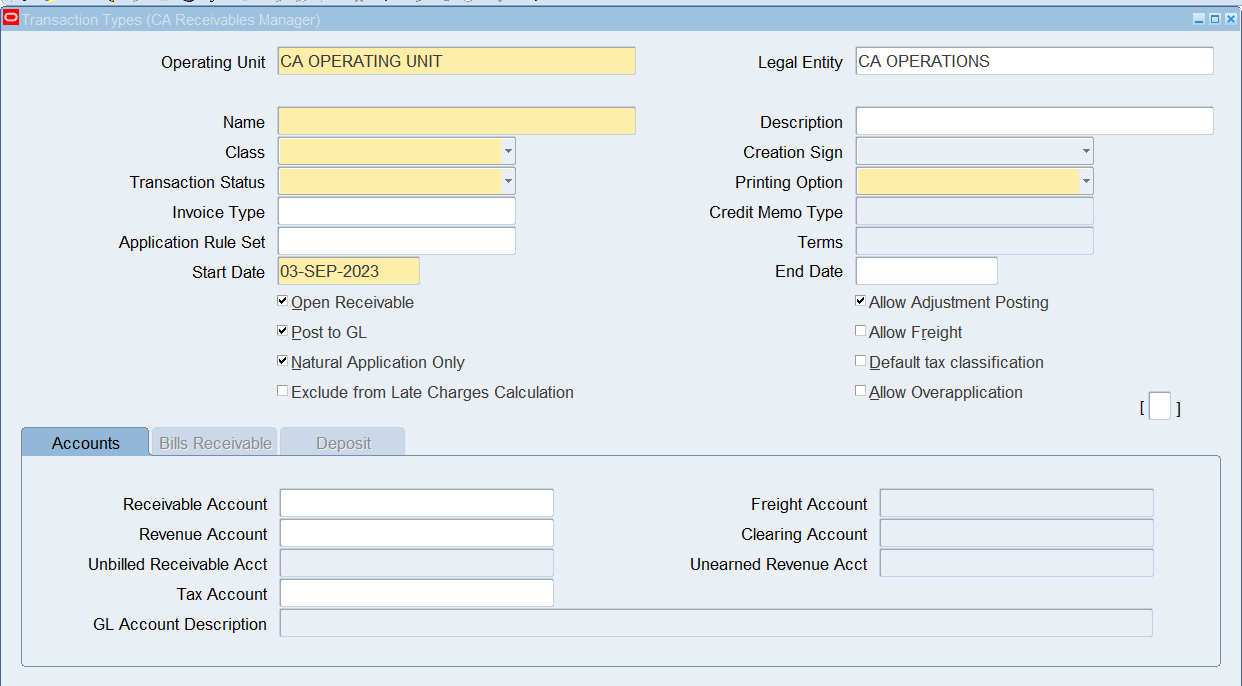
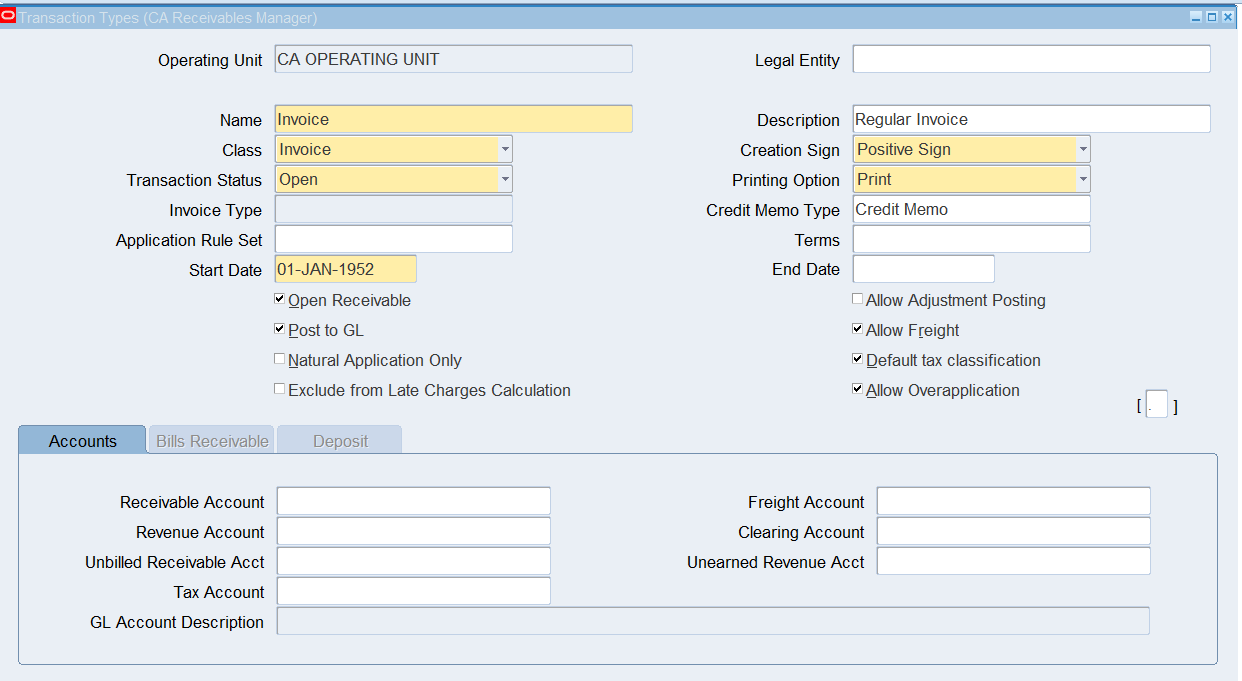
Note: Transaction types let you determine the following: the ability to update receivables balances (pro-forma invoices), to post to GL, to allow freight, and to determine (depending on the Autoaccounting setup) accounting
Review AutoAccounting Setup (Required)
Navigate to the AutoAccounting window.
(N) Setup > Transactions > AutoAccounting
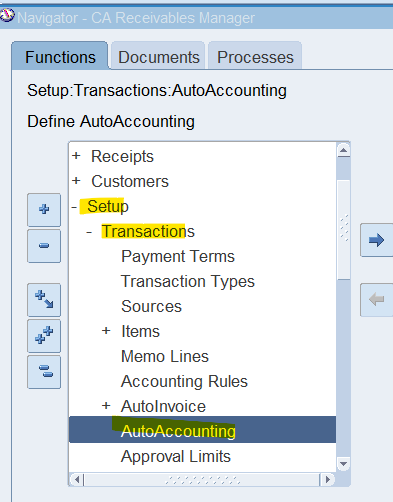
Note: AutoAccounting determines how the GL Accounts will be created for Receivables Transactions. These accounts will later be transferred to the GL during the transfer to the GL process.
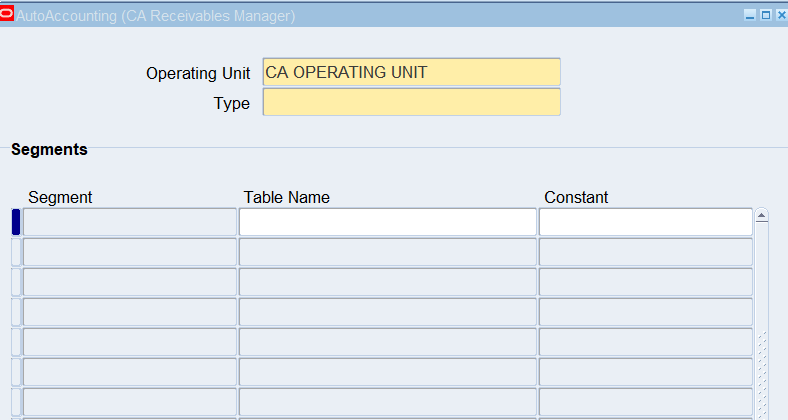
Query the Revenue and Receivables Account AutoAccounting Setups
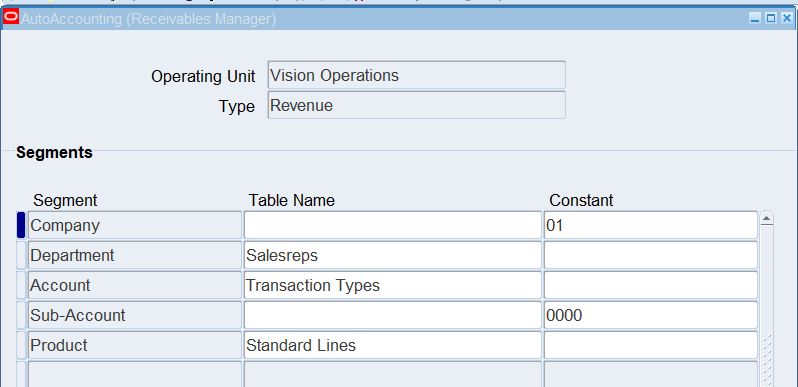
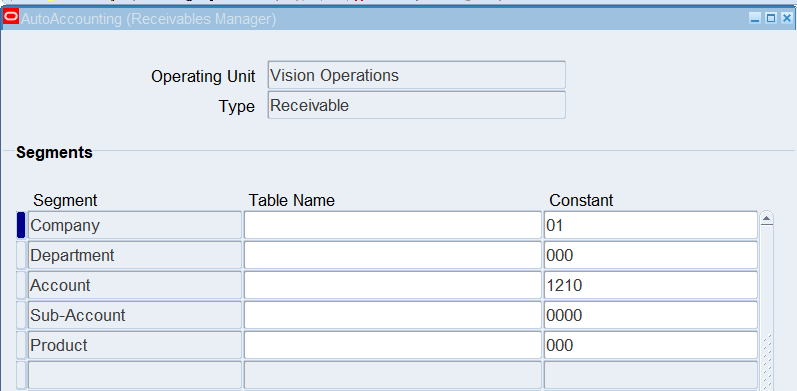
Setting Up AutoAccounting Getting Error: APP-AR-42555 This change impacts your other Balancing Segment definitions (Doc ID 2125457.1)
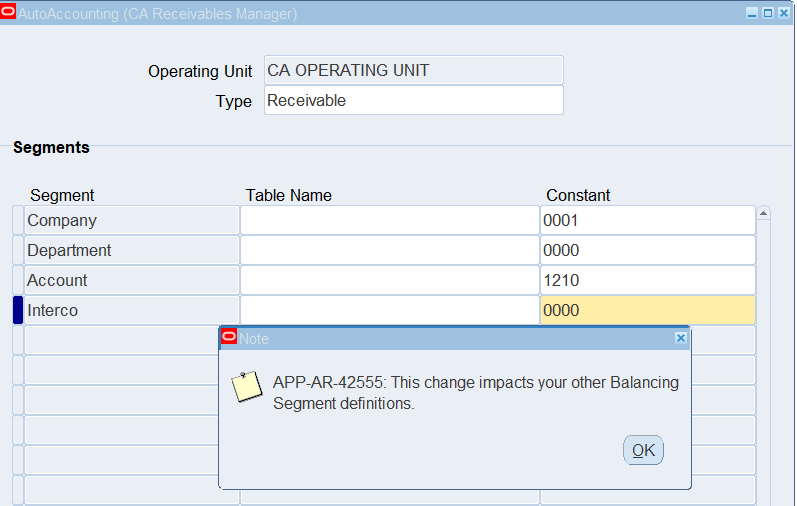
Creating new Auto Accounting for New Operating Unit
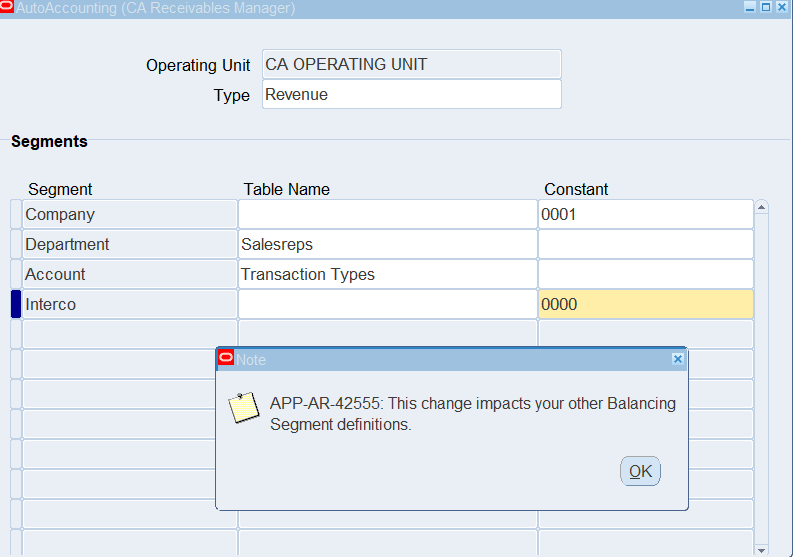
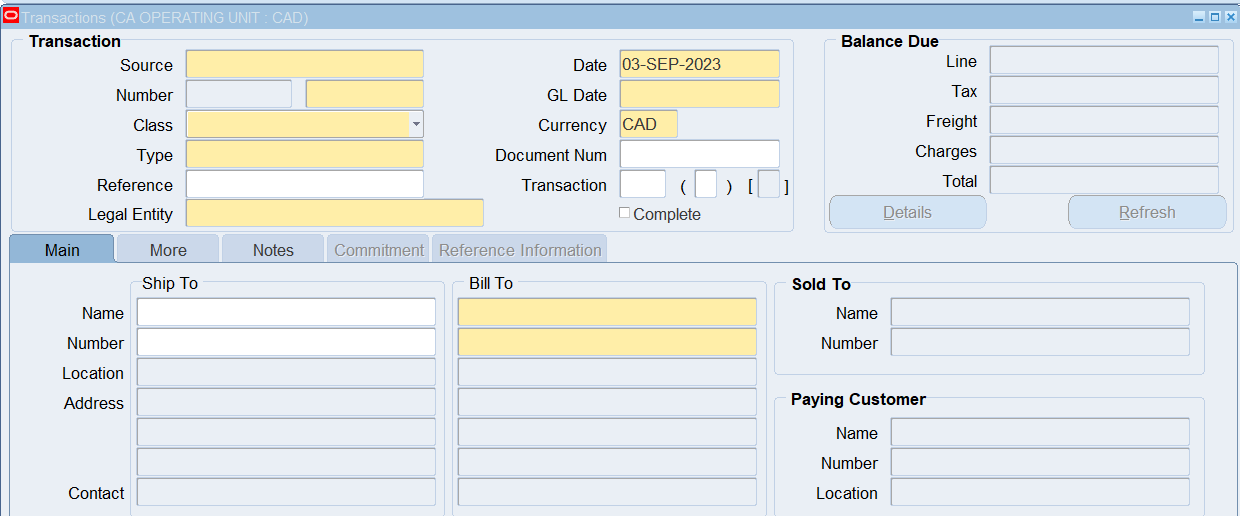
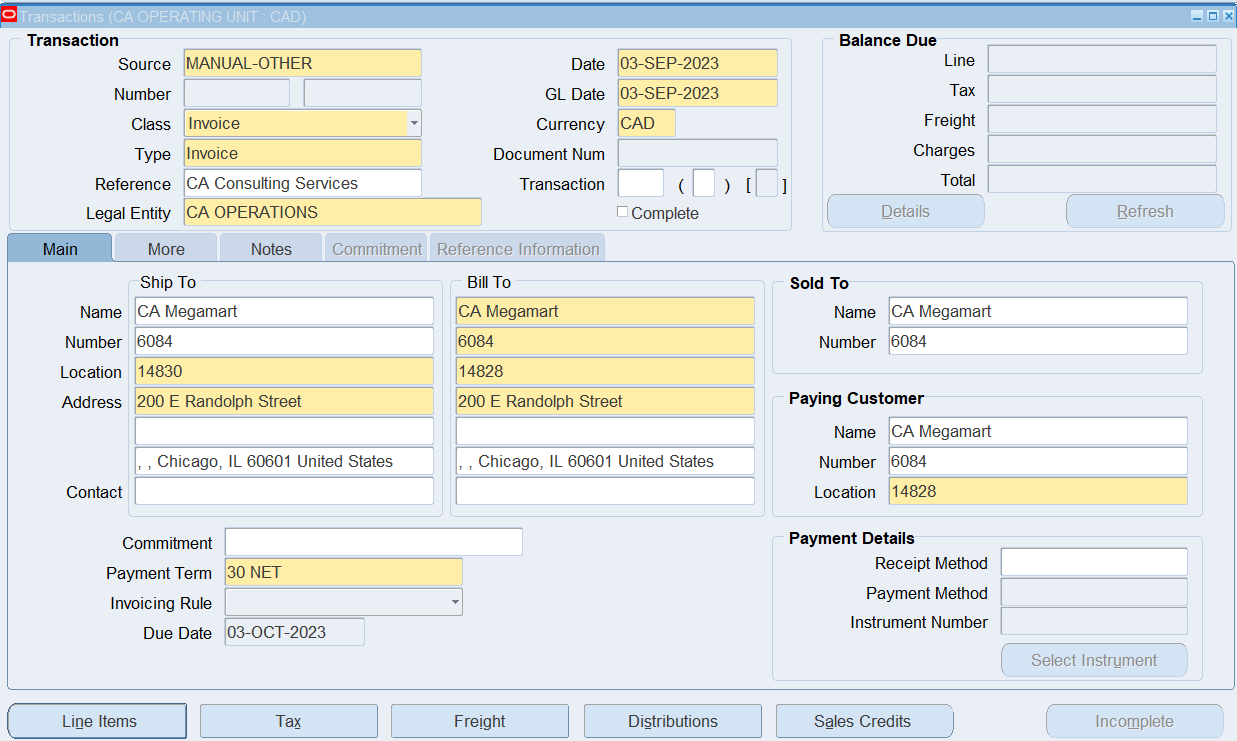
Enter a Manual Invoice
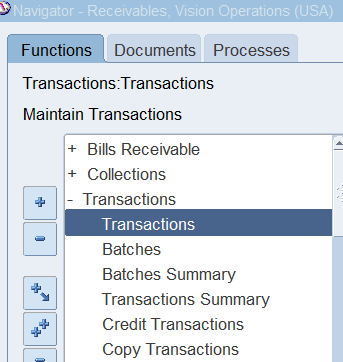
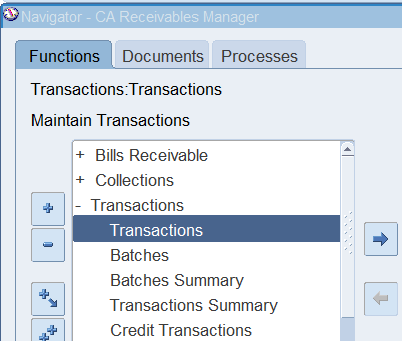
(N) Transactions 🡪 Transactions
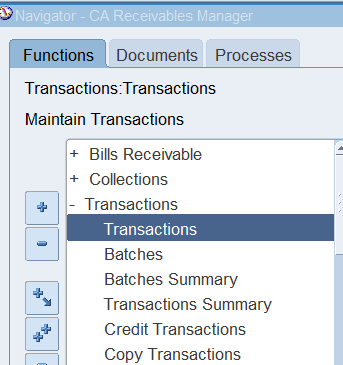
Enter the following Information
| Source | Manual |
| Class | Invoice |
| Type | Invoice |
| Reference | CA Consulting Services |
| Ship-To Name | CA Megamart |
Enter Line Items
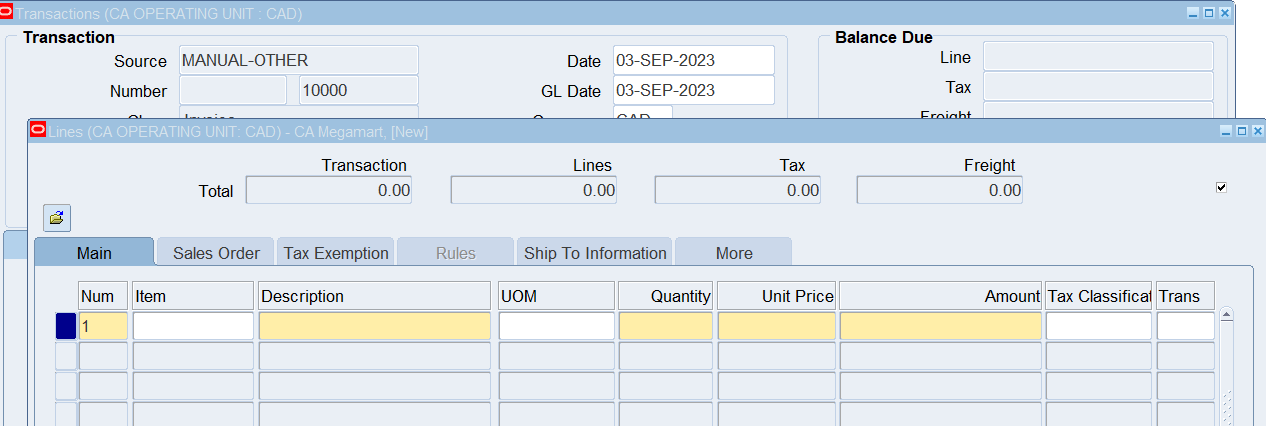
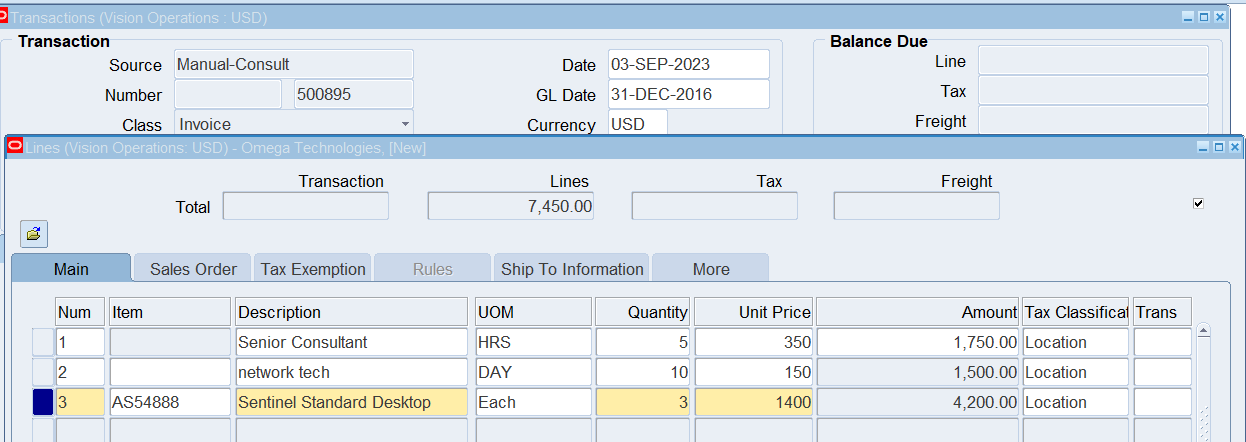
Select “Line Items” and enter following
| Num | Item | Description | UOM | Quantity | Unit Price |
| 1 | Senior Consultant (LOV) | Day | 5 | 350 | |
| 2 | Network Tech (free form) | Day | 10 | 150 | |
| 3 | AS54888 | Sentinel Standard Desktop | Each | 3 | 1400 |
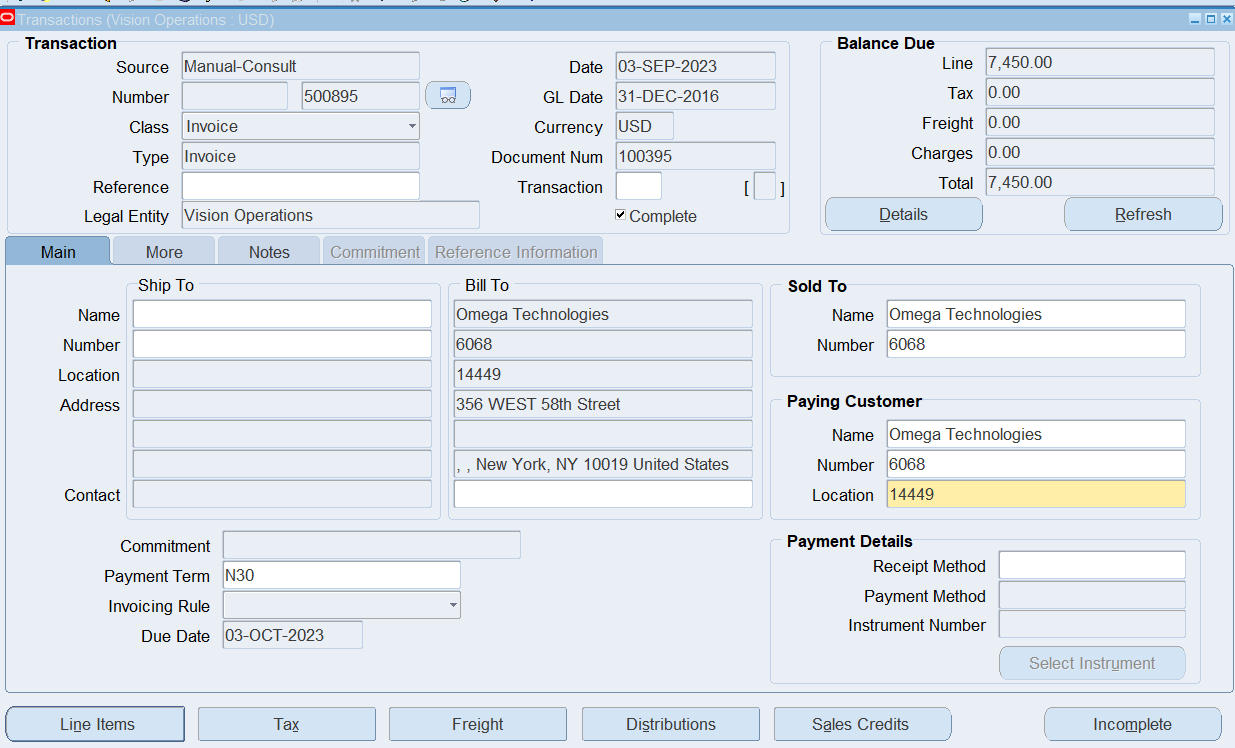
Enter an Invoice with Standard Memo Lines (Required)
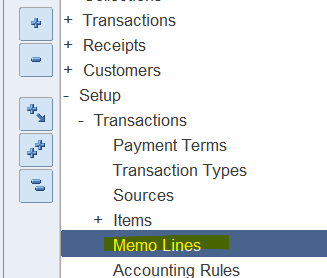
Setup Memo Lines
(N) Setup > Transactions > Memo Lines
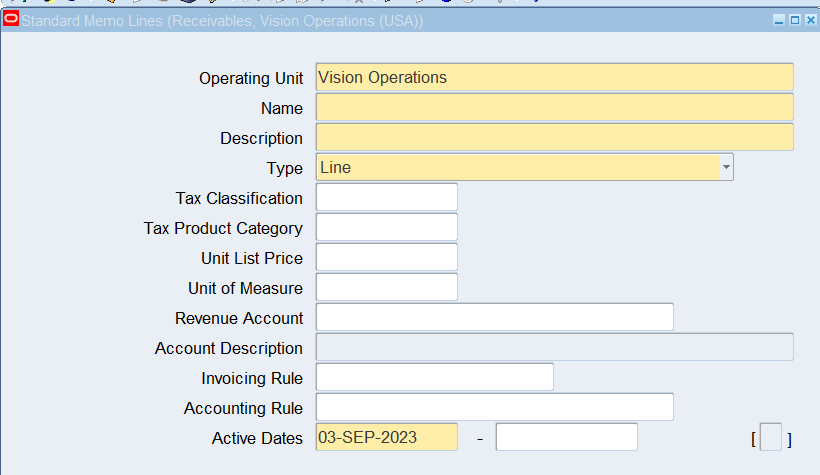
Enter the following information:
- Operating Unit : Vision Operations
- Name : CA Start-up Fee
- Description : CA Start-up Fee
- Type : Line
- Unit List Price : 200
- Unit of Measure : Each
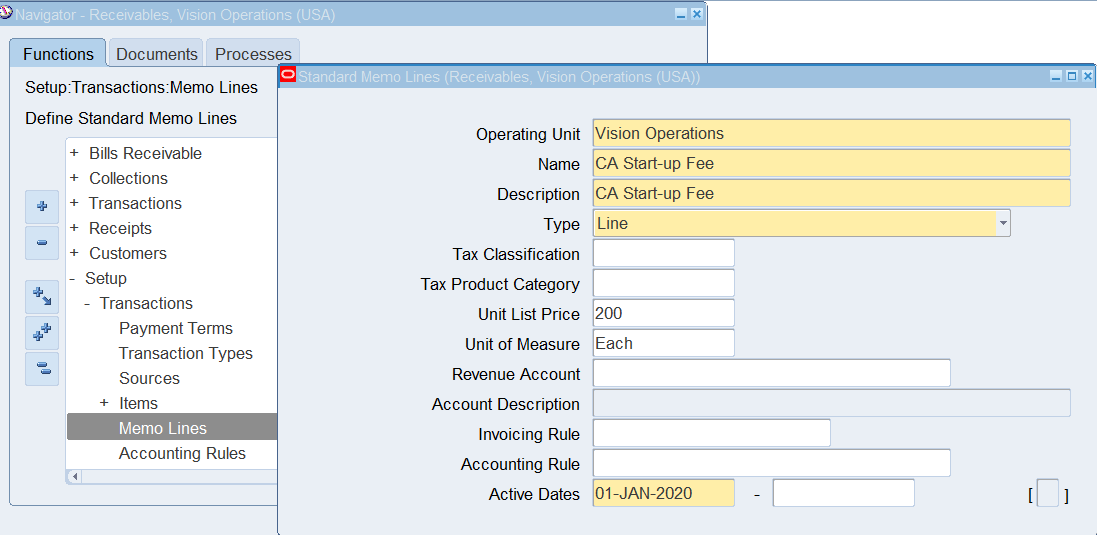
Enter the following information:
- Operating Unit : Vision Operations
- Name : CA-1 Year Support Agreement
- Description : CA-1 Year Support Agreement
- Type : Line
- Unit List Price : 1200
- Unit of Measure : Year
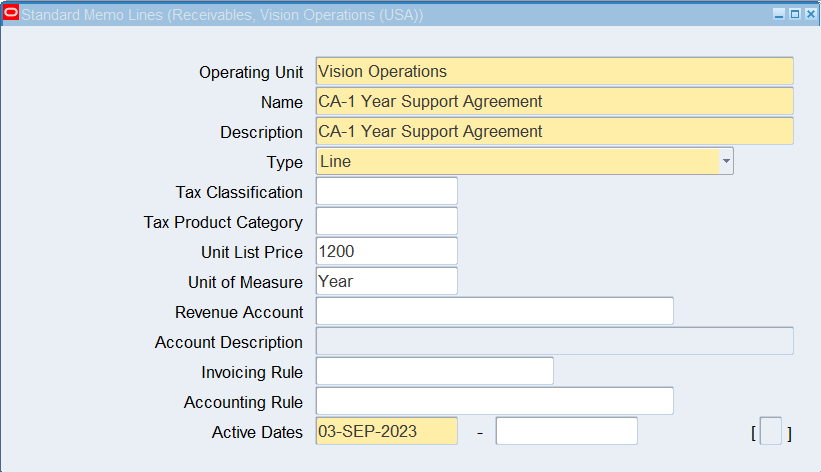
Enter a Transaction Using Standard Memo Lines
(N) Transactions > Transactions
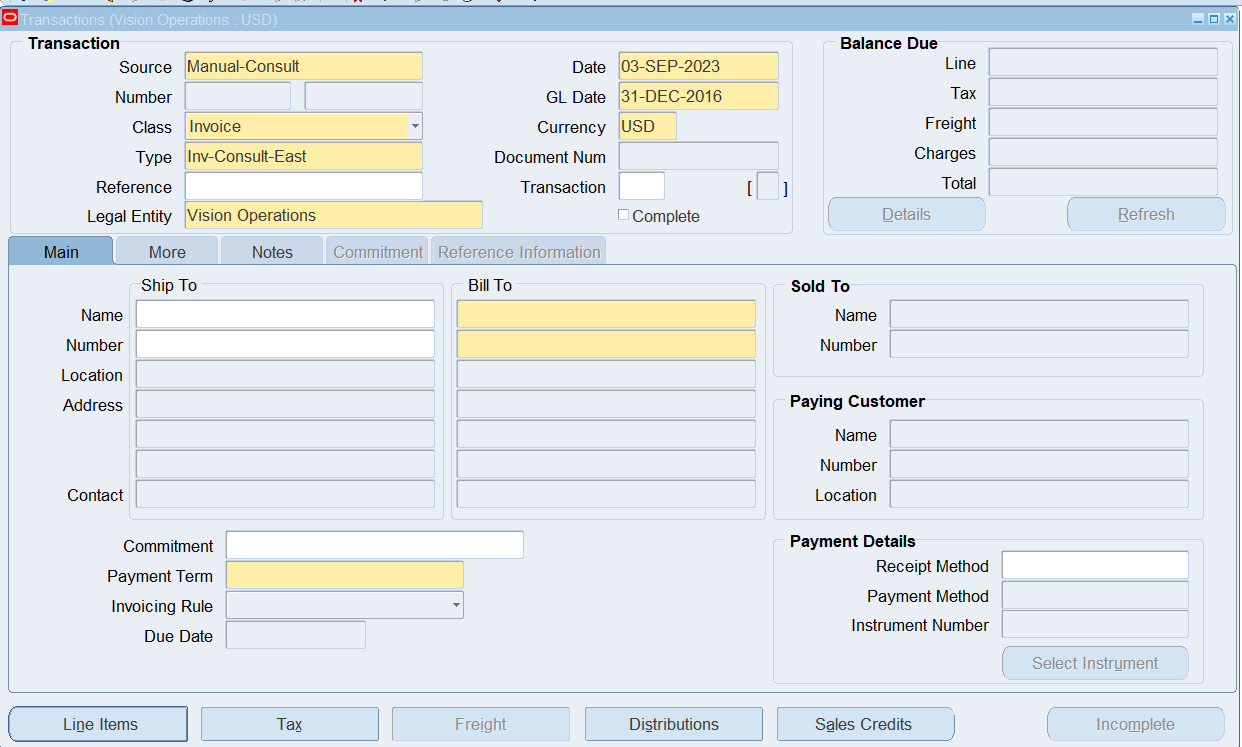
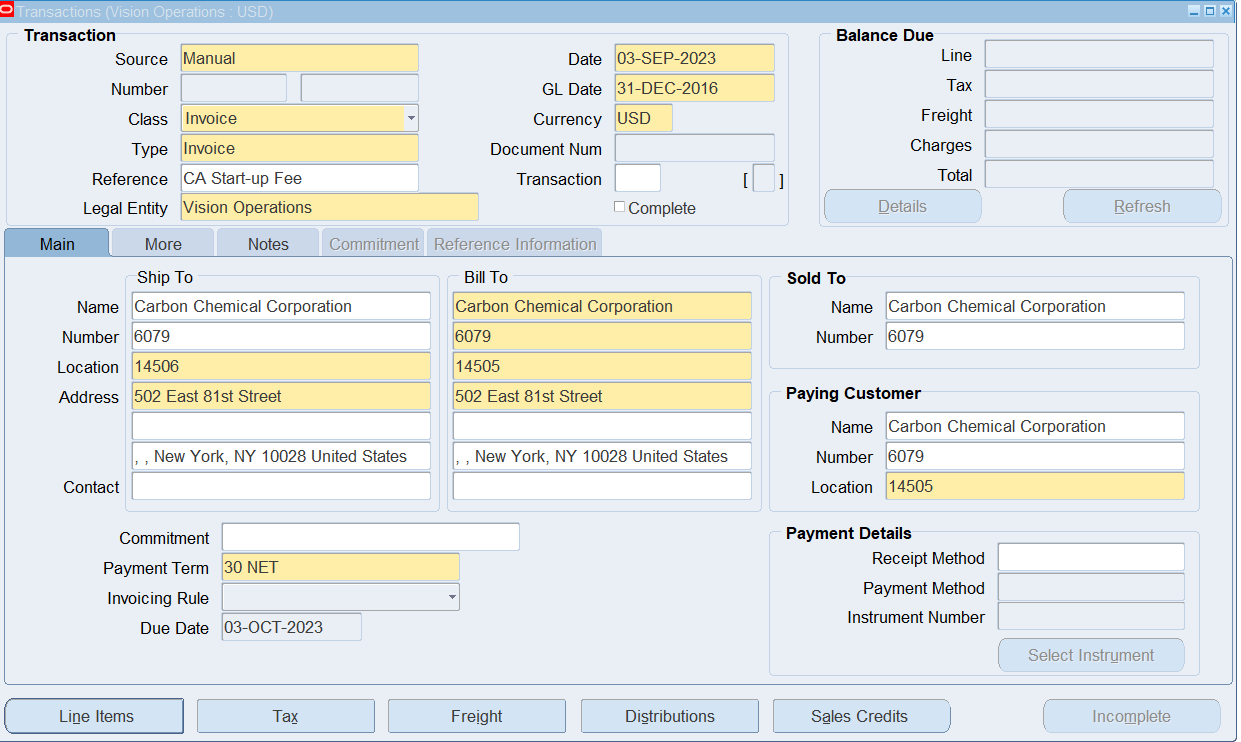

Click “Save”, close Lines window, Click Complete and record transaction number
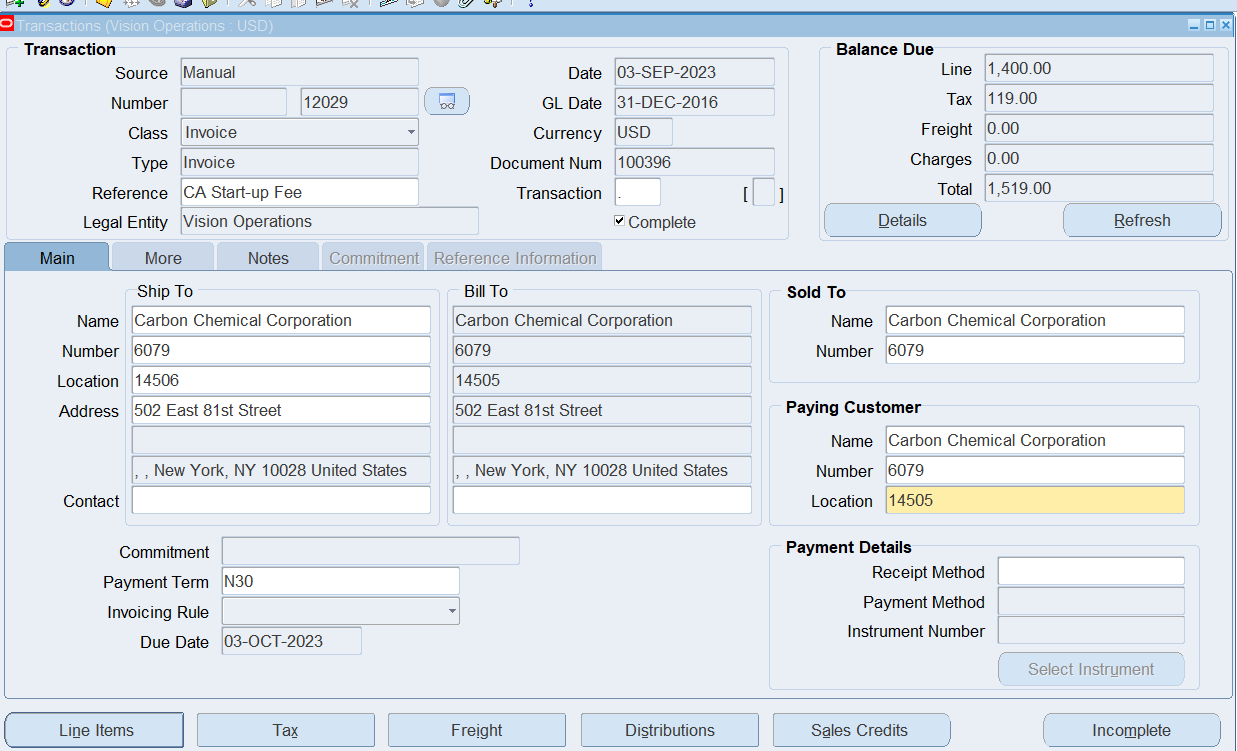

Copy Invoices (Required)
Overview
The customer who contracted for one year of service following a one-time start-up fee has entered into a one-year software license agreement with a total cost of $120,000 for the year. The customer has requested invoicing on a monthly basis during the life of the agreement. In this practice, you will enter a manual invoice and then use the invoice as a template for creating invoice copies
Enter an Invoice to be used as a Template
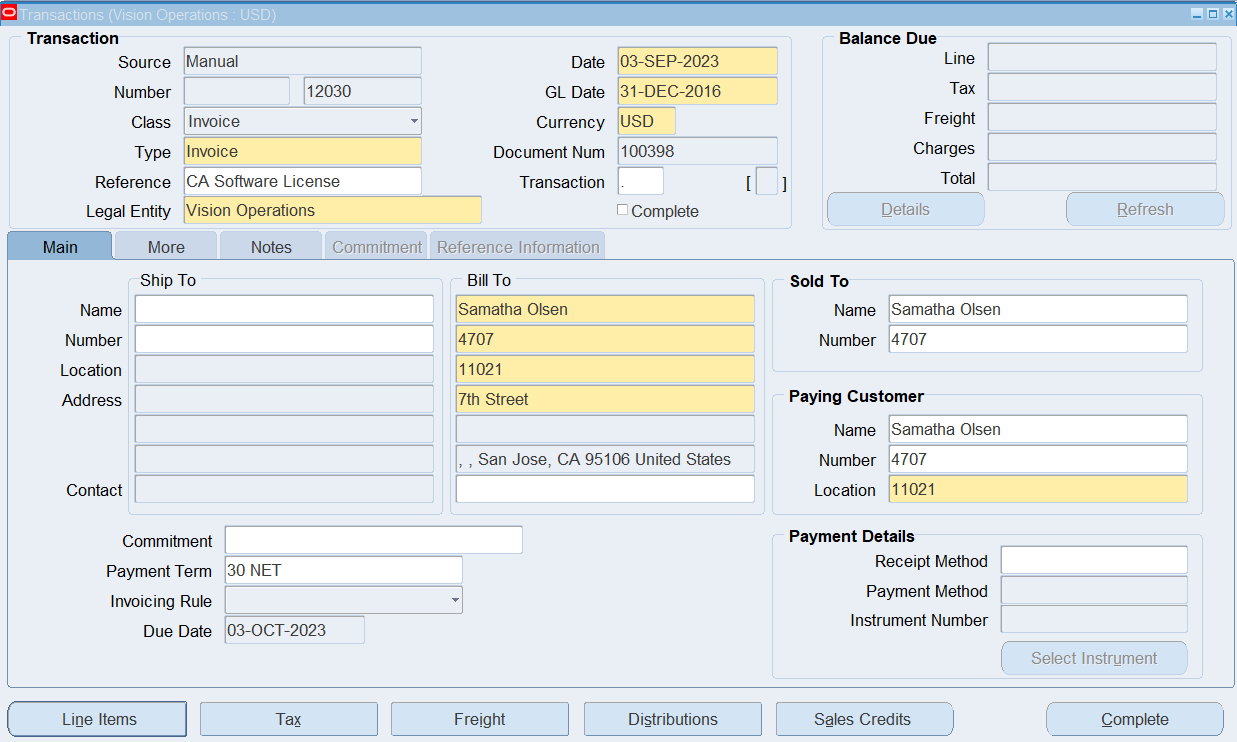
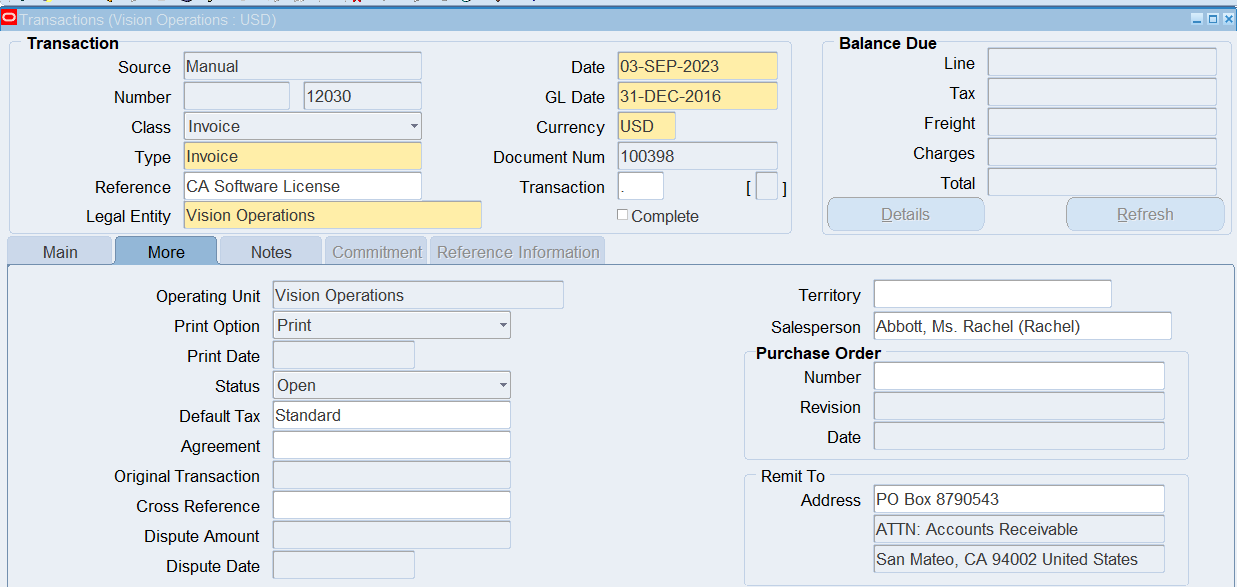
Click (T) More and Update Salesperson = Abbott, Ms. Rachel.

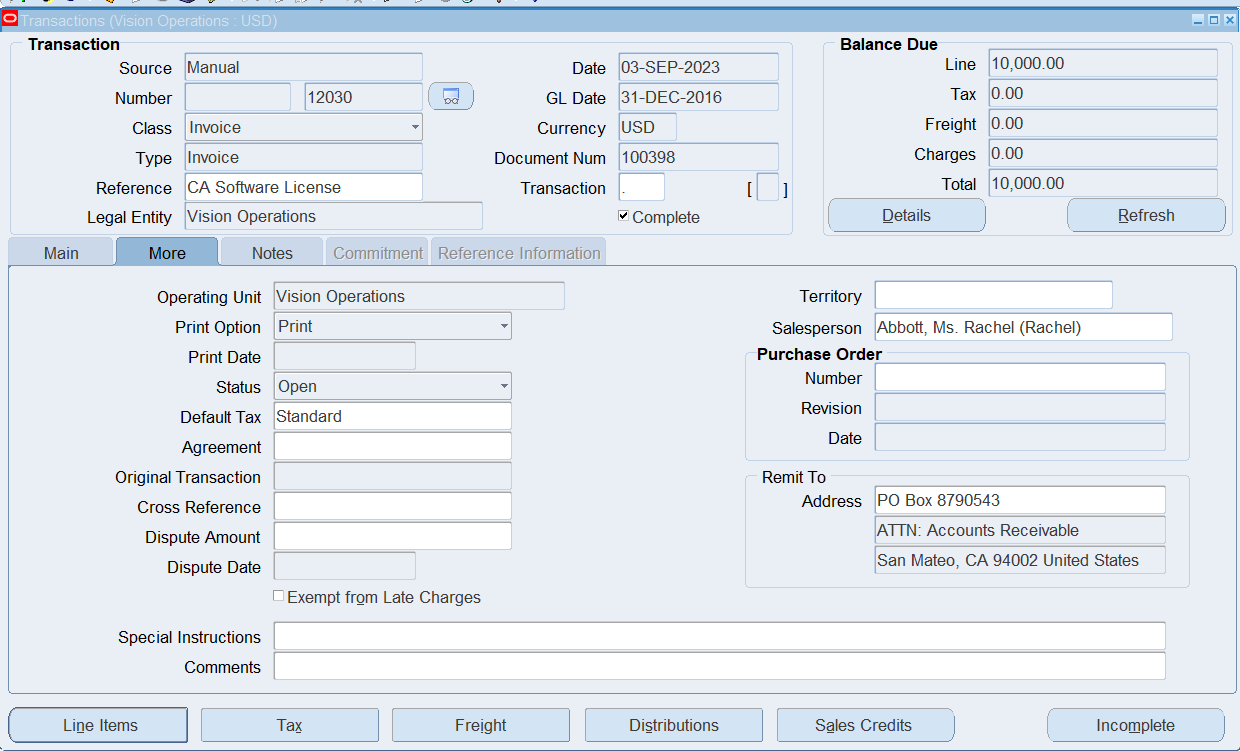
Copy your COMPLETED Transaction
Navigate to the Copy Transactions window.
(M) Actions > Copy To
Enter the following information:
- Rule = Monthly
- Number of Times = 11
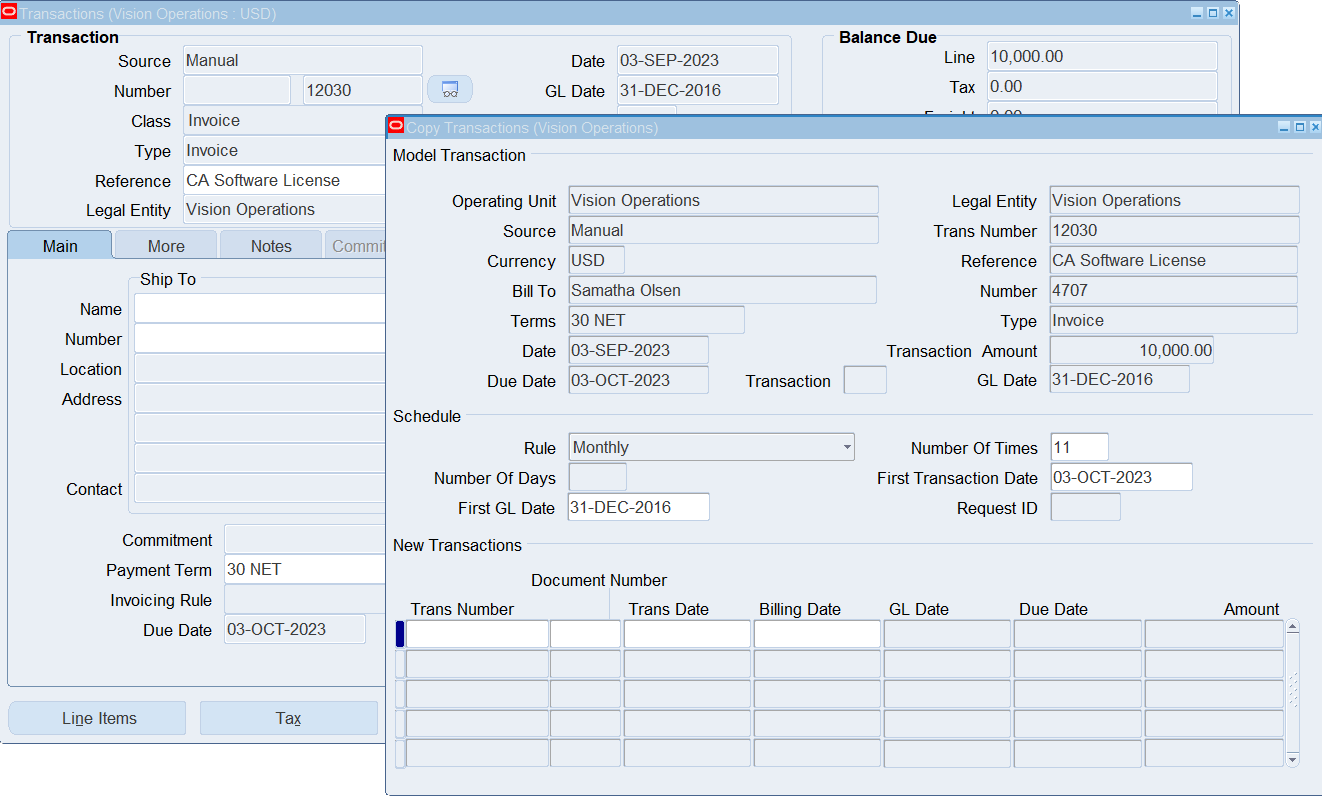
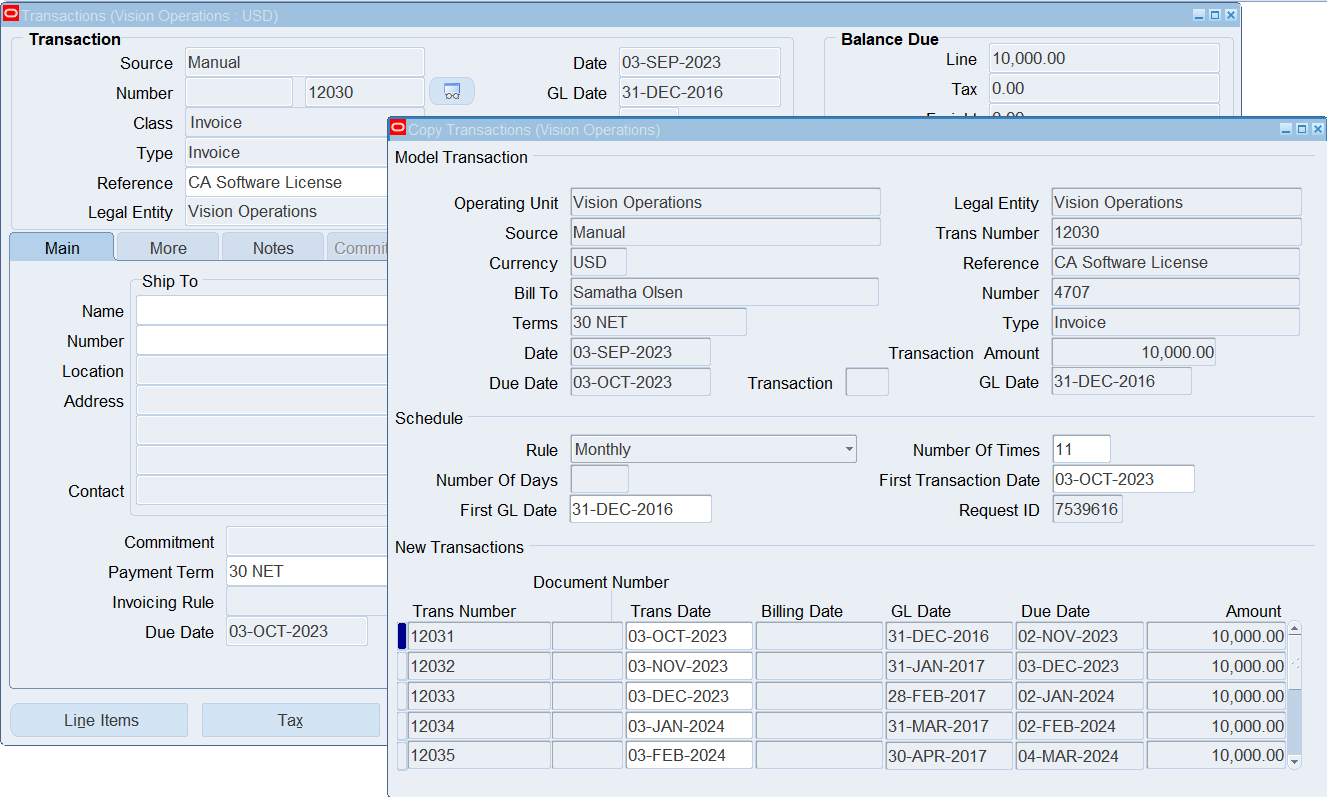

After the invoices are saved, the Recurring Invoice process creates the invoices
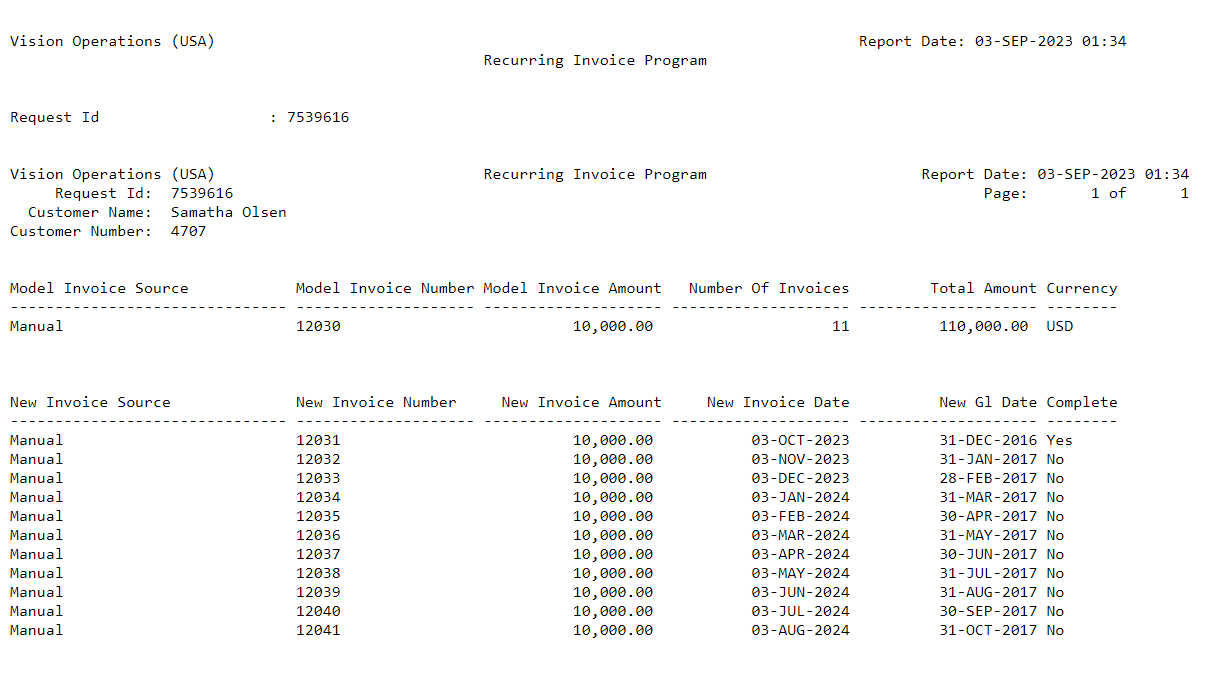
Note: The process may have completed with a Warning to indicate that any invoices created in a closed period will not be completed and must be completed after the period is opened using the following steps.

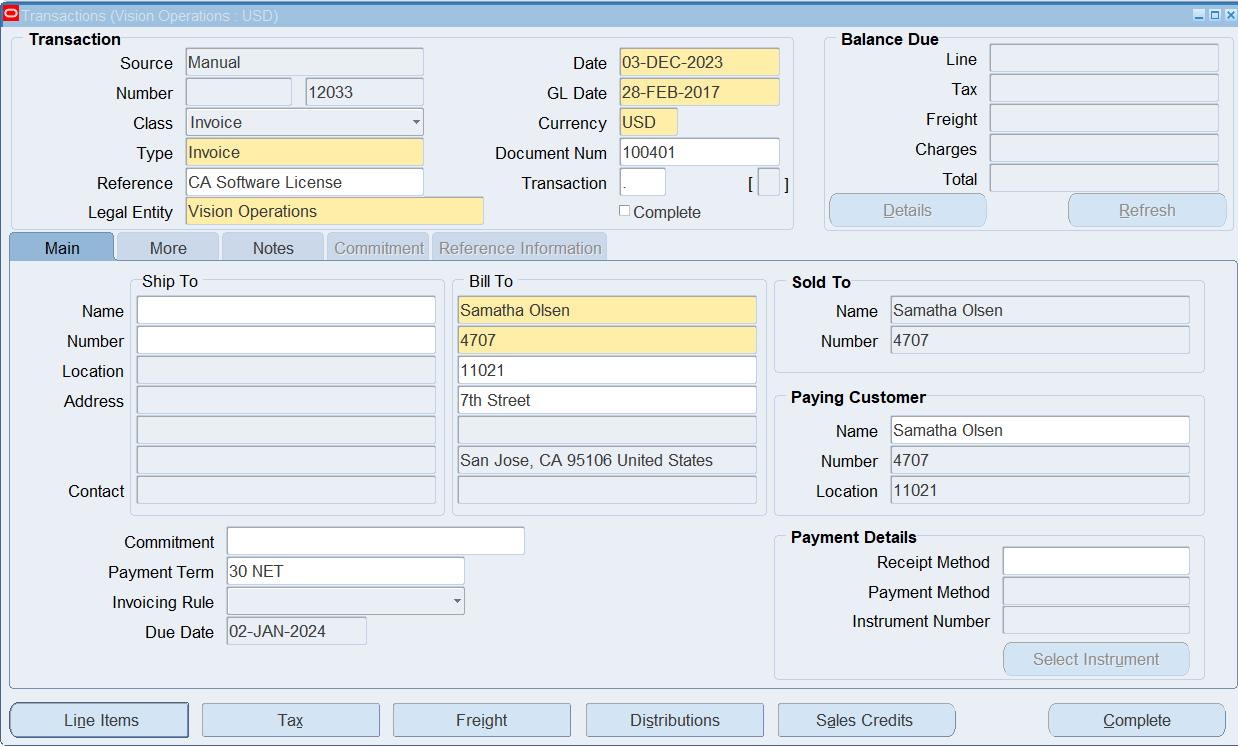
Remember you will only be able to complete transactions that are in an Open or Future Enterable GL Period.
Enter an Invoice with a Bill in Arrears Invoicing Rule
Overview
The customer used the services of a network technician has decided to proceed with a project that requires one year of consulting service from a network technician. The customer will not be invoiced until the project has been completed but revenue must be recognized monthly as the consulting service is provided. The total amount to be invoiced to the customer when the project is completed will be $150,000.00
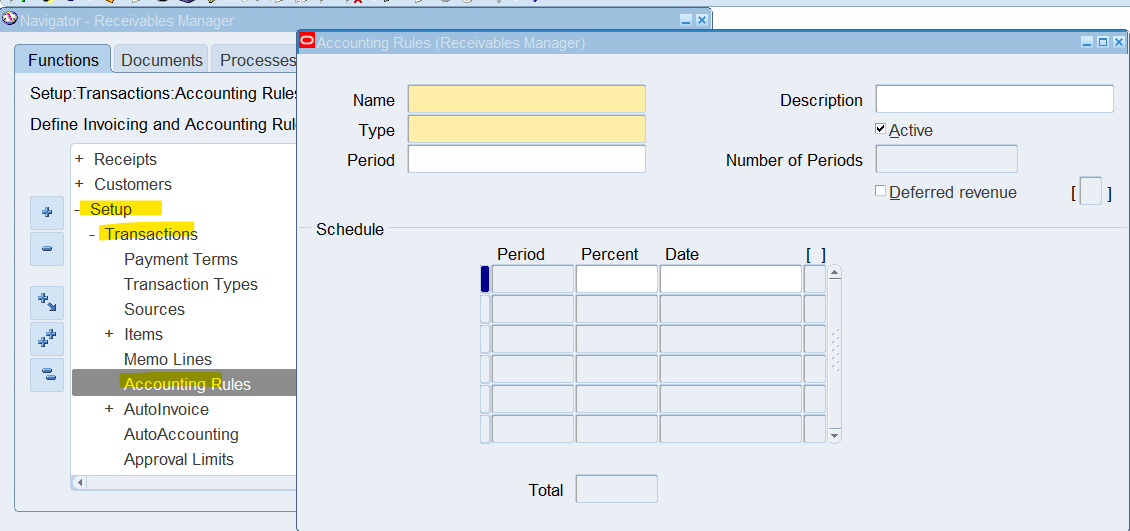
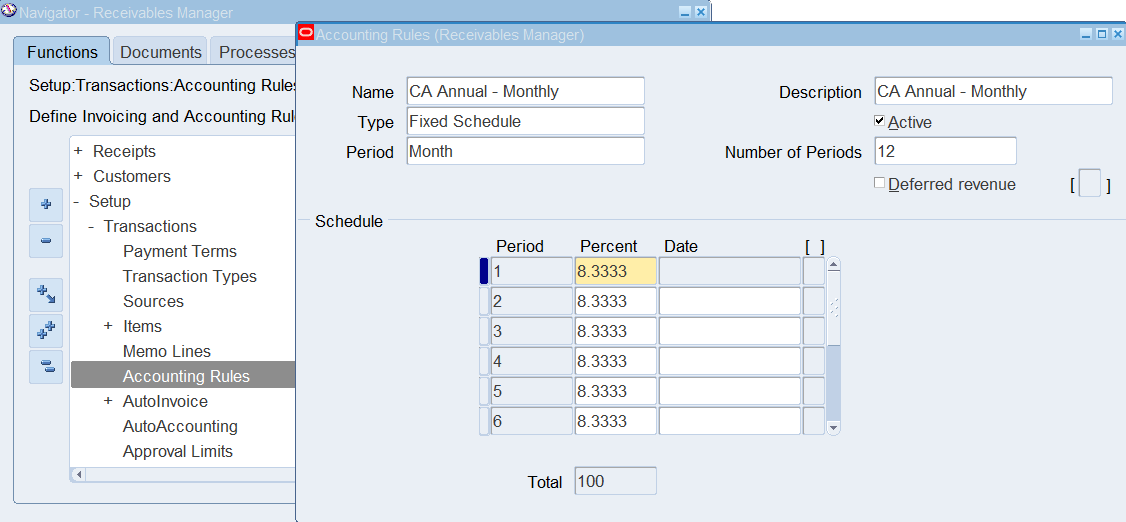
In this example we will define an accounting rule and then enter a manual invoice using accounting rule and a bill in arrears invoicing rule.
Define an Accounting Rules
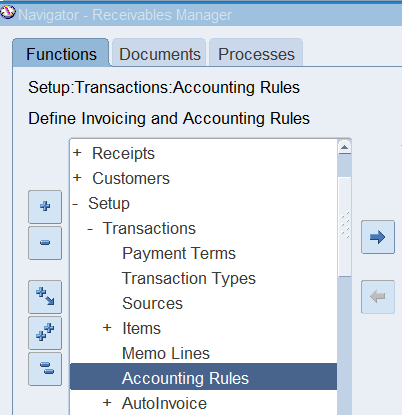
(N) Setup 🡪 Transactions 🡪 Accounting Rules
Enter an Invoice with Rules
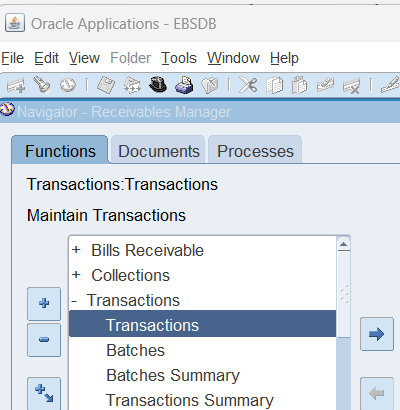
Navigate to the Transaction window.
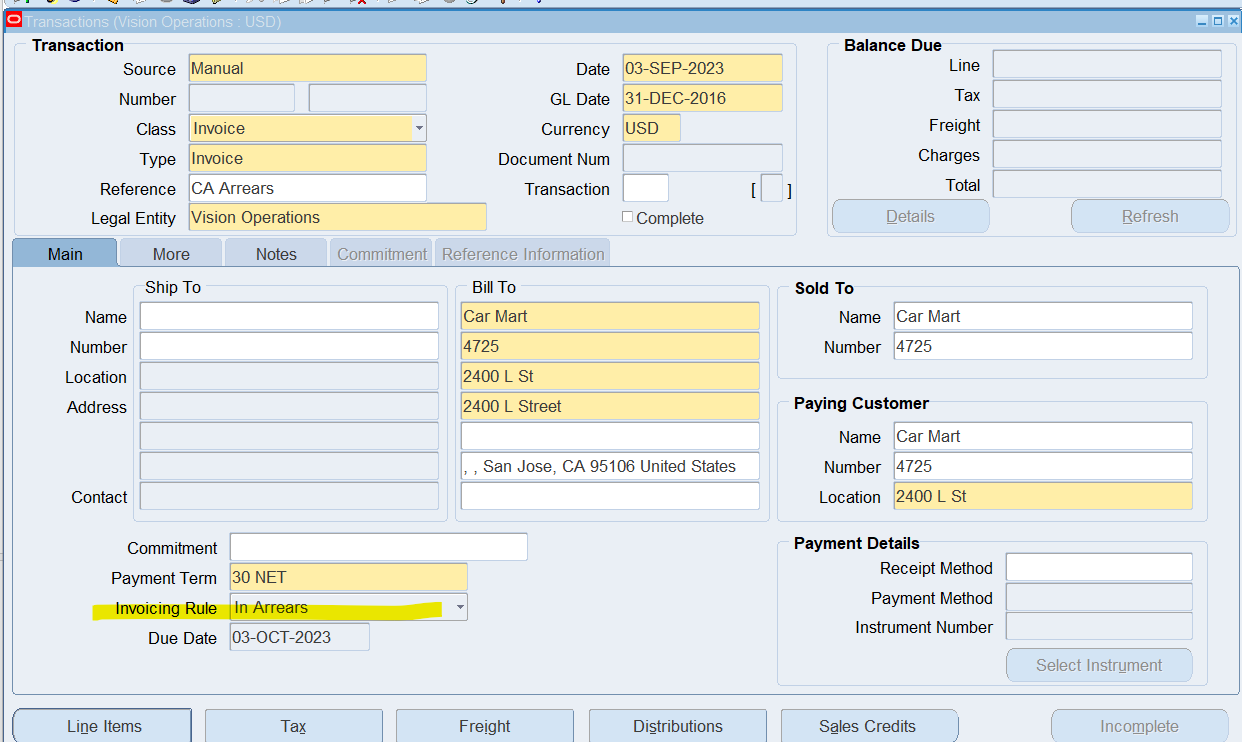
Select “Invoicing Rule” as In Arrears
Note: You must assign the invoicing rule prior to saving the invoice header or navigating to the line items region!
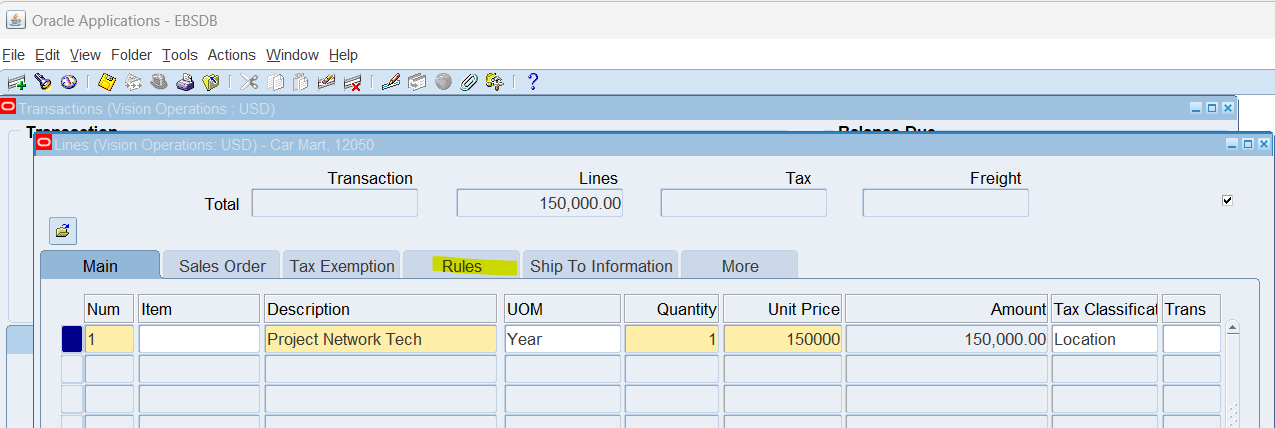
Select “Rules” and enter:
Accounting = CA Annual – Monthly
Enter a Debit Memo for Missed Freight
Overview
You will enter a debit memo to bill CA Megamart for freight charges from a previous invoice. Note that an alternate way of handling this would be to do an invoice adjustment for freight (Transactions Summary window).
(N) Transactions 🡪 Transactions
Enter the following information:
- Source : Manual
- Class : Debit Memo
- Type : Debit Memo
- Reference : Sample Debit Memo
- Ship To : Campbell Technosystems
- Bill To : Campbell Technosystems
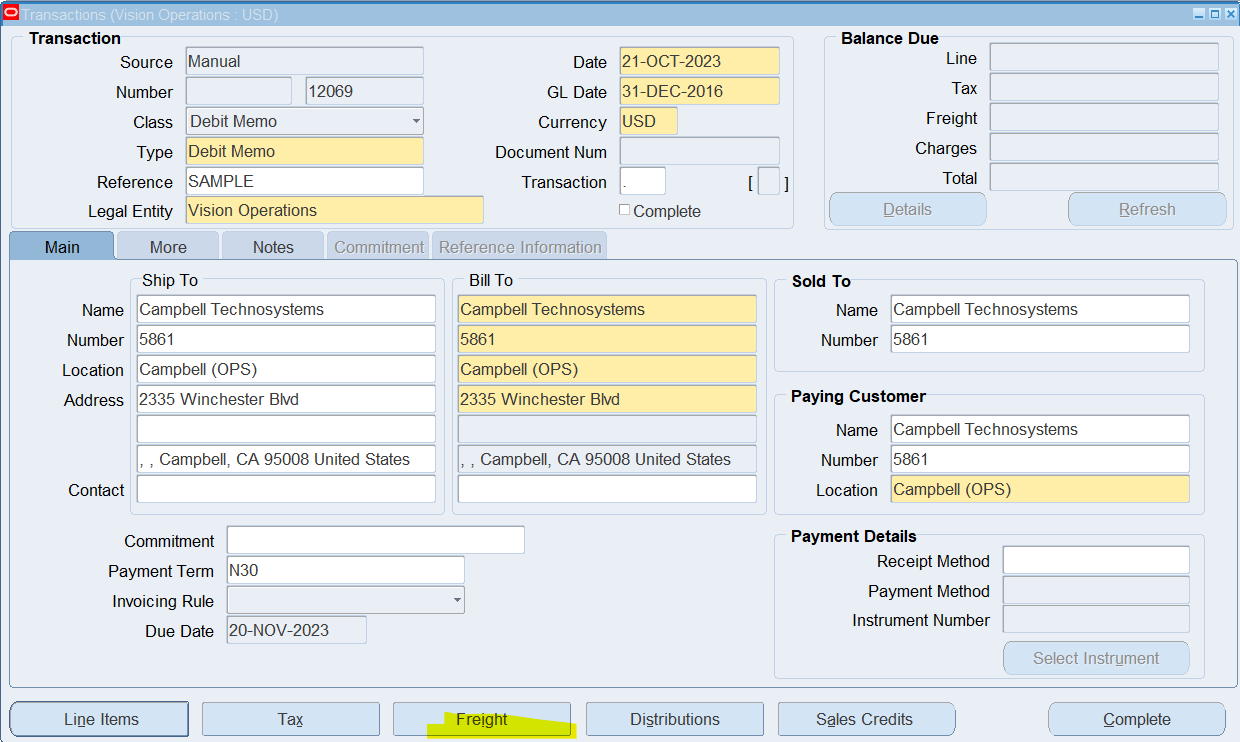
Select Freight
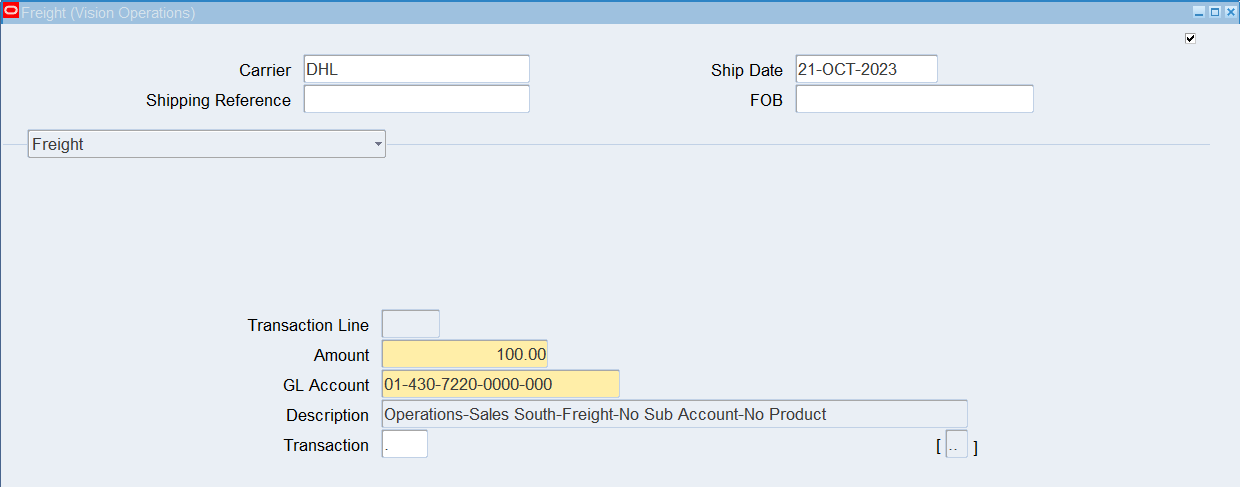
Invoice Distribution

Click (B) Complete
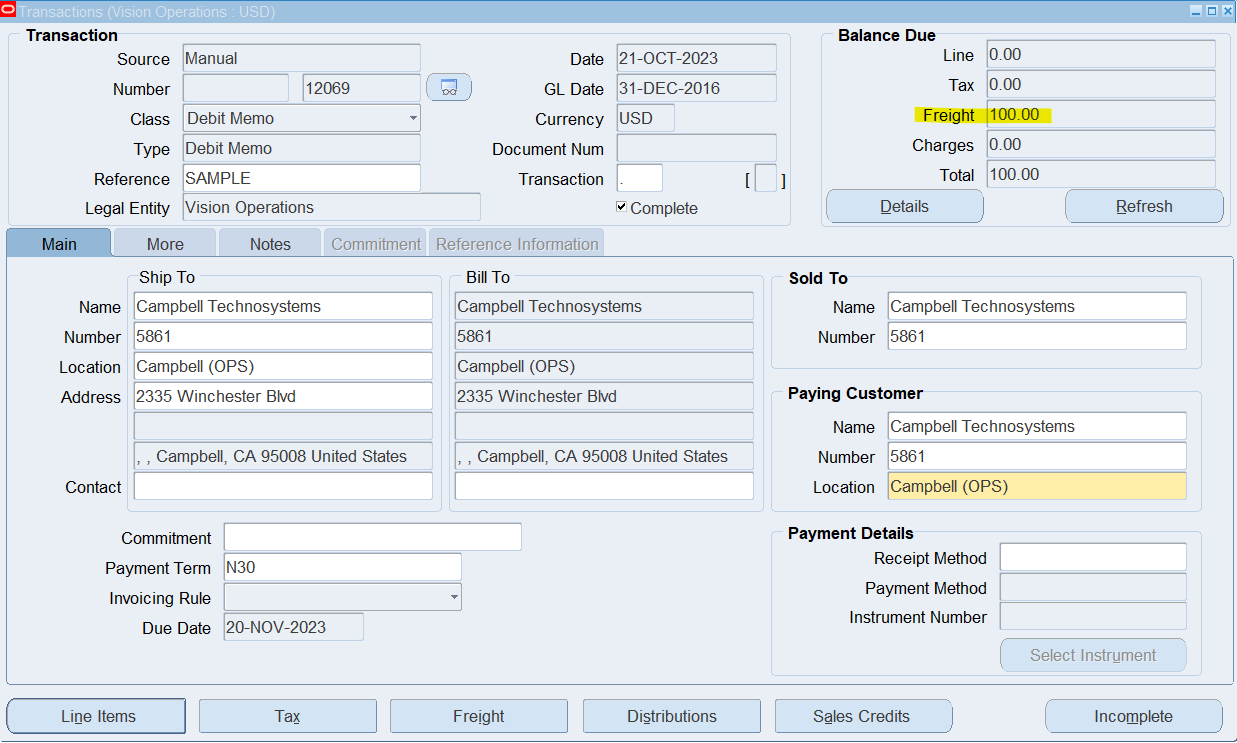
Note: Invoices and debit memos cannot be linked. Utilize the More tab to choose a value in the Cross Reference field or add a note in special instructions. The Cross Reference value does not appear on the invoice, but any special instructions will
Note: If you want to use different numbering sequences for debit memos and credit memos, set up different transaction sources
Create a Write-Off Adjustment
Overview
In this practice you will enter approval limits, create an adjustment, and log in as a different user to approve the adjustment. The adjustment is to write off the debit memo for freight (from a previous practice) that was an error.
- Navigate to the Approval Limits window
- Enter the following information:
- Username : ibrahimr
- Document type : Adjustment
- Currency : USD
- From Amount : -25
- To Amount : 25
- Click Save
(N) Setup 🡪 Transactions 🡪 Approval Limits
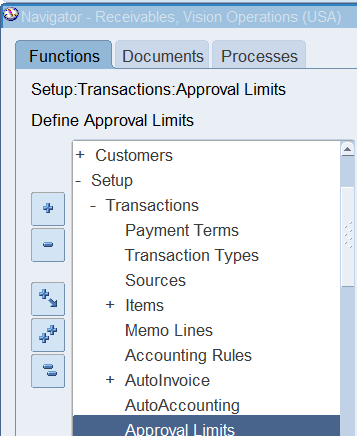
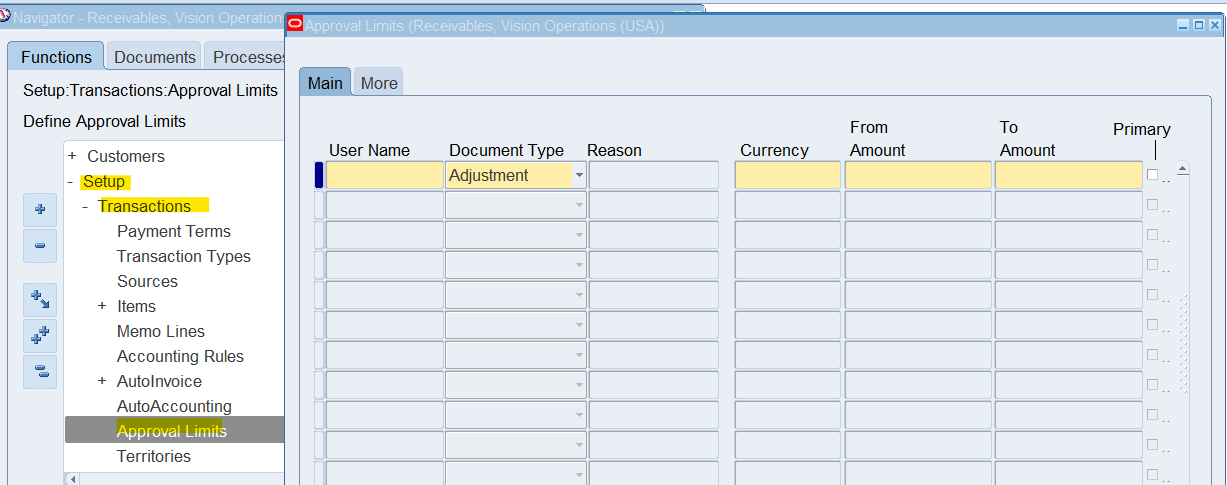

Note: The AR Credit Memo Approval Request workflow process uses the Credit Memo document type. The Primary flag is set to indicate that the user is the primary approver for a currency and a currency range.
Create the Write-Off Adjustment
Navigate to the Transactions Summary window
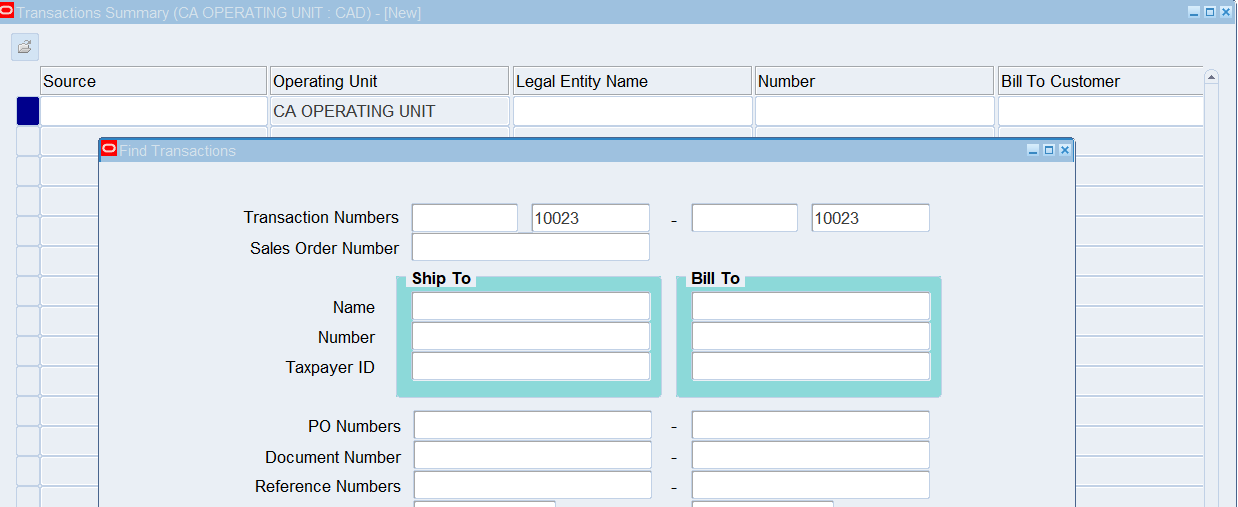
Navigate to (M) View 🡪 Find and enter following information
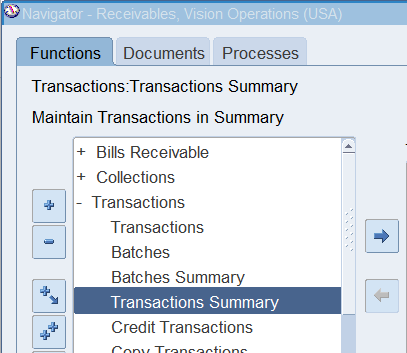
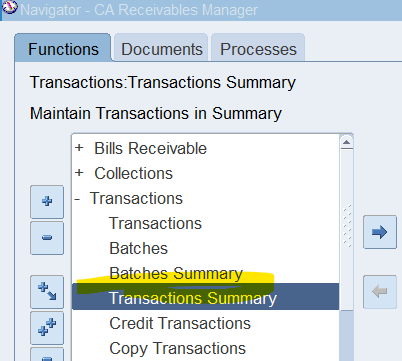
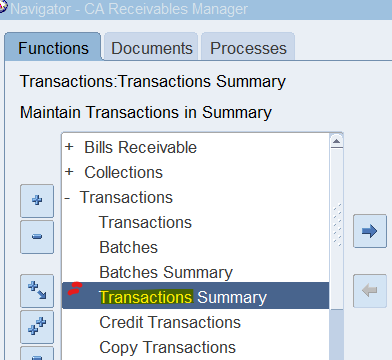
(N) Transactions 🡪 Transaction Summary
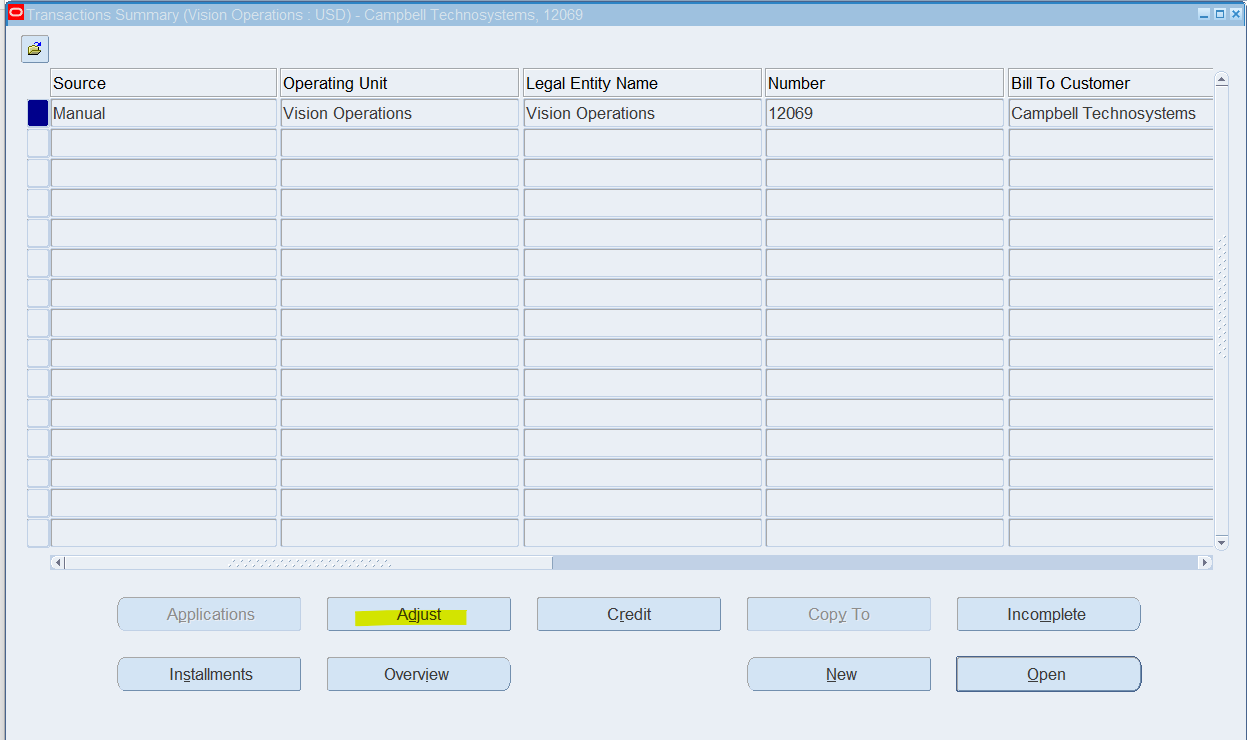
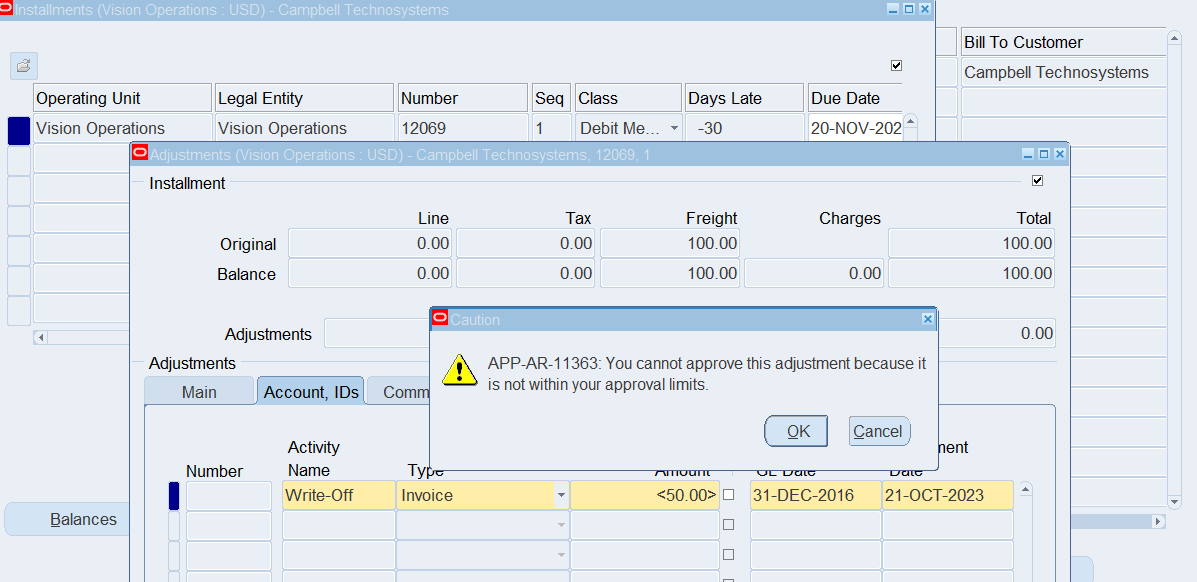
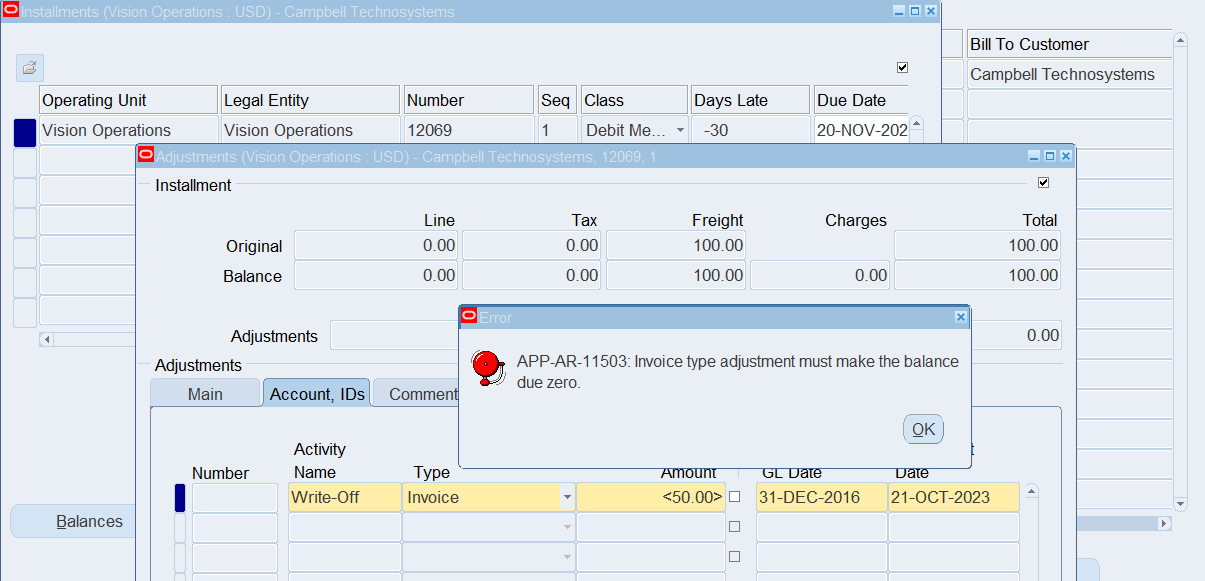
Select “Adjust” and enter following information
- Activity Name : Write-off
- Type : Invoice
- Amount : -50
Log in as a Different User and Approve the Pending Adjustment
Login as user “Operations”
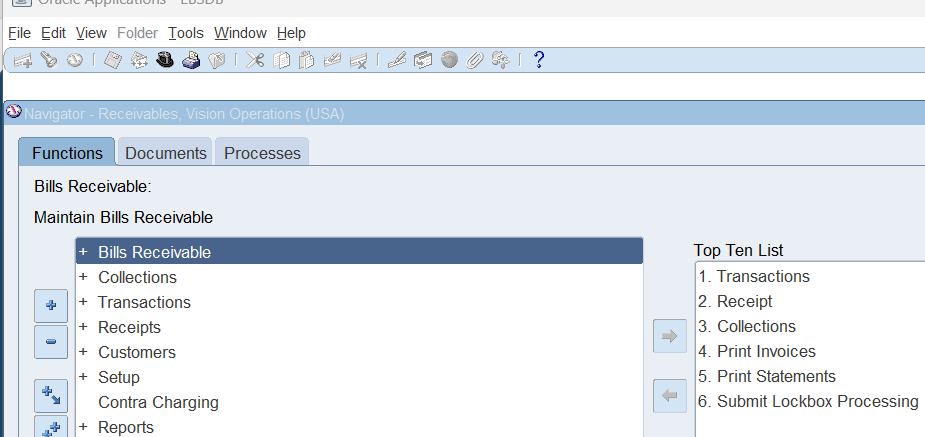
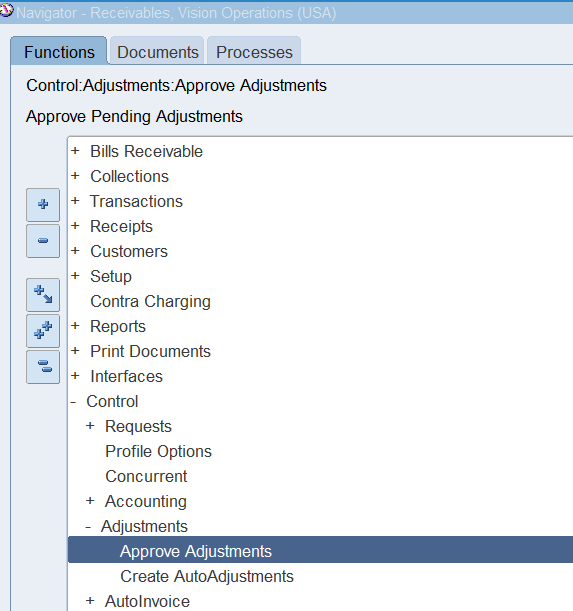
(N) Control 🡪 Adjustment 🡪 Approve Adjustments
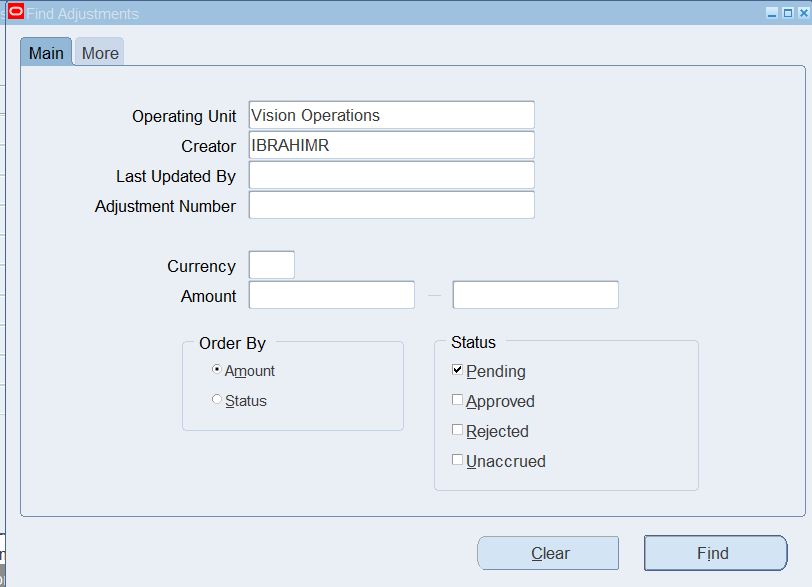

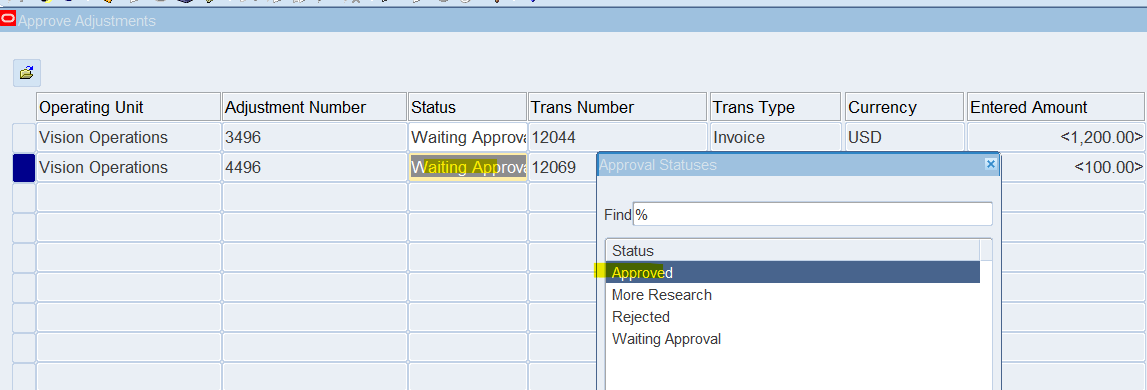


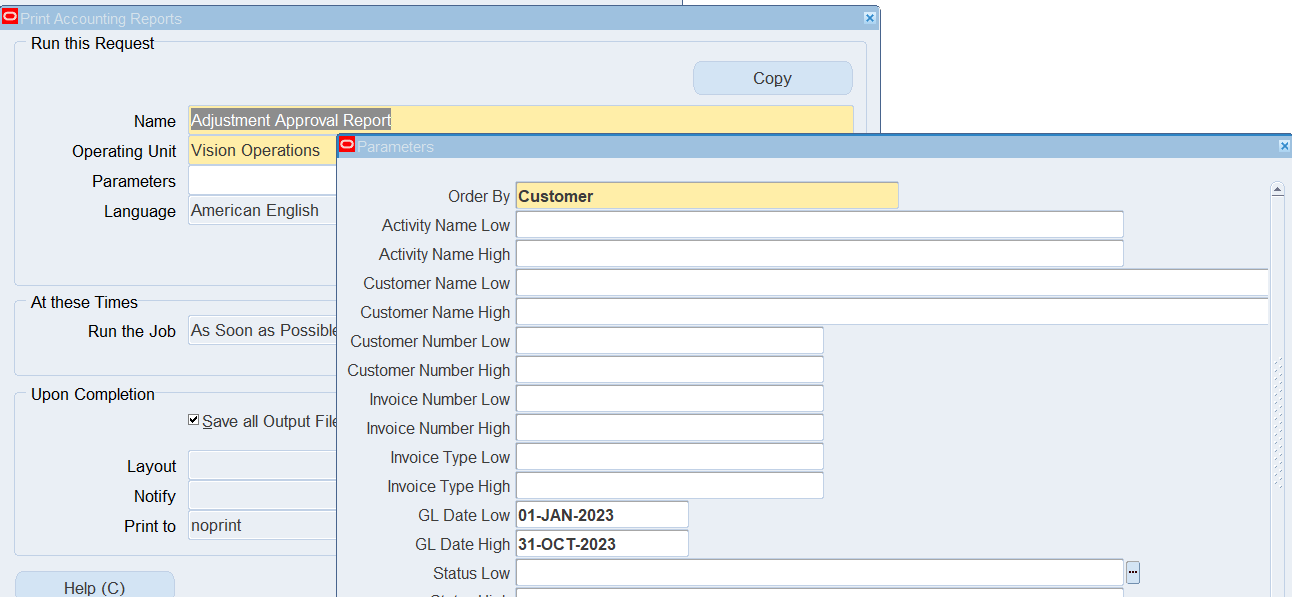
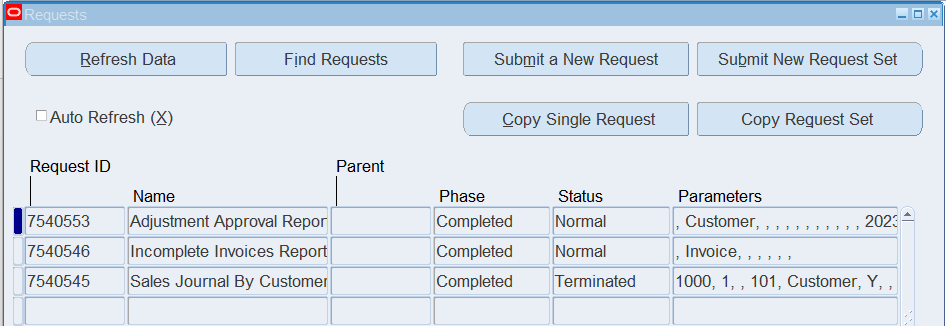
Run the Adjustment Approval Report
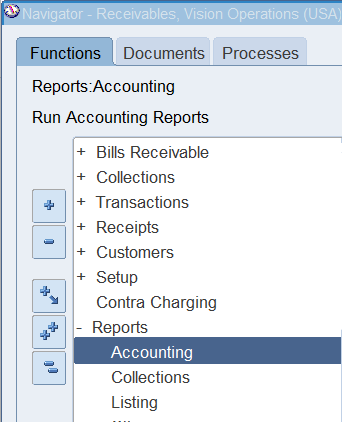
Responsibility : Receivables Manager
Navigation : (N) Standard Request 🡪 Reports 🡪 Accounting

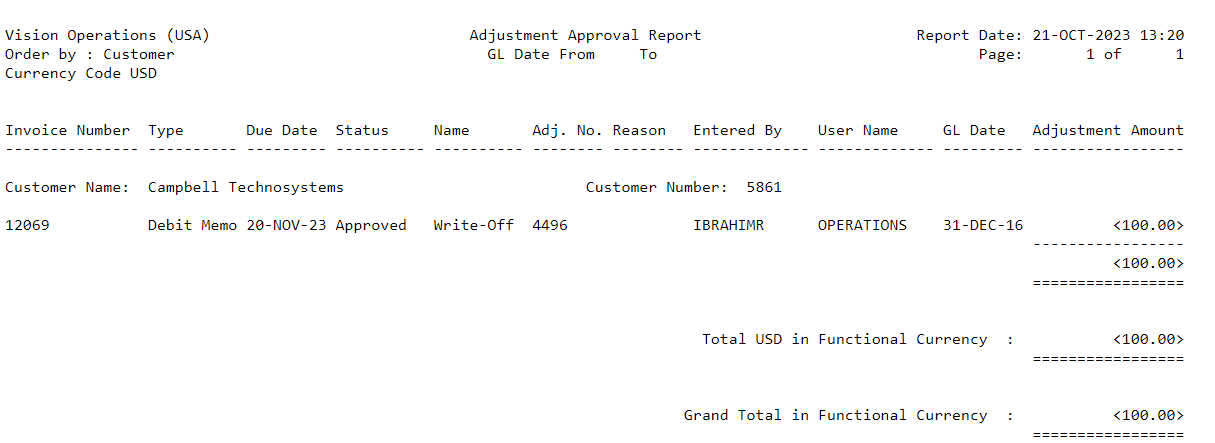
Note: Once the “Create Accounting” has been generated, you can view the adjusted amount and the accounting associated with your debit memo by querying the transaction in the Transaction Summary window, selecting Adjust and using (M) Tools > View Accounting. Also, note that the adjustment has moved from the Pending Adjustments to the Adjustments bucket.
Issue a Credit Memo against a Specific Invoice
Following transactions completed and available for credit memo

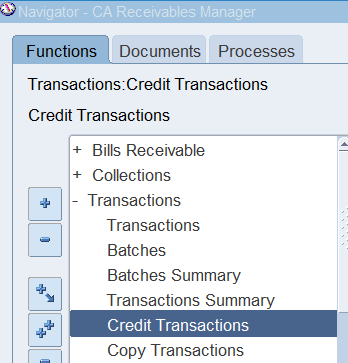
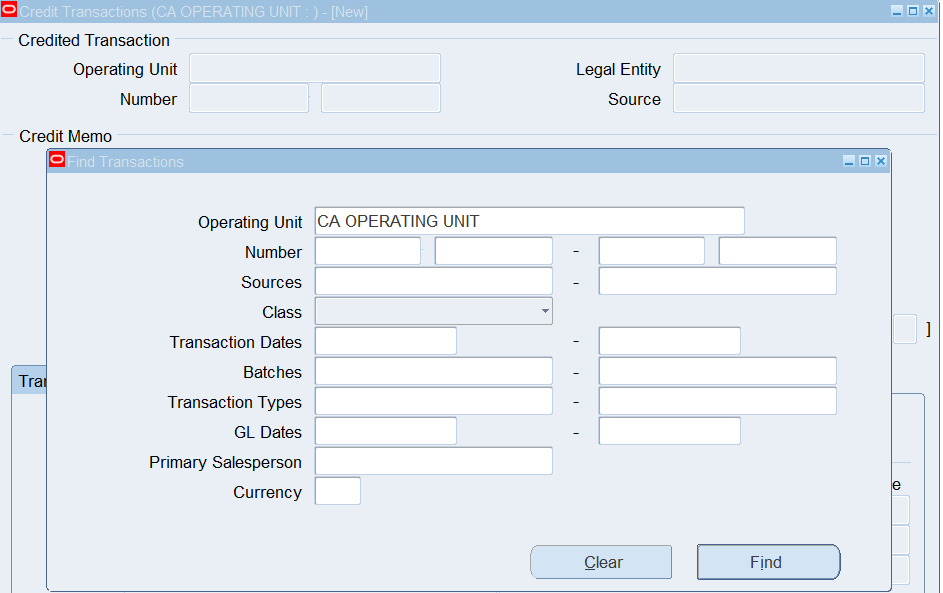
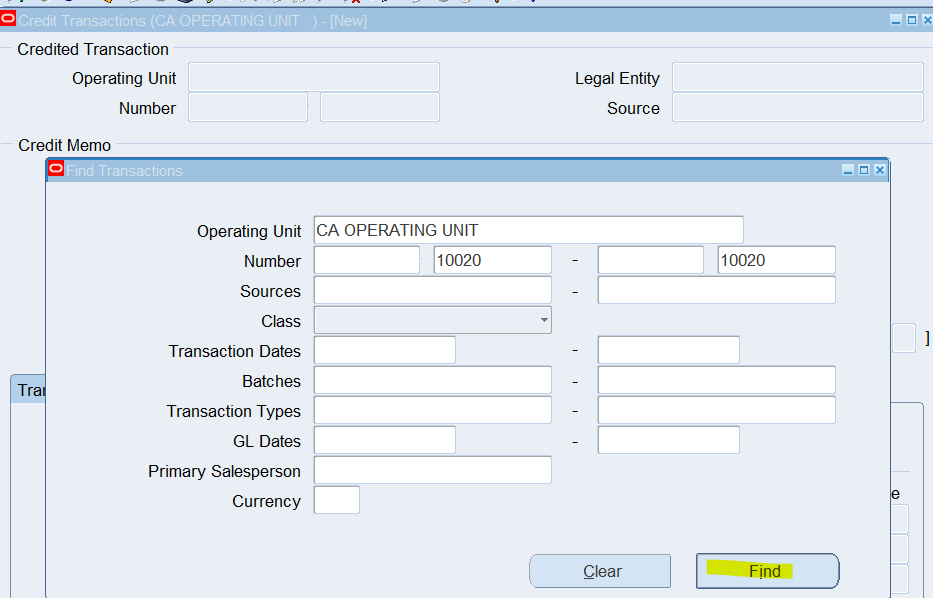
Navigate to the Credit Memo window
(N) Transactions 🡪 Credit Transactions
Enter the following information in the Credit Memo region:
− Reason = Service
− Type = Credit Memo
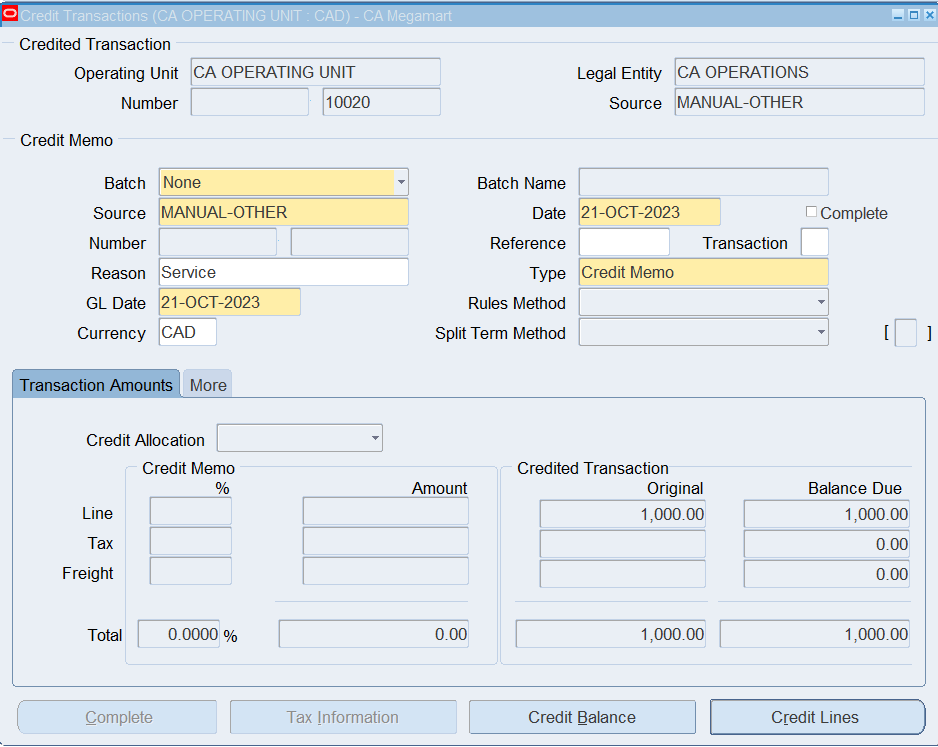
Click (B) Credit Balance
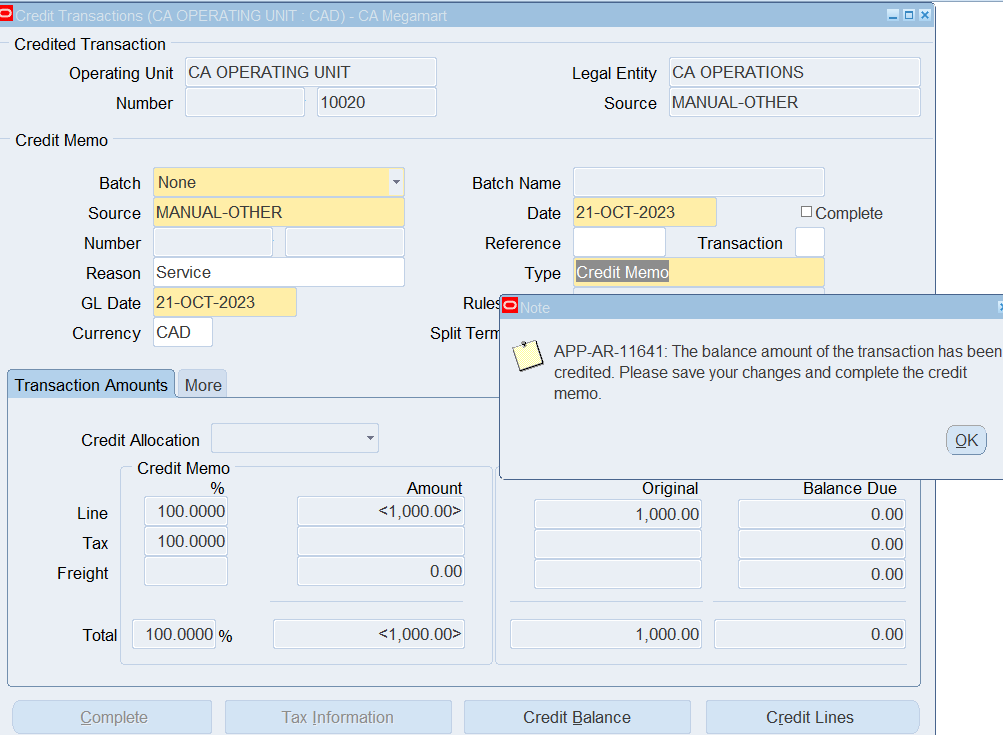
Click (B) OK to acknowledge the message that we are crediting the entire balance of the invoice.
Note: The Credit Balance button is for creating a credit memo for the entire outstanding balance of the invoice. You can also use this window for crediting a certain amount or percent of the invoice or you could credit a specific invoice line in the credit lines window.
Transaction Types in Receivables
In Receivables there are 7 types of Transactions
- Invoice
- Debit Memo
- Credit Memo
- Deposits
- Bill Receivables
- Guarantee
- Charge Back
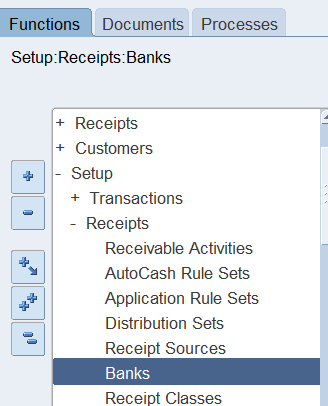
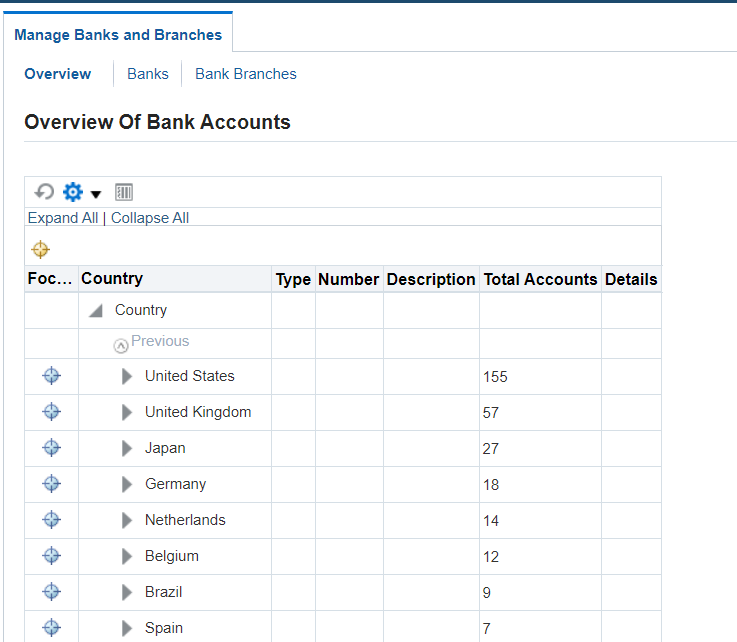
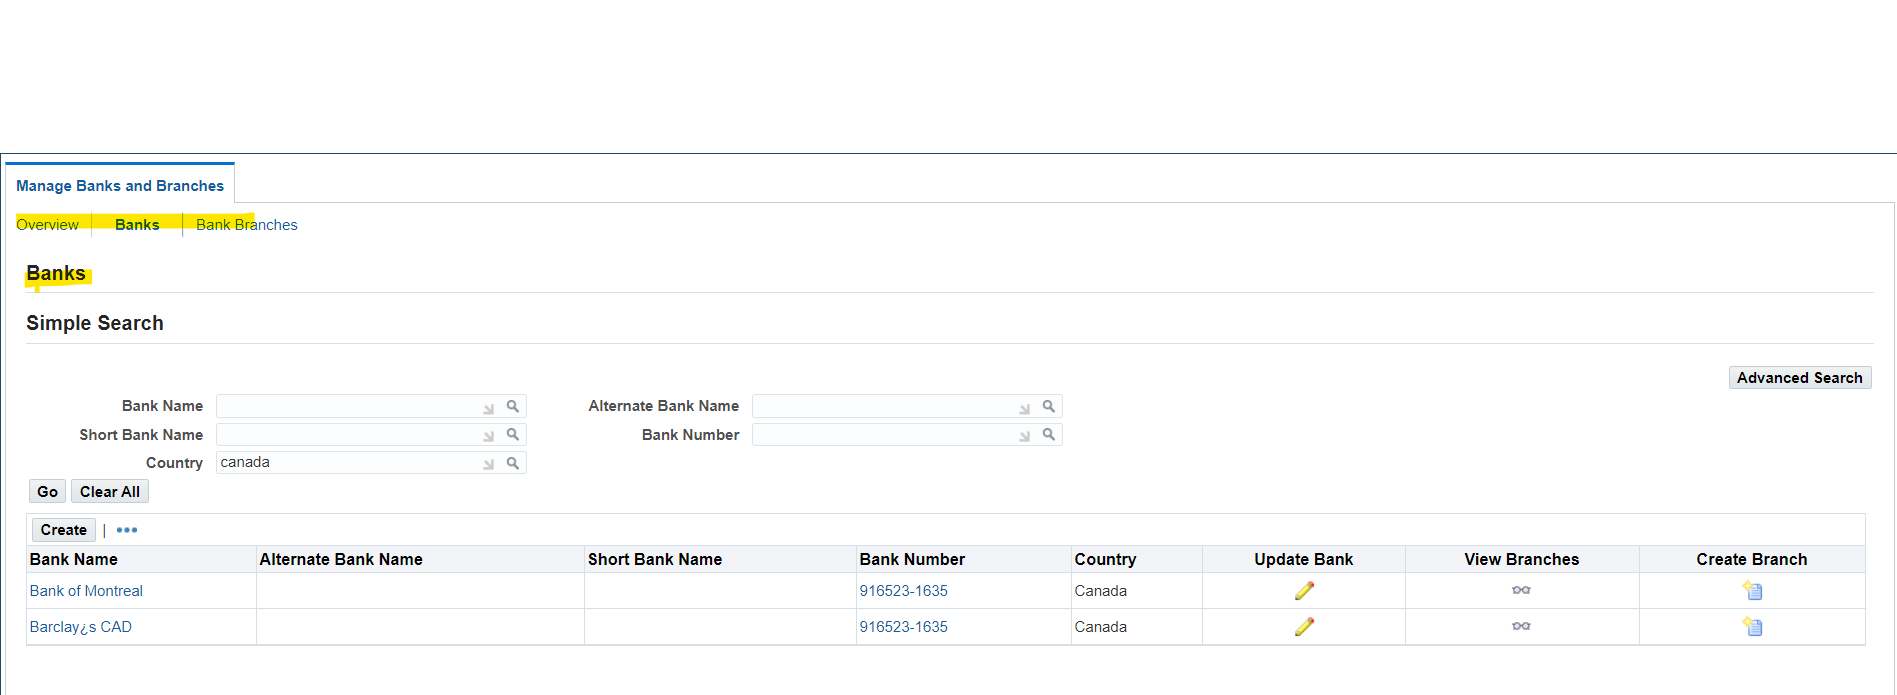
Setup a Customer Bank Account
(N) Setup 🡪 Receipts 🡪 Banks

Accounts Receivables Report
- Adjustments Journal Report
- Applied Receipts Register
- Billing History
- Billing and Receipt History
- Incomplete Invoices Report
- Past Due Invoice Report
- Sales Journal By Customer
- Sales Journal By Account
Additional Notes
Setup Configuration
1. System Options
2. Territory KeyFlexfield (Optional)
Customer
1. Profile Classes
2. Customer
3. Customer Accounts
4. Customer Sites /Addresses
5. Party merge
Transaction
1. Auto Accounting
2. Payment Terms
3. Transaction Types
4. Transaction Sources
5. Standard memo lines
6. Approval Limits
7. Territories
8. Accounting Rules
9. Auto Invoices
a. Grouping Rules
b. Line Order Rules
Types of Transactions
1. Standard Invoice
2. Debit Memo — Increase Customer Amount
3. Credit Memo
4. Deposits – Advances
5. Guarantee — Sales Forecasting
6. Charge Backs — Reschedule payments
Bills in Advance
unearned revenue
Jan:
Receivable Account DR 1000
Revenue 500
Unearned Revenue 500
Feb:
Unearned Revenue DB 300
Revenue 300
Mar:
Unearned Revenue DR 200
Revenue 200
Bills in Arrears
Unbilled Receivables
Mar:
Receivables DR 1000
Revenue 500
Unbilled Receivable 500
Jan
Unbilled Receivables Dr 300
Revenue 300
Feb
Unbilled Receivables Dr 200
Revenue 200
Setup
1. Define Period Types
2. Define Accounting Rules
3. Create Transactions
What Occurs During Auto Invoice
1. SQL Loader Program populates ths 3 interface tables with
lines, sales credit and accounting information
2. BFB payment terms are validated
3. Lines are ordered and grouped
4. Legal entities are assigned to transactions
5. Tax is calculated
6. GL date is determined
7. GL accounts are assigned using Auto Accounting, where necessary
8. Tax, freight, commitments and credit memos are lined to transaction lines
9. All transactions are batched
10. Validated lines create the transactions
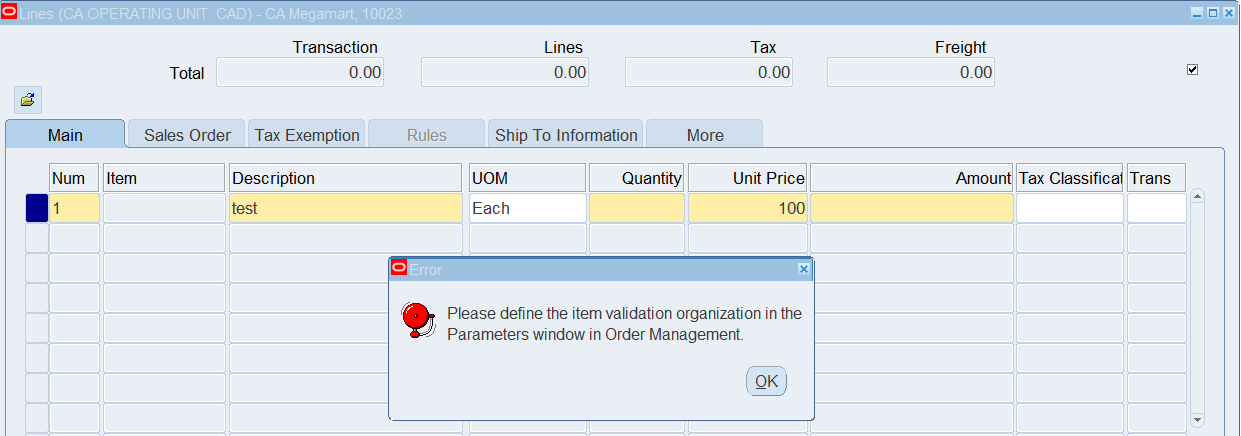
Please define the item validation organization in the Parameters window in Order Management
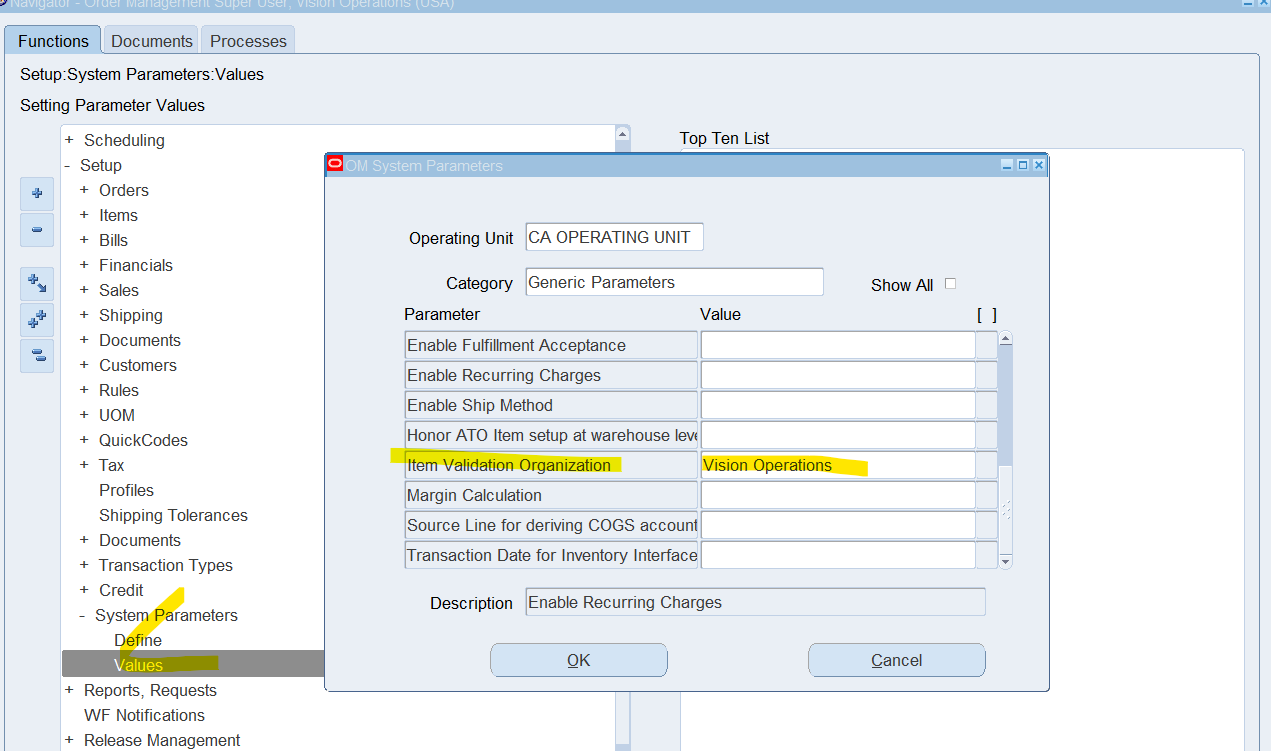
Responsibility:Order Management User 1.Navigation: Setup > System Parameters > Values 2. Select the ‘Generic Parameters’ Category. 3. Select the correct operating unit for ‘Item Validation Organization’ 4. Save your work.
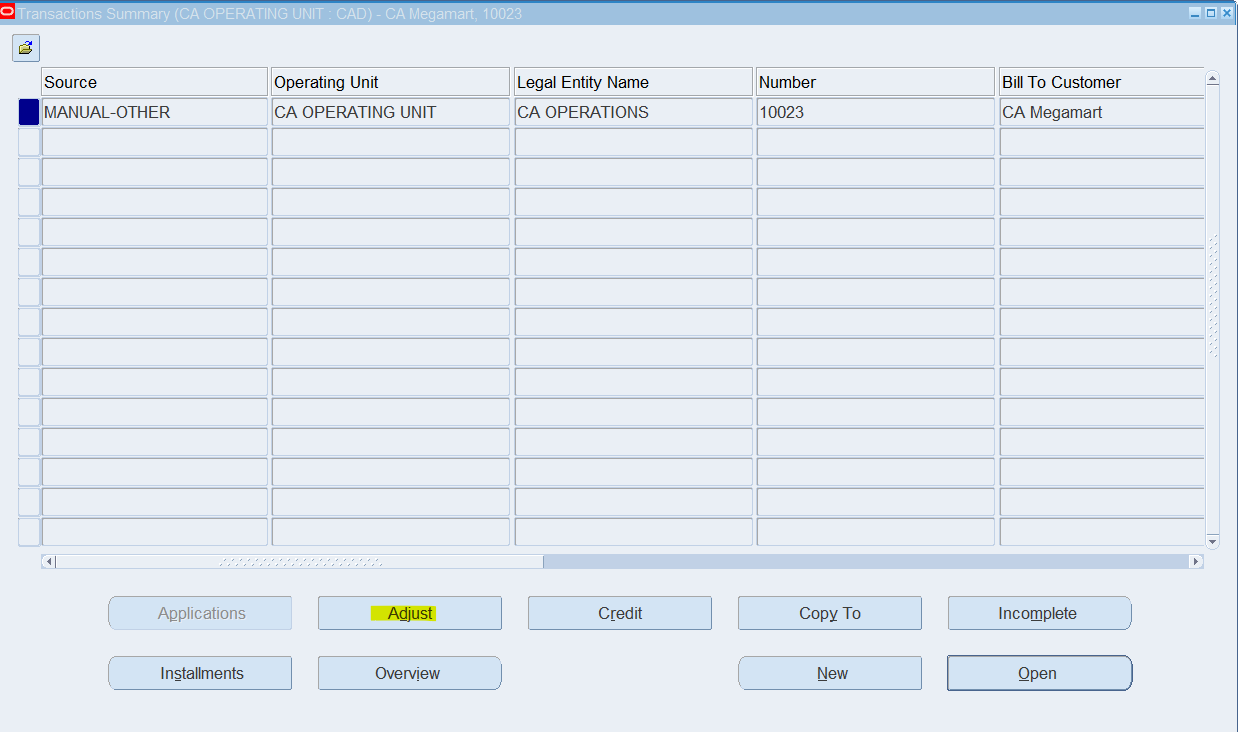
Select “Adjust”
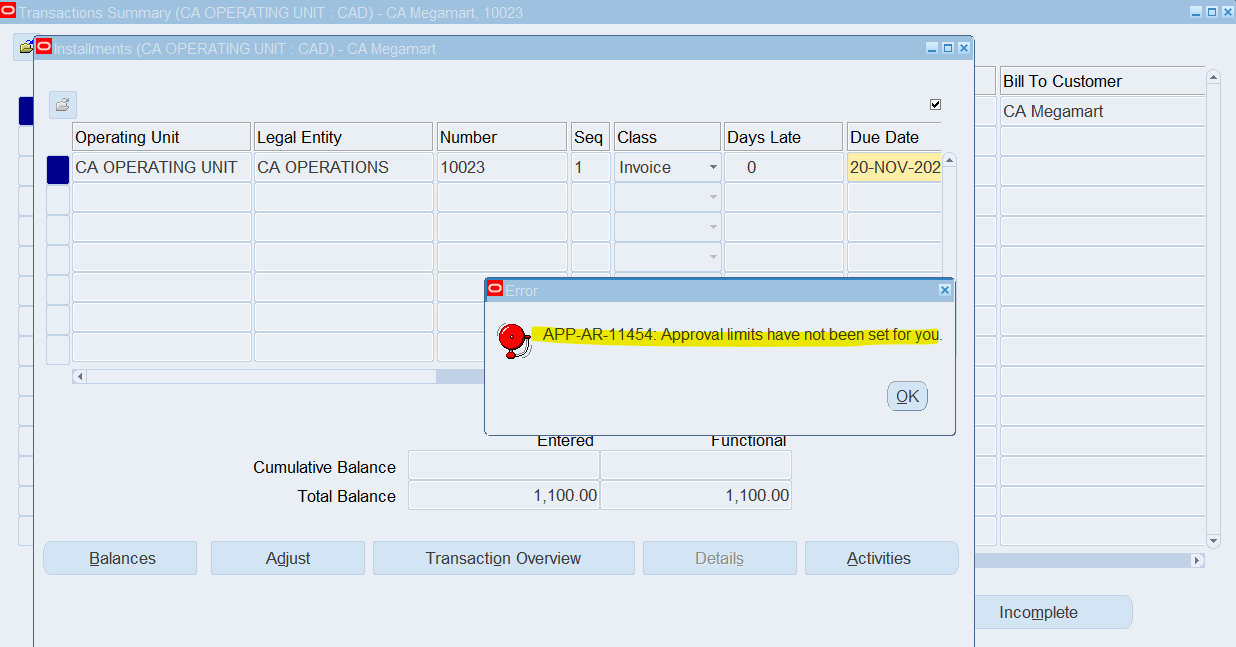
1st Setup Approval Limit
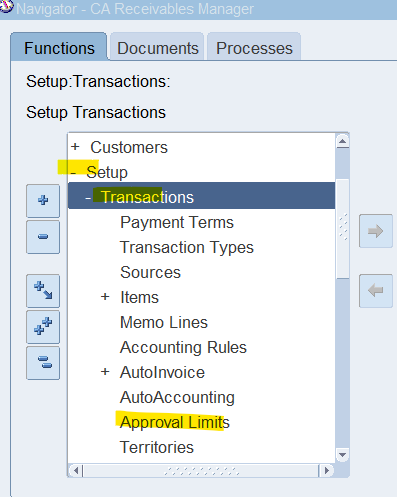
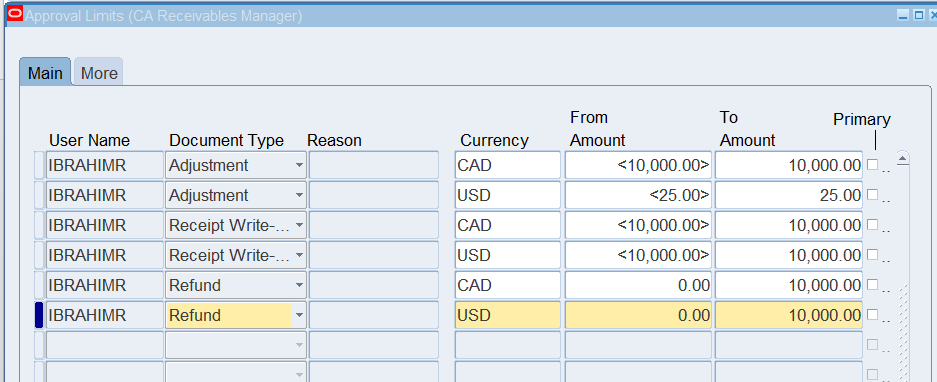
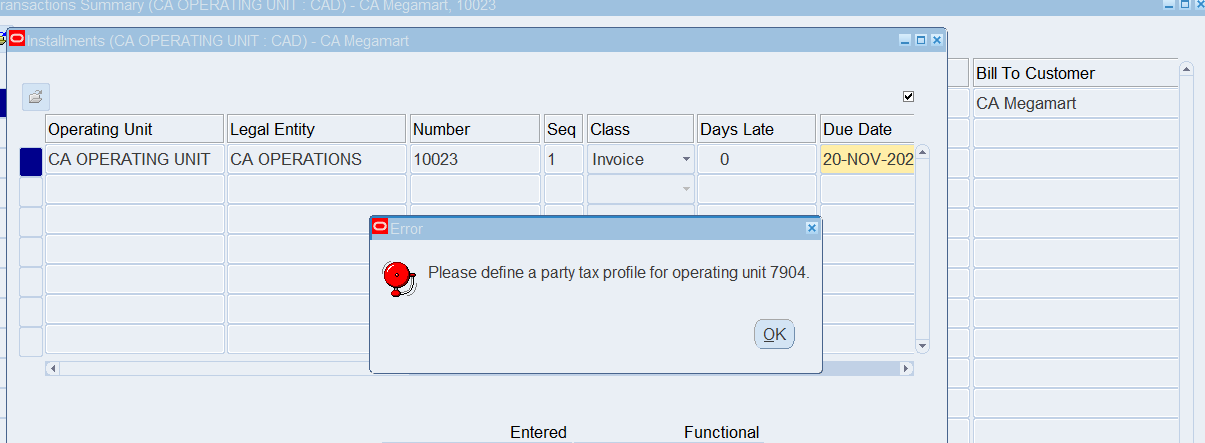
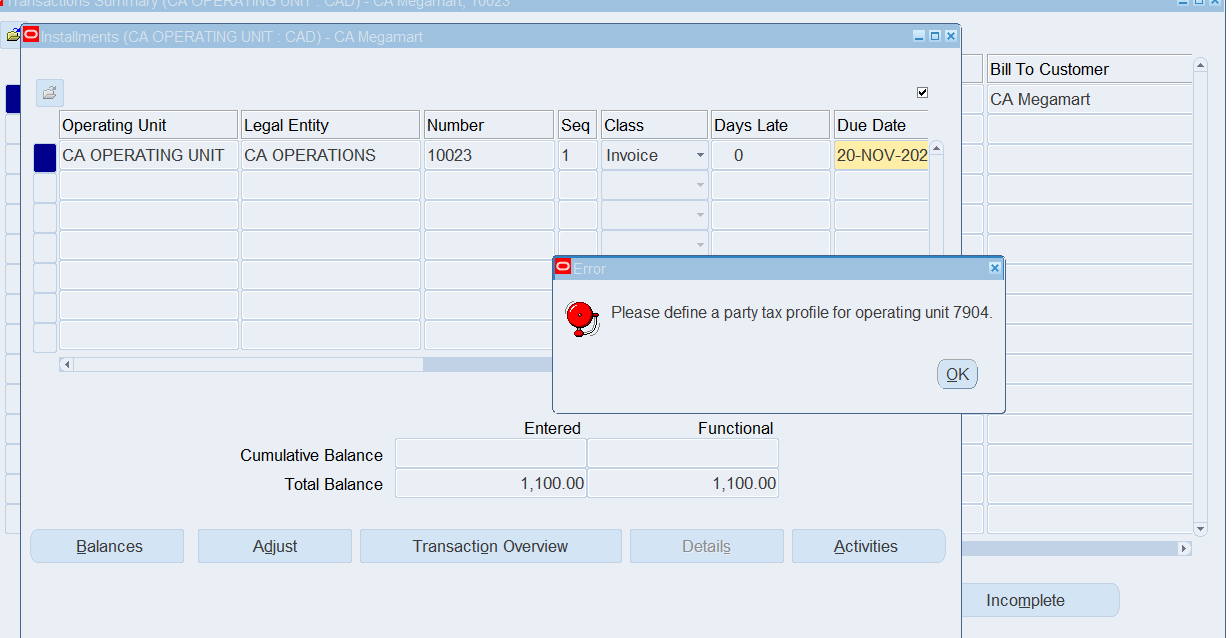
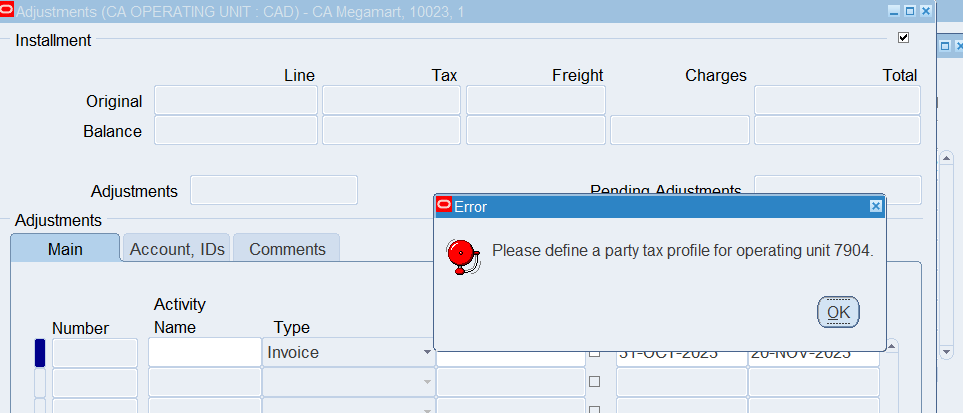
Issue 1 (Approval Limit) is resolved, now fix define Party Profile for Operating Unit 7904
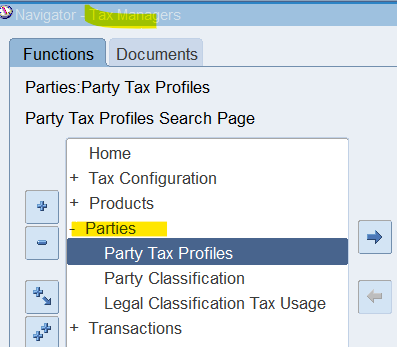
Responsibility: Tax Managers
(N) Parties 🡪 Party Tax Profiles


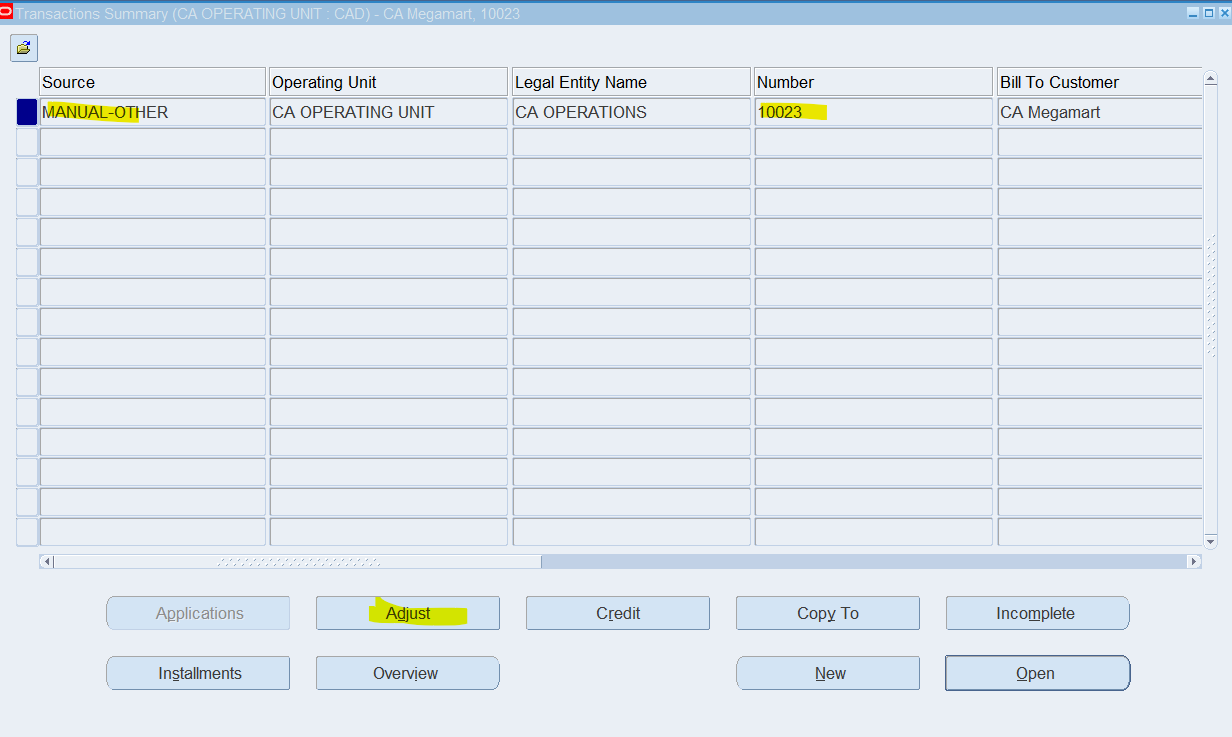
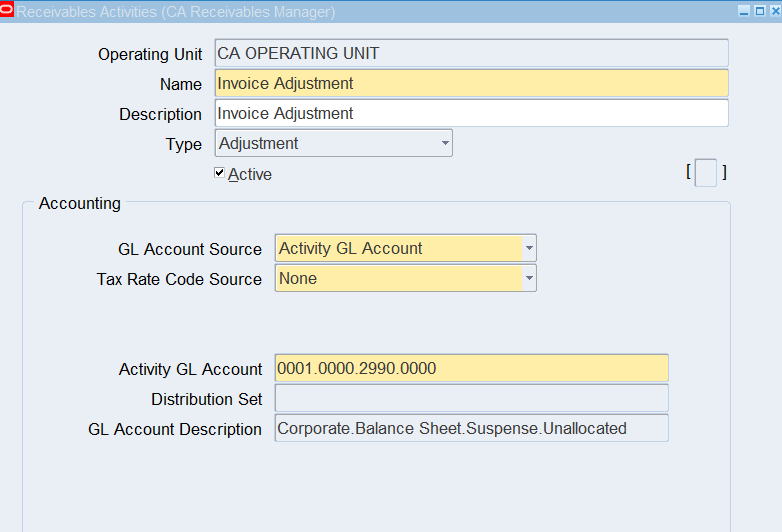
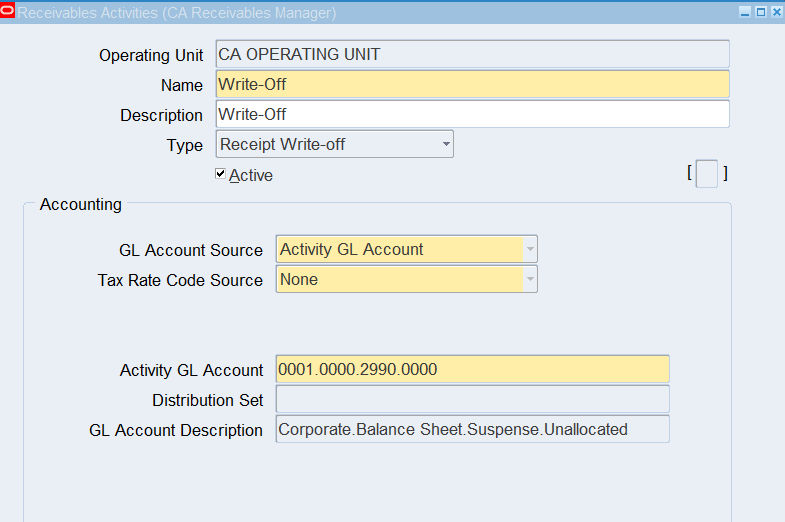
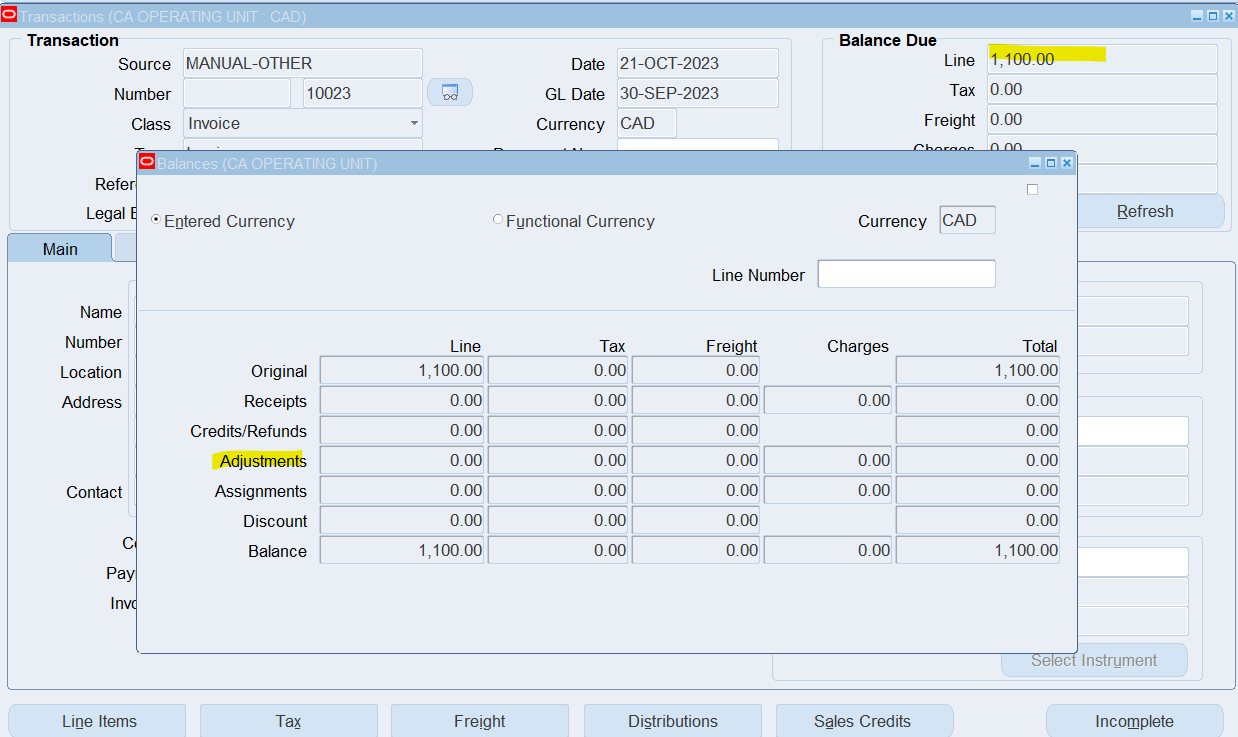
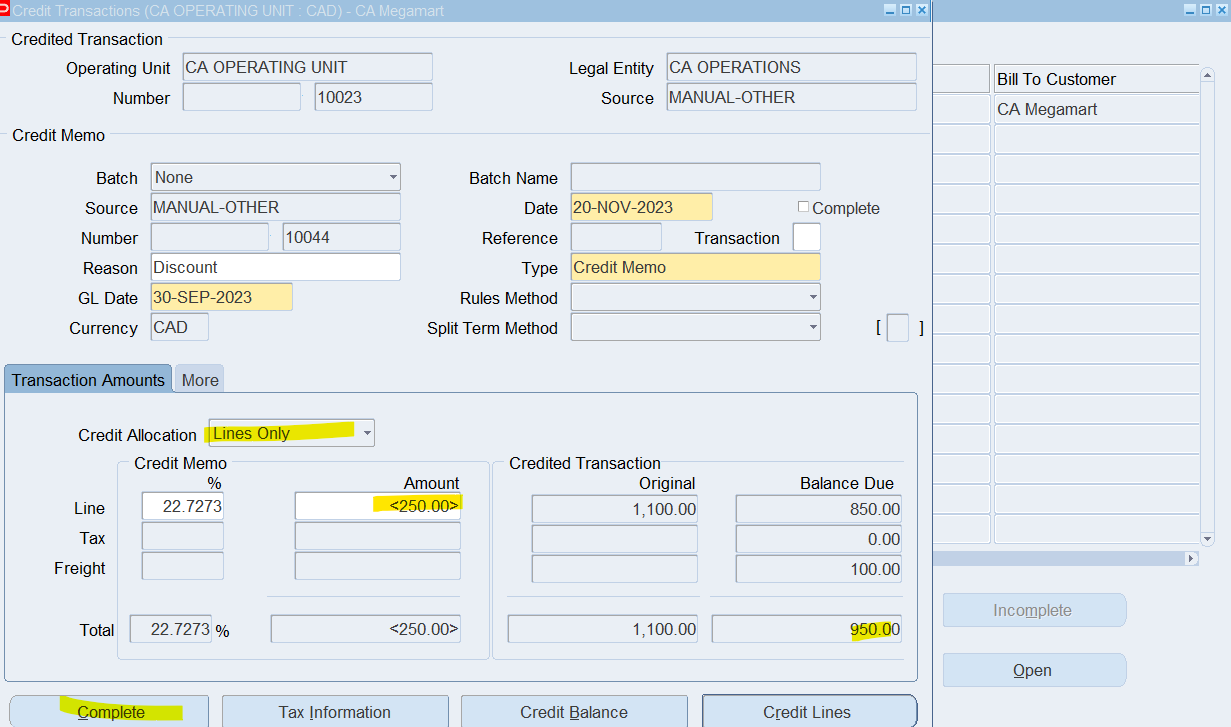
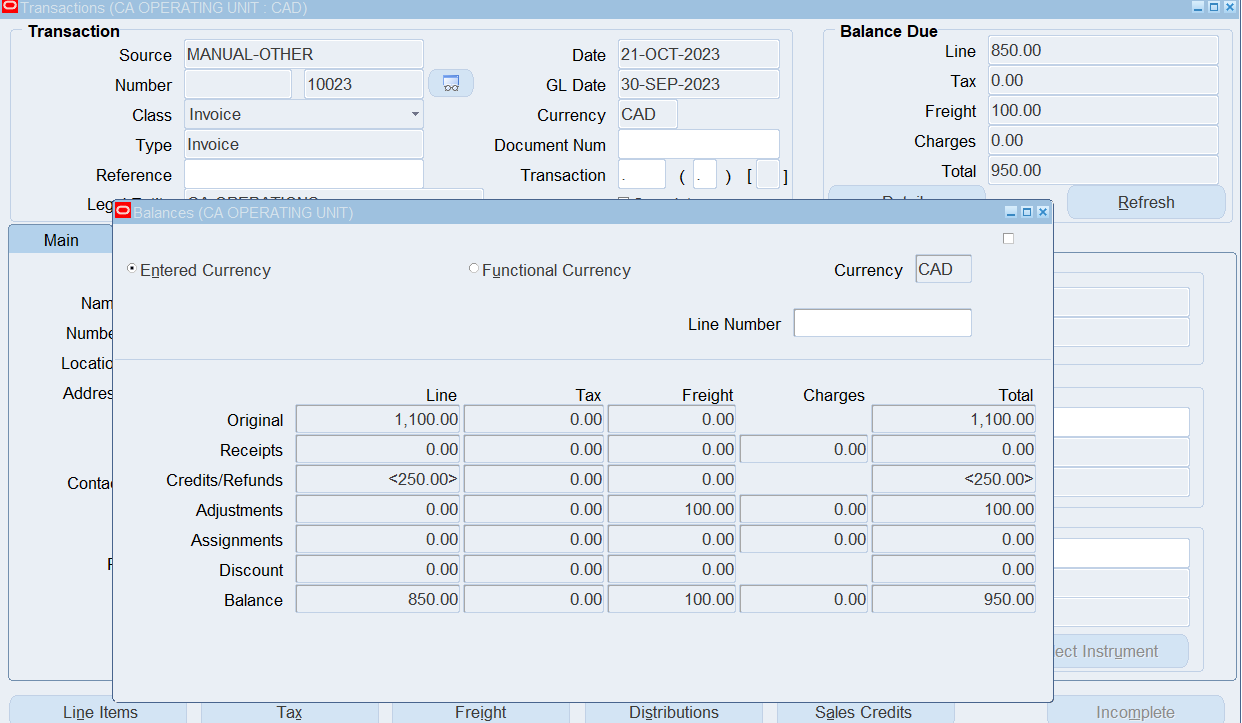
Invoice 10023 Total = $1,100.00 and not adjustments
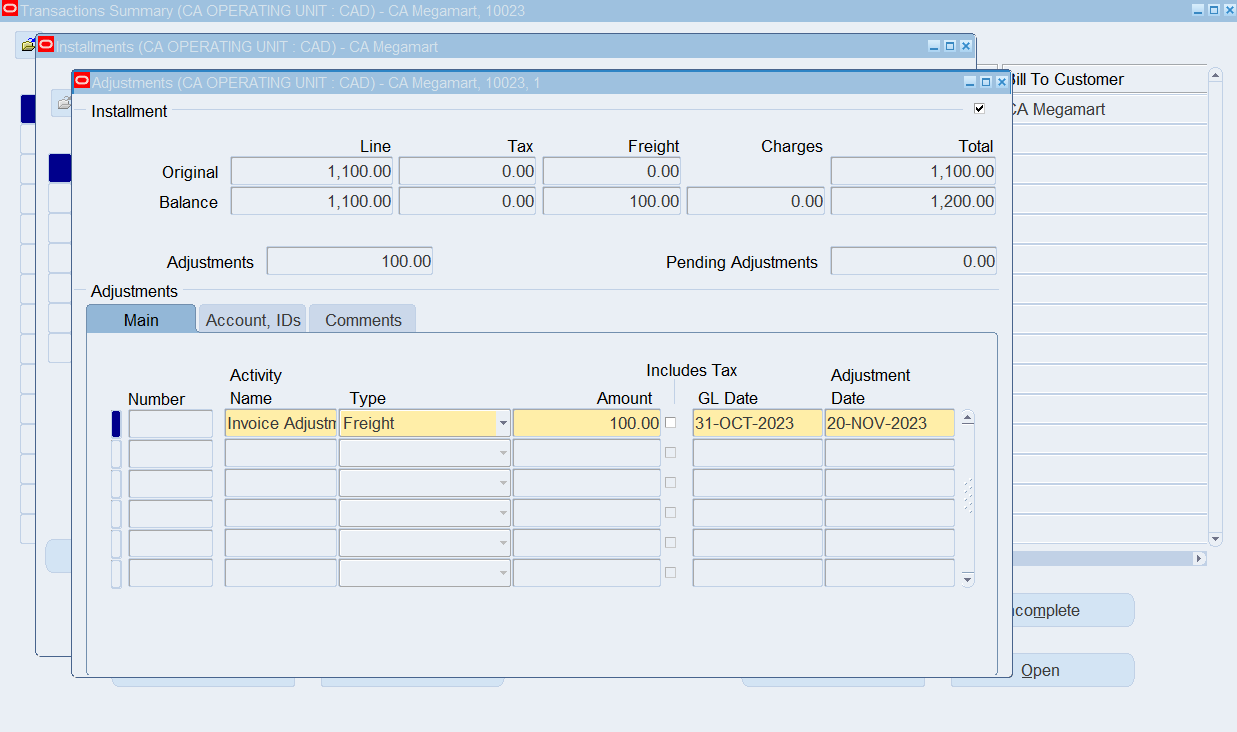
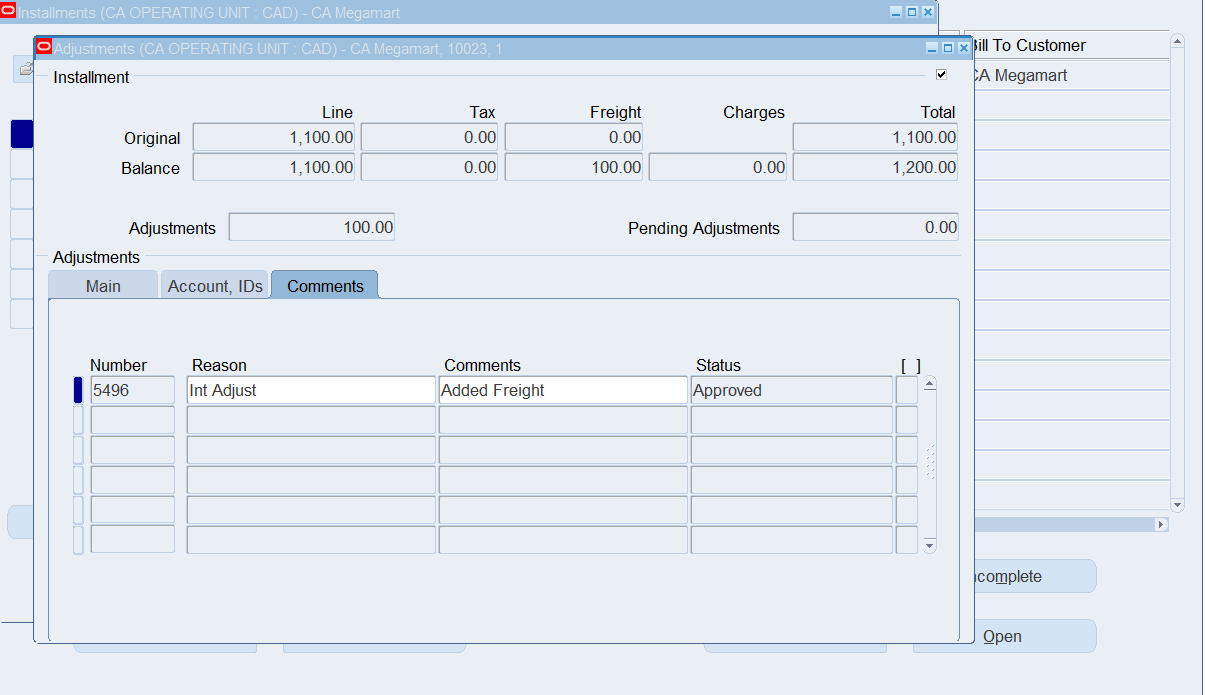
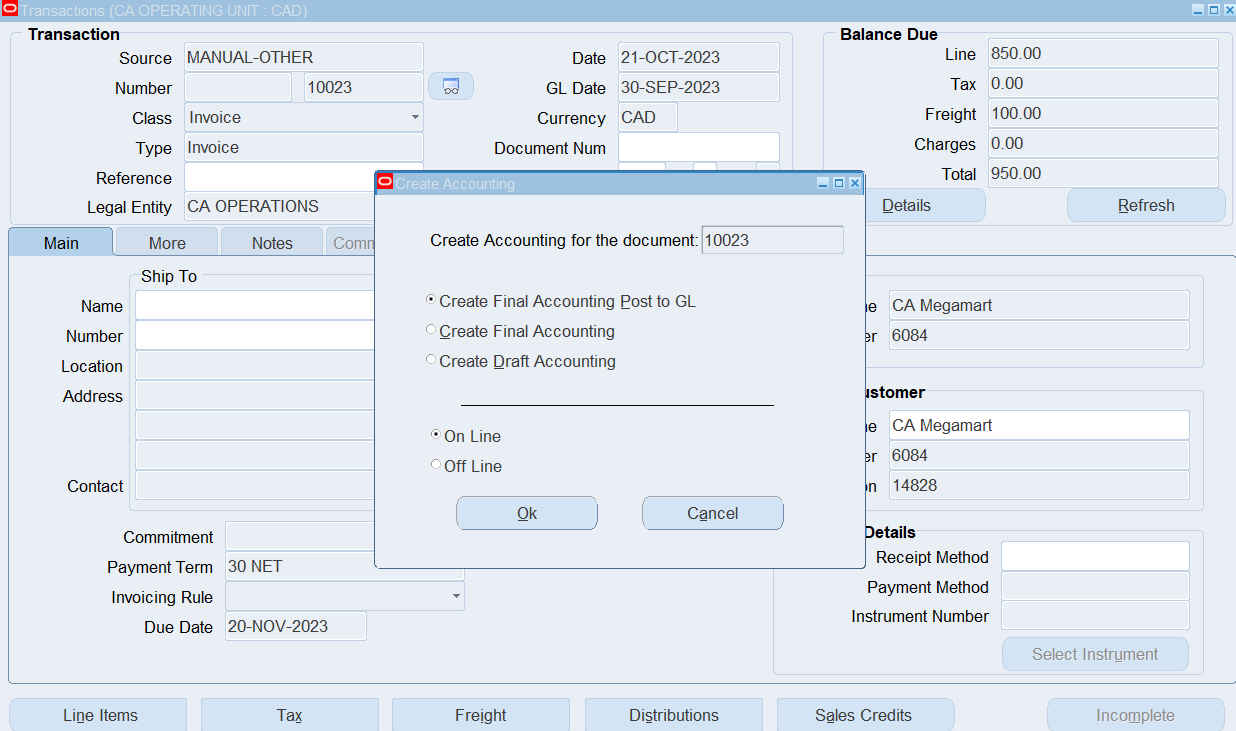
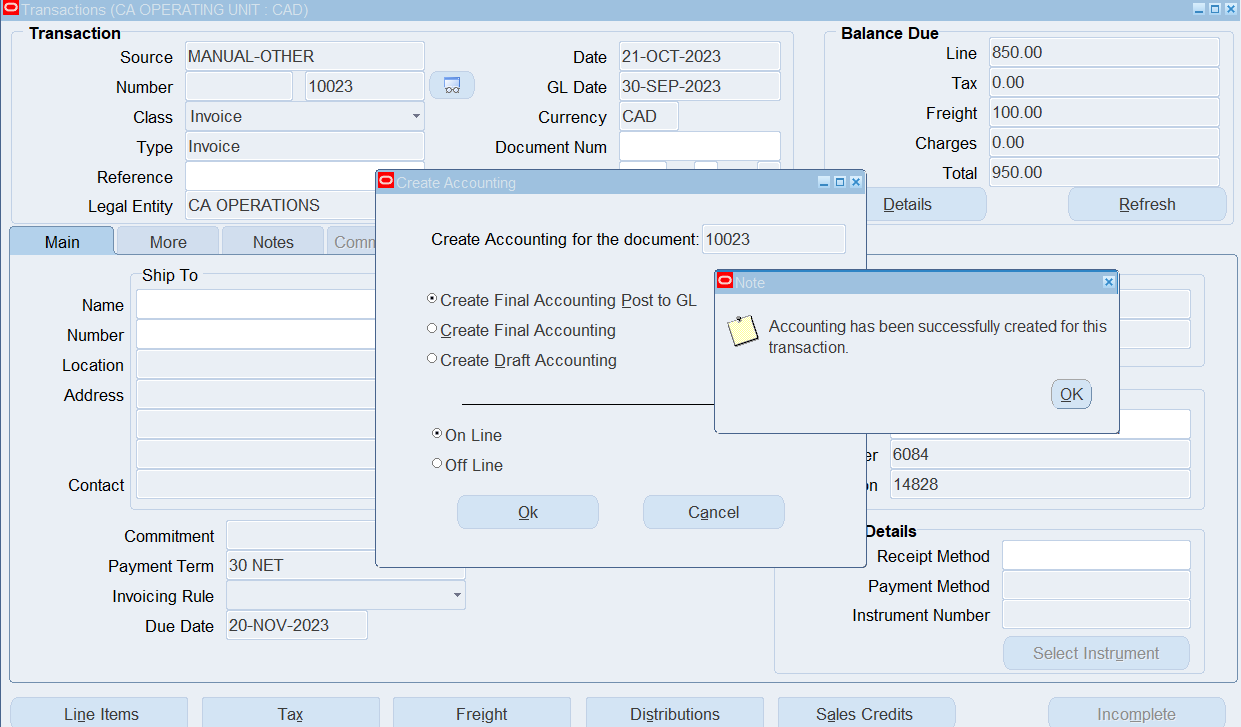
Review Invoice

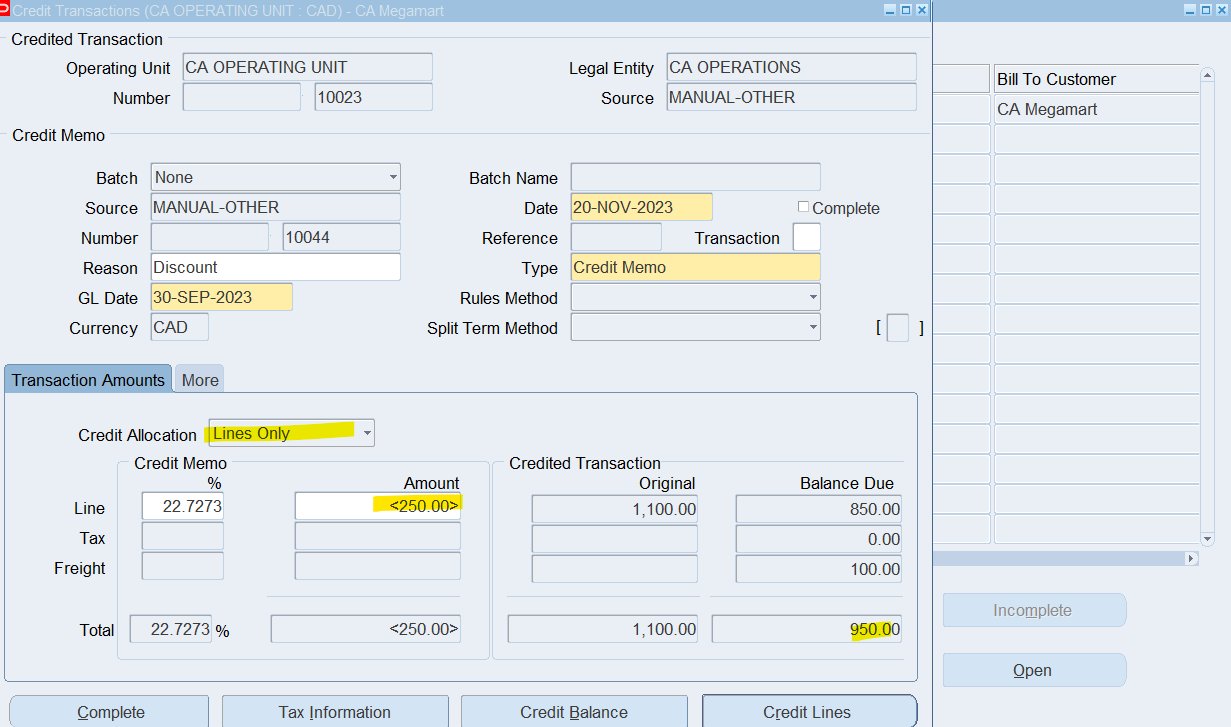
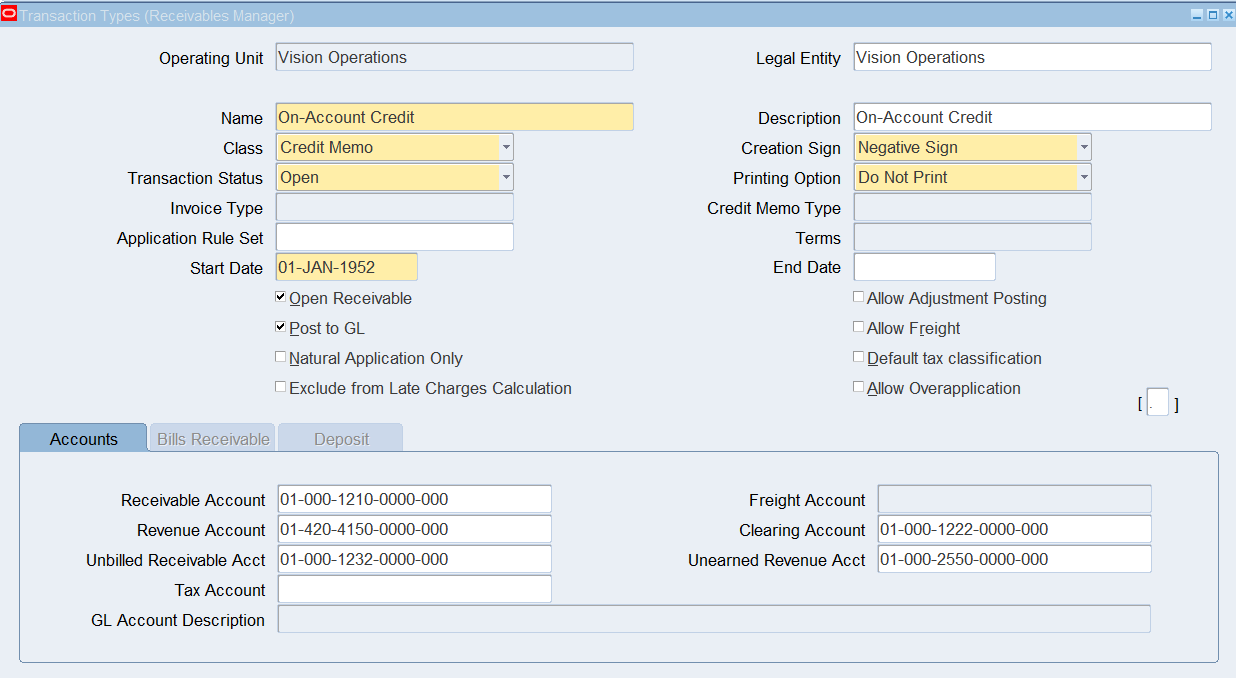
Create an On-Account Credit
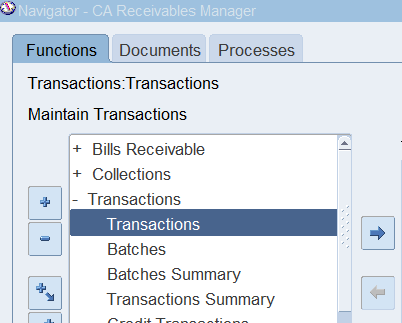
(N) 🡪 Transactions 🡪 Transactions
Source : Manual
Class : Credit Memo
Type : On-Account Credit
Reference : XX On Account
Ship To Name : XX Giant Distribution
Auto Invoice Interface Tables
Auto Invoice uses four interface tables:
- RA_INTERFACE_LINES_ALL
- RA_INTERFACE_DISTRIBUTIONS_ALL
- RA_INTERFACE_SALESCREDITS_ALL
- Auto Invoice report validation errors using RA_INTERFACE_ERRORS_ALL table
- Auto Invoice can be submitted using following programs:
- AutoInvoice Master Program
- AutoInvoice Import Program
Auto Invoice Purge Program deletes the interface lines that were processed and successfully transferred into Receivables by the Auto Invoice Import Program
Receivables uses the Transaction Flexfield to uniquely identify each transaction and transaction line import through Auto Invoice. Transaction Flexfields are also used to refer to the link transaction lines.
Types of Transaction Flexfields
- Line Transaction Flexfield
- Invoice Transaction Flexfield
- Reference Transaction Flexfields
- Link-To Transaction Flexfields
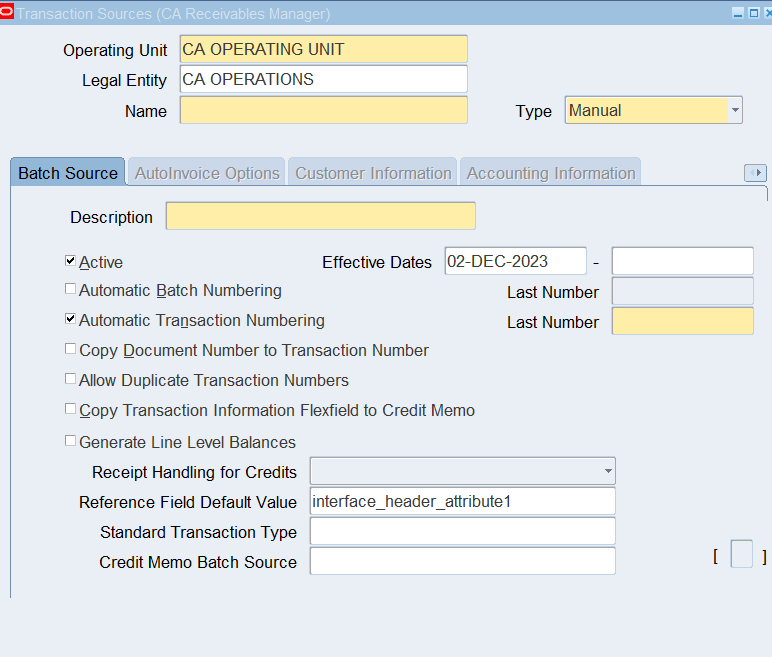
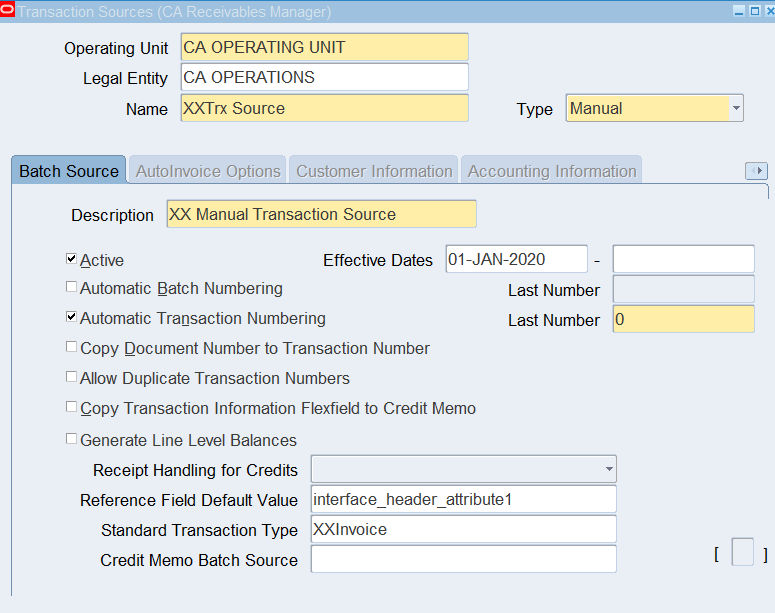
Transaction Batch Sources: Batch sources control the standard transaction type assigned to a transaction and determine whether Receivables automatically numbers your transactions and transaction batches.
A batch source provides default information, which can optionally change at the transaction level.
Two types of Batch Sources can be defined:
- Manual
- Imported
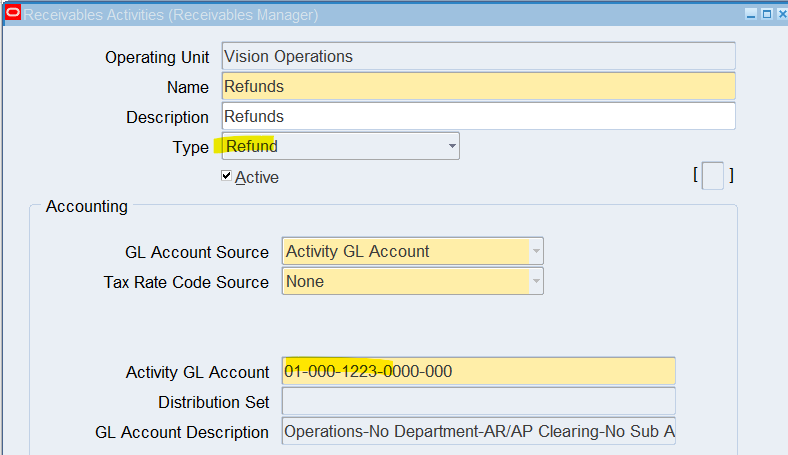
AR Customer Refund
Setups Required for Customer Refund
- Define Receivables Activity for Refund
- Create Invoice Transaction
- Create Receipt
- Remit Receipt to Bank
- Create Refund Transaction
- Find Payment Request Invoice in Accounts Payables
Define Receivable Activity for Refund
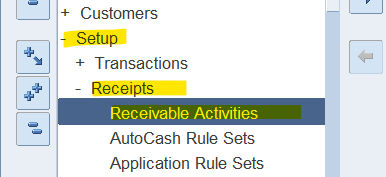
(N) 🡪 Setup 🡪 Receipts 🡪 Receivable Activities
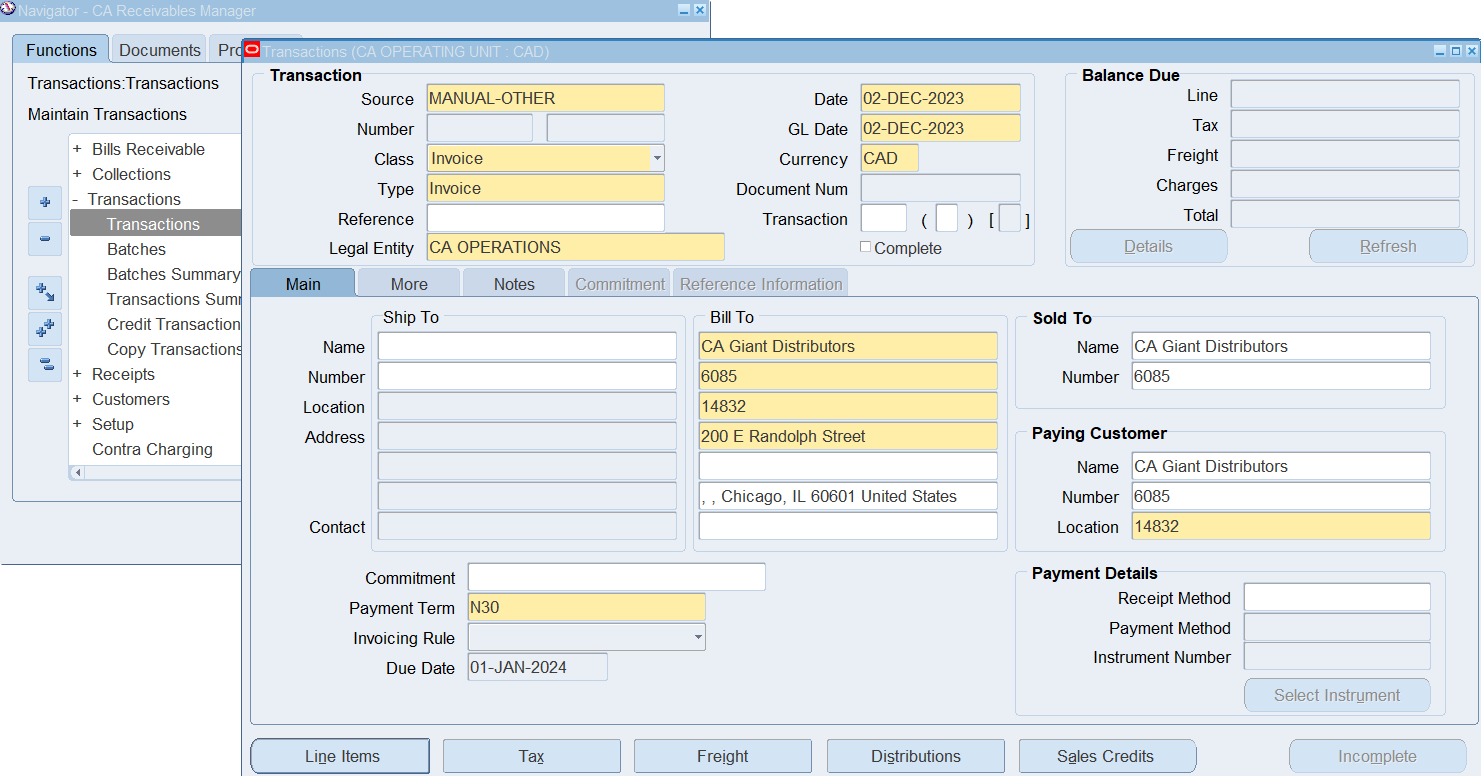
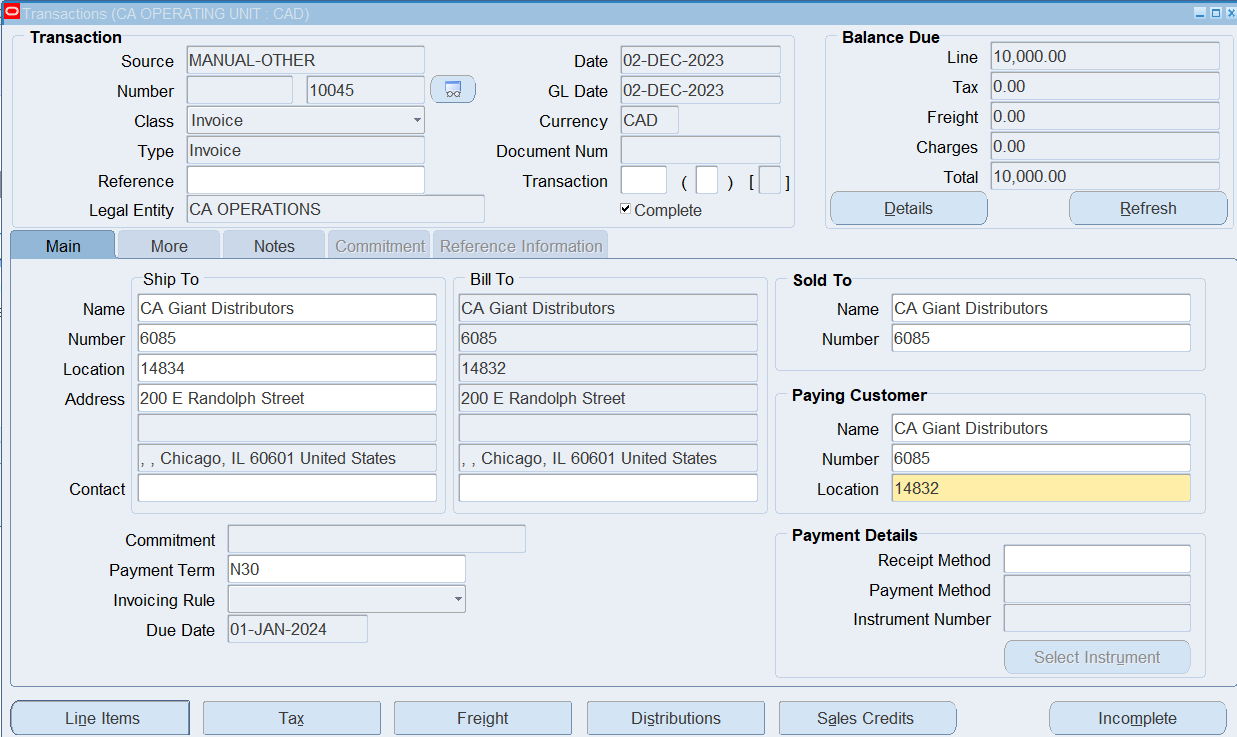
Step 2: Create Invoice Transaction
(N) Transactions 🡪 Transaction
- Select Transaction Source
- Select Transaction Type
- Select Invoice Type
- Select Bill To and Ship To
- Click on Line Items

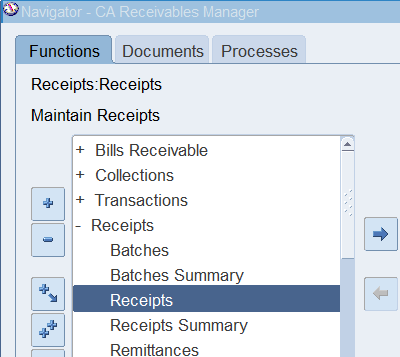
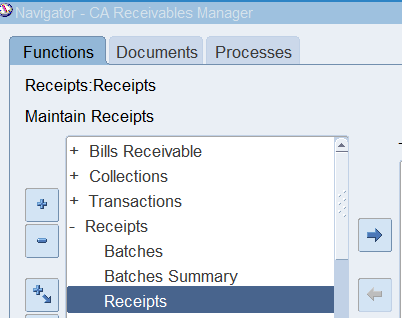
Step 3: Create Receipt
(N) Receipts 🡪 Receipts
- Select Receipt Method
- Enter Receipt Number
- Enter Receipt Amount
- Select Receipt Type as Standard
- Click on Search and Apply
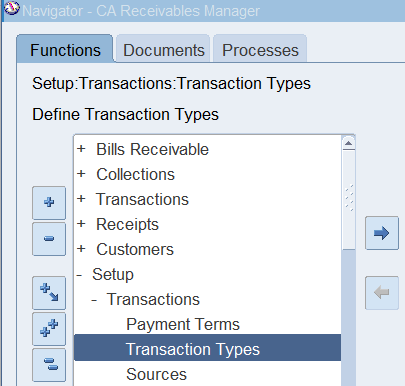
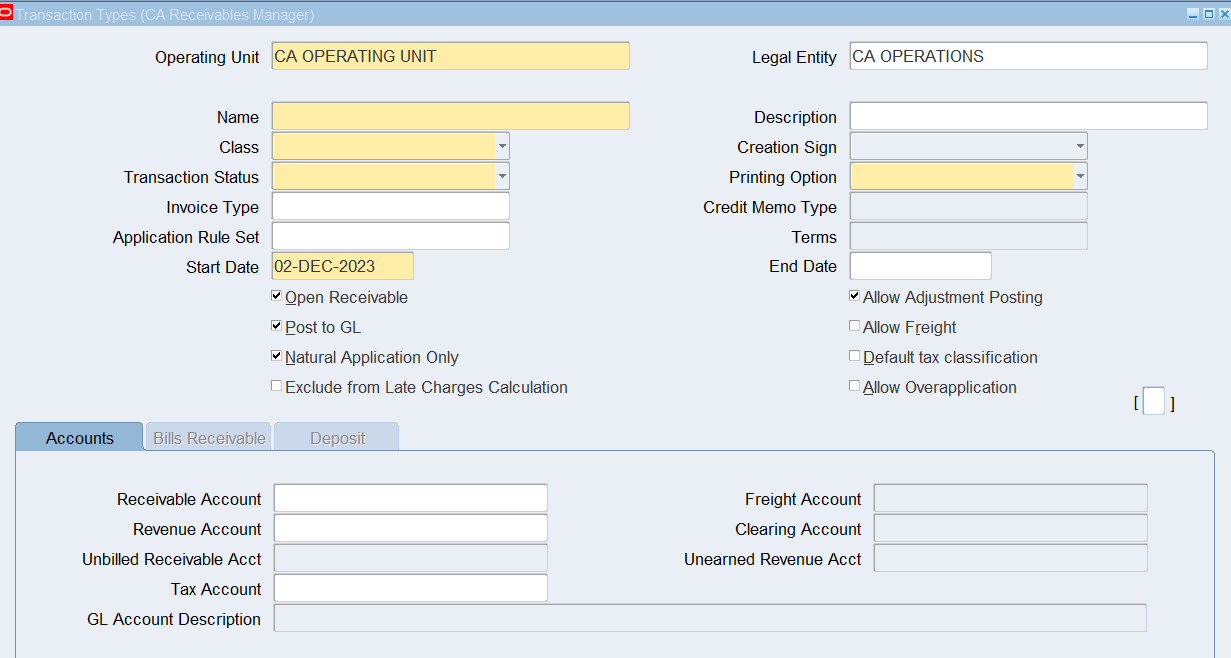
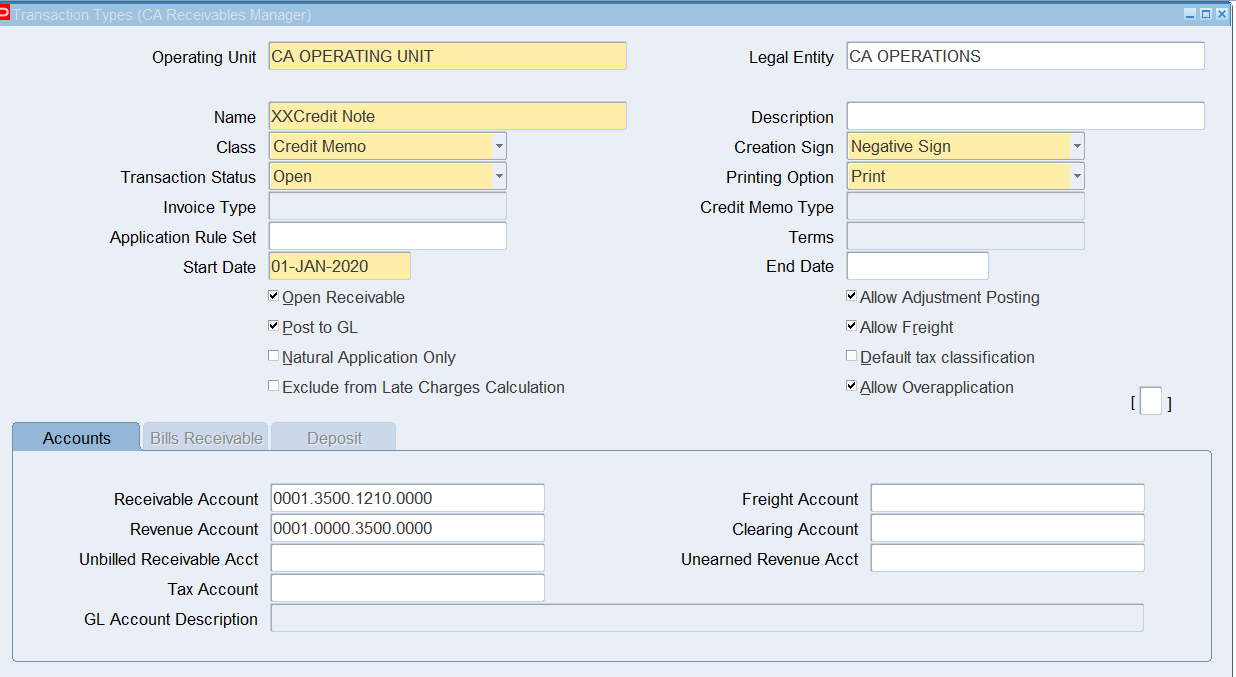
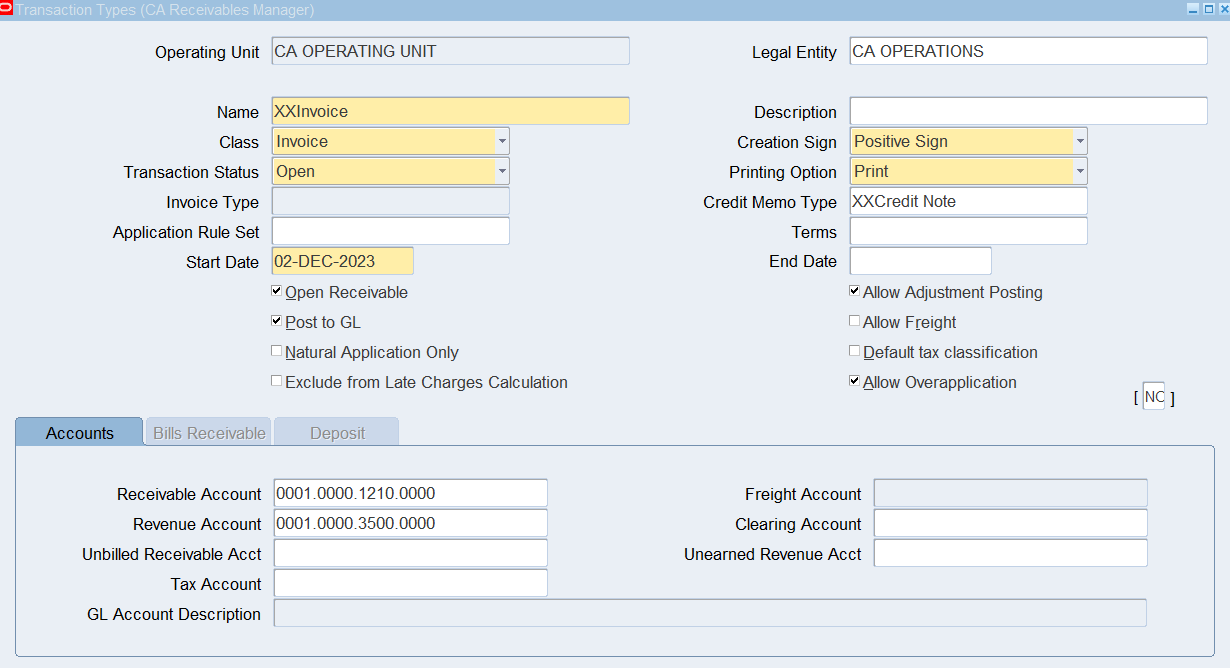
Define a Credit Transaction Type
(N) Setup 🡪 Transactions 🡪 Transaction Types
Define a Transaction Source
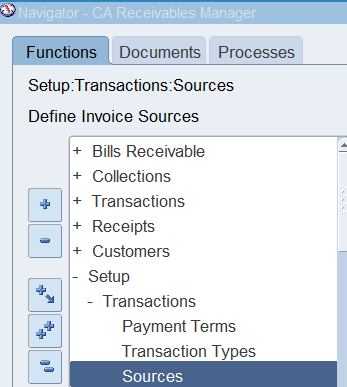
(N) Setup 🡪 Transactions 🡪 Sources
Enter a Manual Receipt Batch
Overview
Use the Applications window to apply your receipts or on-account credits. You can apply all or part of a receipt or on-account credit to a single debit item or to several debit items. For example, your customer may send a single check to pay all of one invoice and part of another invoice. Or, a customer may have an on-account credit he will expect you to use with his receipt to close an
open debit item. You cannot apply an unidentified receipt; you must specify the customer who remitted the receipt before you can apply it to a transaction.
Use a Manual-Regular batch to view the difference between your control and actual batch counts and amounts as you process your receipts. These differences can alert you to data entry errors, missing or lost receipts, or duplicate entries. Batches also group related receipts together to share default attributes such as receipt class, payment method, and automatic numbering.
In this practice you will enter a batch of manual receipts. XXGiant Distributors has made two payments: one for $2,200 and another for $10,000. Create a regular manual batch receipt for these payments. Apply these cash receipts to any of the open invoices in the XXGiant Distributors account.
