Create a Supplier and Supplier Site
Creating suppliers and supplier sites is an essential part of the procurement process. A supplier is modeled as a global entity. It’s not created within a business unit or any other organizational context.
A procurement business unit establishes a relationship with a supplier through the creation of a site, which maintains internal controls for how to procure to pay transactions are carried out with the supplier.
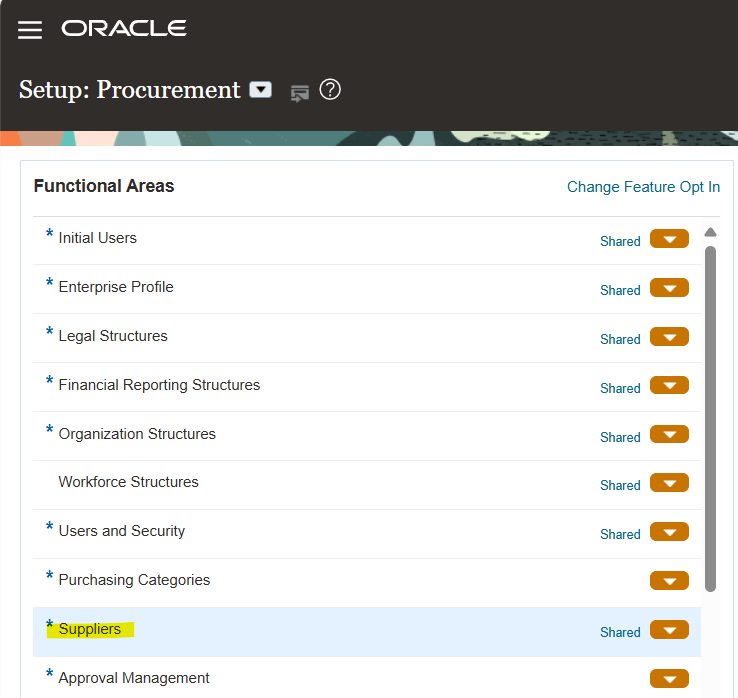
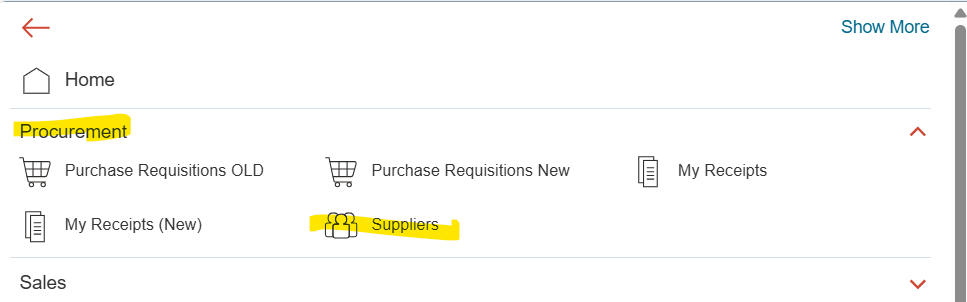
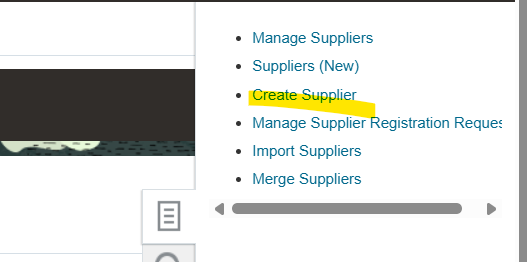
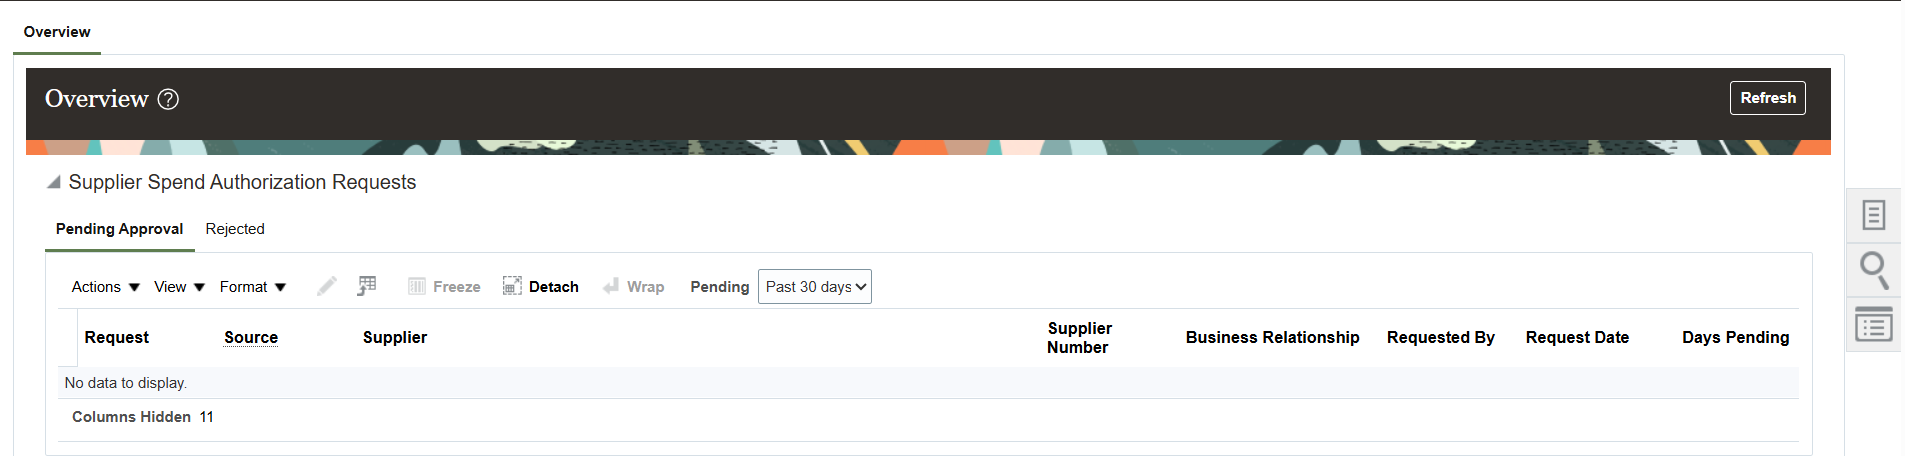
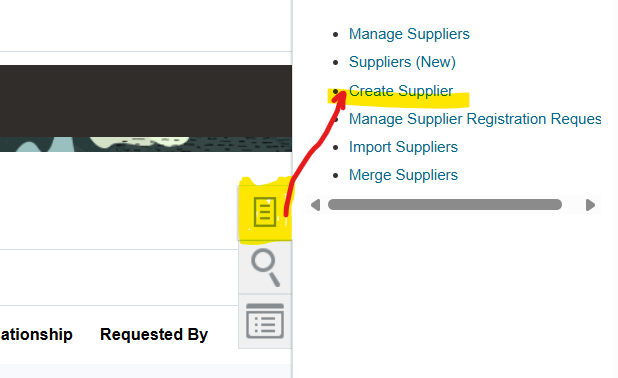
- Within the application, navigate to the Suppliers > Create Supplier task.
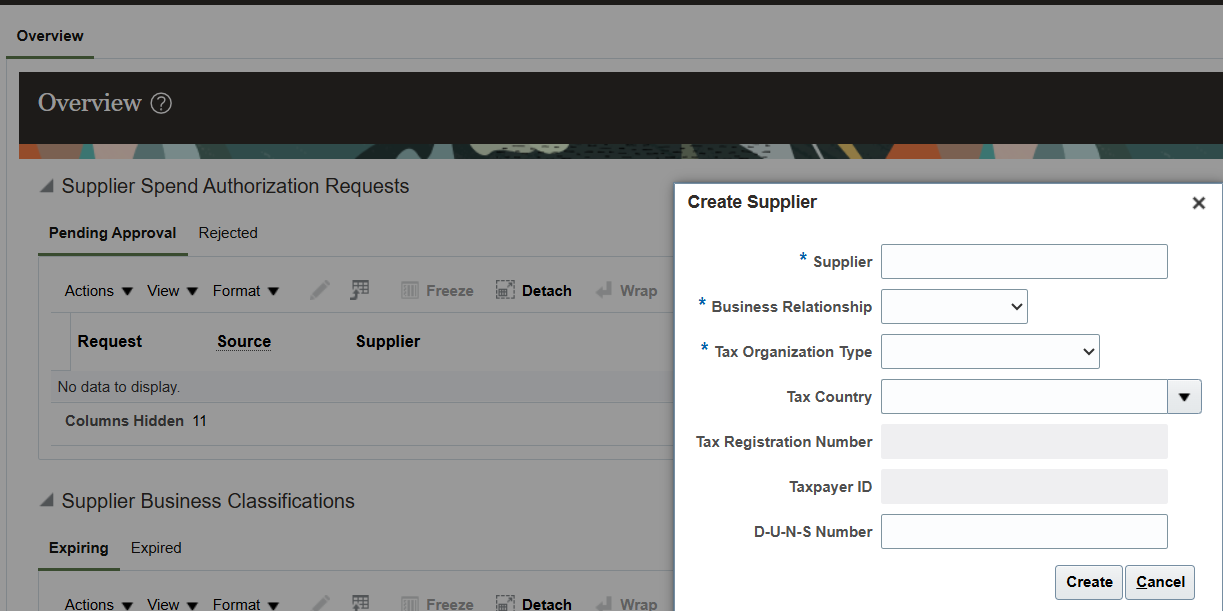
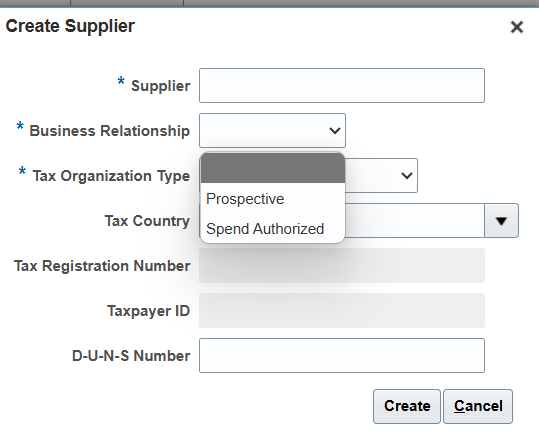
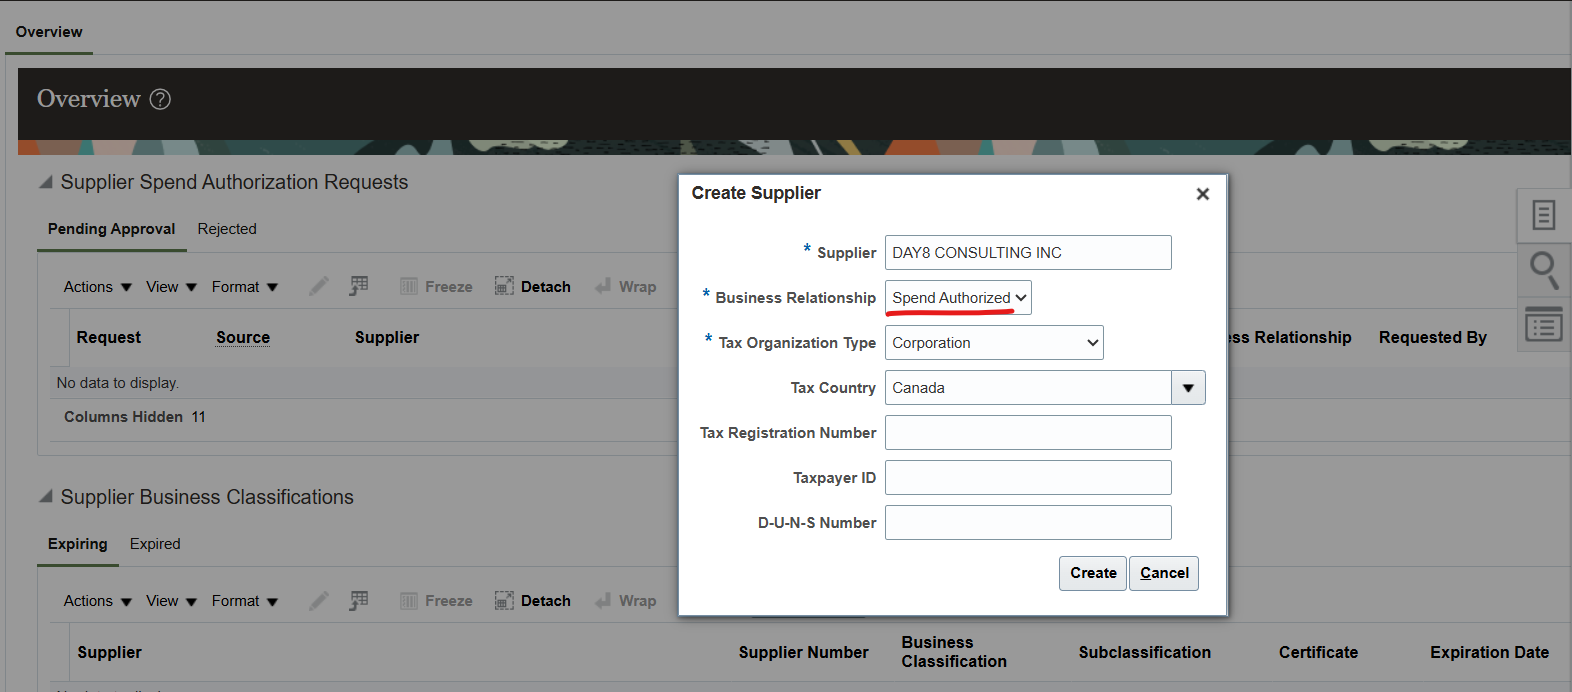
- On the Create Supplier dialog box, enter:
- Name
If Streamline B2B Document Sharing With Intelligent Oracle Business Network Connectivity is enabled, you can use the type-ahead autosuggestion to search and select the company, you must register as a supplier, from a global directory. Selecting from the global directory helps identify if the supplier has an OBN trading partner account.
-
- Tax Country
- Tax Registration Number
- Click Create.
The complete list of supplier attributes that can have values are Alternate Name, Corporate Web Site, SIC, Current Fiscal Year’s Potential Revenue, Year Established, Industry Category, and Industry Subcategory. If required, you can review the defaulted values and update them.
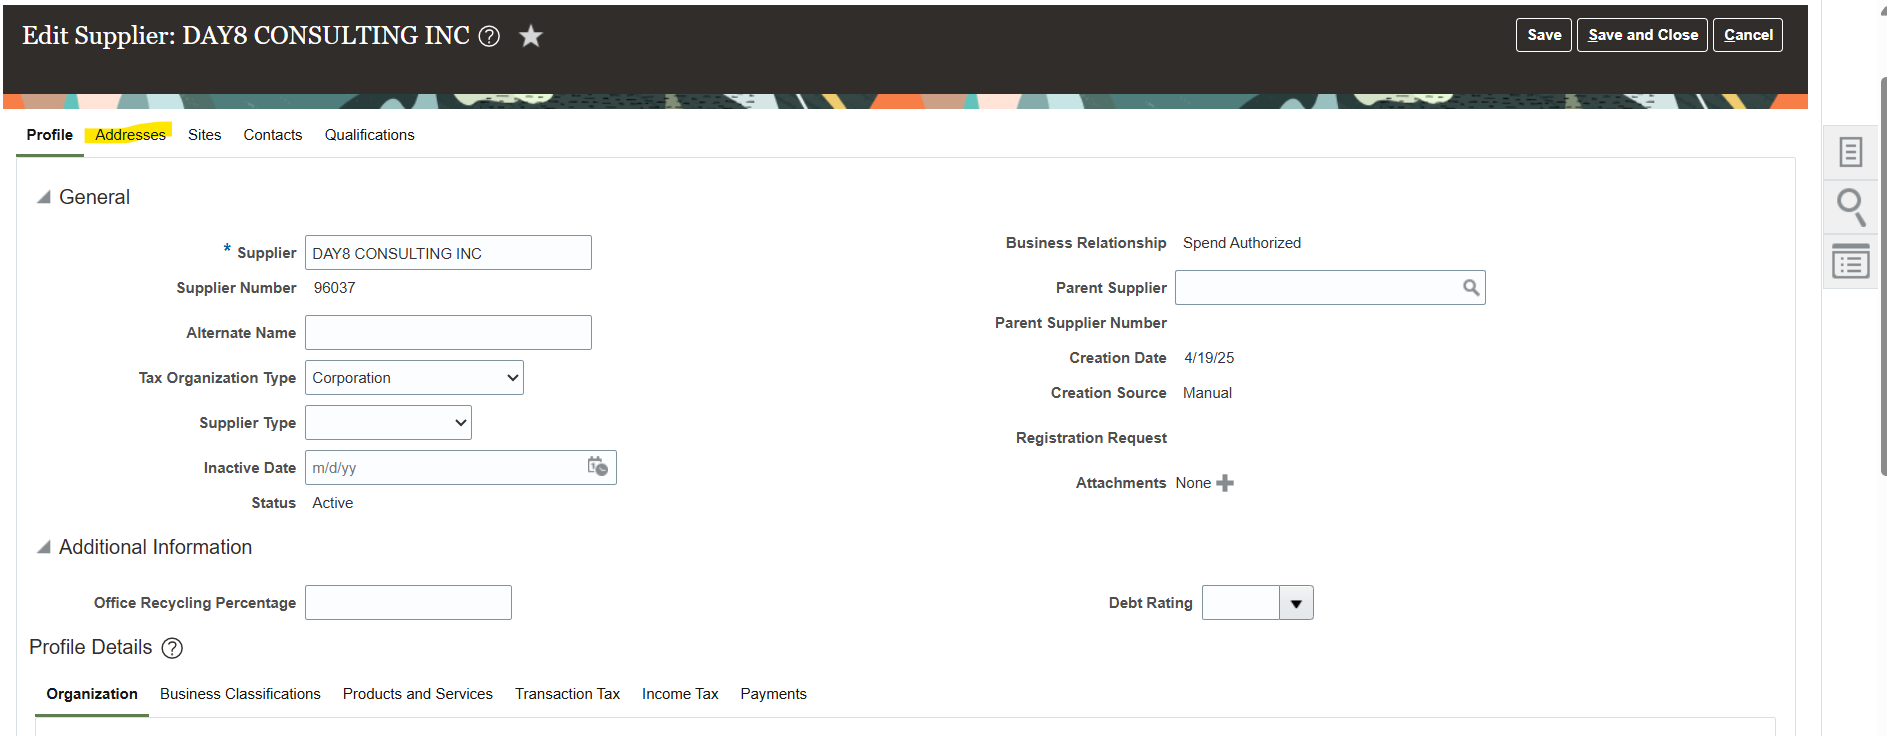
- On the Edit Supplier page, Profile tab, enter:
- Supplier Type
- When there are mergers or acquisitions, the supplier contact of the parent company might have increased responsibility to respond to the negotiations of their subsidiaries. If you’re a subsidiary supplier of a parent company, in the Parent Supplier field, search and select you parent company.
- In Profile Details, on the Organization tab, select the One-time Supplier option if the supplier is created with a purpose of single transaction and isn’t expected to be in continuous business after being paid once.
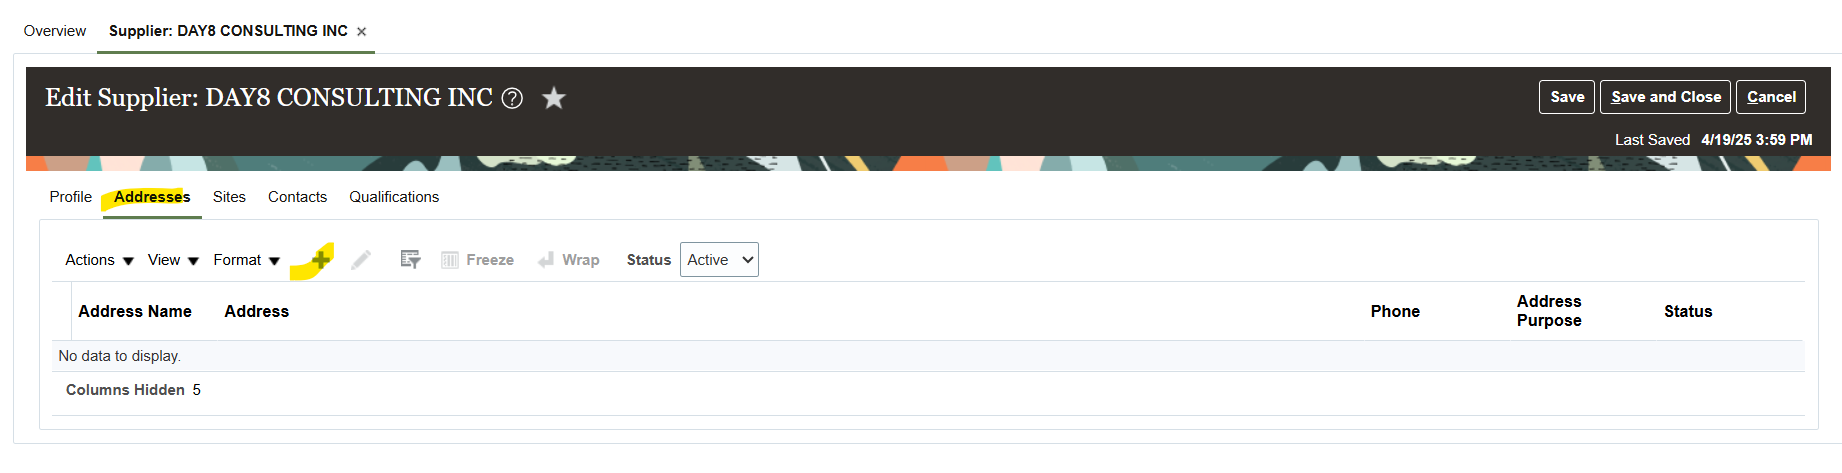
- On the Edit Supplier page, Addresses tab, click the Create icon.
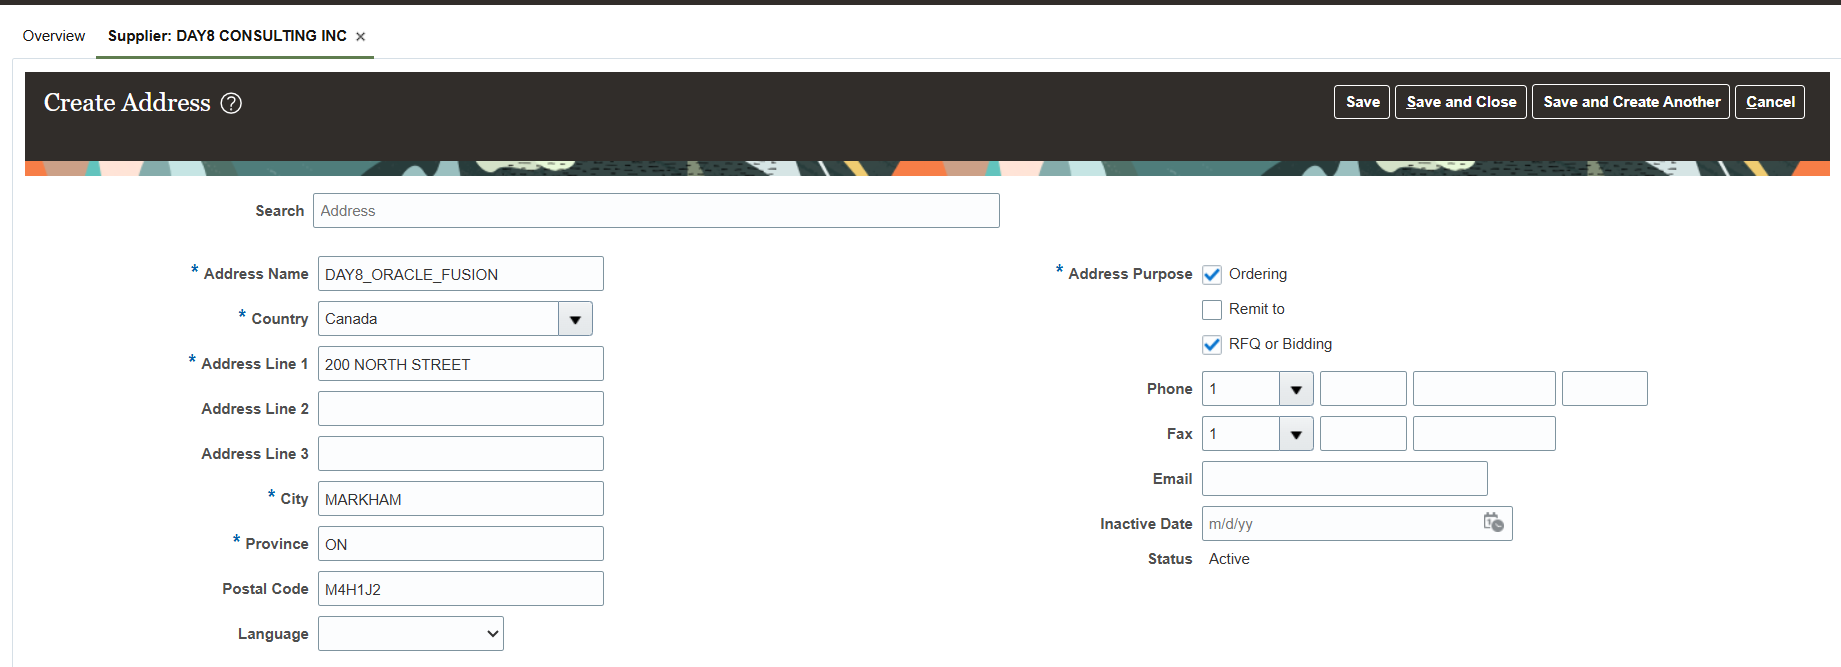
- On the Create Address page, enter:
- Address Name
- Country
Note: The Country field automatically defaults to the country set in your Work Location, as seen in the Personal Information page, Employment Details tab.
-
- Address Line 1
- City
- County
- State
- Postal Code
- Language
- Address Purpose
Select all applicable boxes. At a minimum select Purchasing.
- If smart address search is enabled, then for a supplier, you can search a specific address and include that address information here.
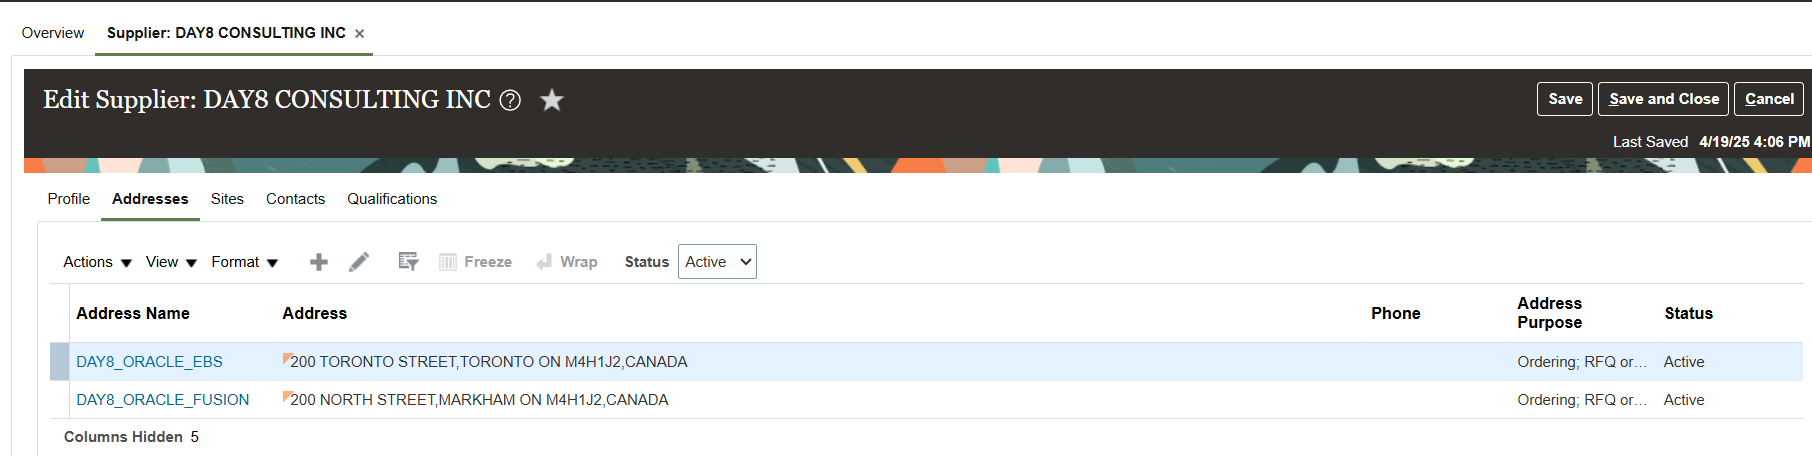
- Click Save and Close.
Repeat address creation for all addresses you do business with for this supplier.
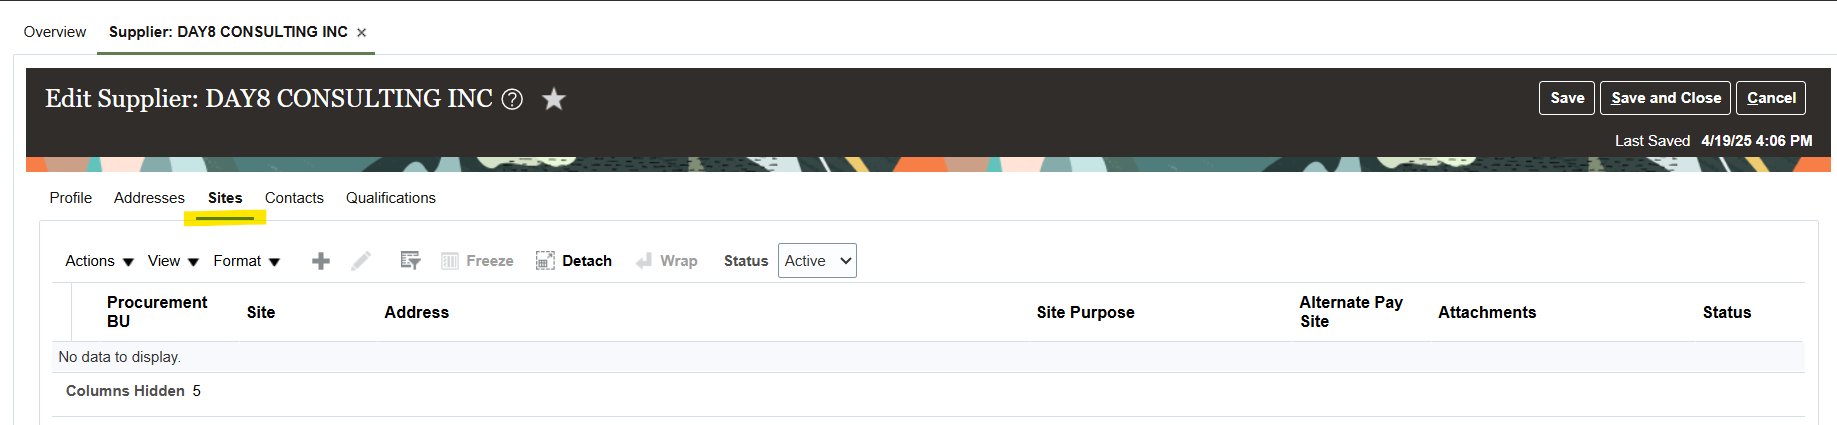
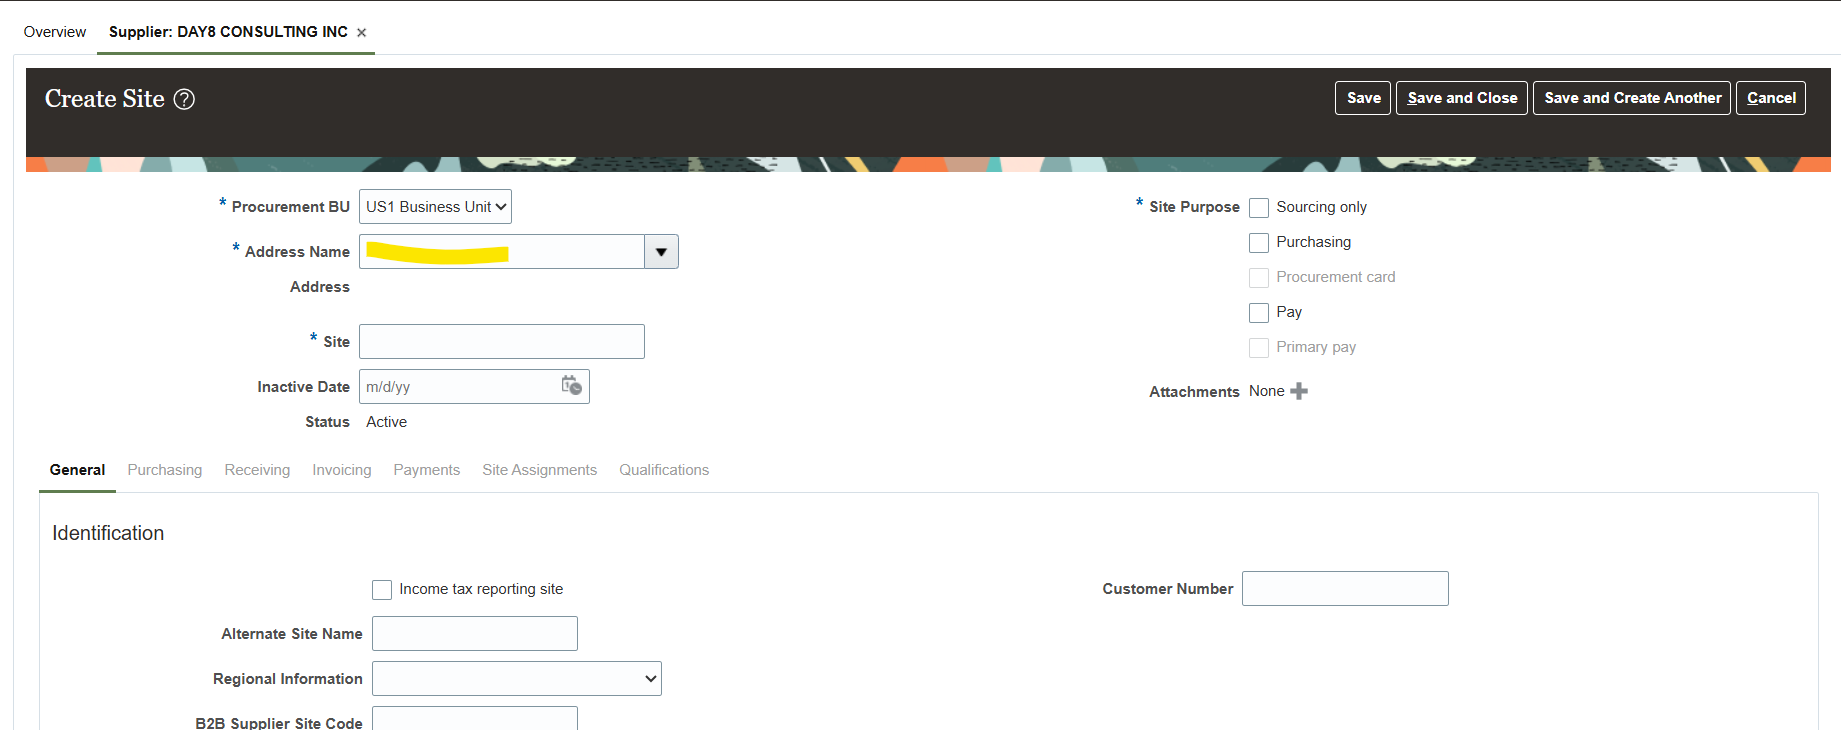
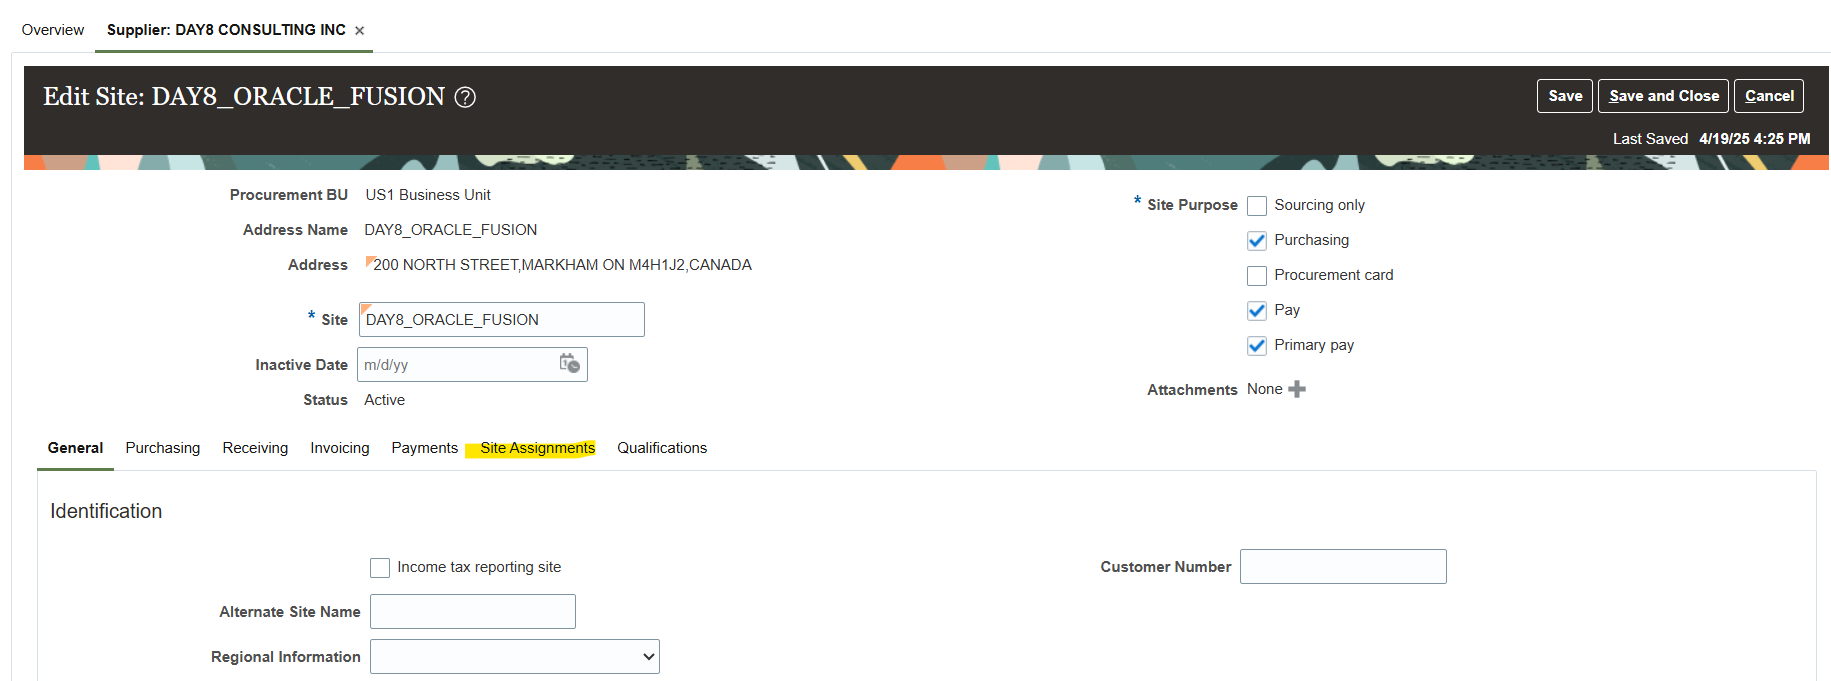
- With your supplier selected, open the Sites tab and click the Create icon.
- On the Create Site page, enter:
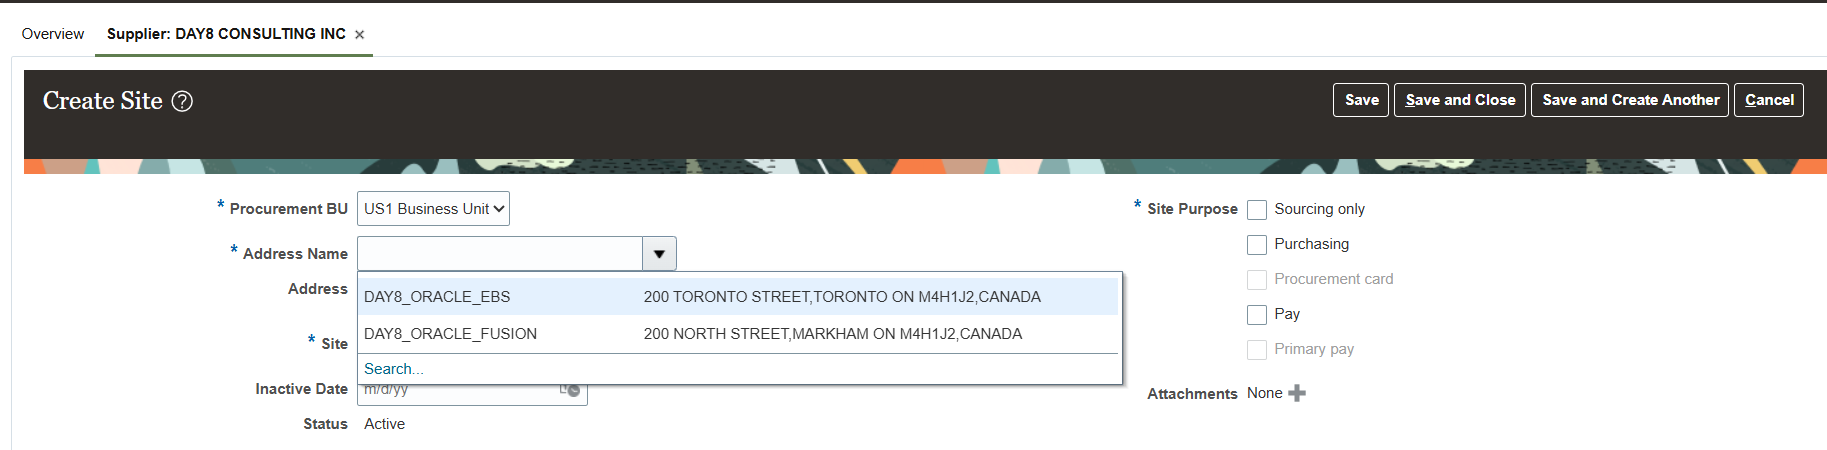
- Address Name
Select the address for this supplier site.
You can create supplier sites with a name of up to 240 characters, this will assist to better identify them; providing flexibility to satisfy the requirements of any naming convention.
-
-
- If the supplier is an OBN trading partner, you can enable B2B messaging to improve your transaction efficiency. On the General tab, in the B2B Communication, click the contextual action for OBN Enabled to view the supplier’s supported documents configured in OBN.
- To improve transaction efficiency, in Enable B2B messaging, select Yes.
-
- Click Save.
- Click the Receiving subtab and enter:
- Receipt Routing
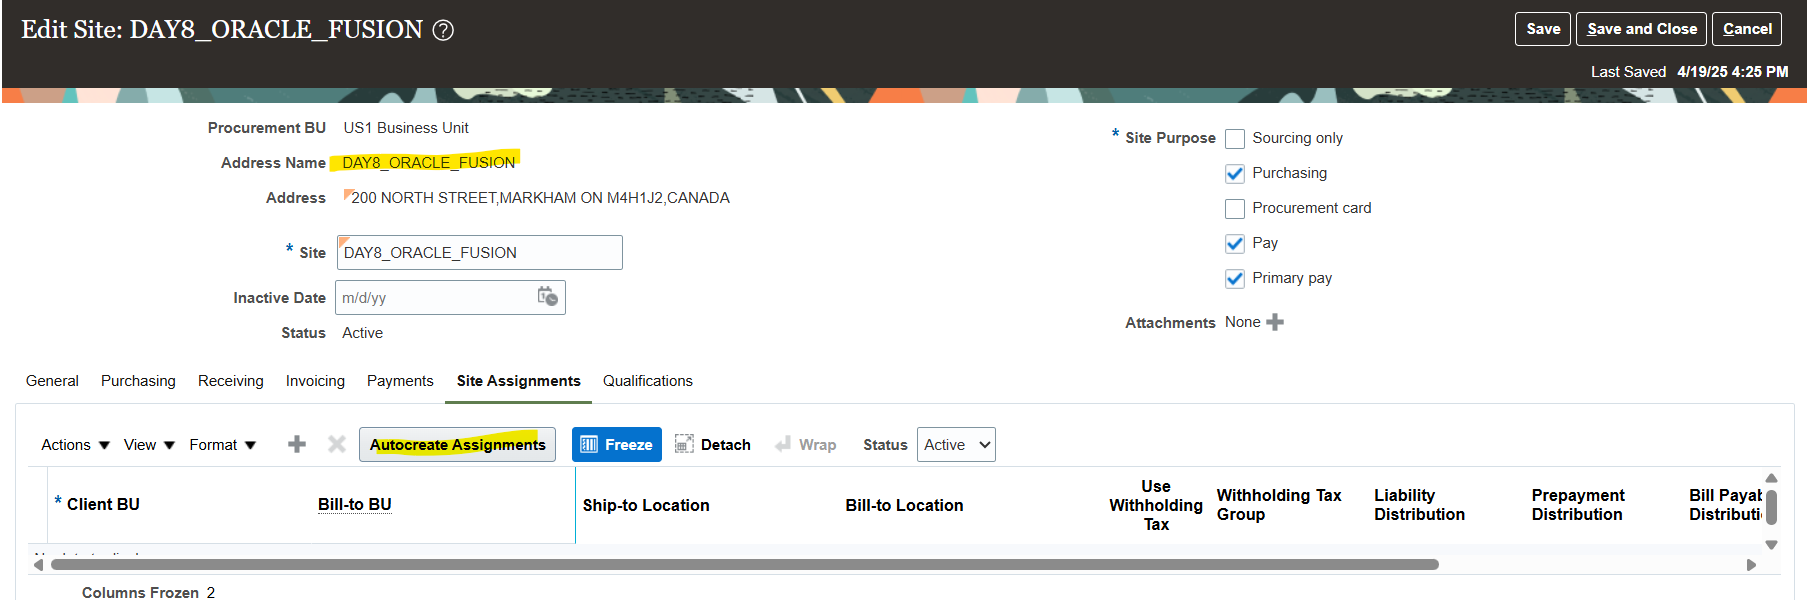
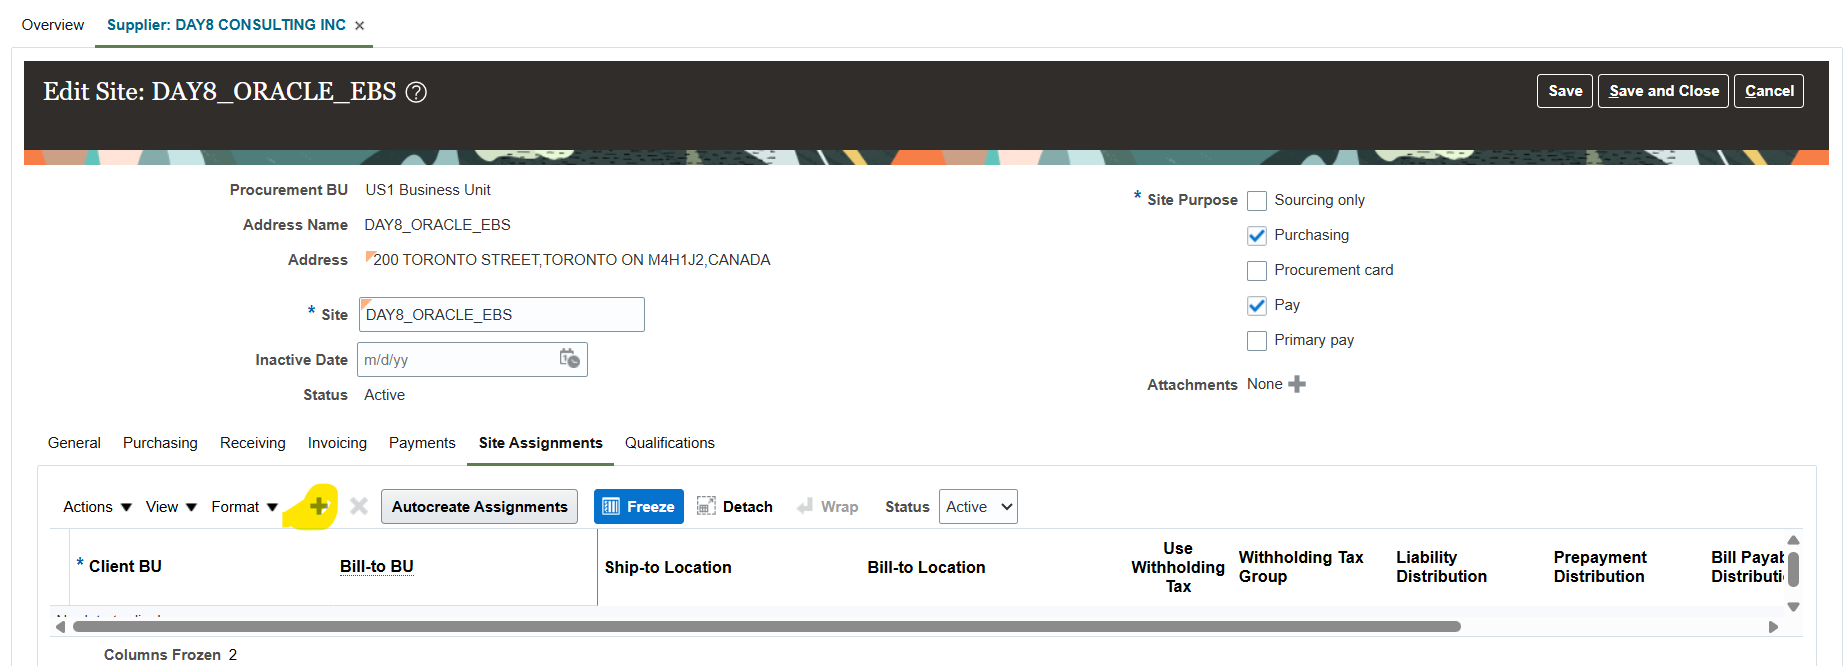
- Click the Site Assignments subtab and click Autocreate Assignments. This may only be appropriate for your first site. Other sites may require manual creation.
- Click Save and Close.
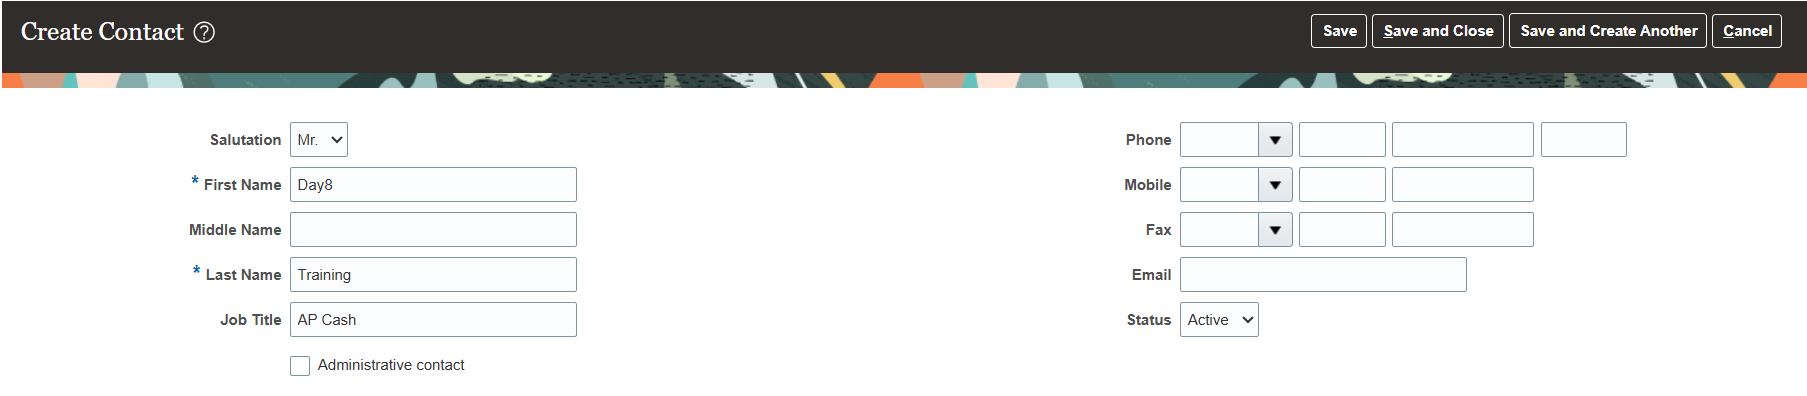
- With your supplier selected, open the Contacts tab and click the Create icon.
- On the Create Contact page, enter:
- First Name
- Last Name
- Select Administrative contact check box
- To facilitate mergers or acquisitions, the parent supplier contact may respond to the negotiations of its subsidiaries. To provide access to the parent supplier contact, select Create user account, and on the Data Access tab, confirm that the parent supplier information is included.
The parent contact can respond to its subsidiaries’ negotiations in the Oracle Supplier Portal.
- Click the Create icon.
- In the Contact Addresses region, click the Select and Add icon:
- Select the contact address.
- Click Apply.
- Click OK.
- In the User Account region, click the Create user account check box. Accept all the applicable privileges for this contact.
- Click Save and Close.
- Click Save and Close.
Supplier Creation
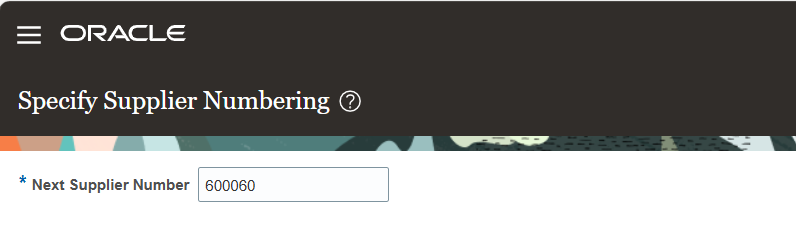
- Supplier Number Generation
- Supplier Lookup
- Supplier Types
- Supplier Approvals
- Supplier Creation
- Supplier Address
- Supplier Site Creation
- Supplier Site Assignment BU
- Supplier Contacts Creation
Pre-Requisites
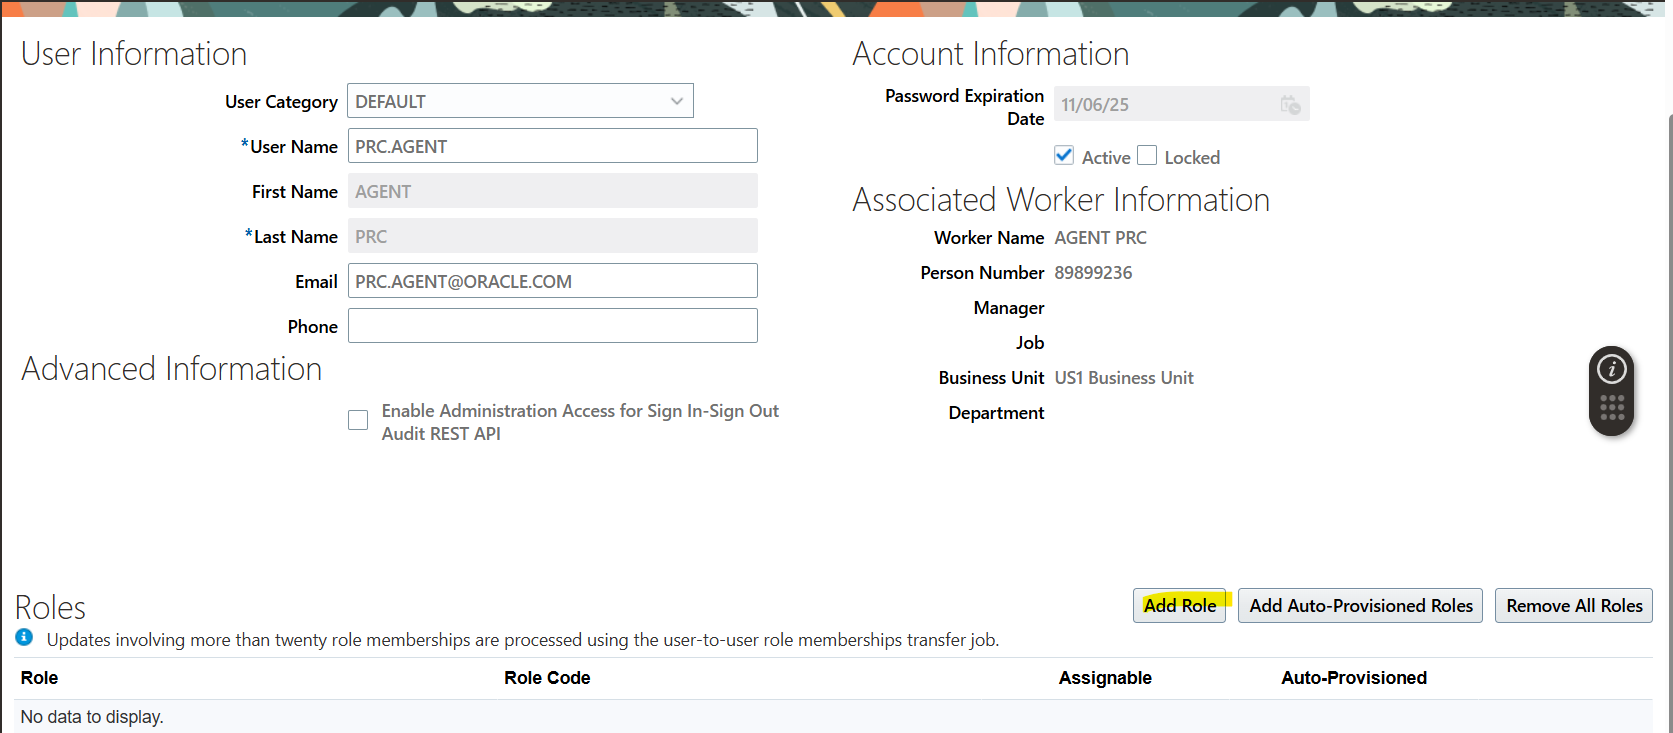
- Employee – Procurement Agent
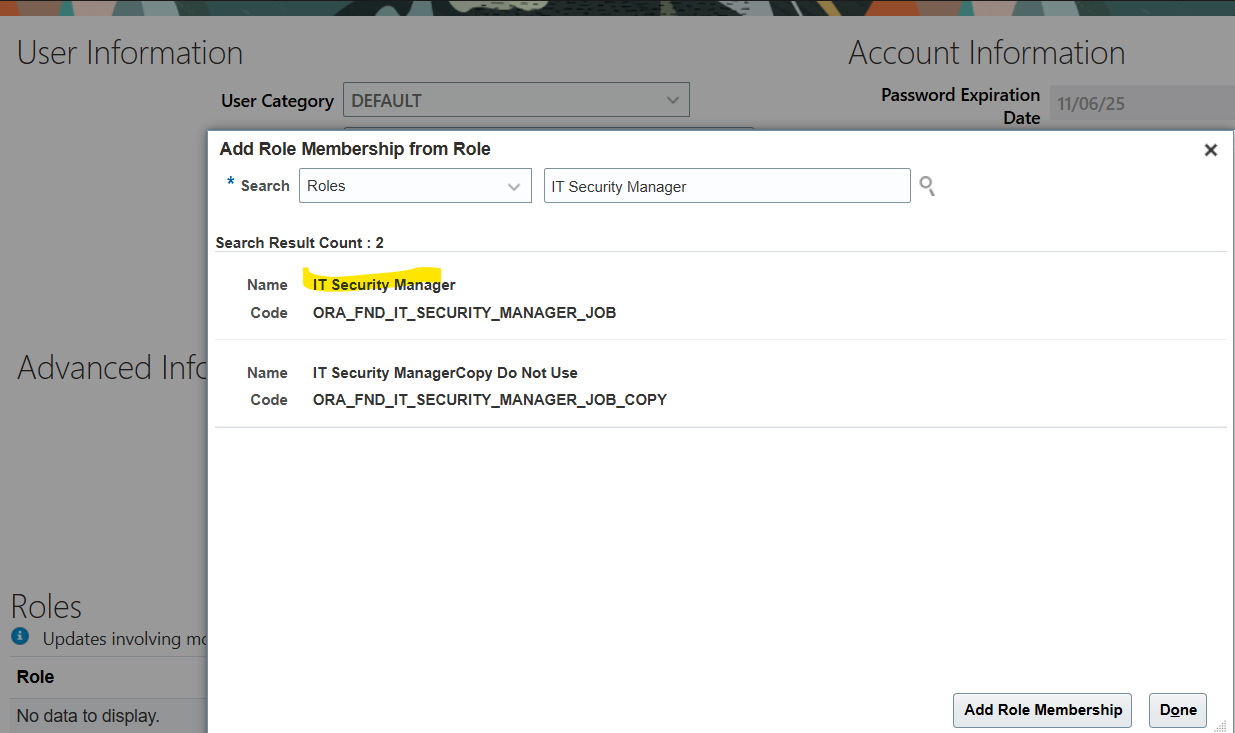
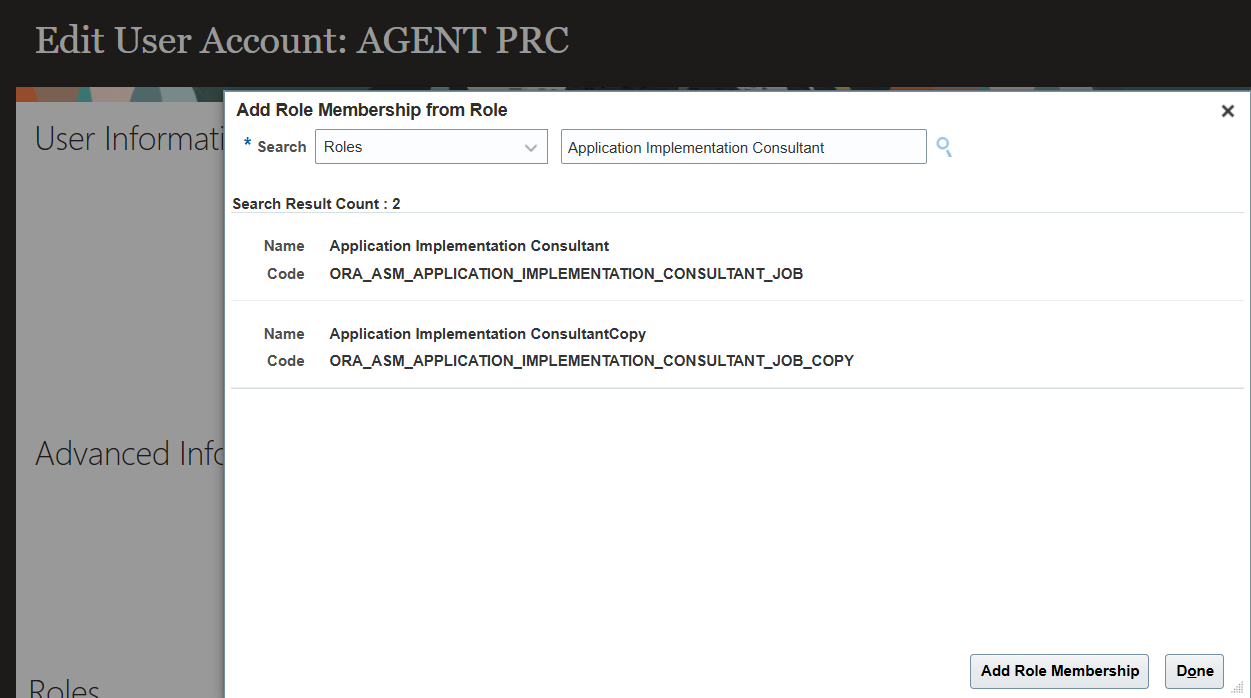
- Add Roles Implementation Roles
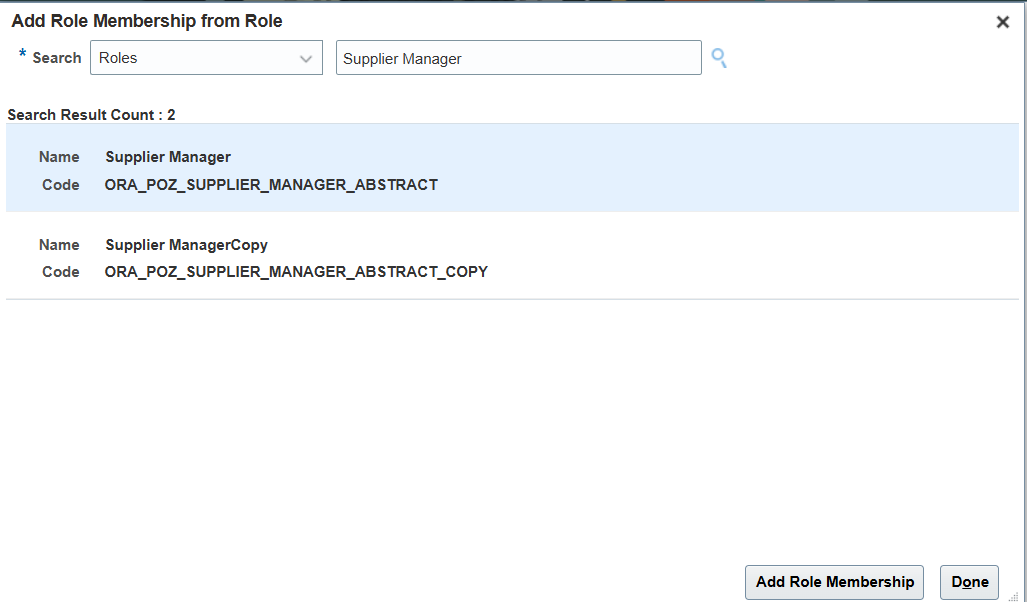
- Supplier Manager
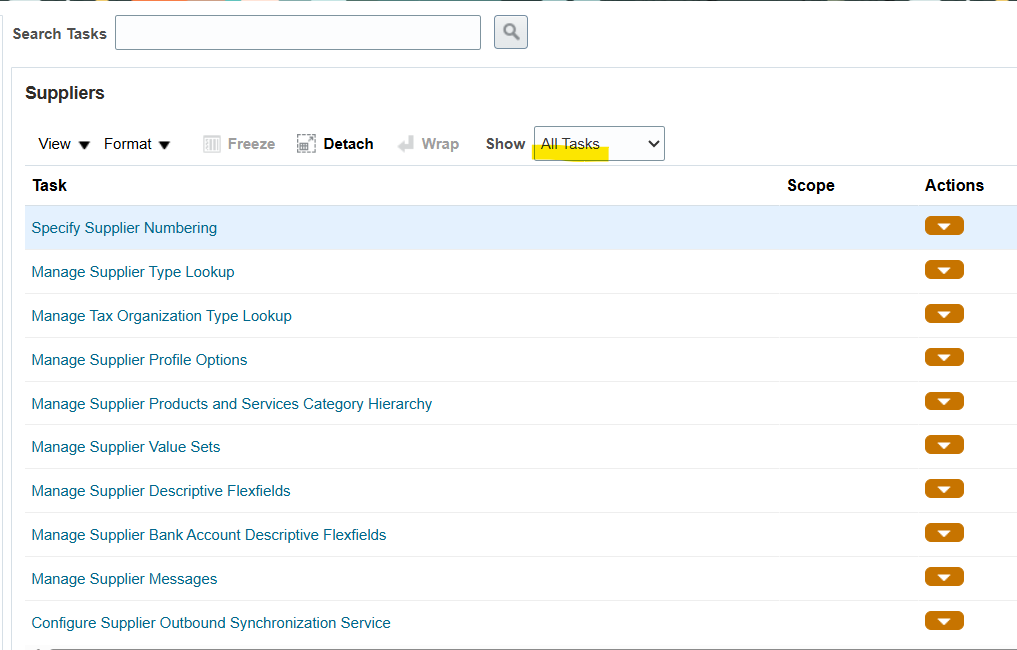
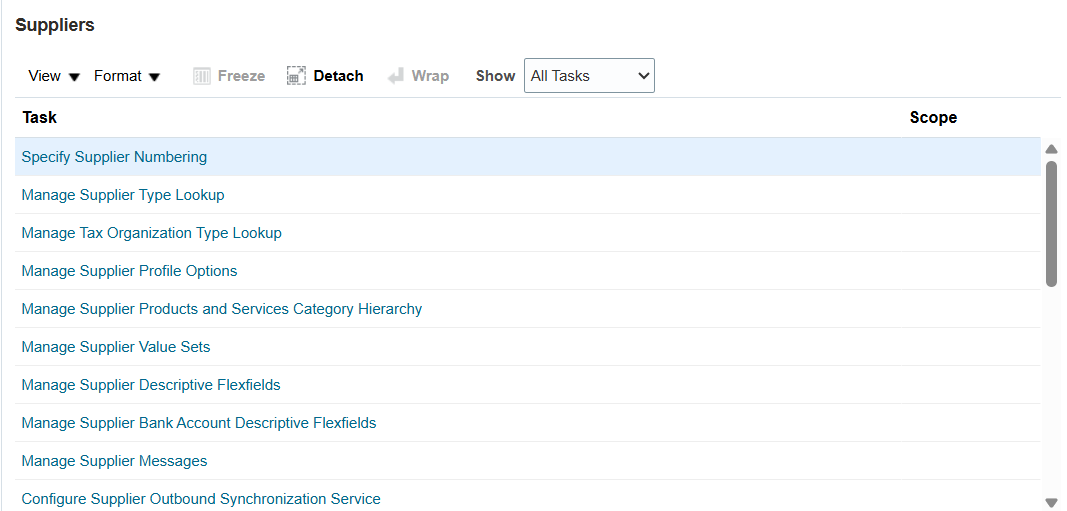
Select “All Tasks”
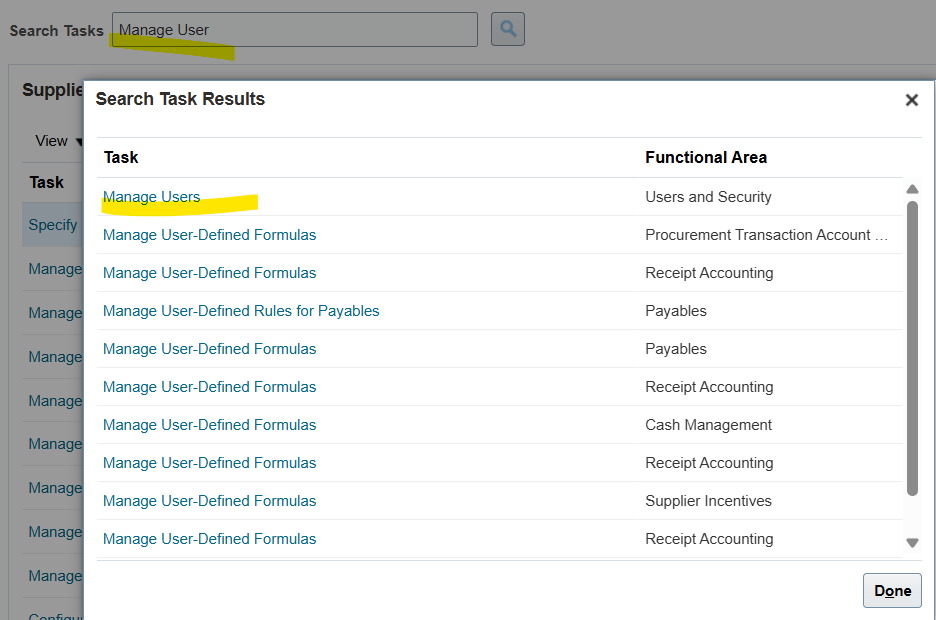
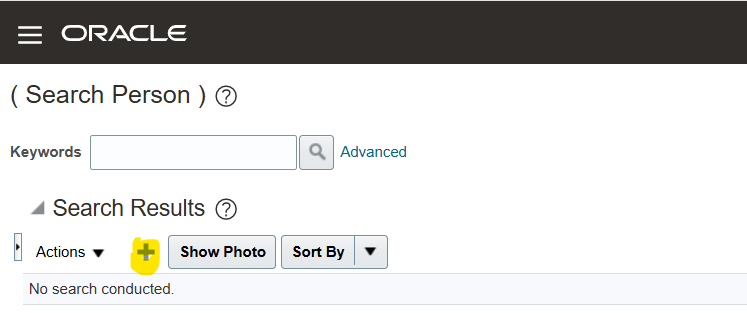
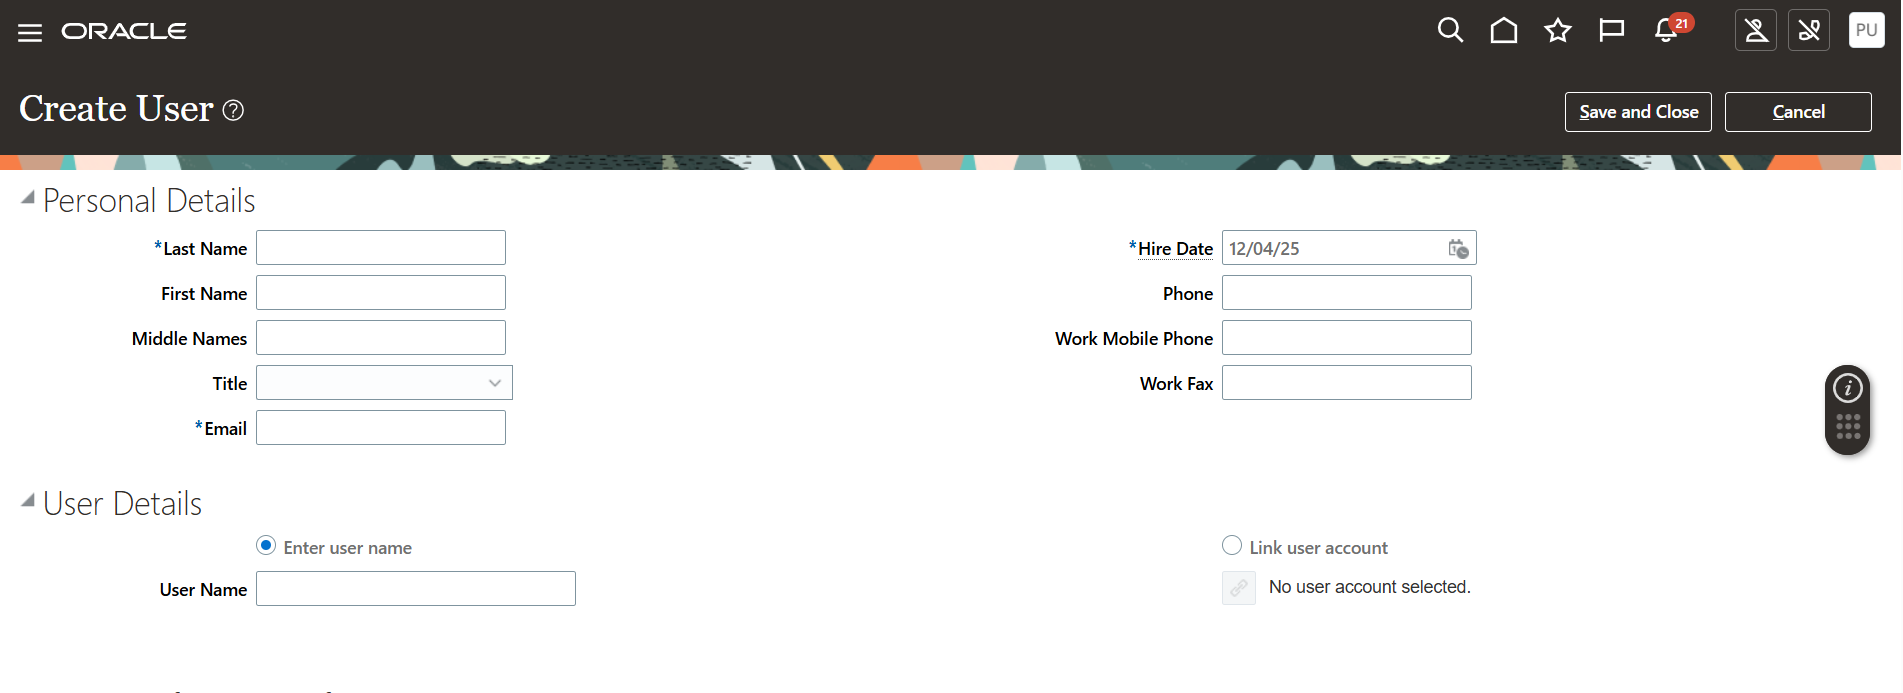
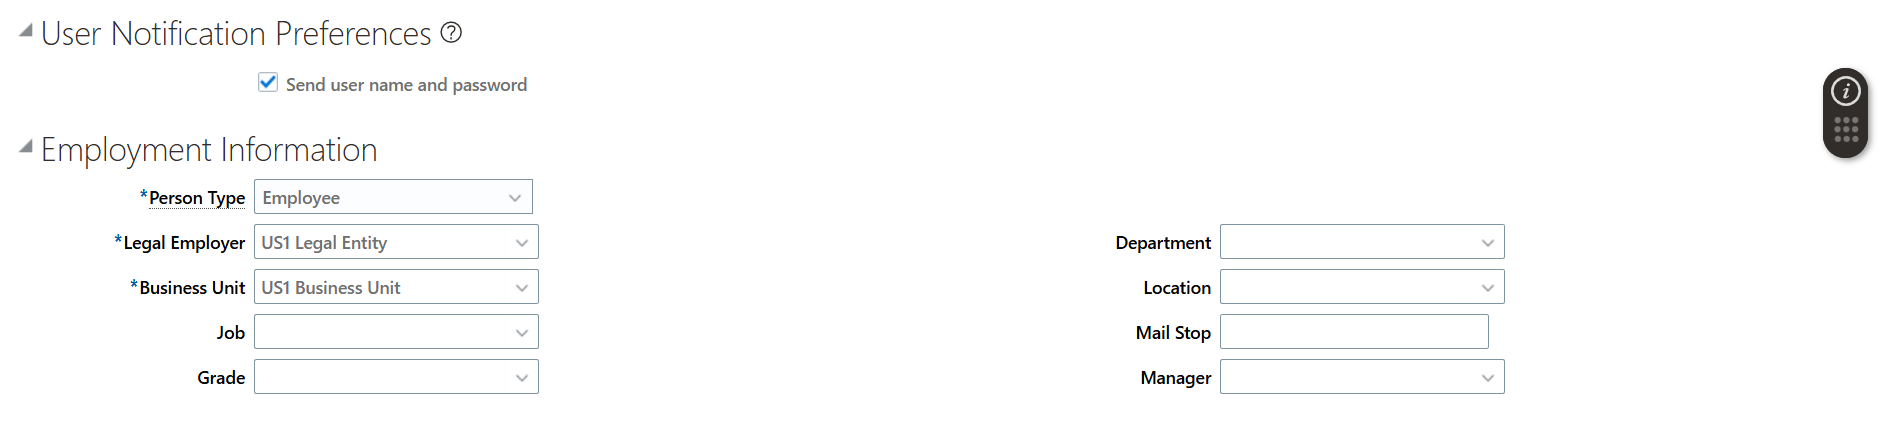
Add New Employee/User

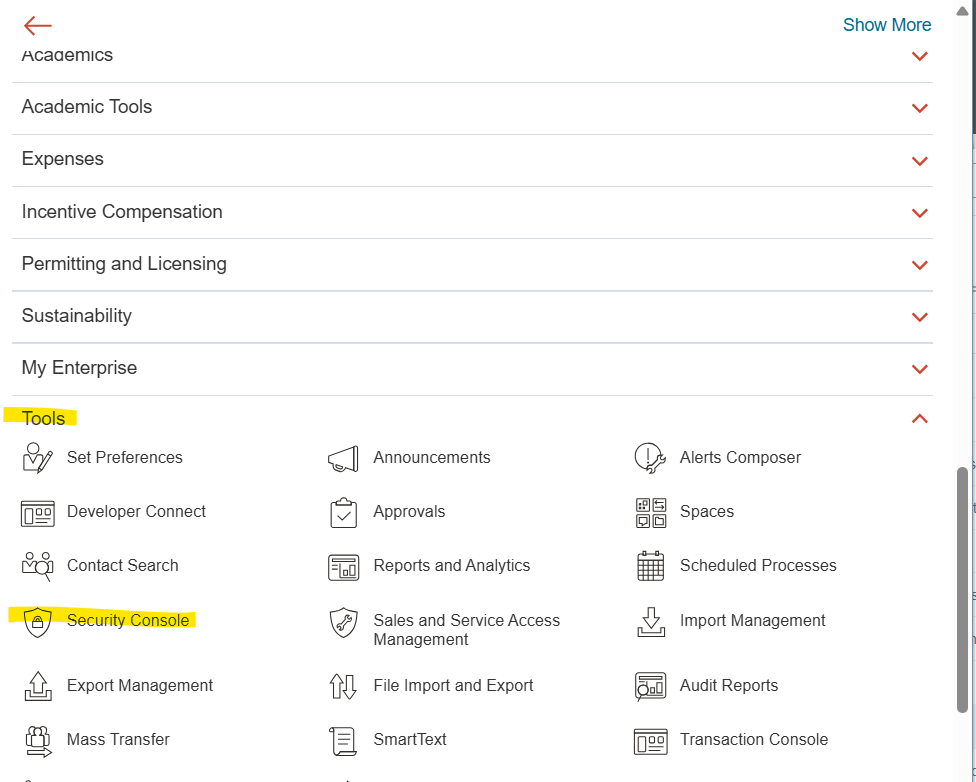
Select Security Console from Tools
Add New Roles
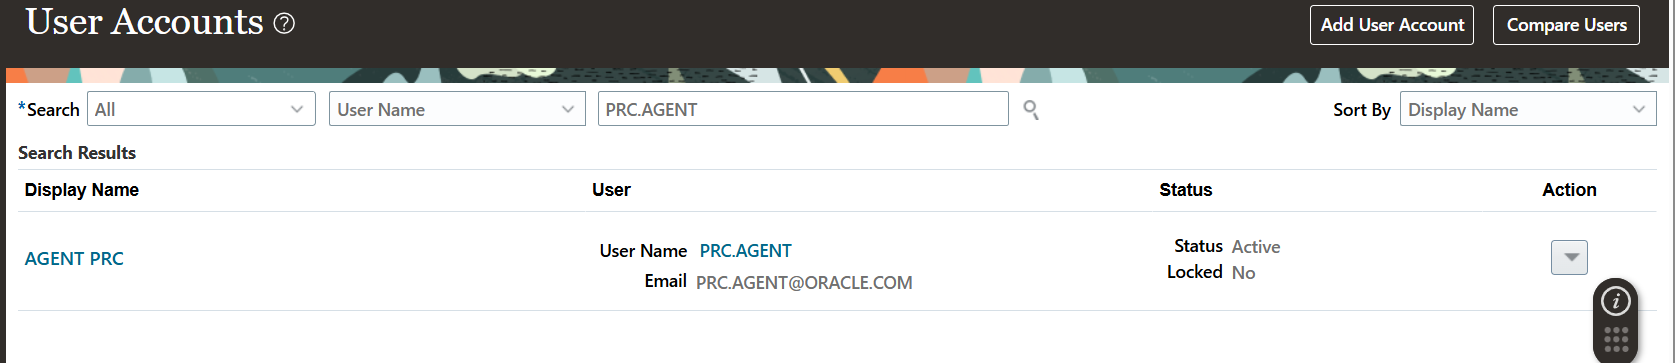
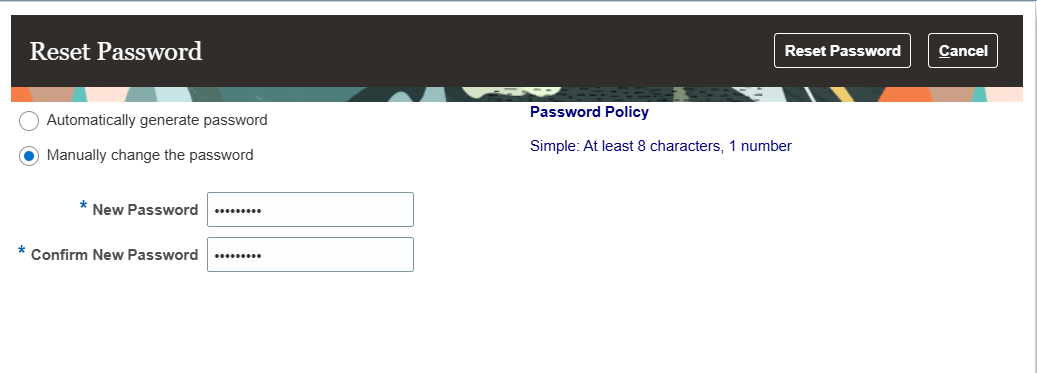
Search new user created and reset password

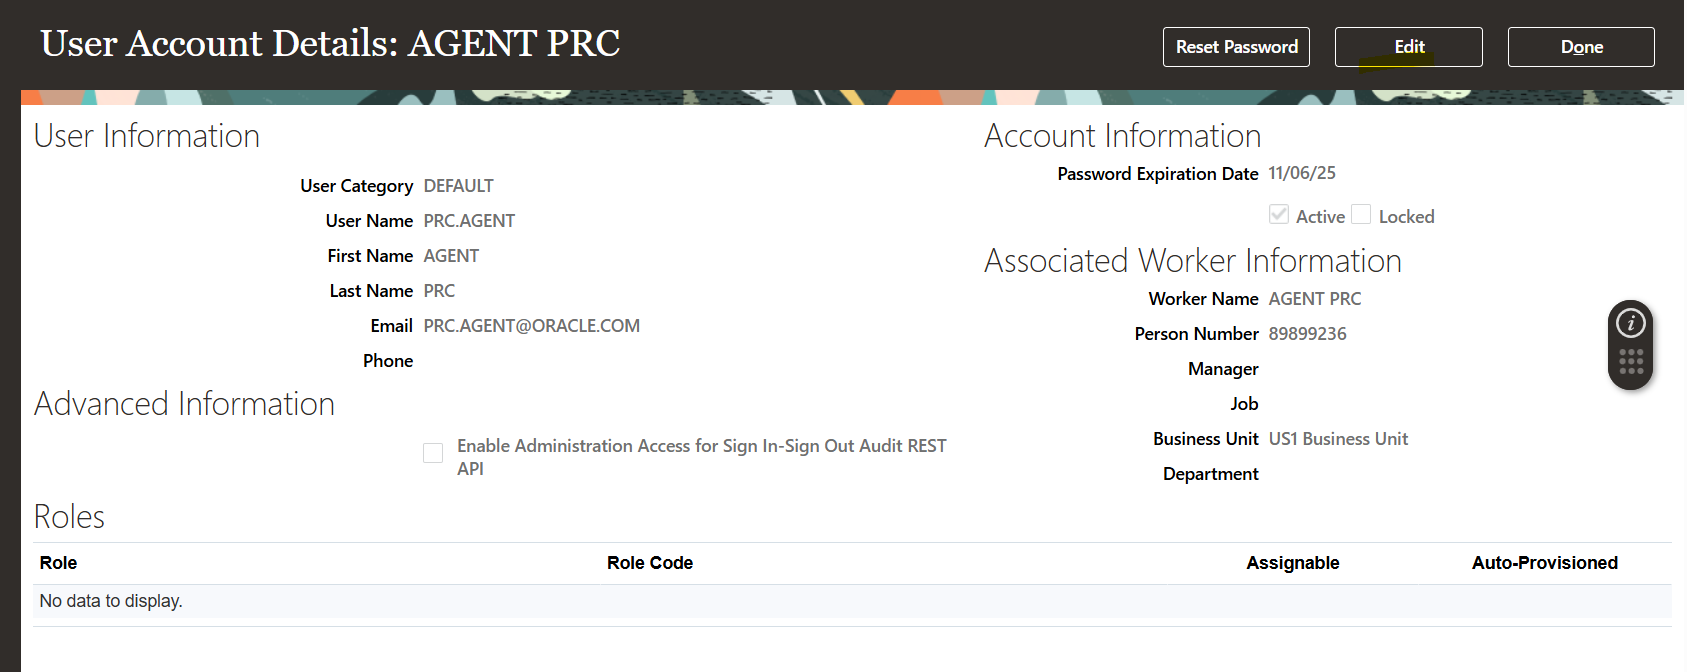
Select Edit and Add new Roles
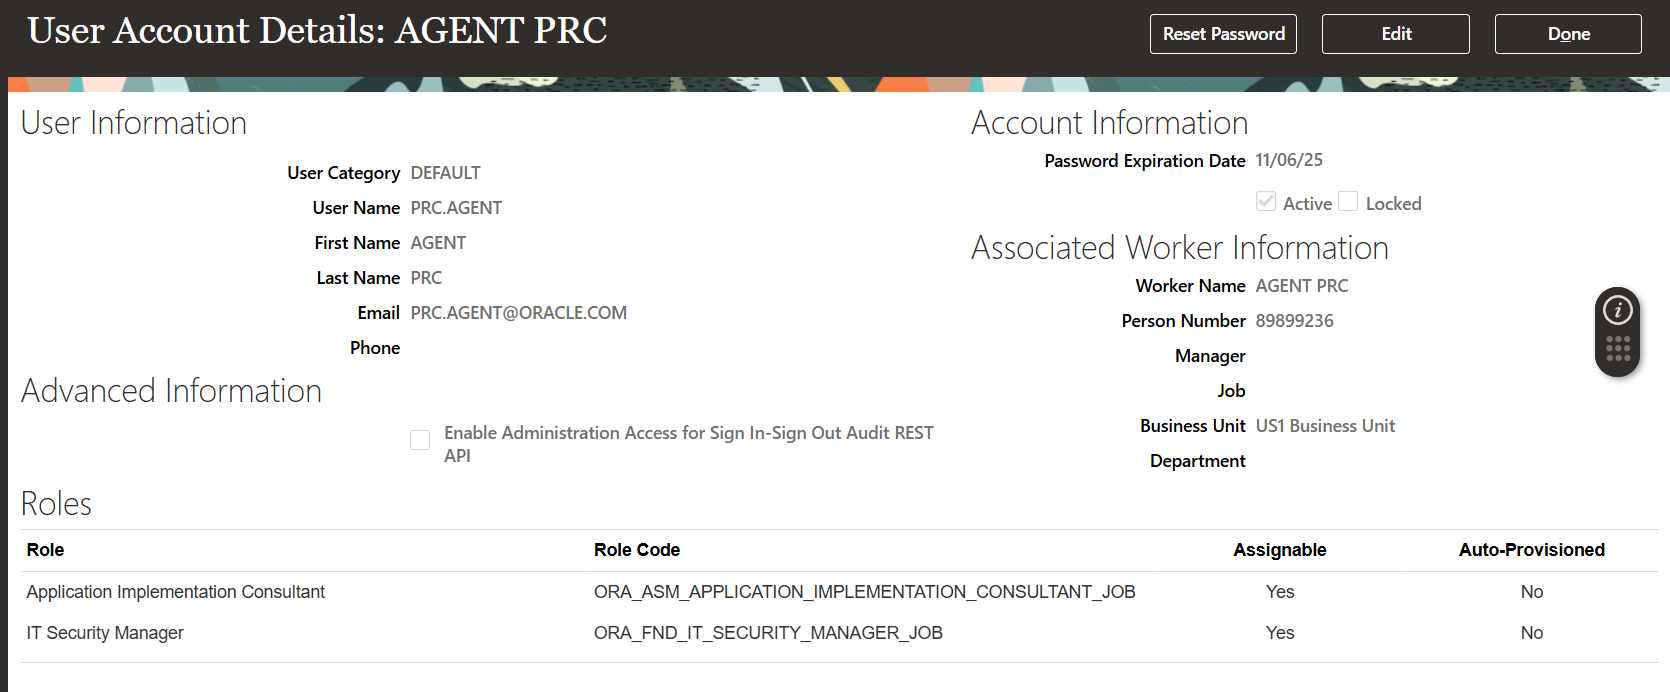
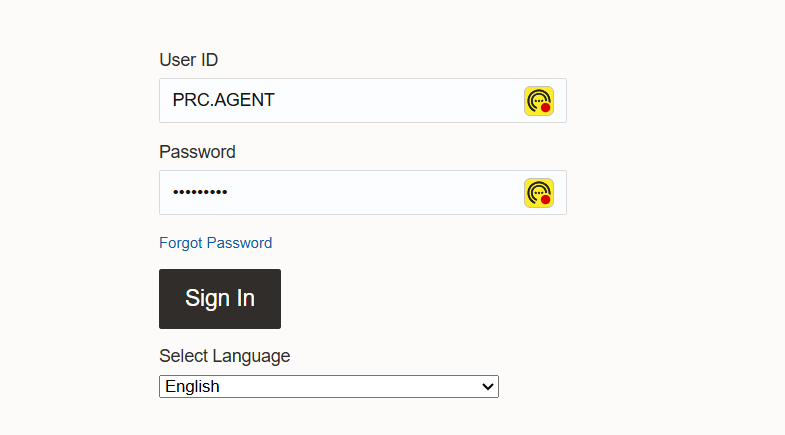
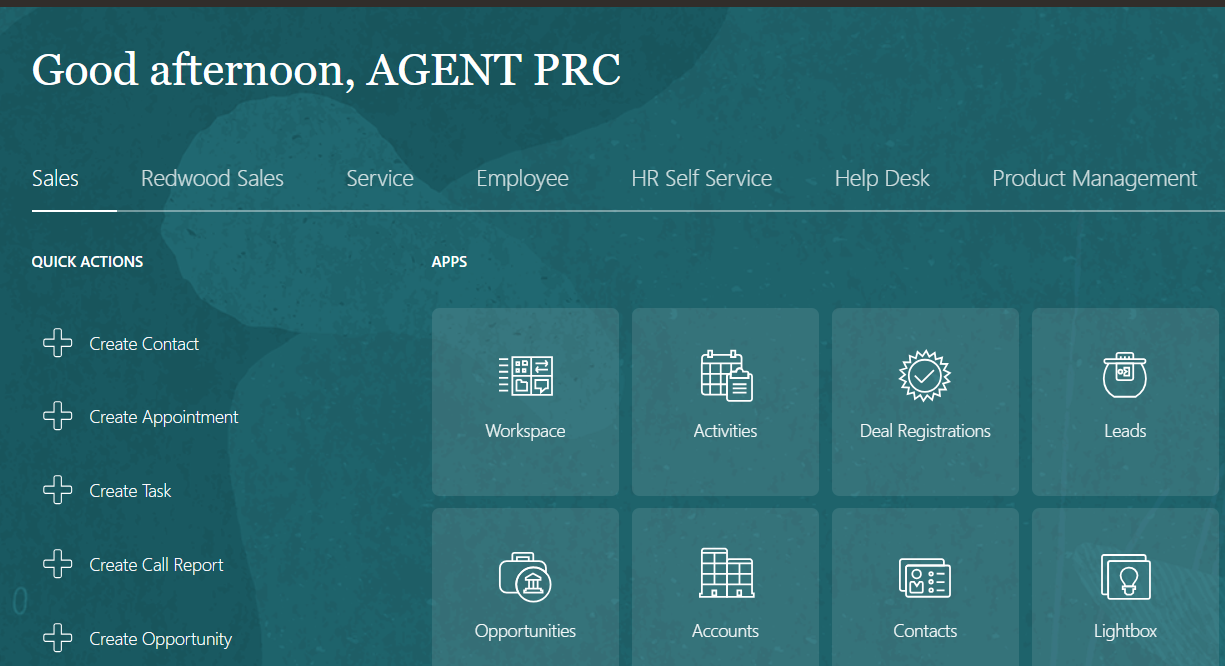
Successfully access new user
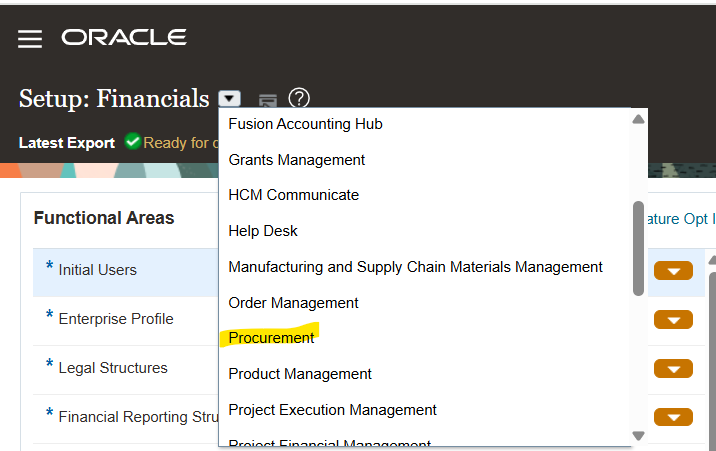
Setup Buyer Setup 🡪 Procurement
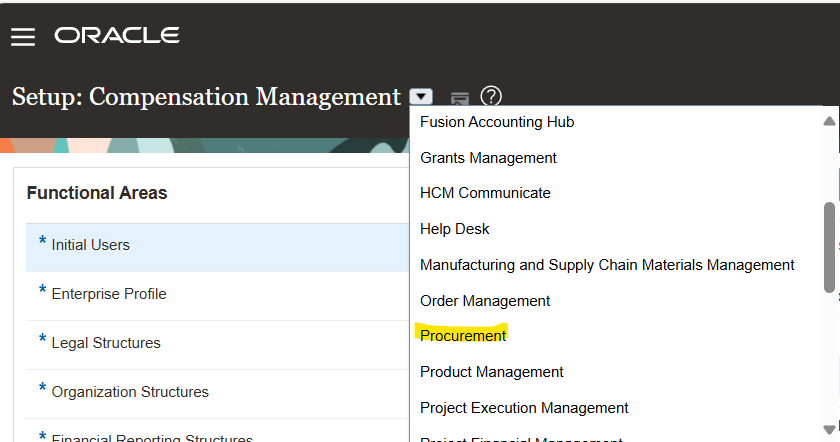
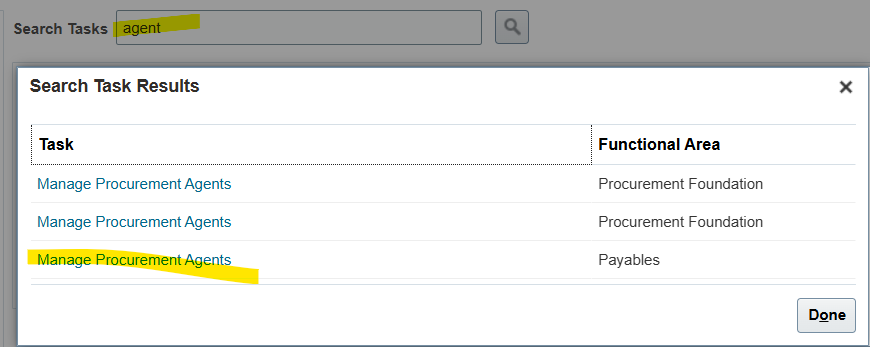
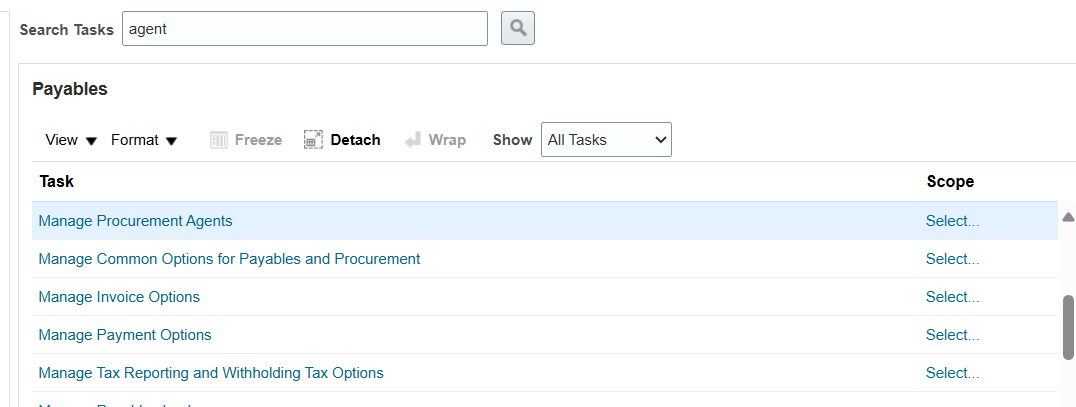
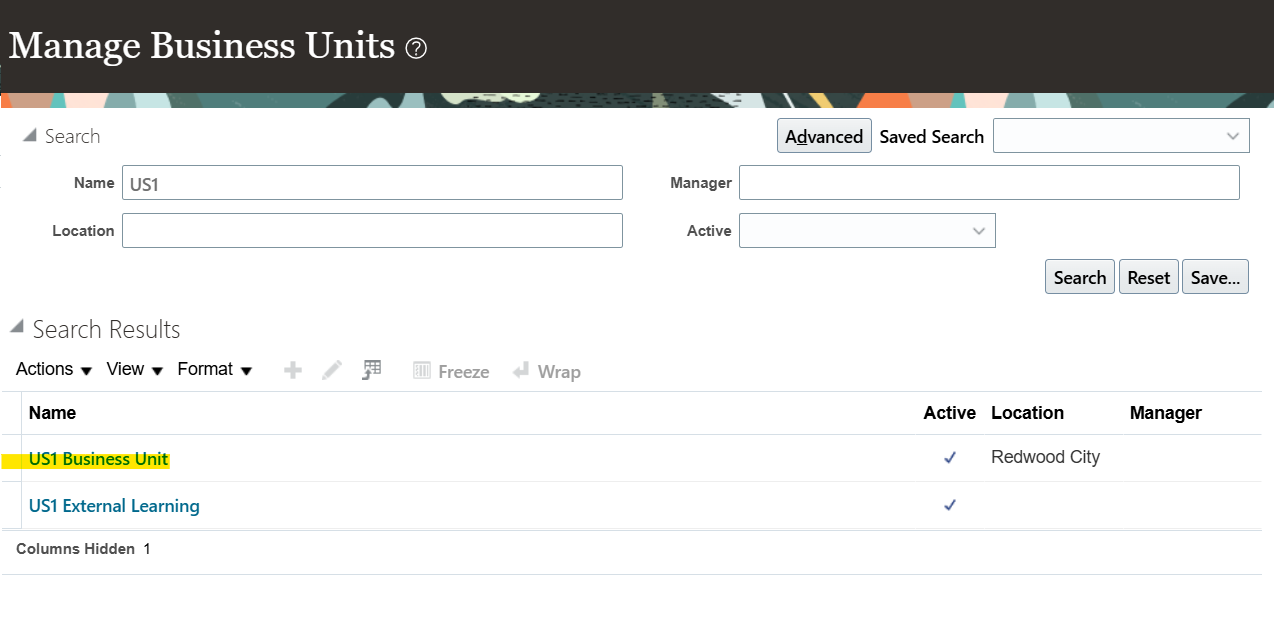
Select Business Unit from task list
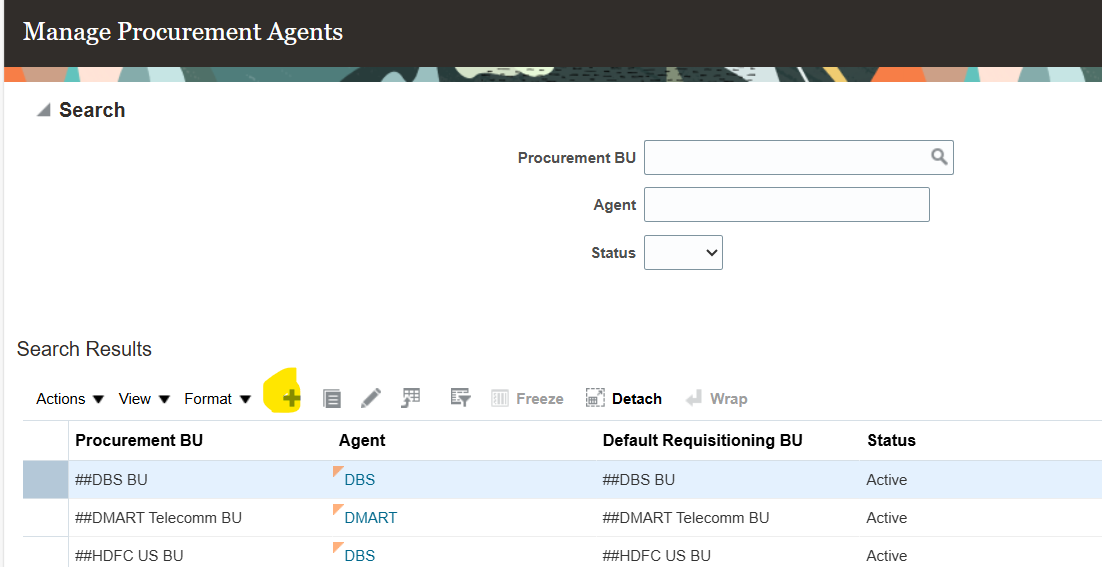
Add new Procurement Agent
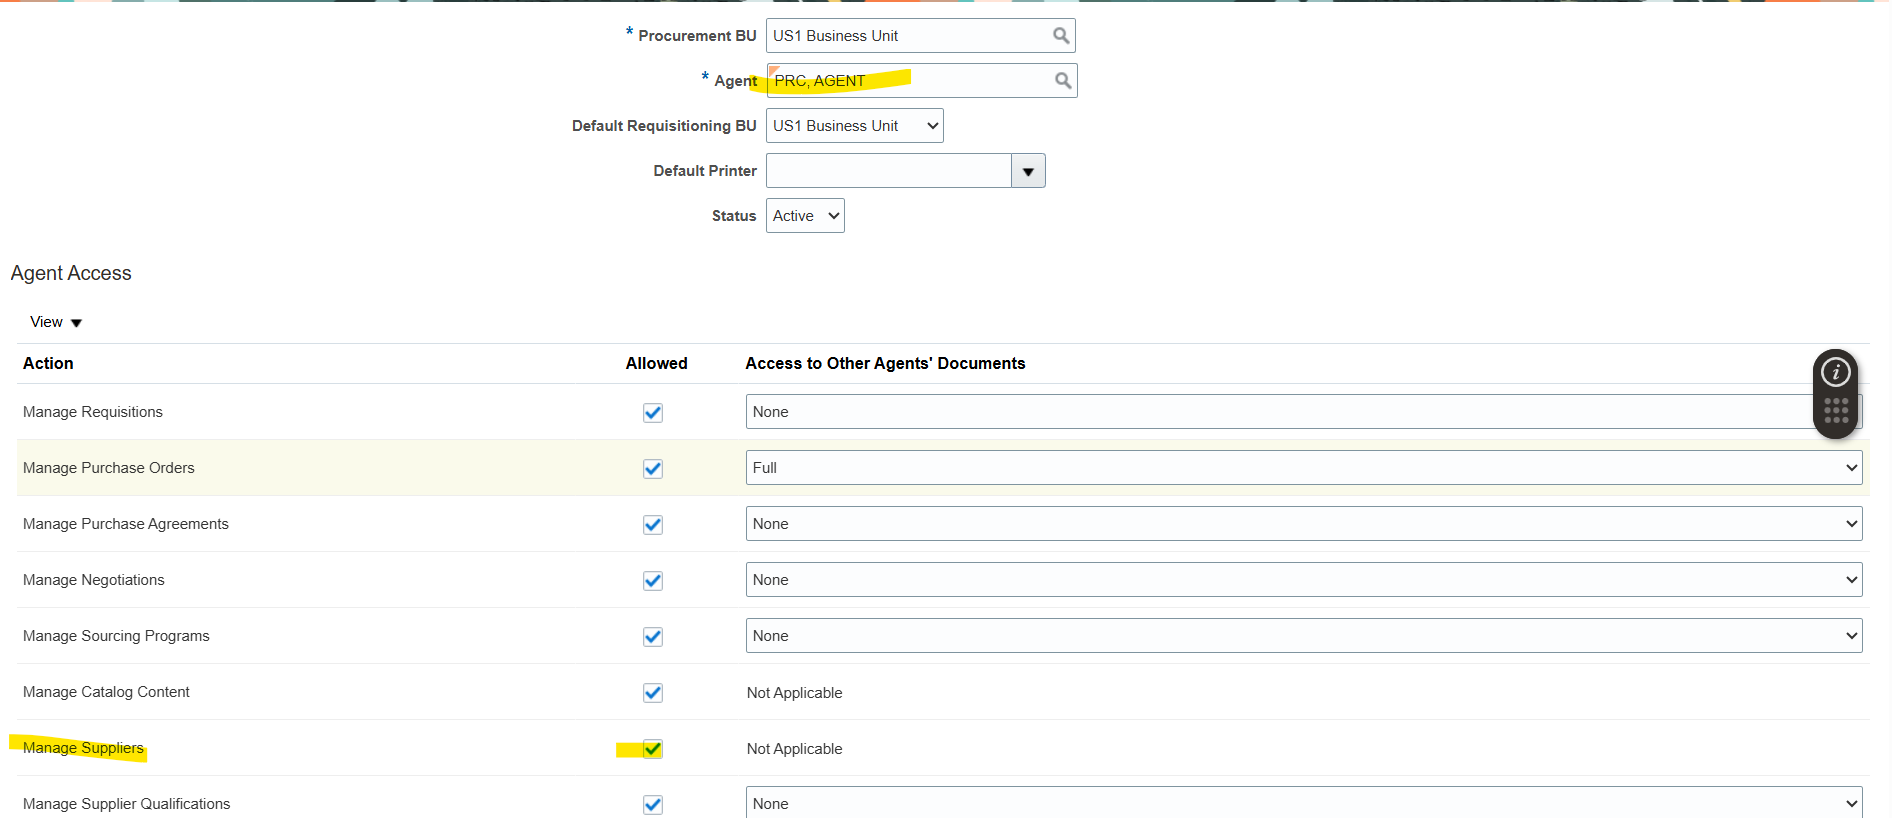
Supplier Option is enable for Procurement Agent
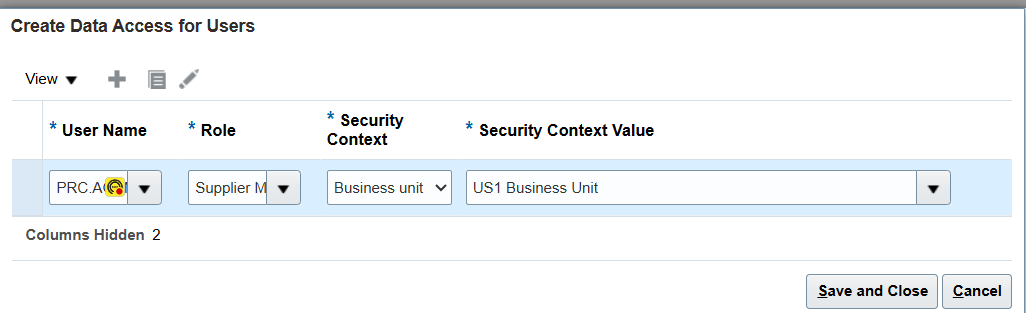
Add Data Set for Business Unit
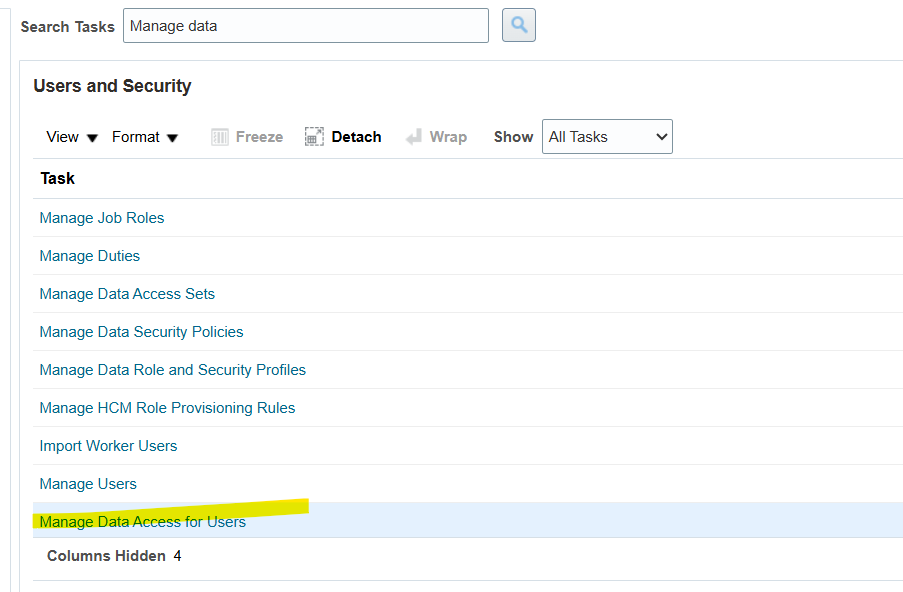
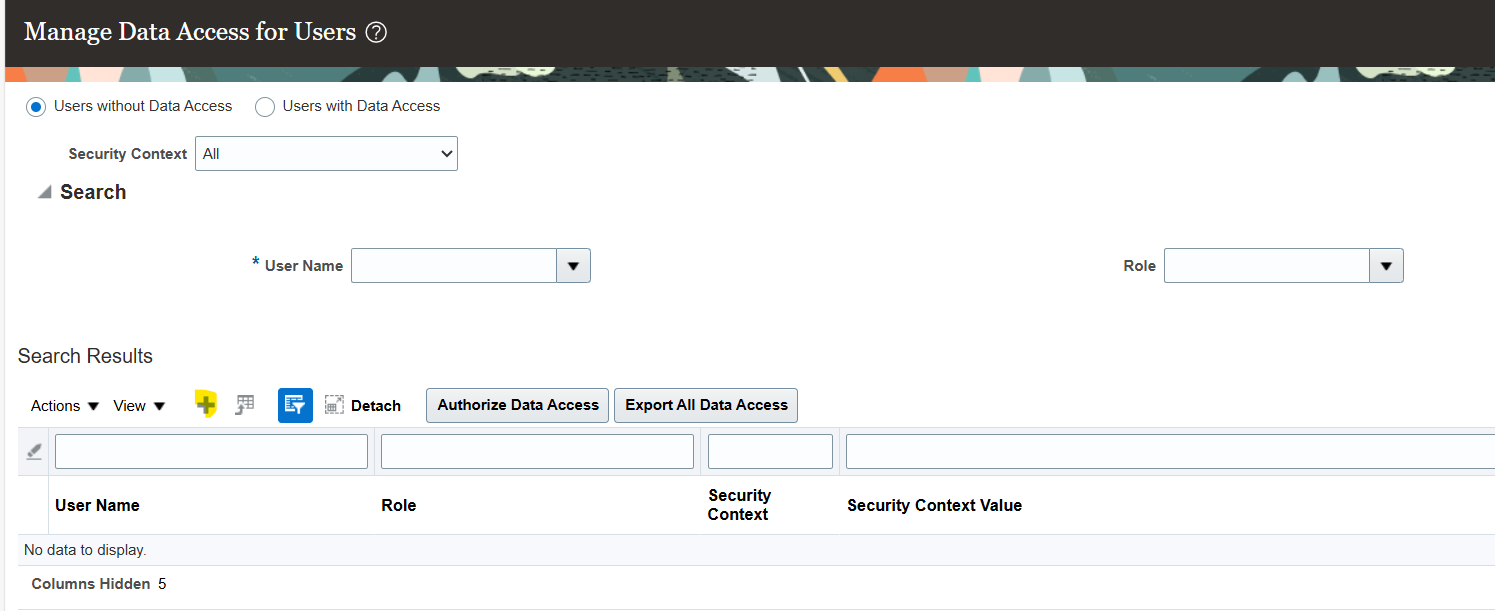
After assigning roles and data access run LDAP process


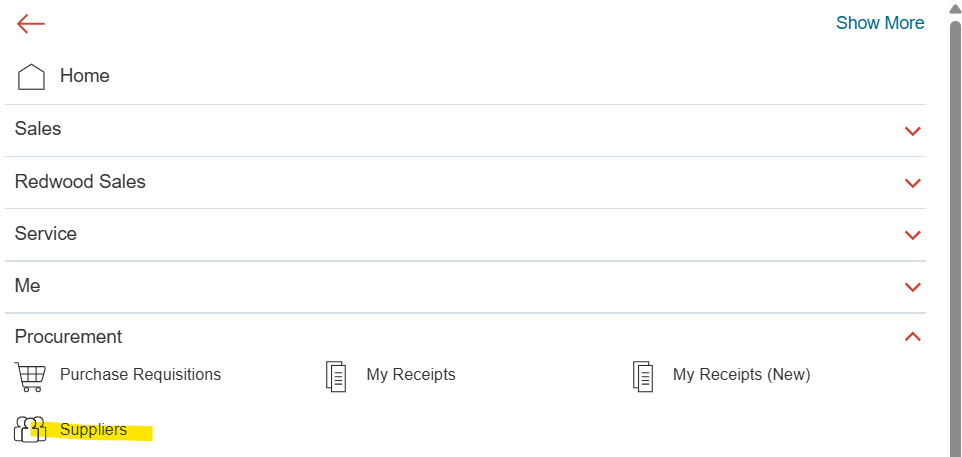
Navigate to Procurement 🡪 Suppliers
Supplier Types
- Spend Authorized
- Prospective
In the context of suppliers within a buying organization, a prospective supplier is one that is being evaluated for potential business but is not yet authorized for financial transactions, while a spend authorized supplier is one that is fully approved and can be used for procurement activities including purchase orders and invoices
Prospective Suppliers:
Purpose:
These suppliers are typically used for sourcing negotiations and supplier qualification processes.
Limitations:
They are not yet authorized for procurement transactions that involve financial spend.
Example:
A company might register a new supplier as prospective to gather information and determine if they meet the required standards before moving to spend authorization.
Spend Authorized Suppliers:
Purpose:
These suppliers are fully authorized to be used in all procurement activities, including purchase orders, invoicing, and other financial transactions.
Example:
Once a supplier is determined to be reliable and meets the buying organization’s requirements, they are transitioned to spend authorized status, allowing them to be used for all financial interactions.
Process:
A prospective supplier can be promoted to spend authorized status through a request process, such as after being awarded a negotiation.
Suppliers related Tasks
Check if Approval is required to create Spend Authorization Approvals
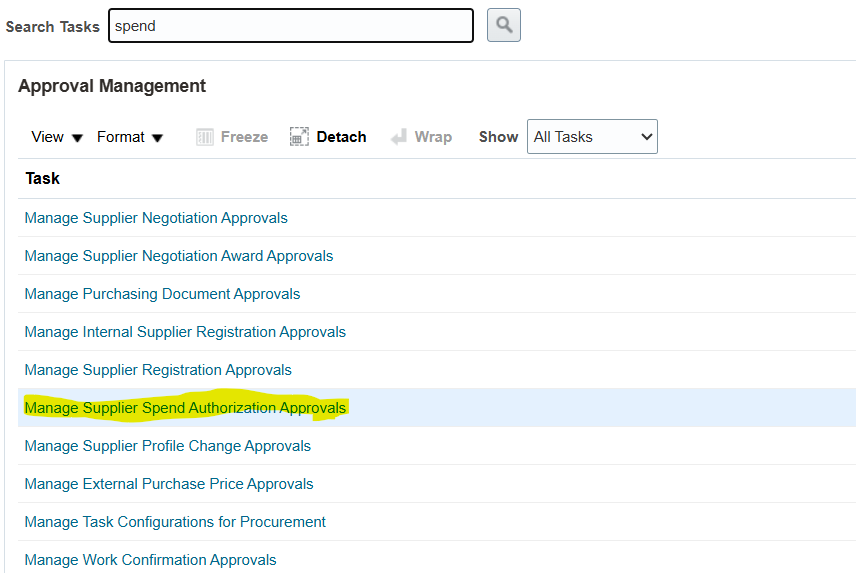

Review Approval Rules
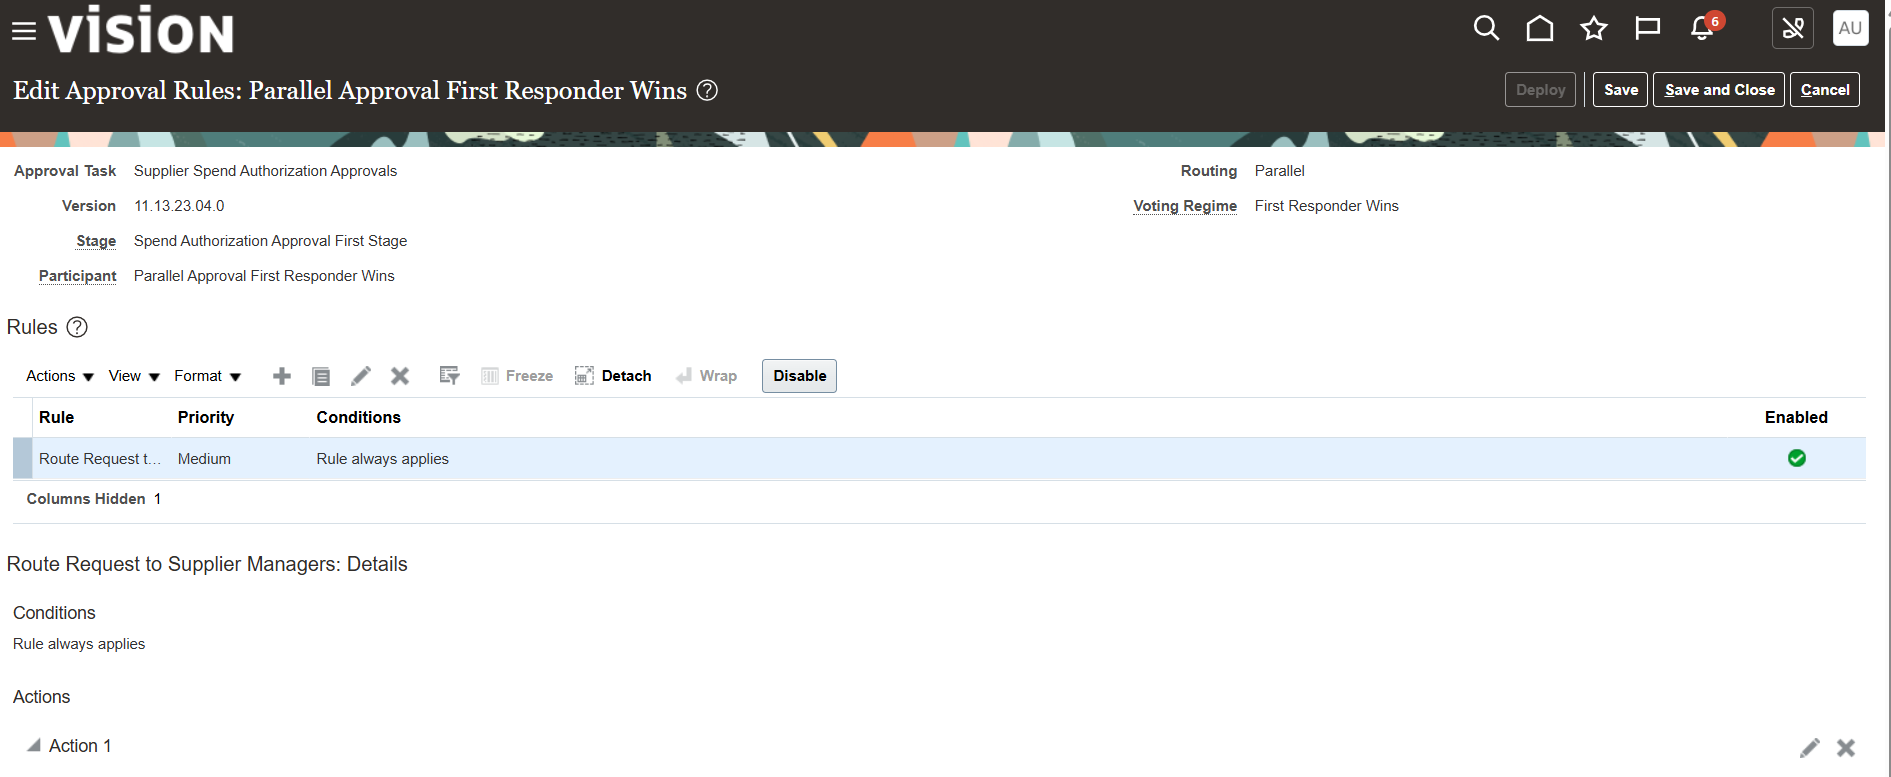
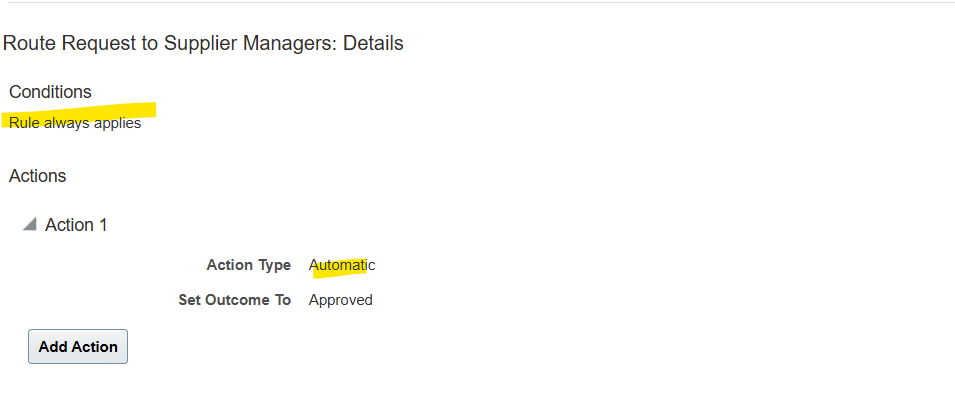
Only one rules without conditions
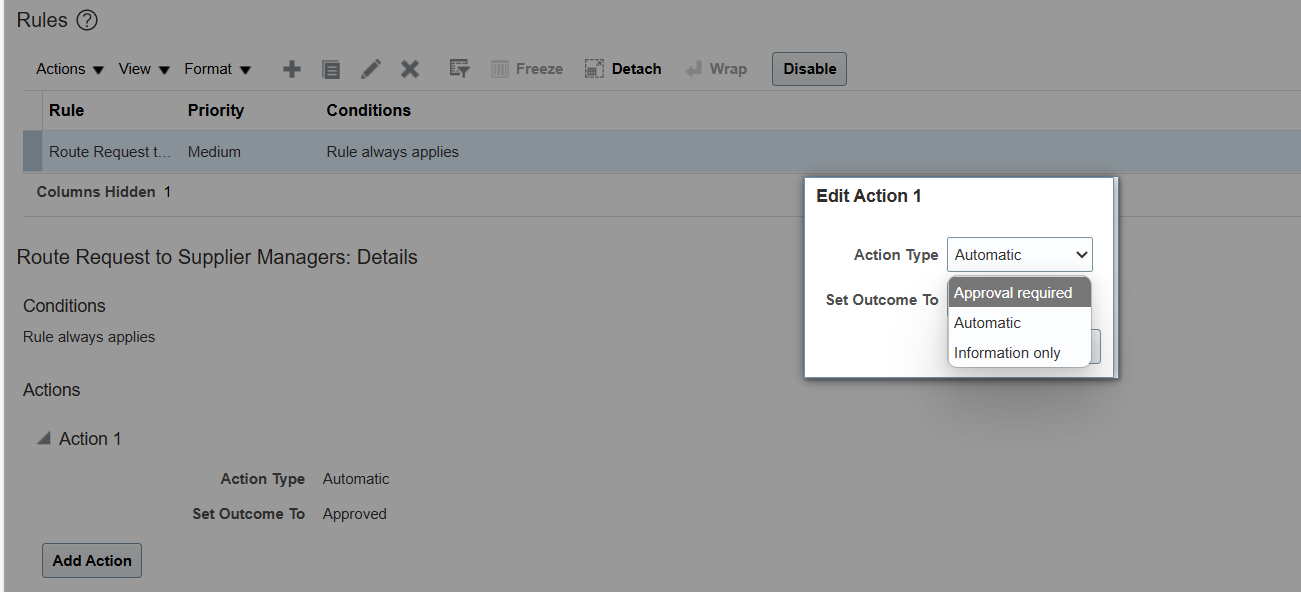
To update rule select Action type to “Approval Required”
Create New Supplier
Select Suppliers from Procurement work area.
Create Supplier Address
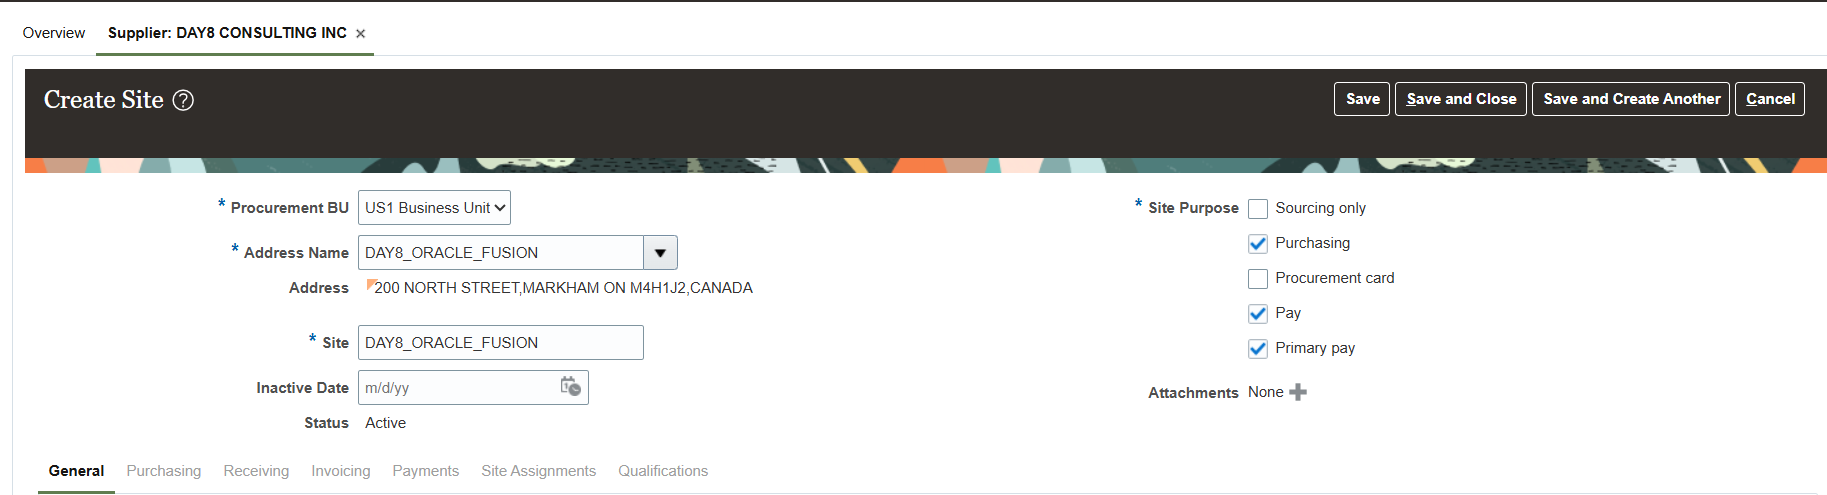
Create two address for same supplier

Create Supplier Sites
Select Supplier Address for Sites
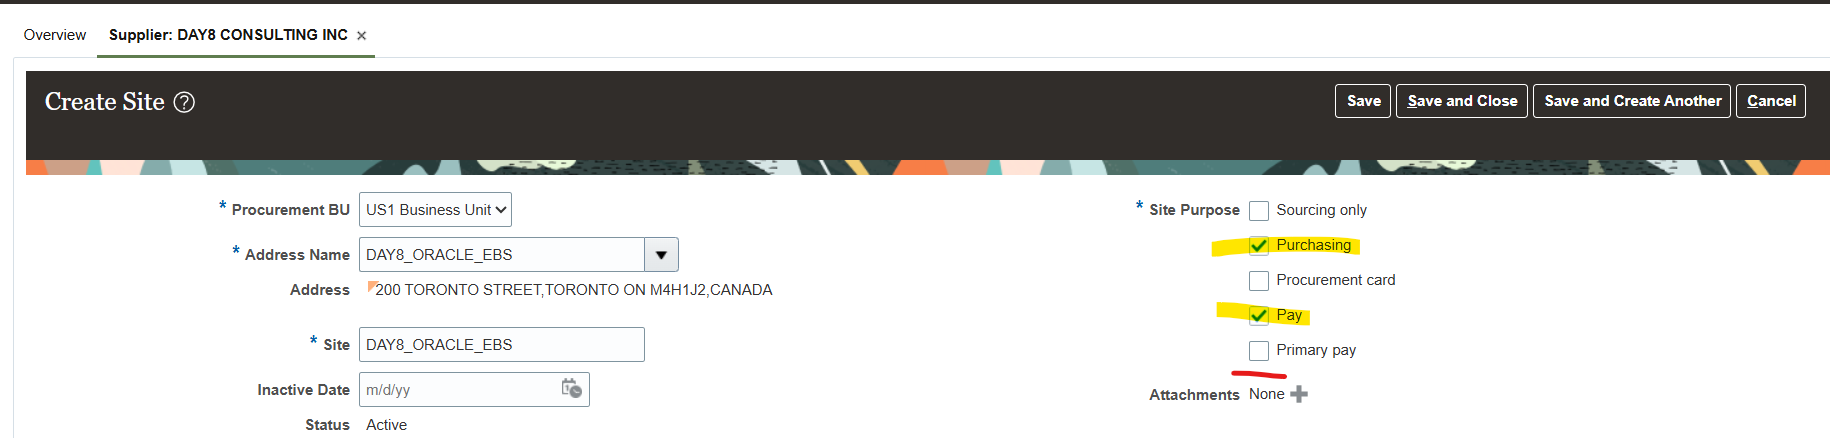
In case there are multiple supplier sites and one sites require to be Primary, select Primary Pay “Check box”
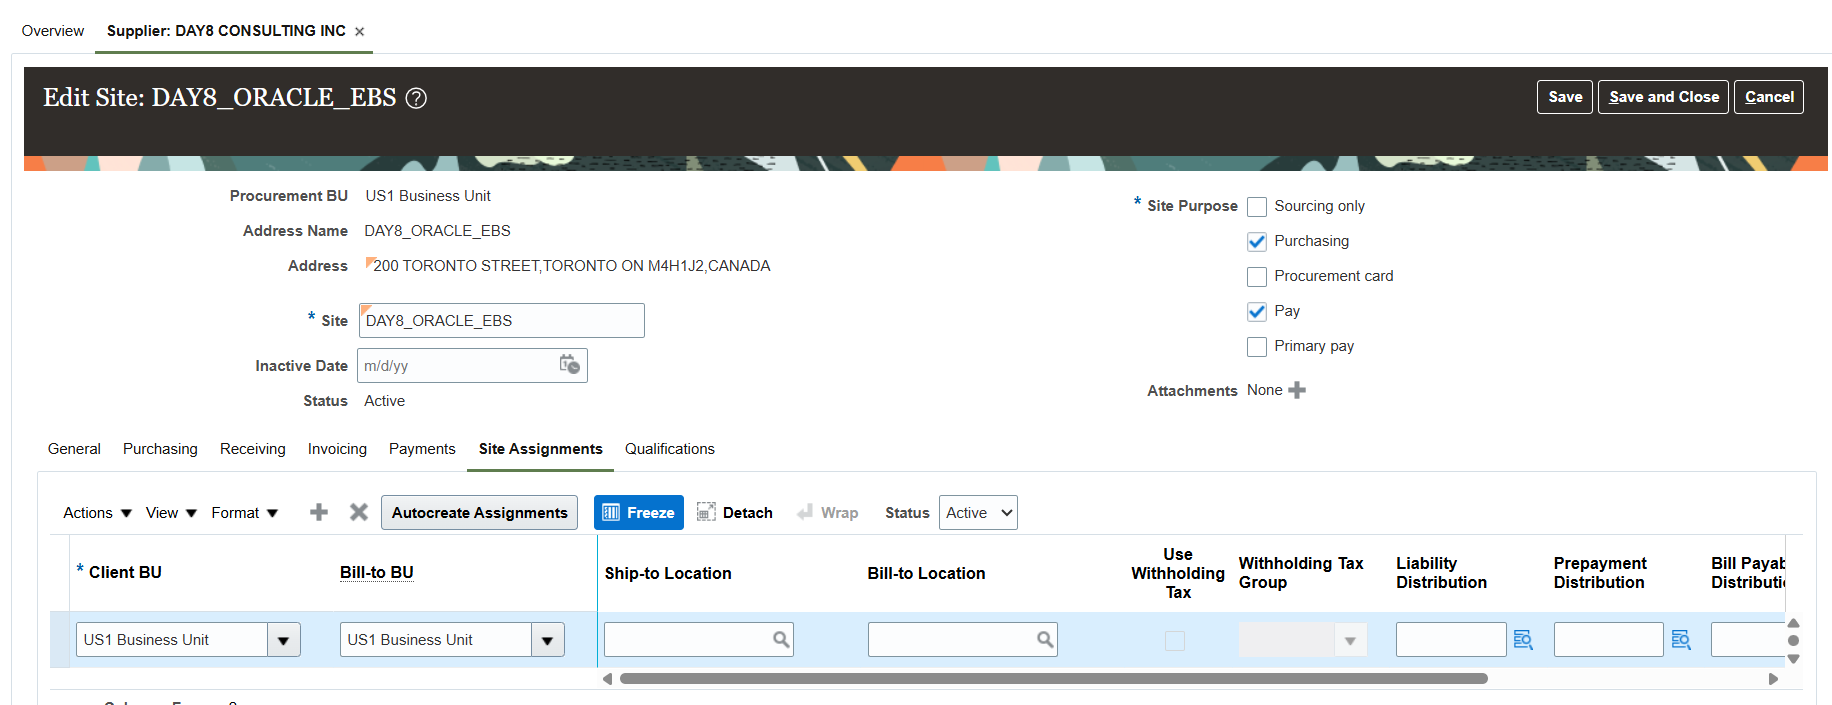
Site Assignments to Business Unit
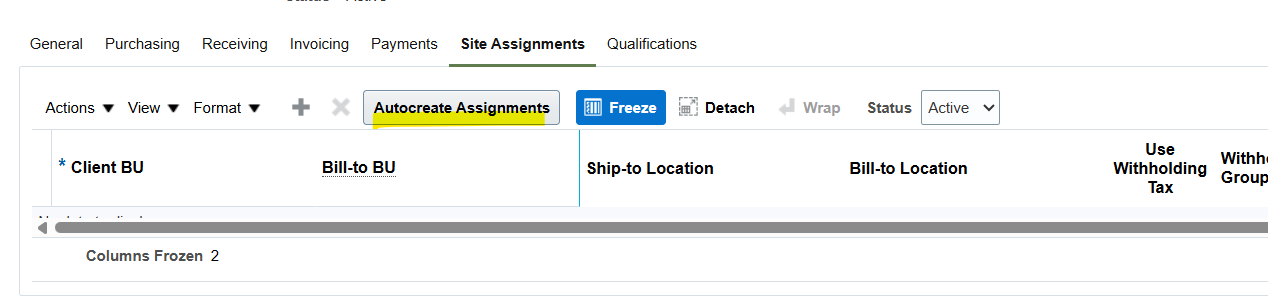
Two options available to assign business unit to supplier sites
- Autocreate Assignments 🡪 System assign business unit as per user access
- Manually “+” assign business unit to supplier Site
Option 1: Auto Create Assignment use system setup and select “Autocreate Assignments”
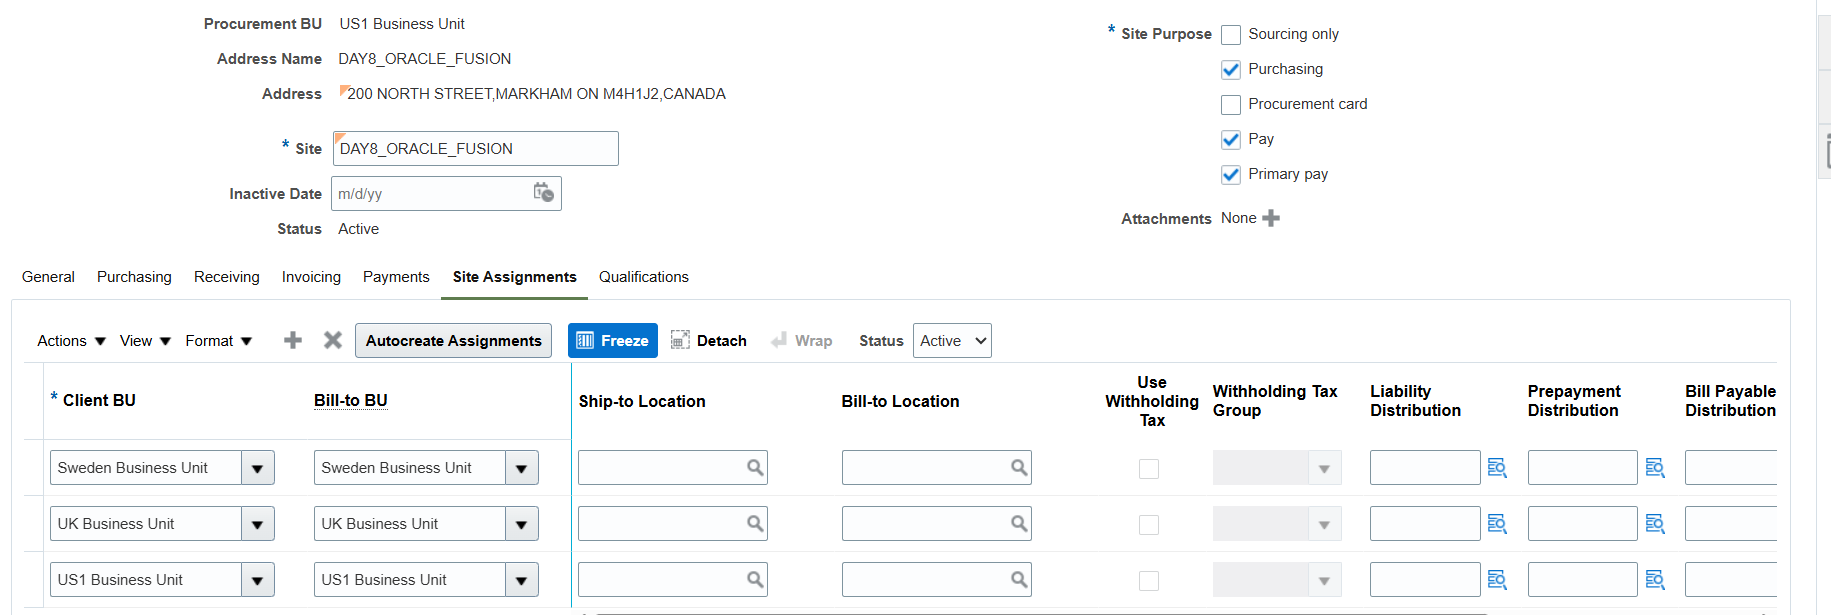
Option 2: Select Business Unit Manually “+”
Add Contacts Information

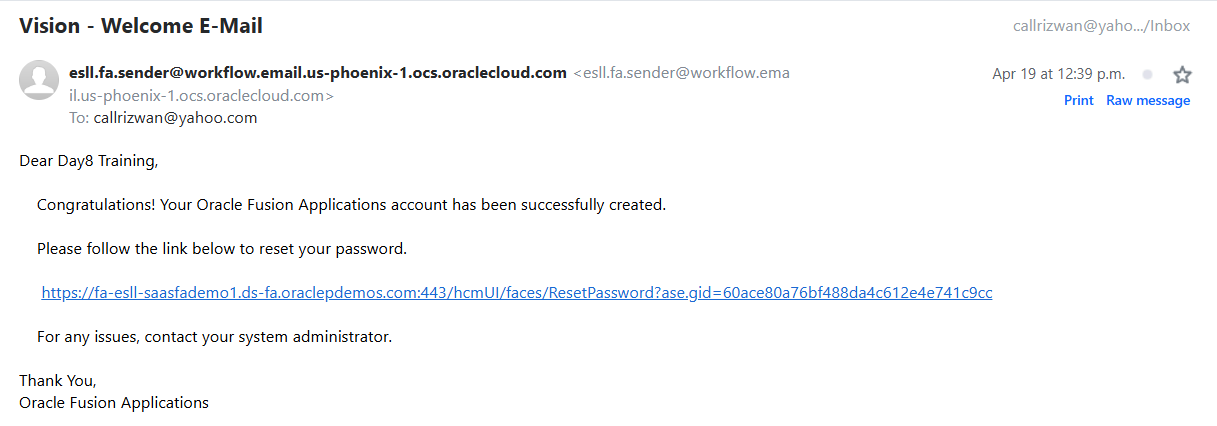
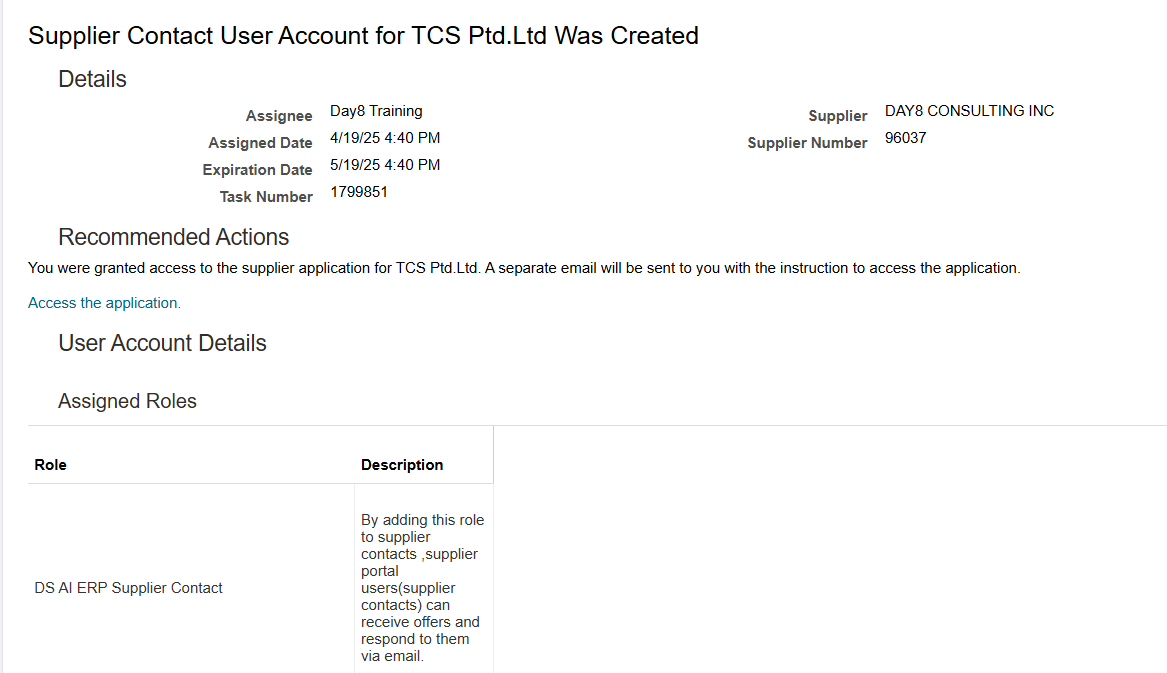
Note: If you want to create user account for supplier (supplier Portal) enable “Create User Account”

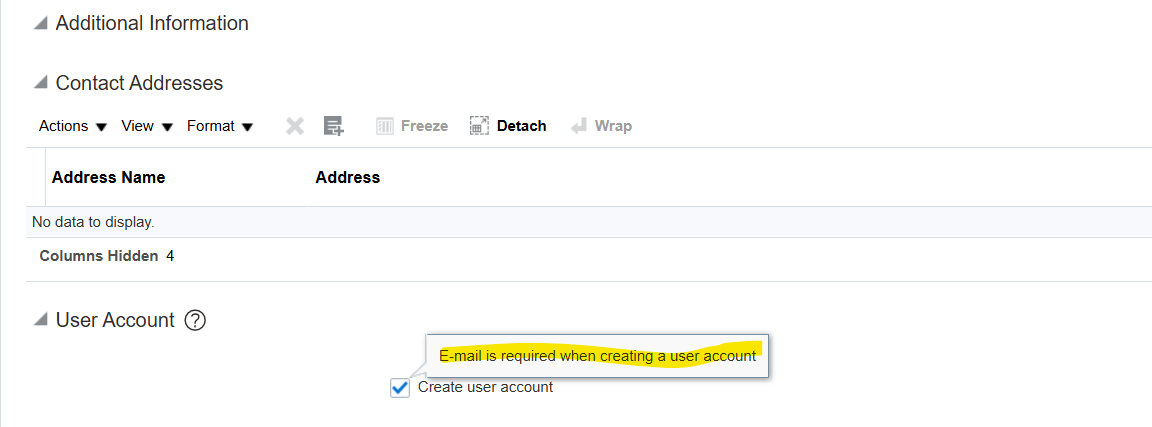
Once save system will send email to supplier to reset password
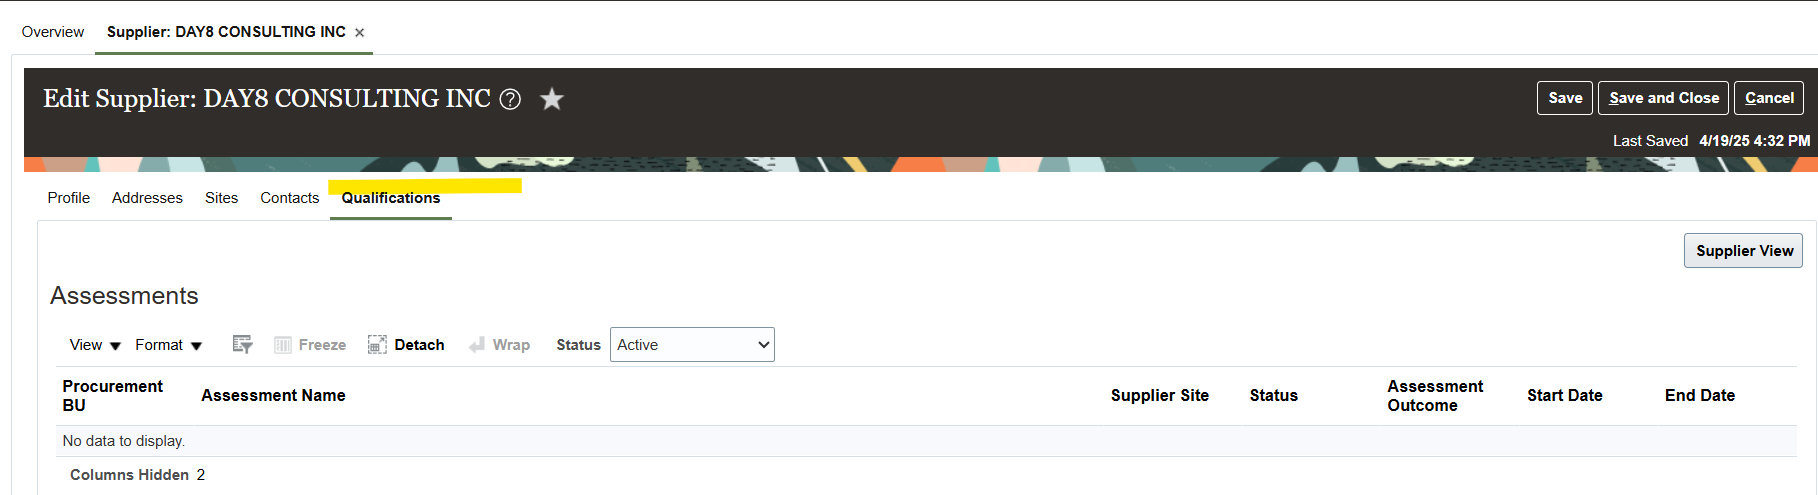
Add Supplier Qualifications (require in Sourcing Module not in Payables)
Payment Terms
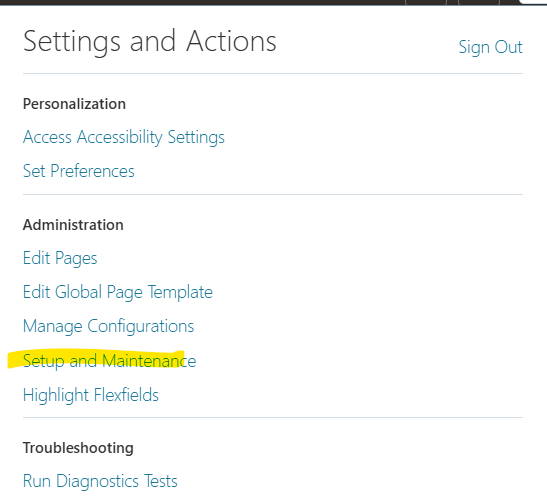
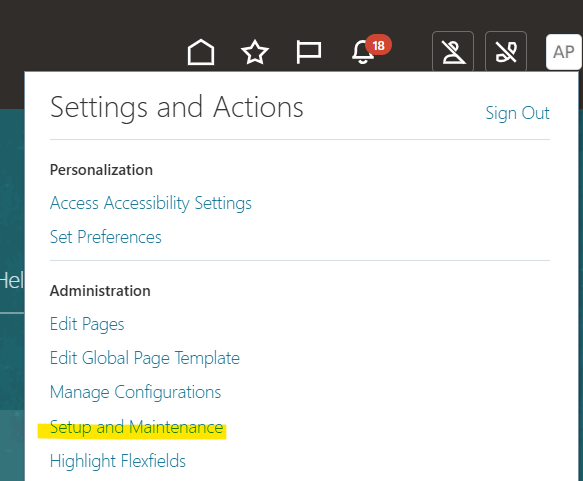
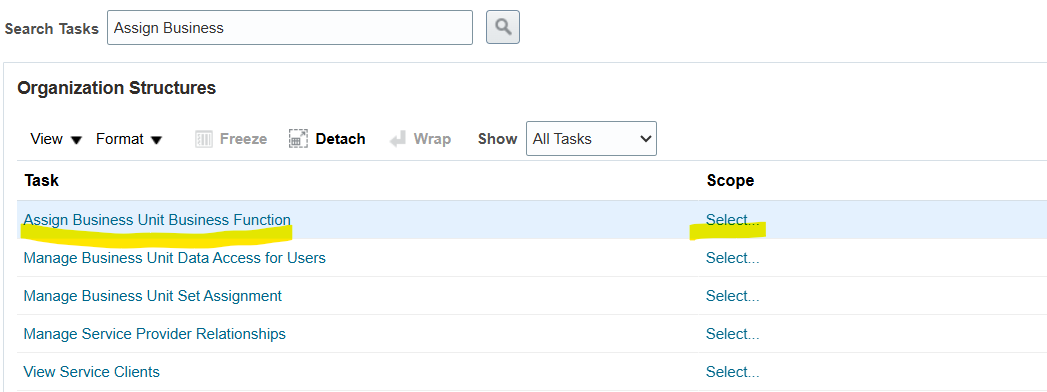
Select “Setup and Maintenance” from FSM (Functional Setup Manager)
Select “Assign Business Unit Business Function” and select Scope “Business Unit”
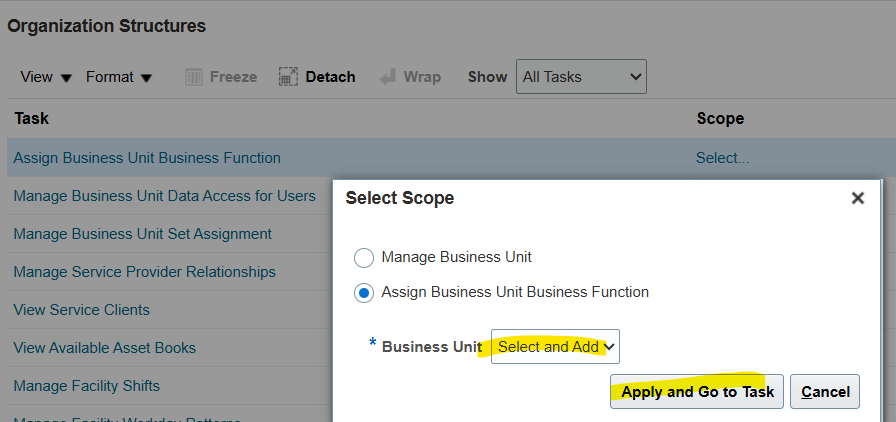
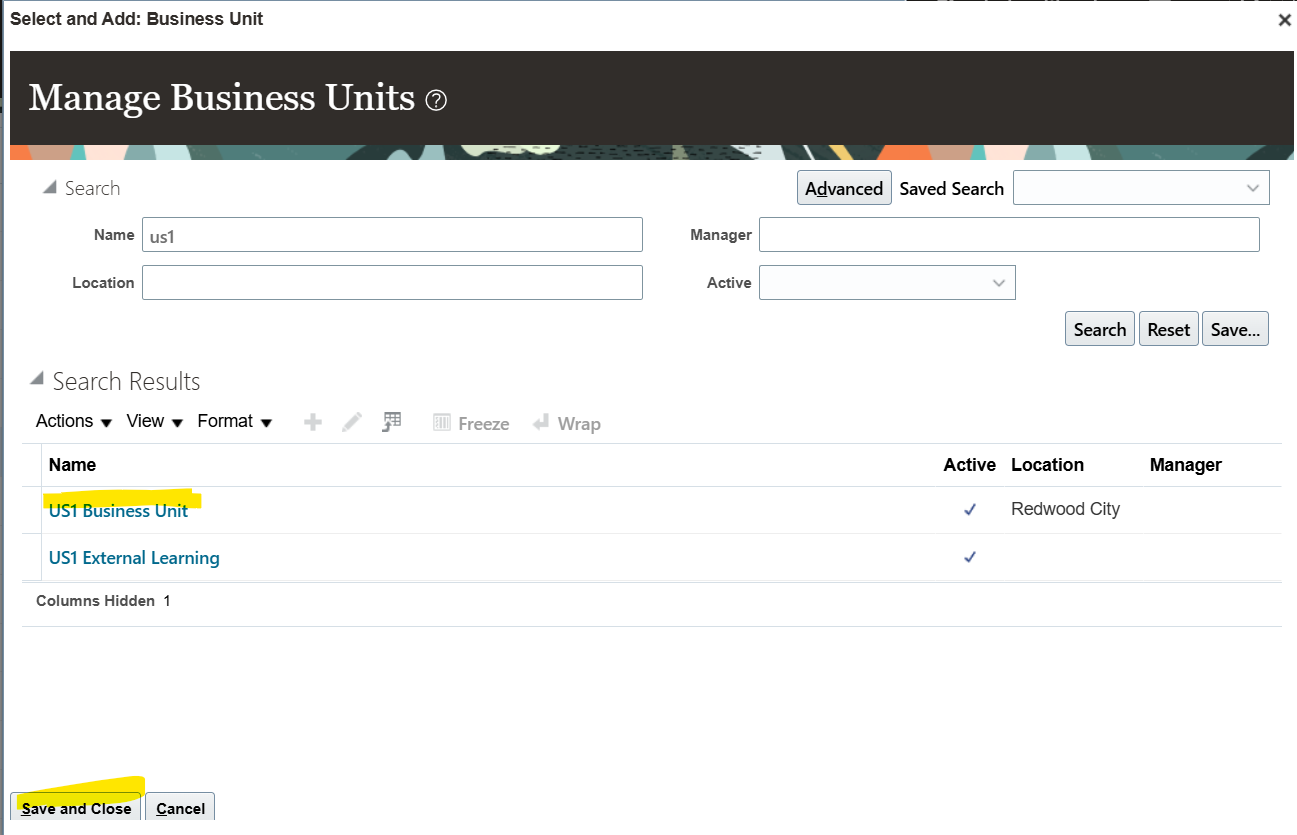
Select and Add Business Unit
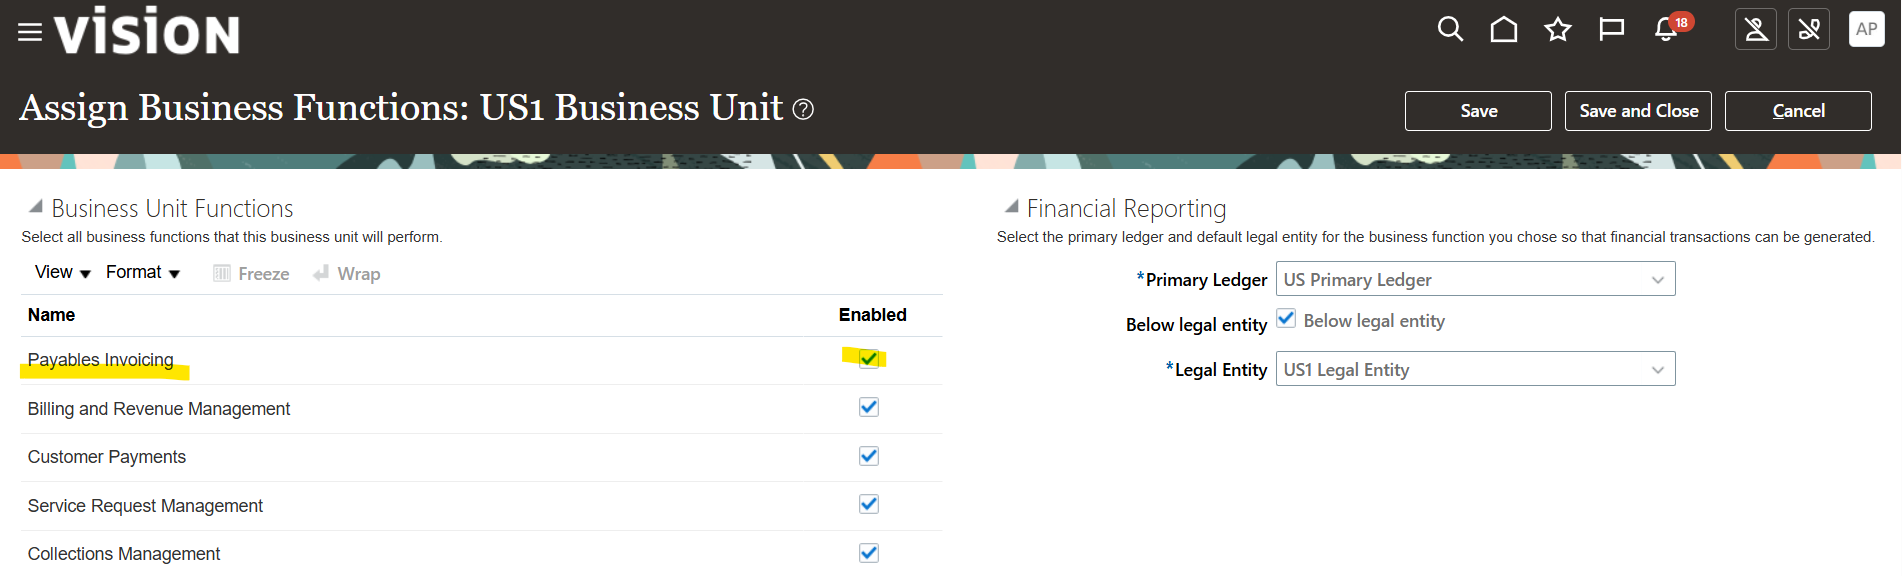
Make sure “Payables Invoicing” Option is enabled
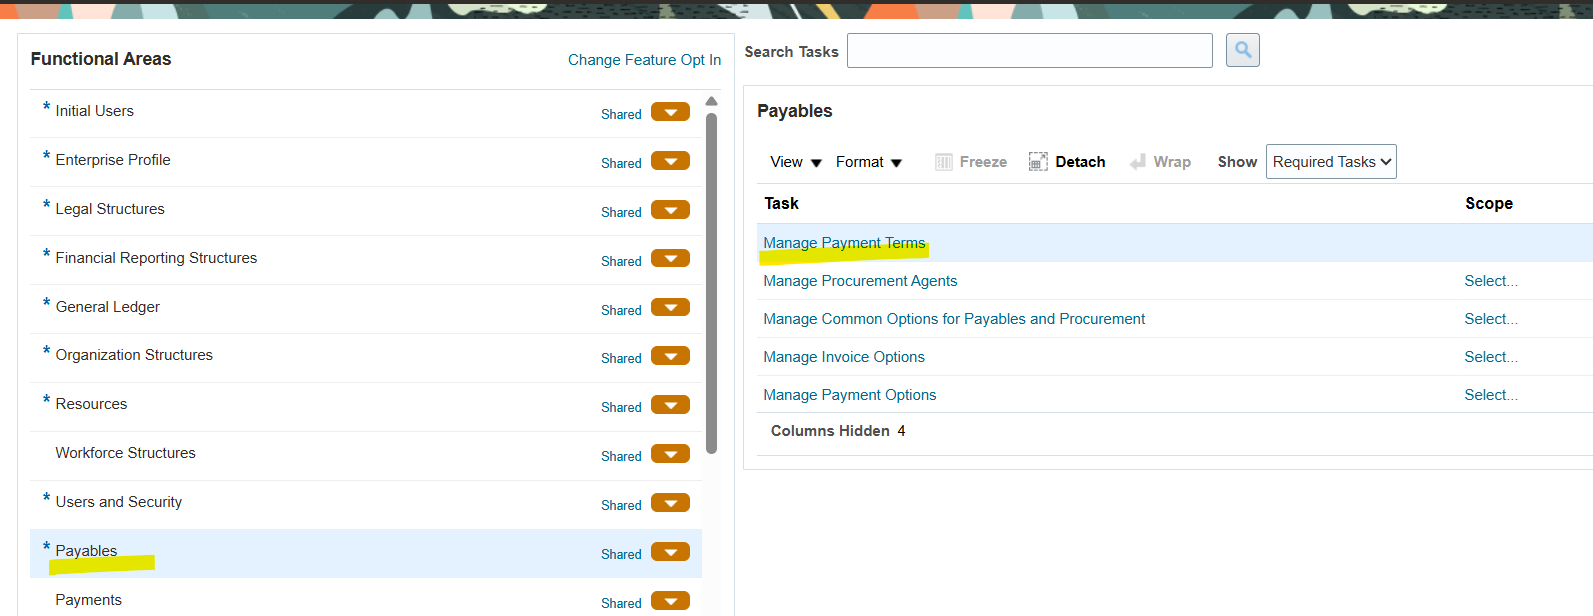
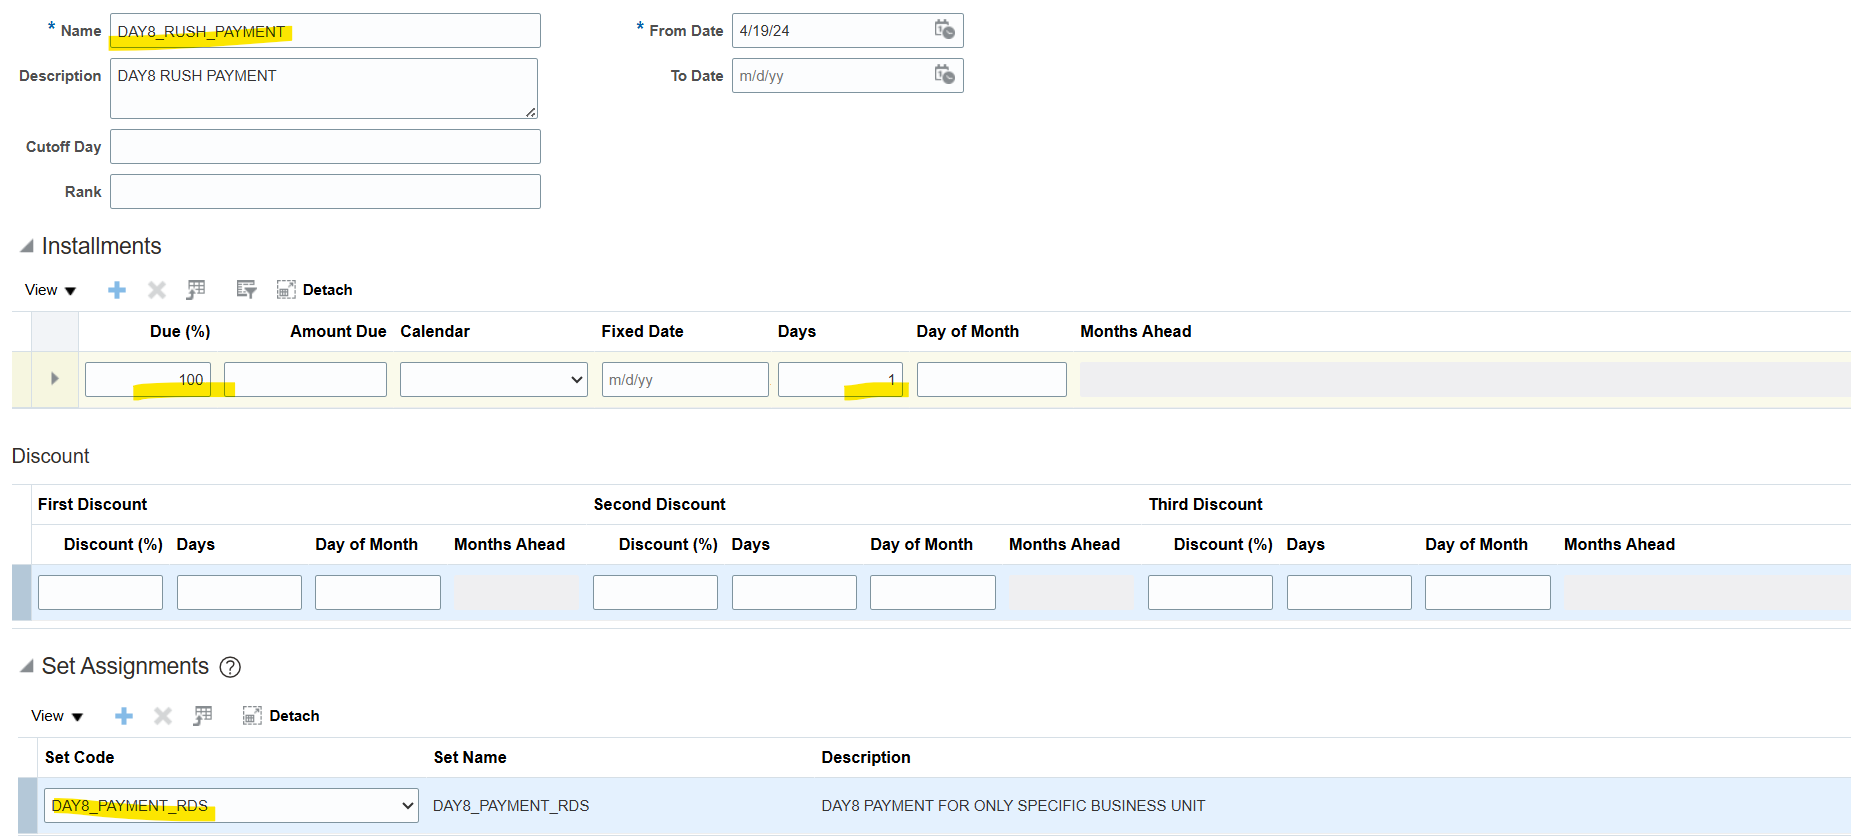
Select “+” to create new payment terms
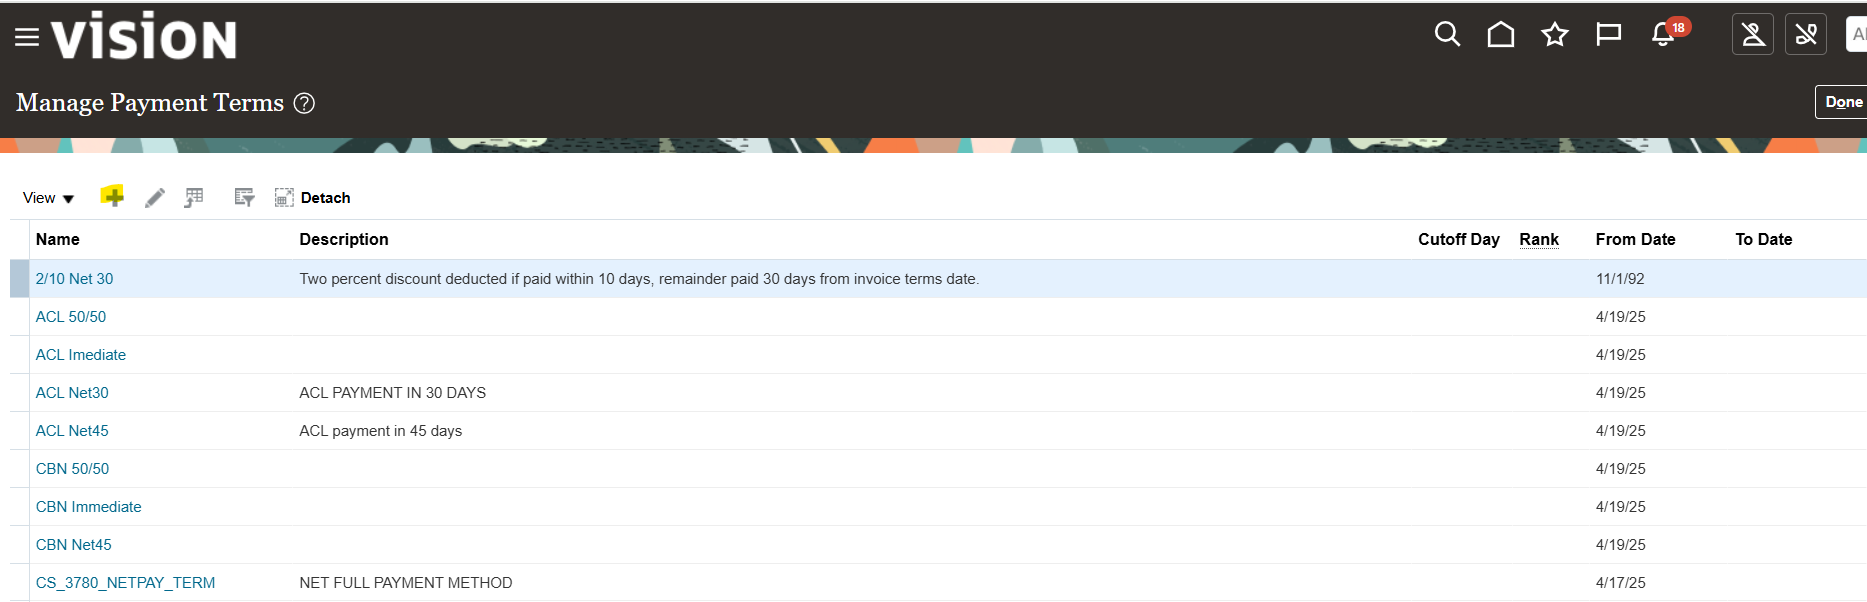

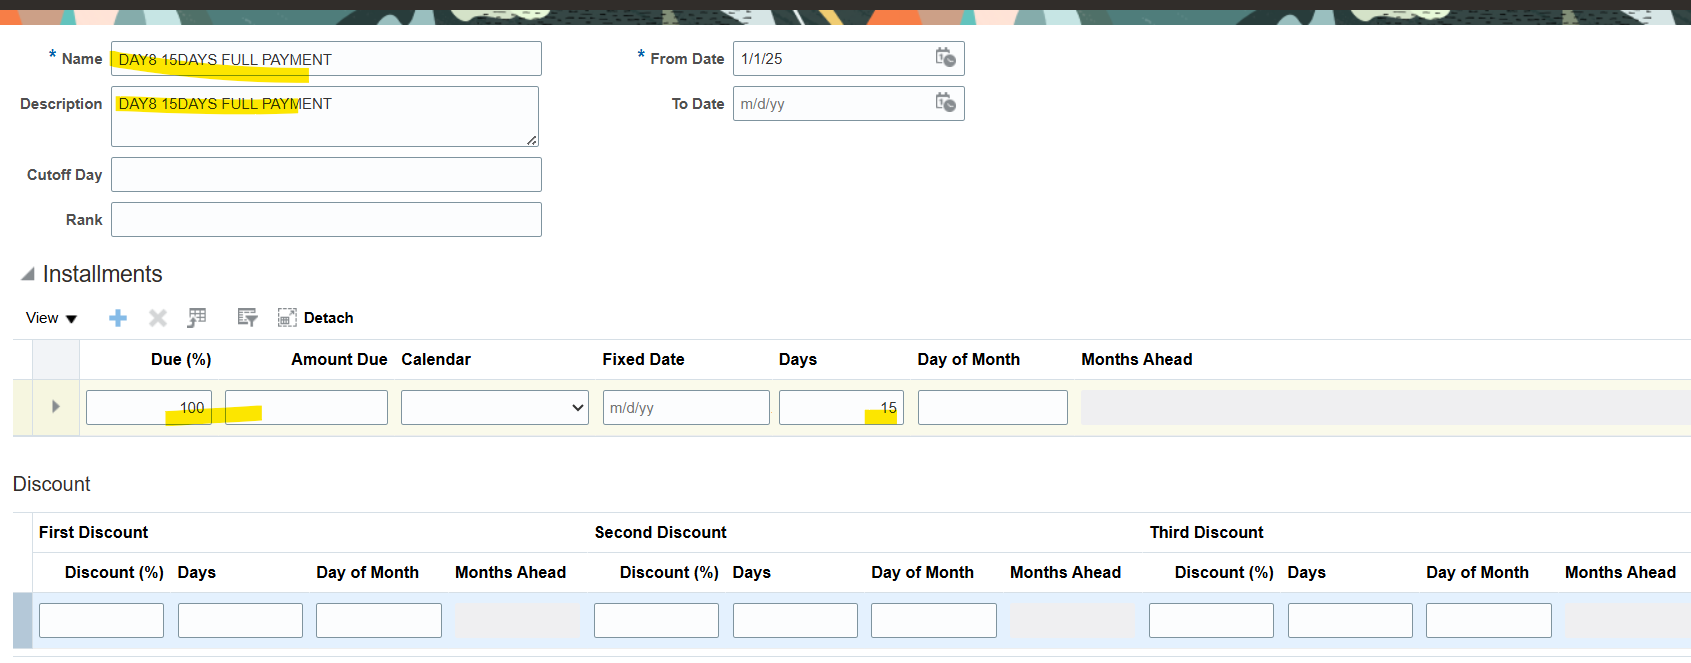
100% PAYMENT IN 15 DAYS

Note: Make sure to assign payment terms to Reference Data Set
Once you assign to Common Reference Data Set by default it will assign to all Business Unit however in case business requirement is to assign new payment terms to only specific business unit first define new “Reference Dataset” and assign payment terms to new RDS.
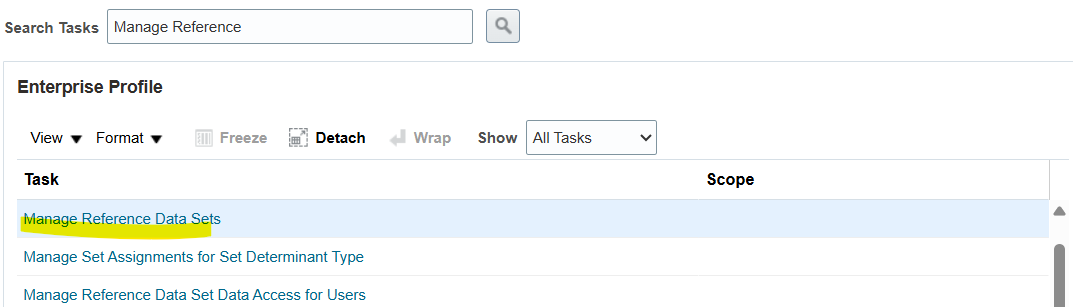
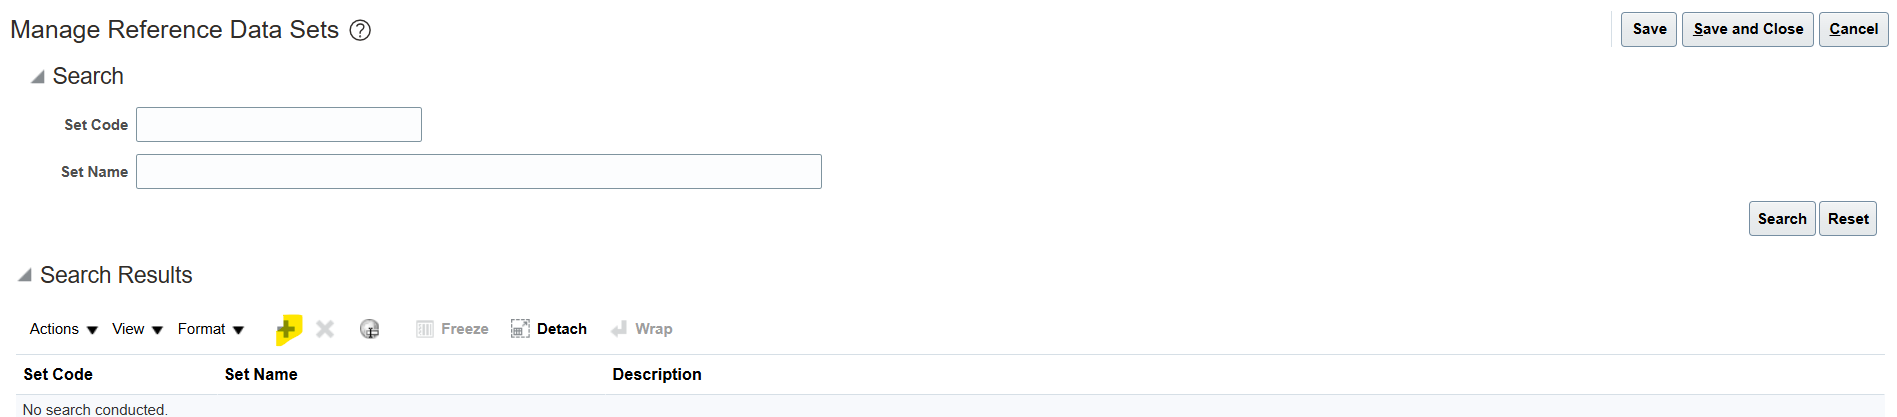
Create Reference Data Sets
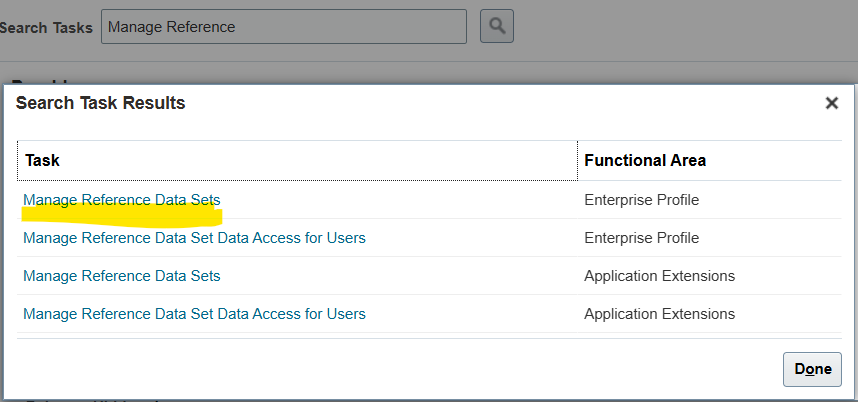
Select “Manage Reference Data Sets”

Create New Payment Terms and assign to new RDS
Now assign Reference Data Sets to Business Unit
Select Task “Manage Business Unit Set Assignment”
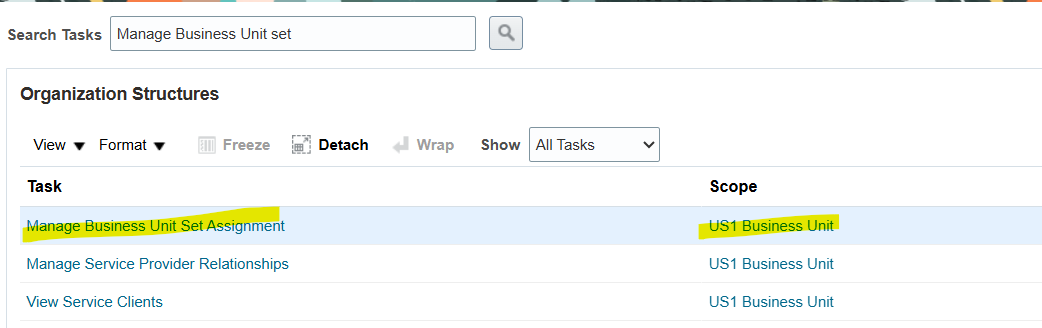
By default, ‘COMMON” Reference Data Set assign to Business Unit
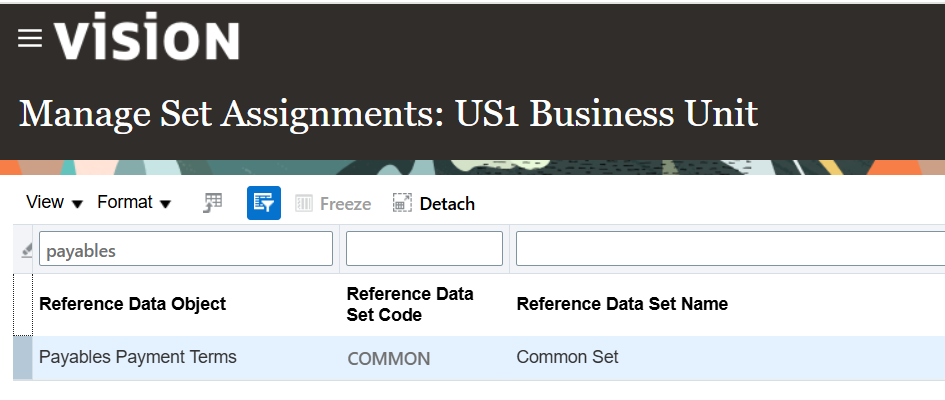
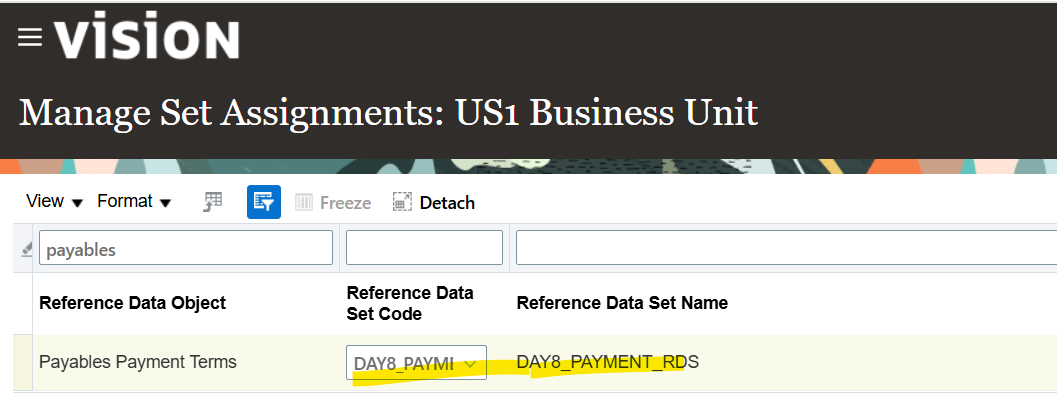
Update to “DAY8_PAYMENT_RDS
