Table of Contents
Define an Accounting Key Flexfield Structure 8
Verify Functional Currencies are enabled 32
Complete Reporting Currencies 43
Create a Responsibility for the Controller 46
View System-Generated Data Access Sets 46
Create a New Responsibility 46
Assign Data Access Set to Responsibility 47
Assign new responsibility to user 49
Practice: View Account Combinations created with Dynamic Insertion 51
Assign the Rule to a Responsibility 56
Define Cross Validation Rules 57
Define the Balance Sheet Rule 60
Define and Test Shorthand Aliases 61
Query the Flexfield Structure 63
Disable Account Aliases for Your User 71
Open the First Accounting Period (Required) 73
Open the Account Hierarchy Manager 81
Define Sequencing – Setup Accounting Sequencing 82
Enter Journal and View Sequences 85
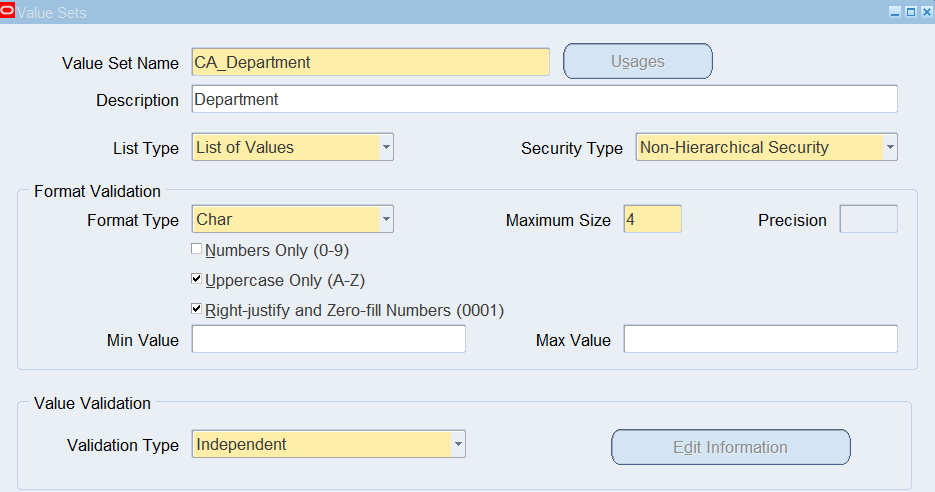
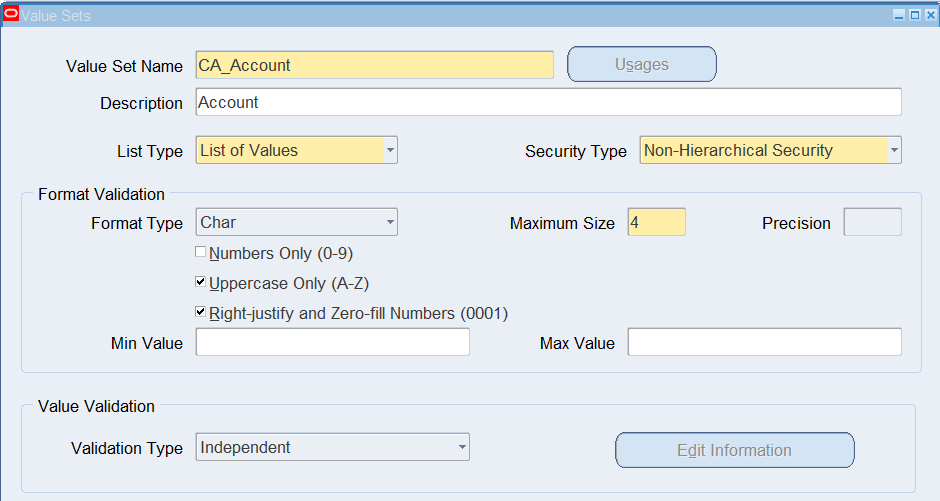
Create Value Sets
| Responsibility | General Ledger Super User |
| Navigation | (N) Setup 🡪 Financials 🡪 Flexfields 🡪 Validation 🡪 Sets |
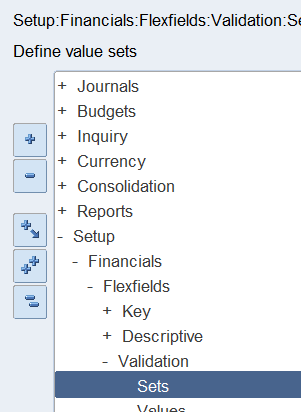
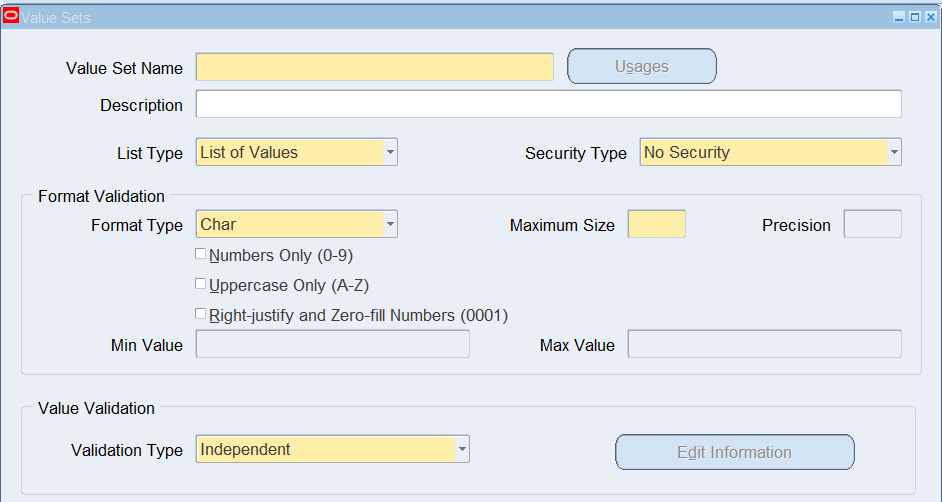
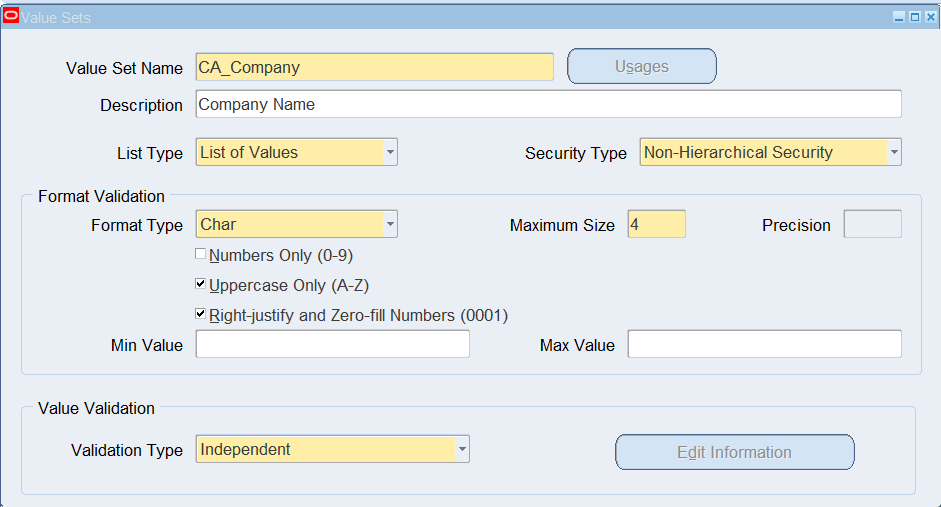
Define following Value Sets

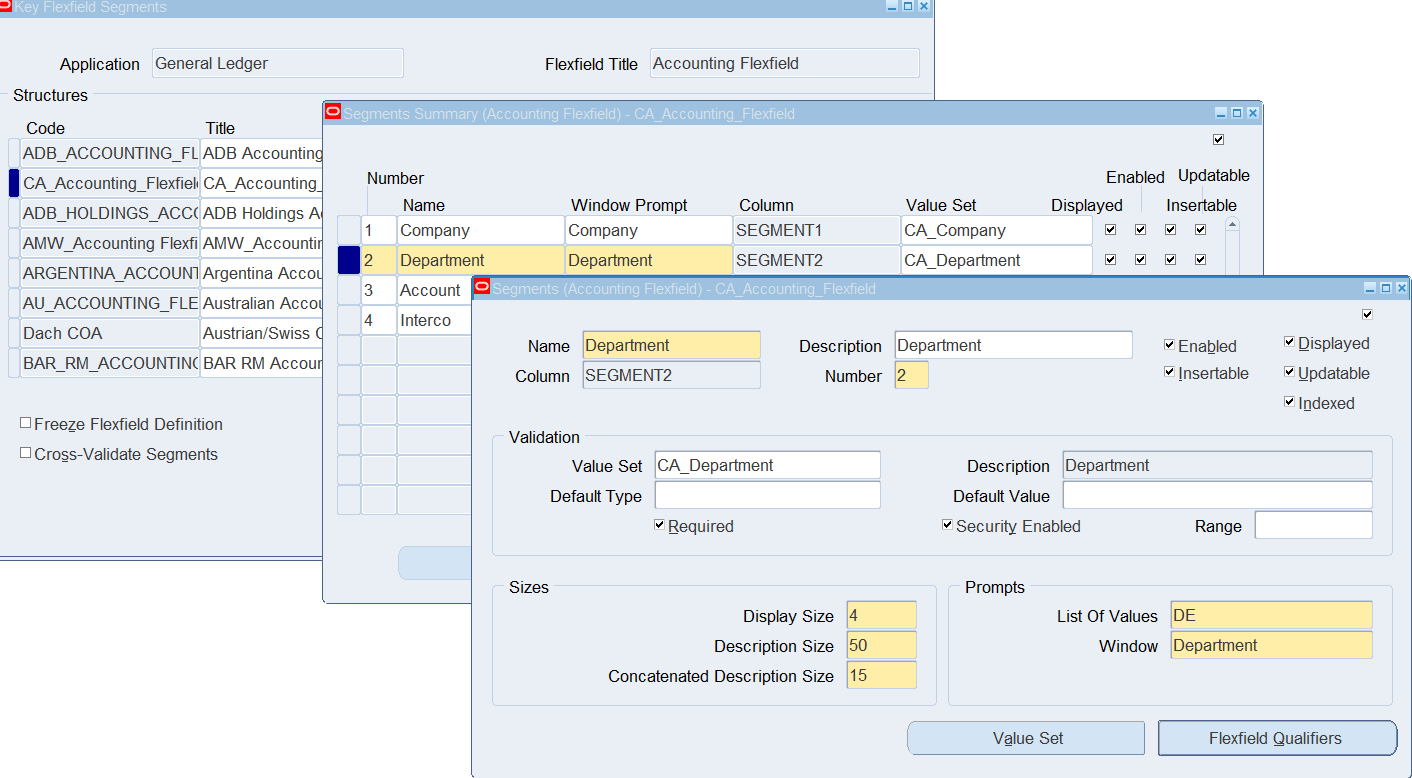
Define an Accounting Key Flexfield Structure
| Responsibility | General Ledger Super User |
| Navigation | (N) Setup 🡪 Financials 🡪 Flexfields 🡪 Key 🡪 Segments |

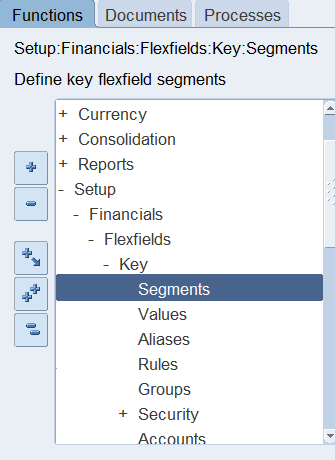
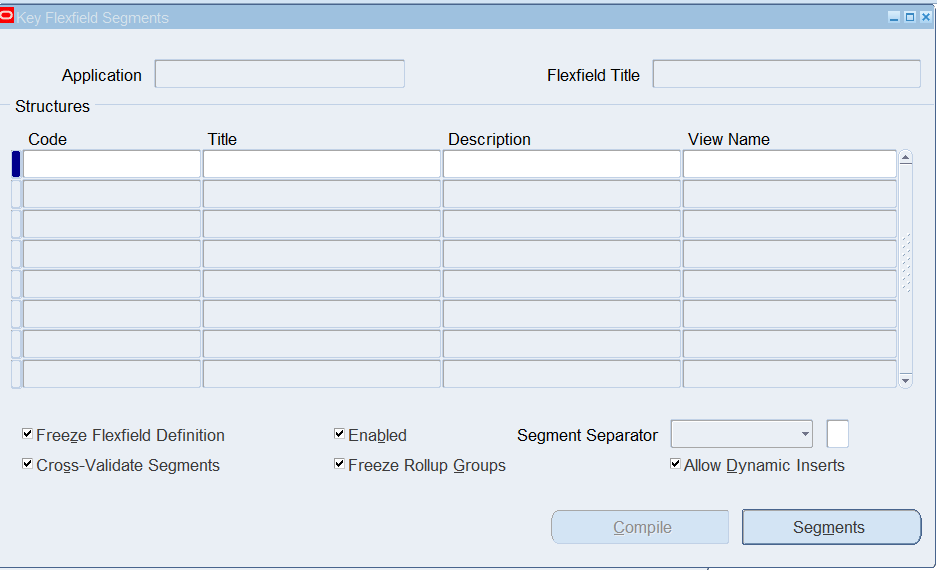
In the Application field, query General Ledger
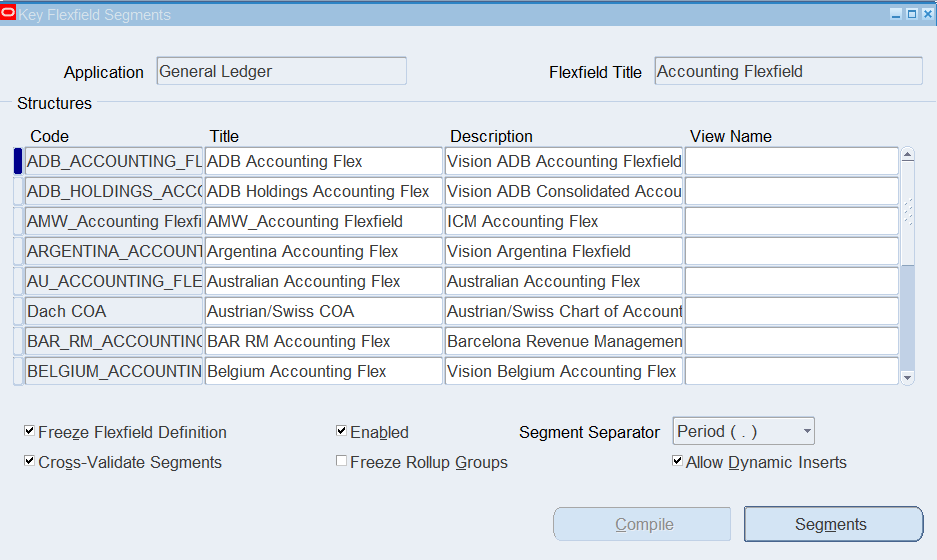
Ensure that the Flexfield Title is Accounting Flexfield
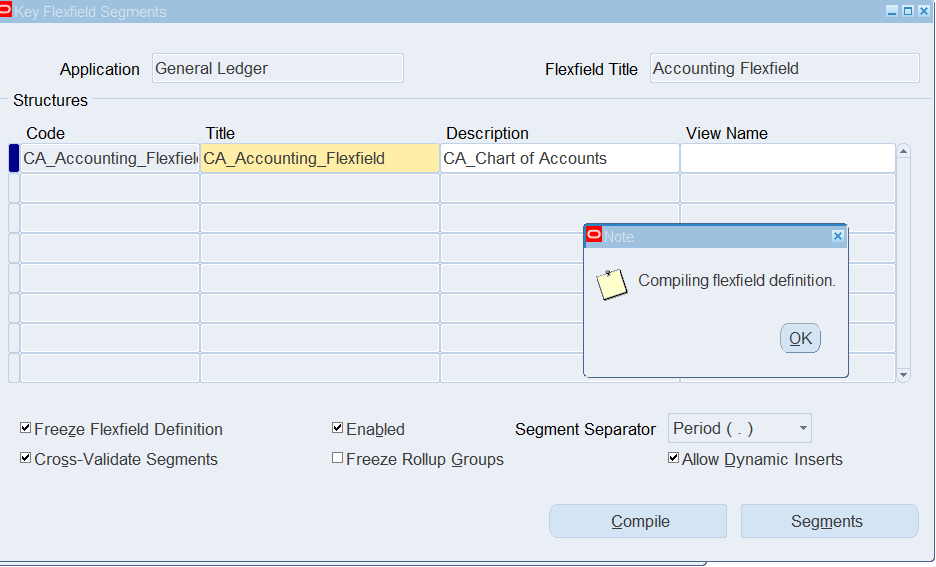
Create a New Accounting Key Flexfield Structure
Create a new Accounting Key Flexfield structure by selecting any of the existing structures and selecting (I) New.
Name the new structure in the Code column CA_Accounting_Flexfield
Note: If you do not select Cross Validate Segments, you will not be able to assign cross validation rules to your flexfield structure.
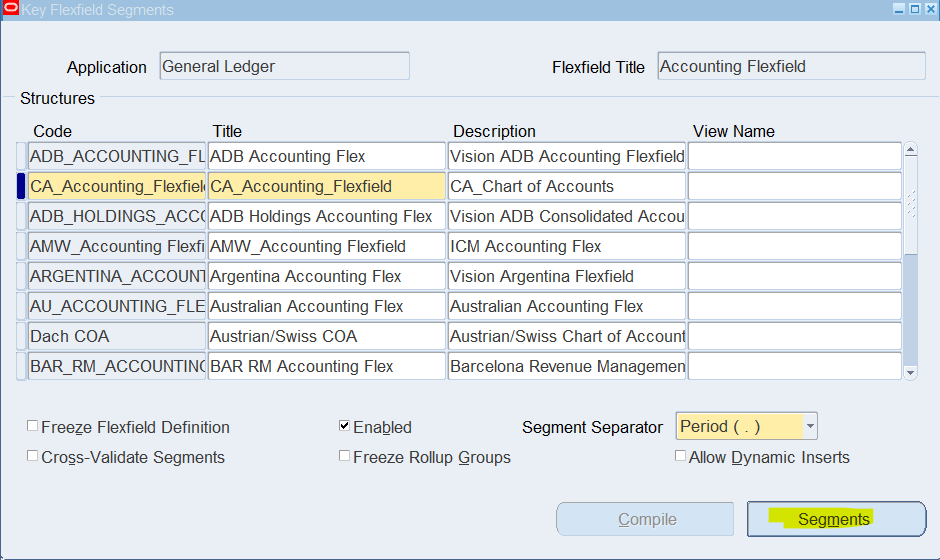
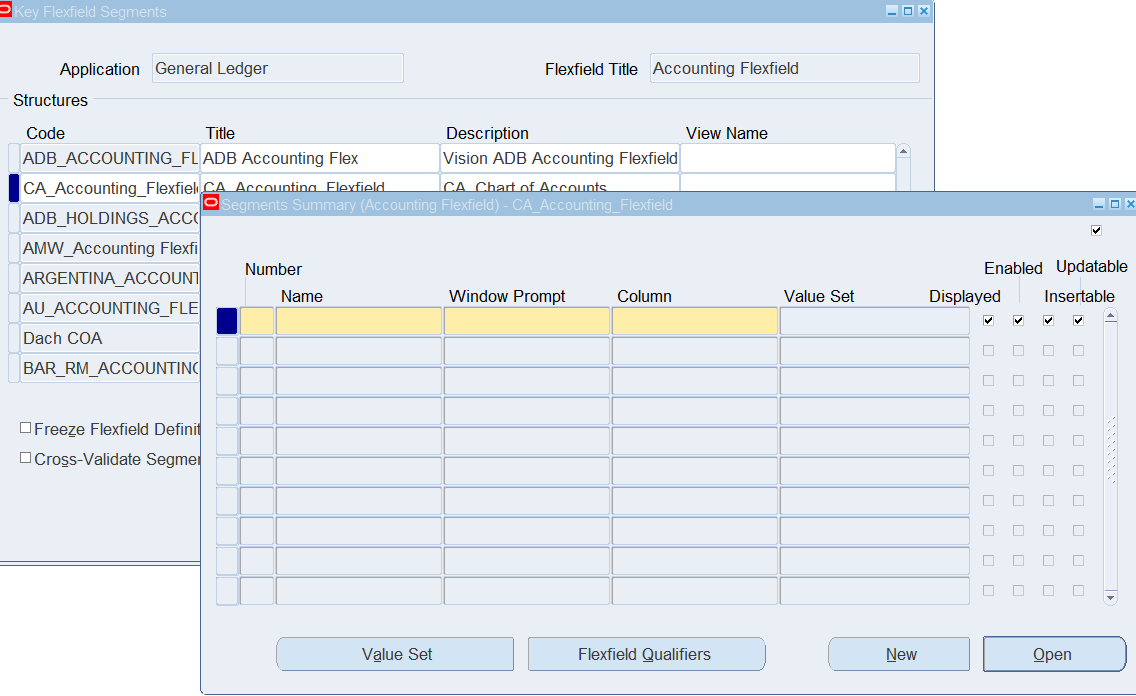
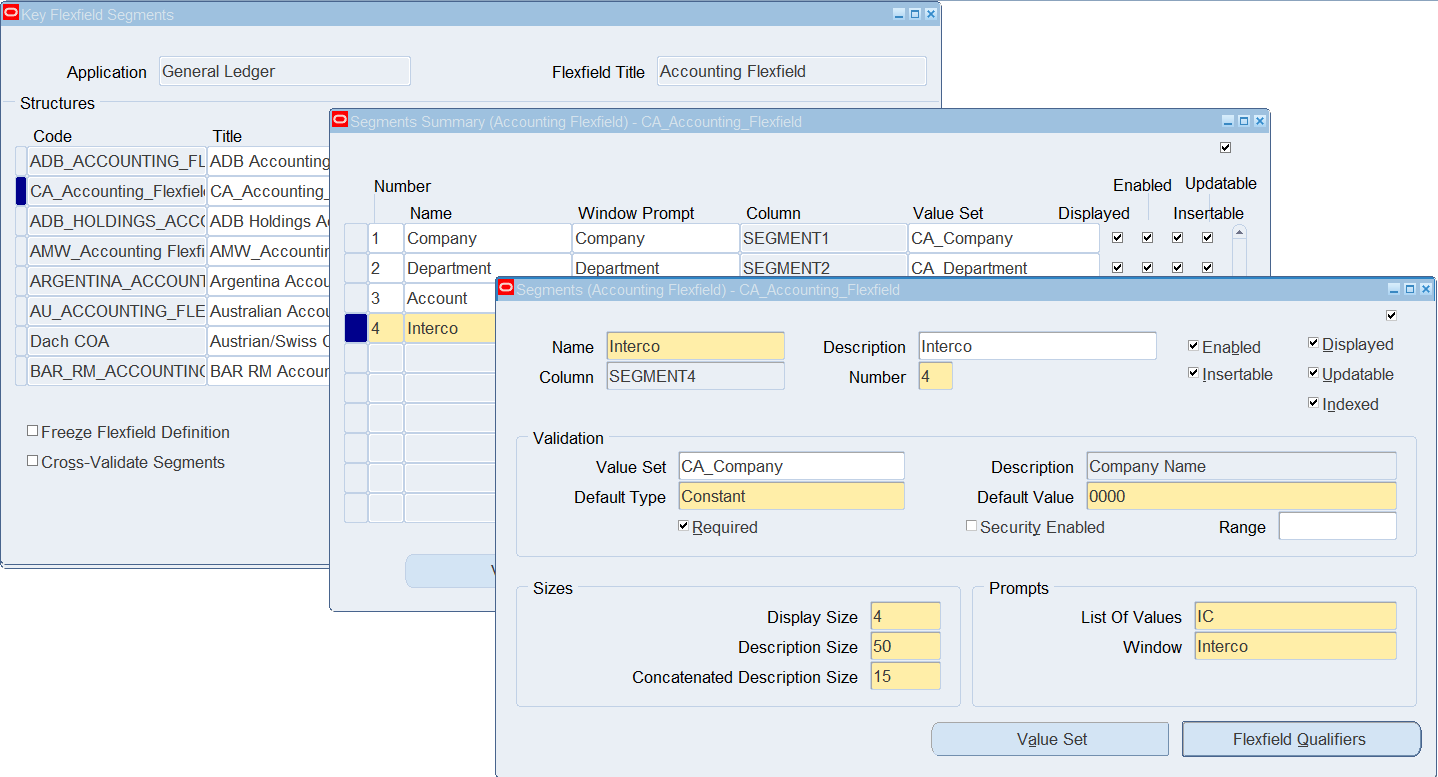
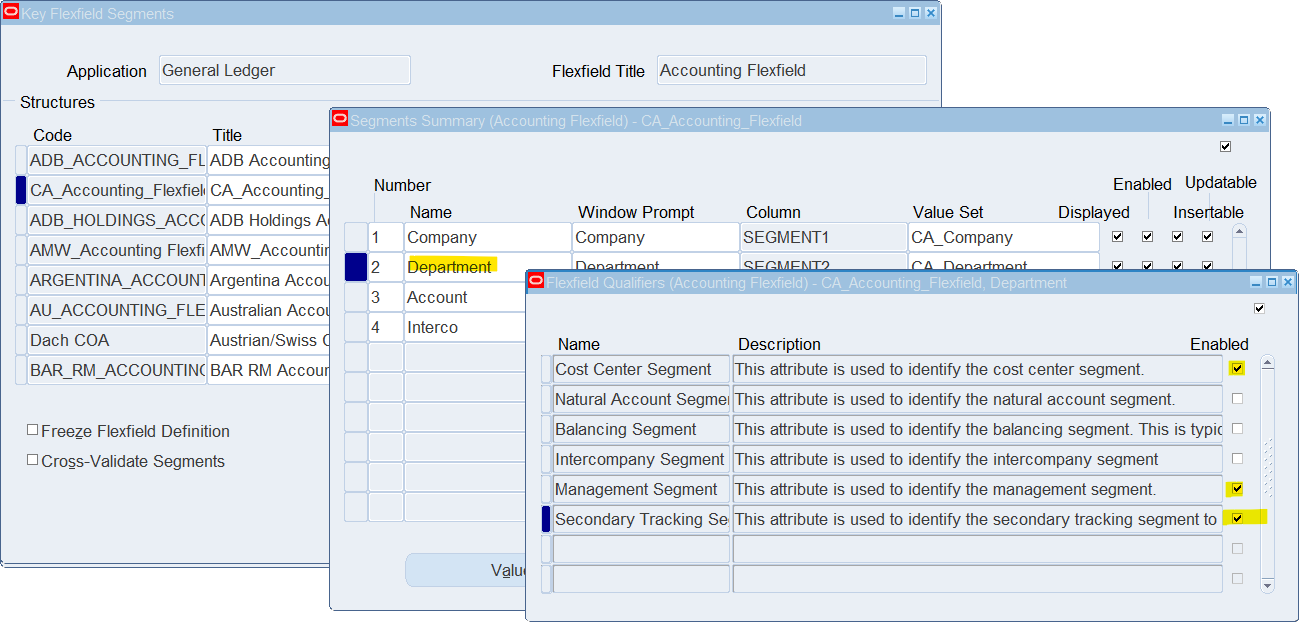
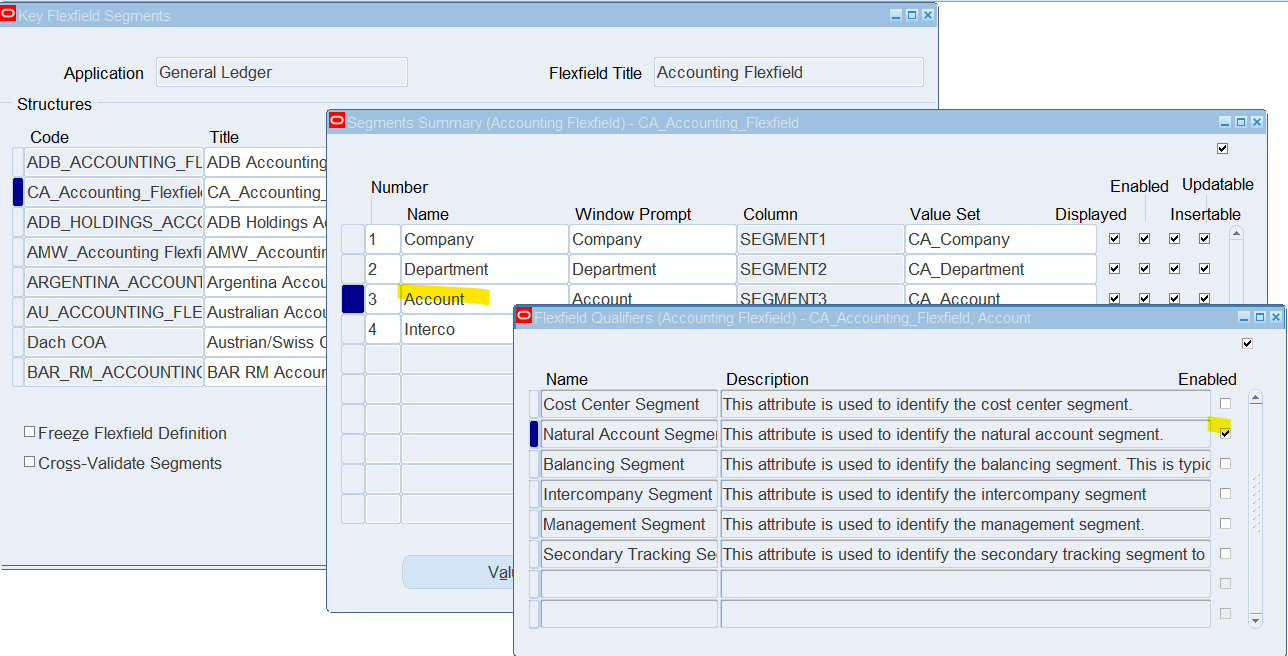
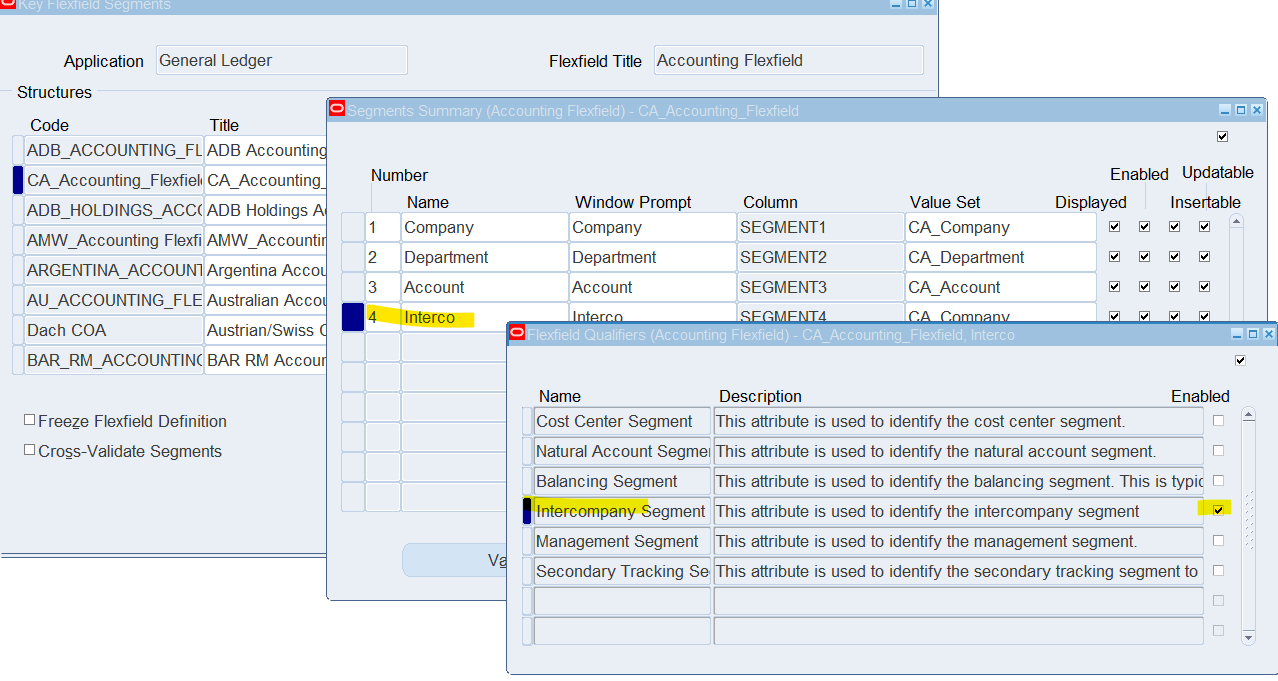
Select “Segments”
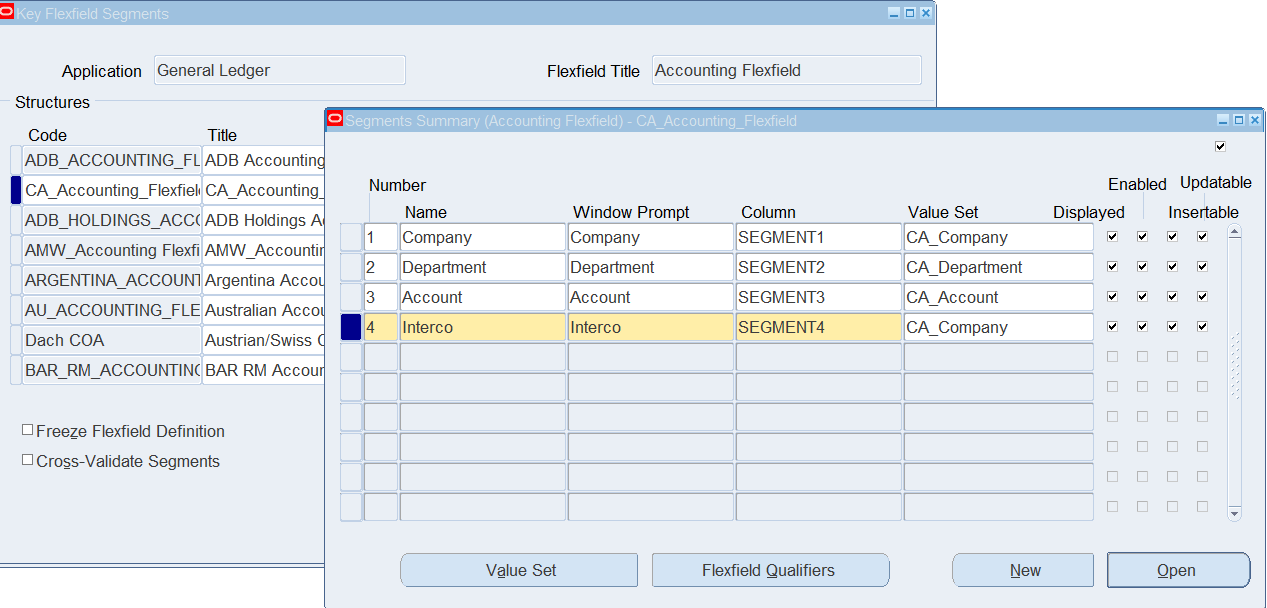
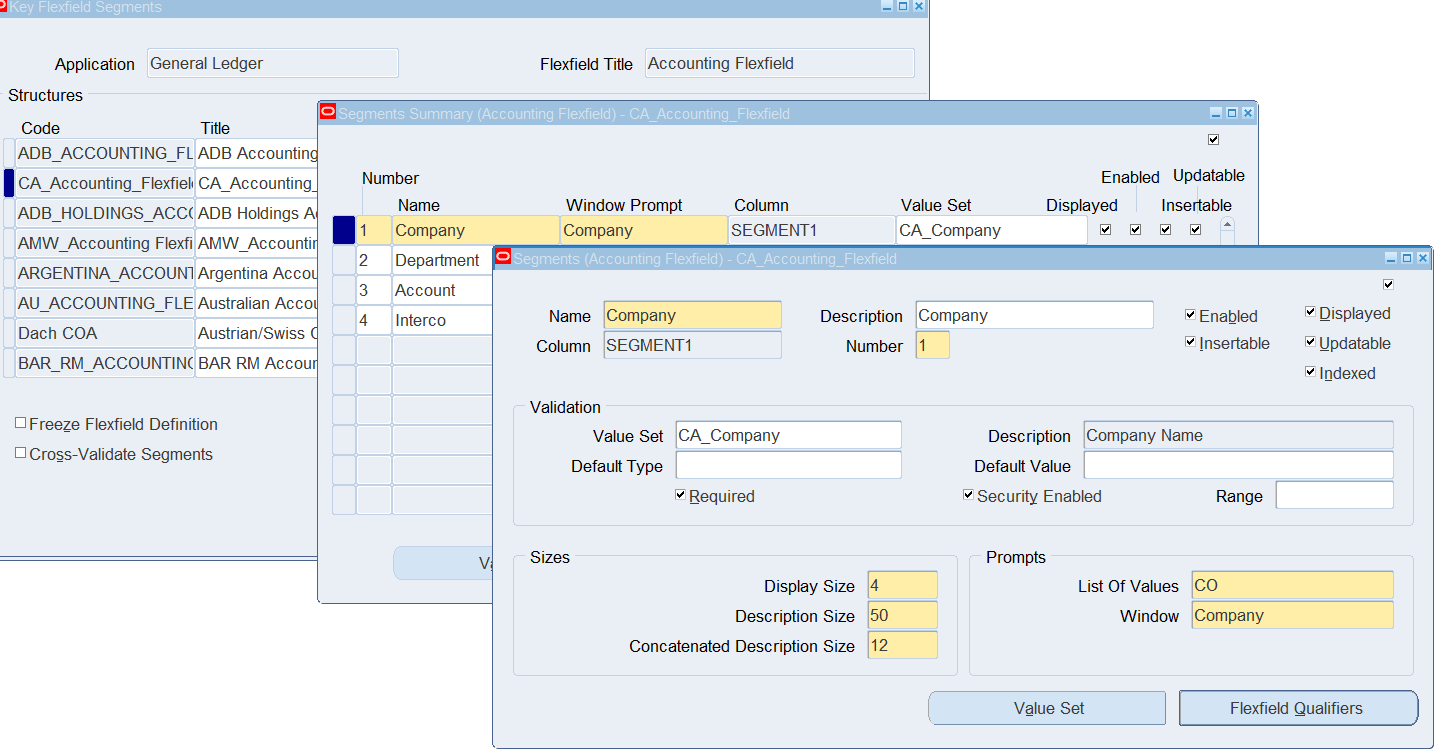

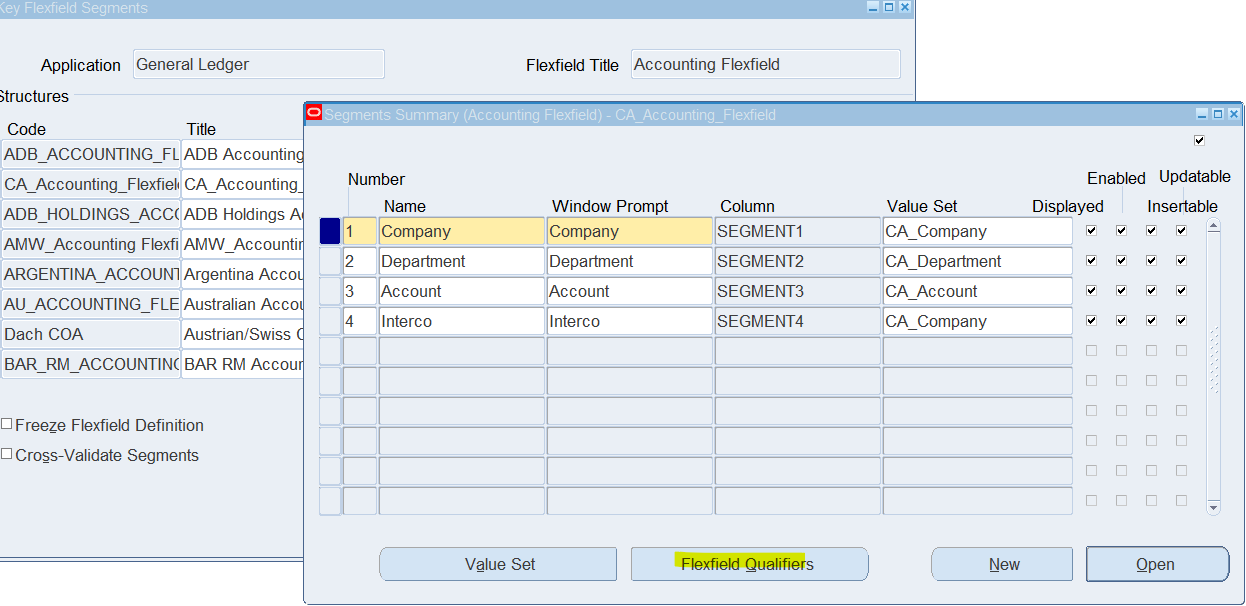
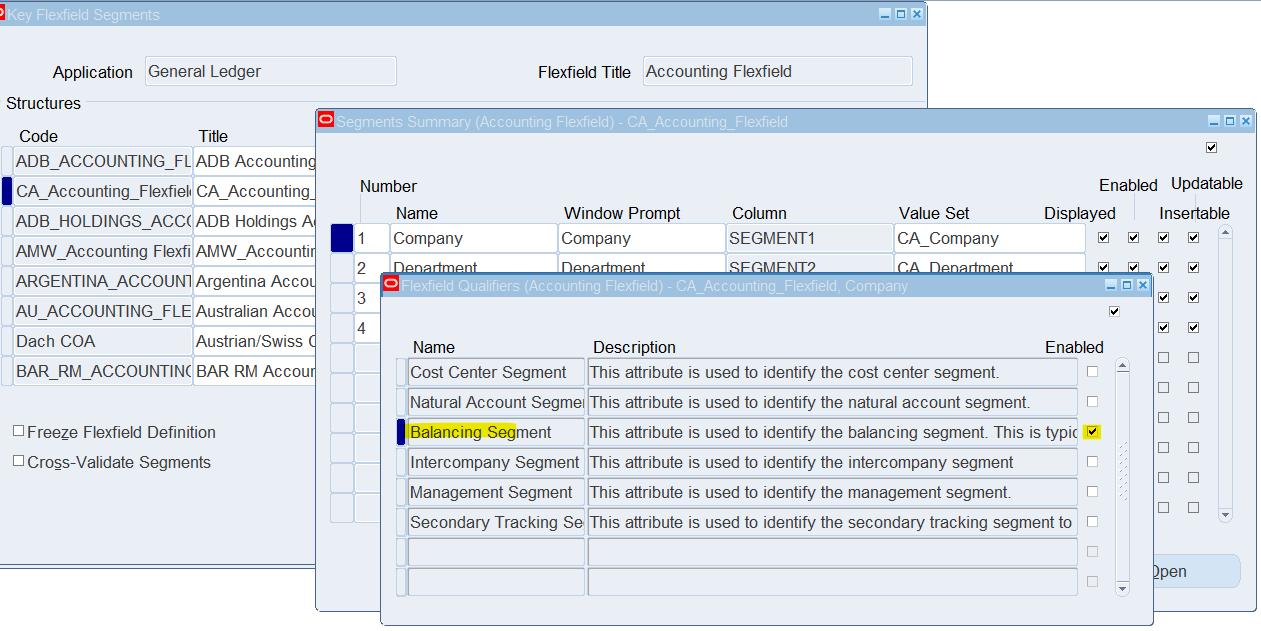
Update Flexfield Qualifier
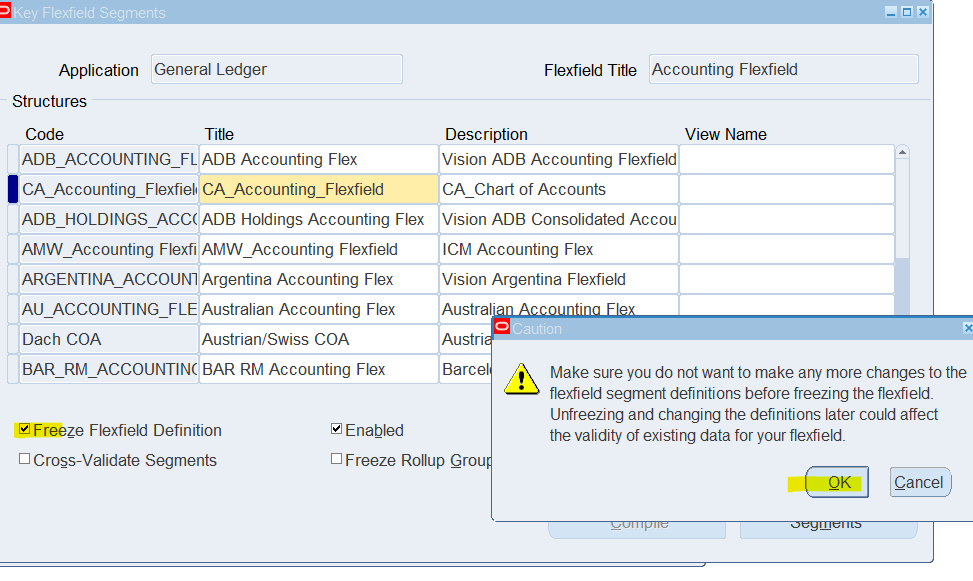
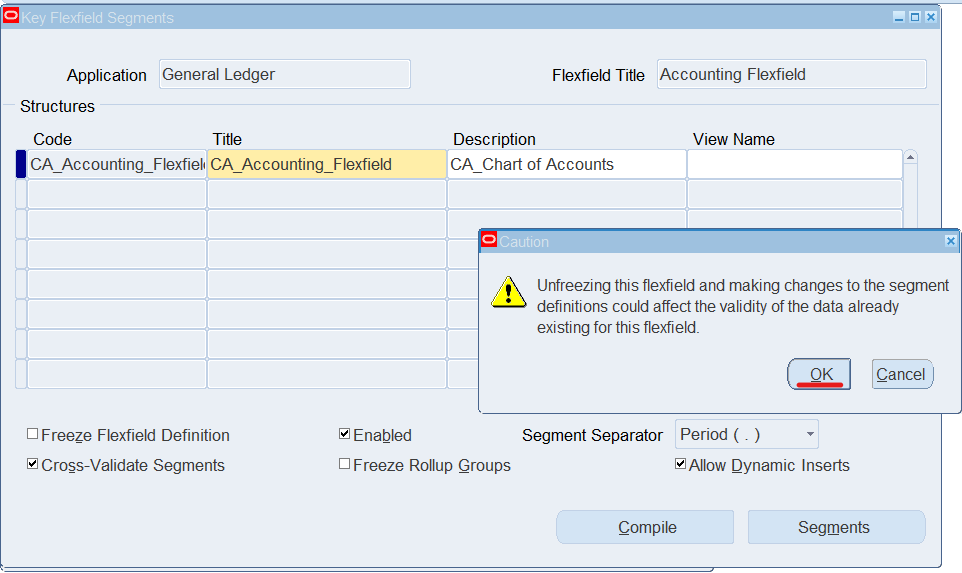
Freeze the flexfield definition
- Freeze the Flexfield definition.
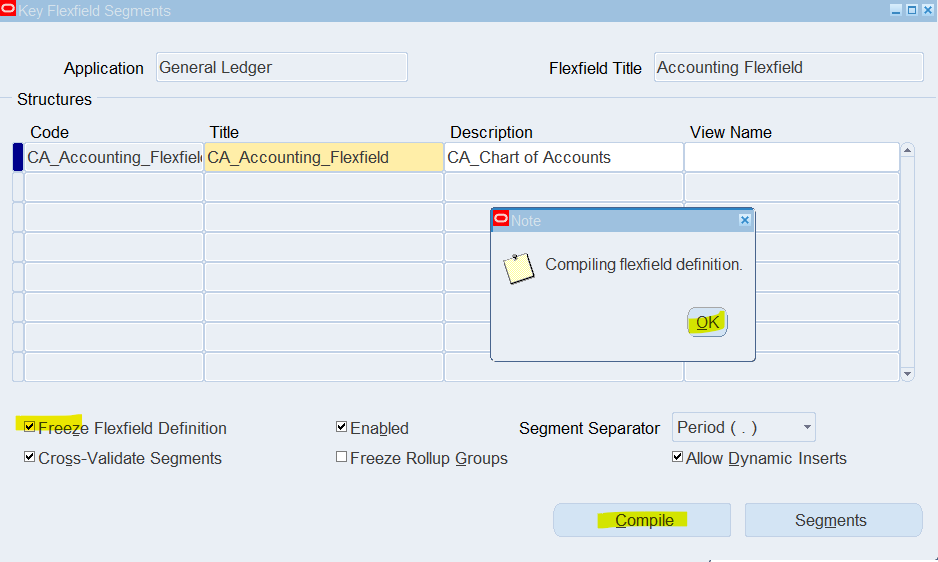
Freeze Flexfield Definition = Checked
OK in the Caution window
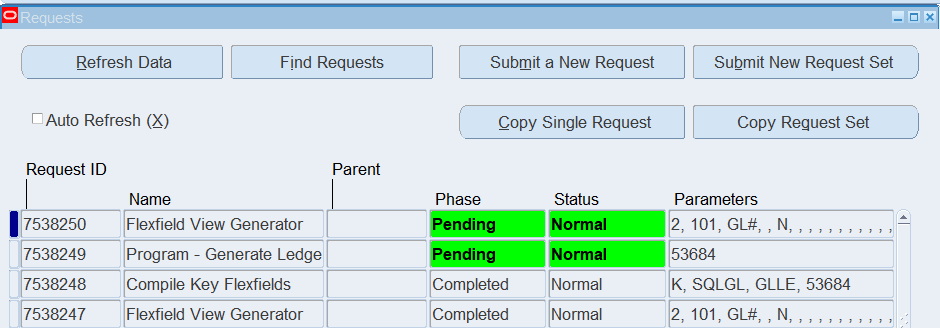
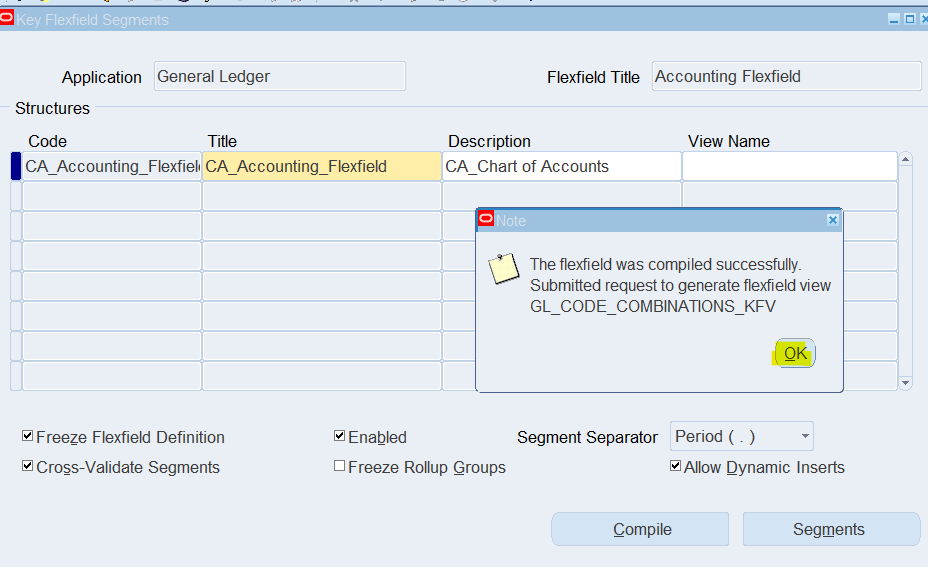
- Compile
OK in the two Note windows
- Close windows until you are back at the Navigator.
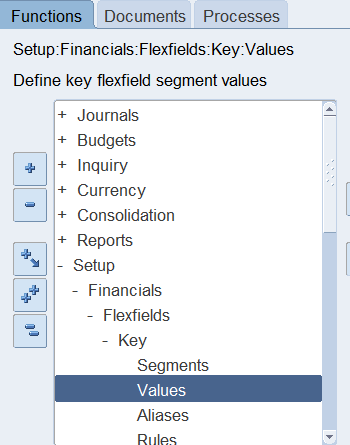
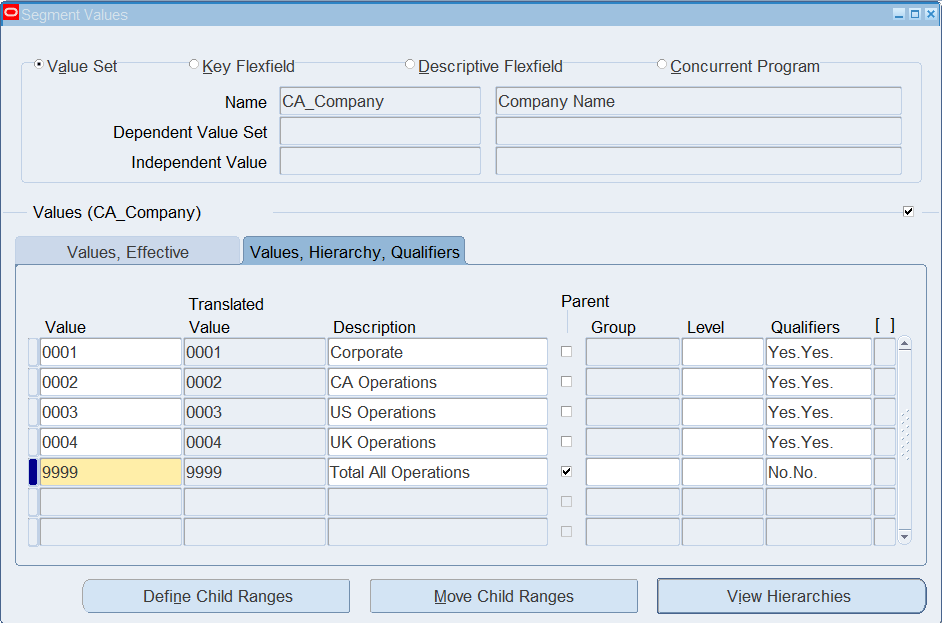
Enter Account Values
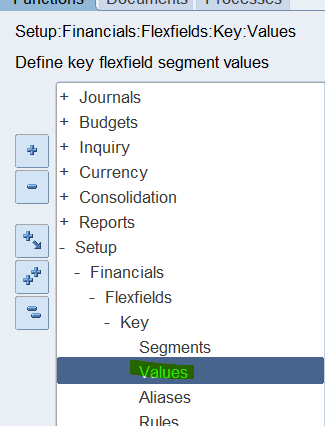
(N) Setup > Financials > Flexfield > Key > Values
Find your CA_Company value set, enter the values and information for the segment. Note that for each value you must tab completely through the row to see both Effective Date information and Qualifier information.
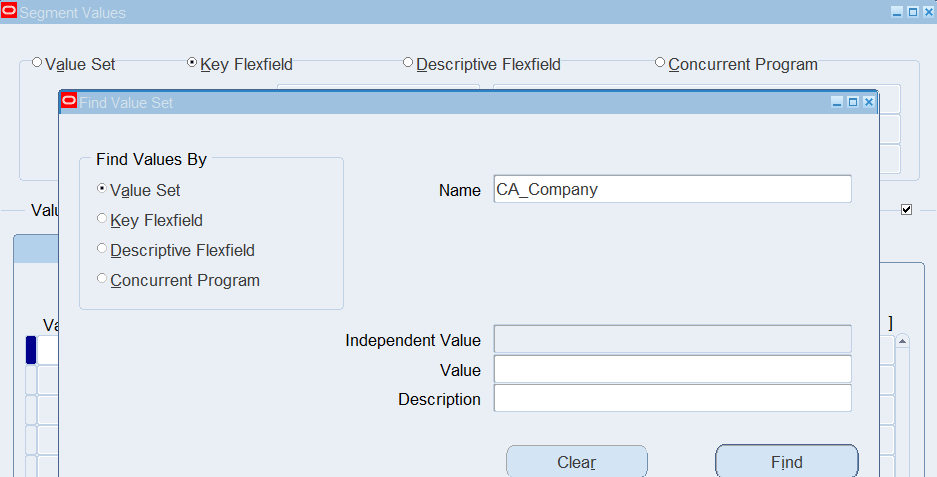
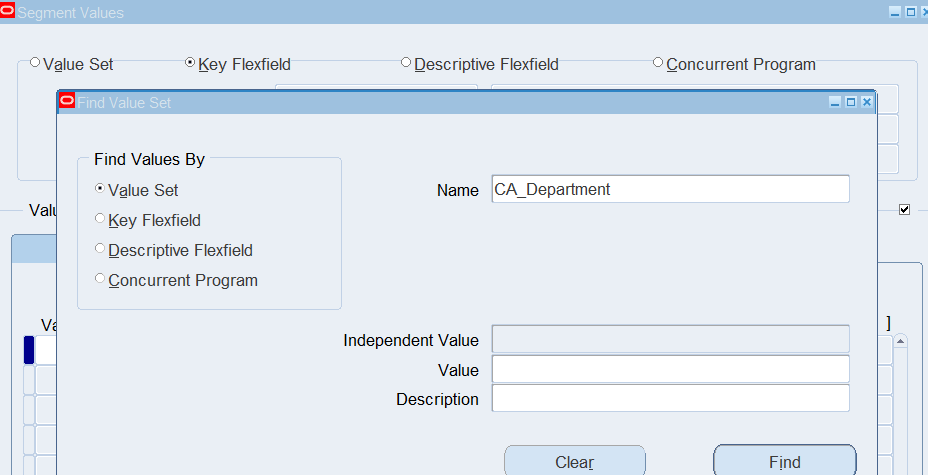
Find your CA_Department value set; enter the values and information for the segment. Note that for each value you must tab completely through the row to see both Effective Date Information and Qualifier information
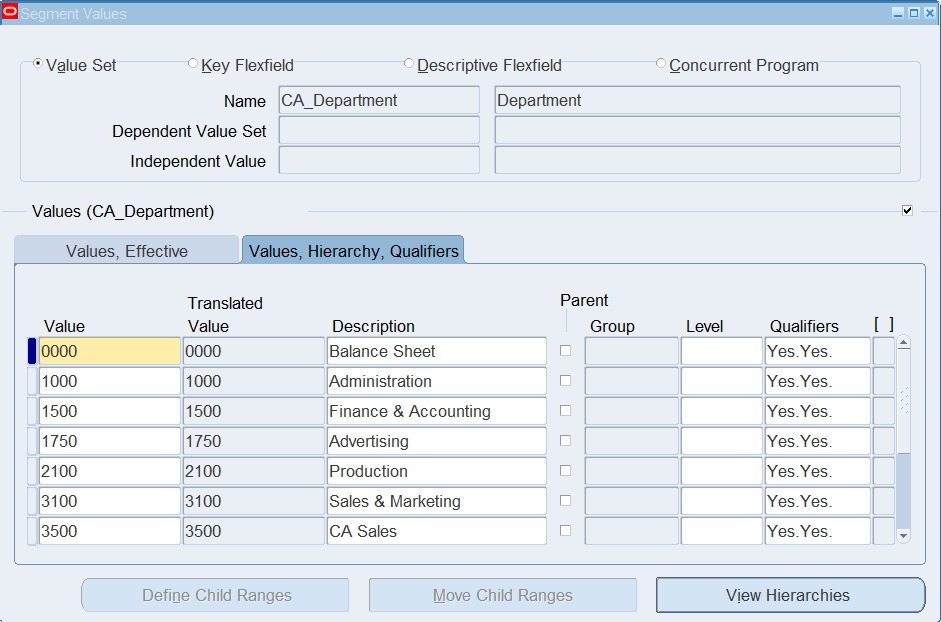
 .
.
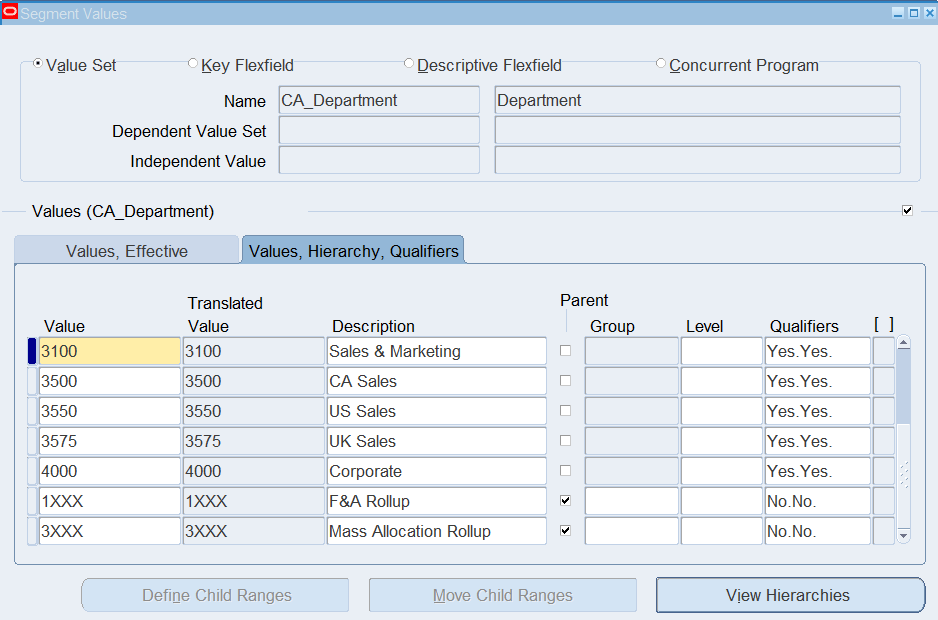
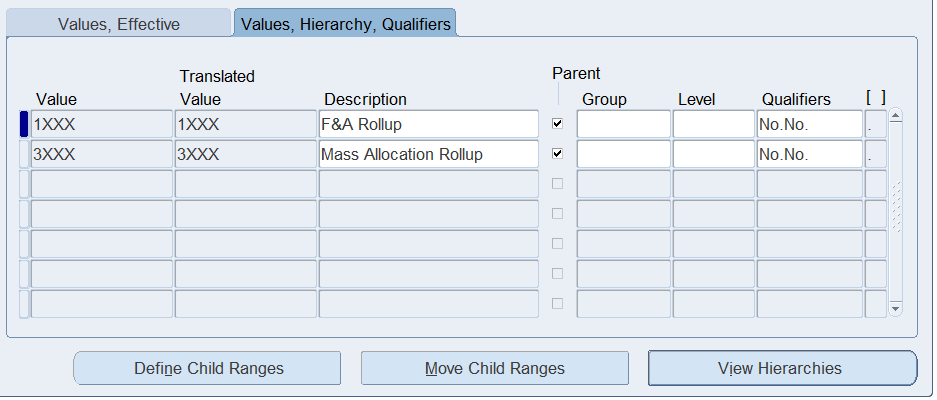
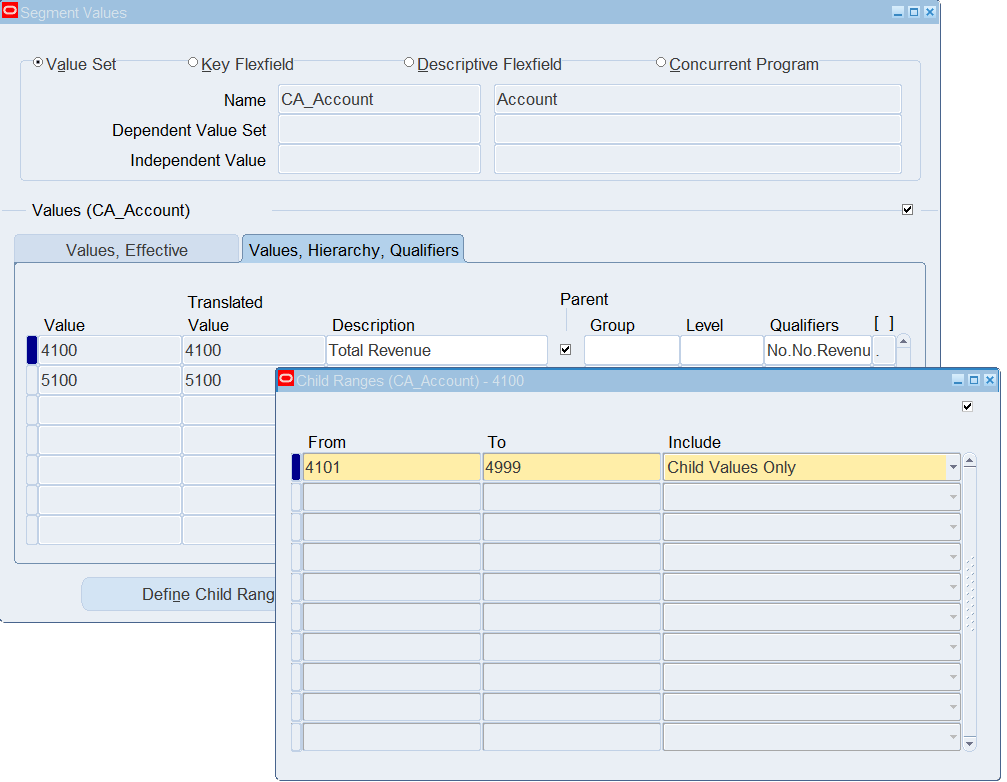
Define Parent Accounts
(N) Setup 🡪 Financials 🡪 Flexfields 🡪 Key 🡪 Values
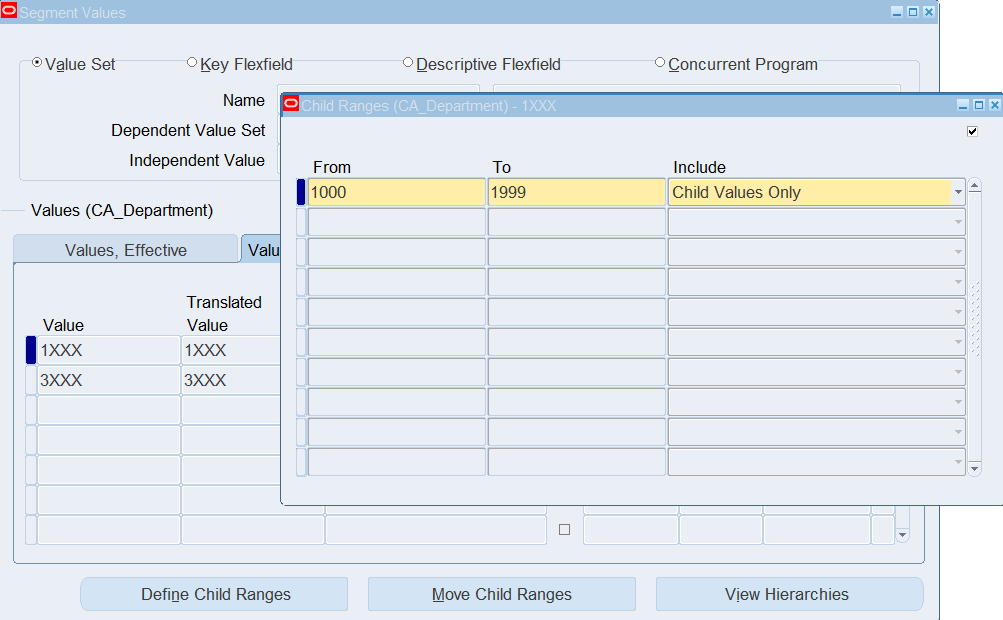
Find your CA_Department value set
Find your Department value set and enter child range information for the 3XX parent value.
For the MassAllocation Rollup parent value
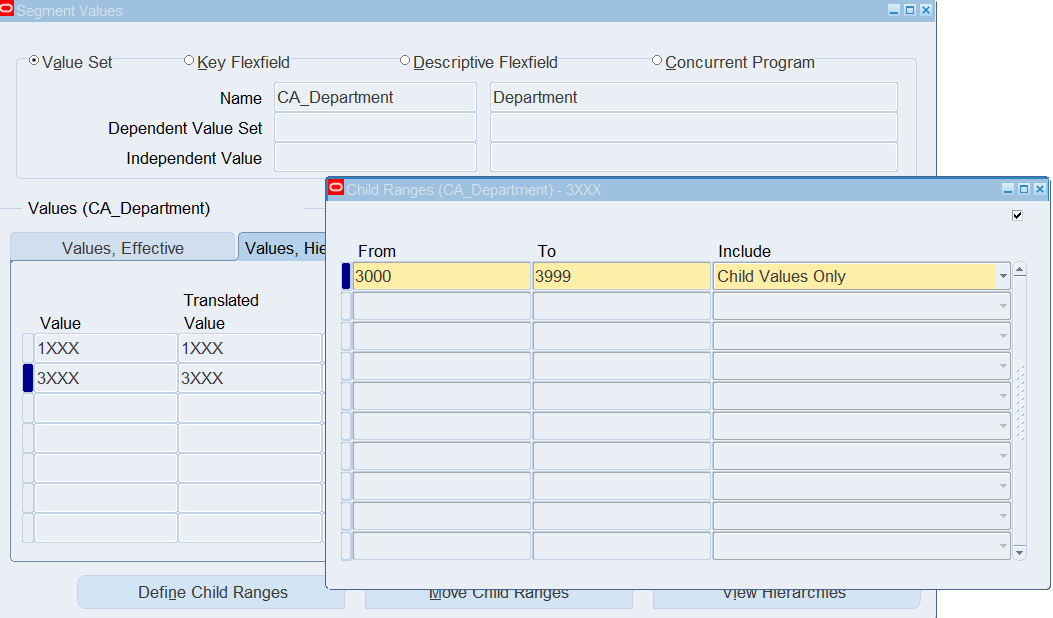
Save and close Child Ranges window
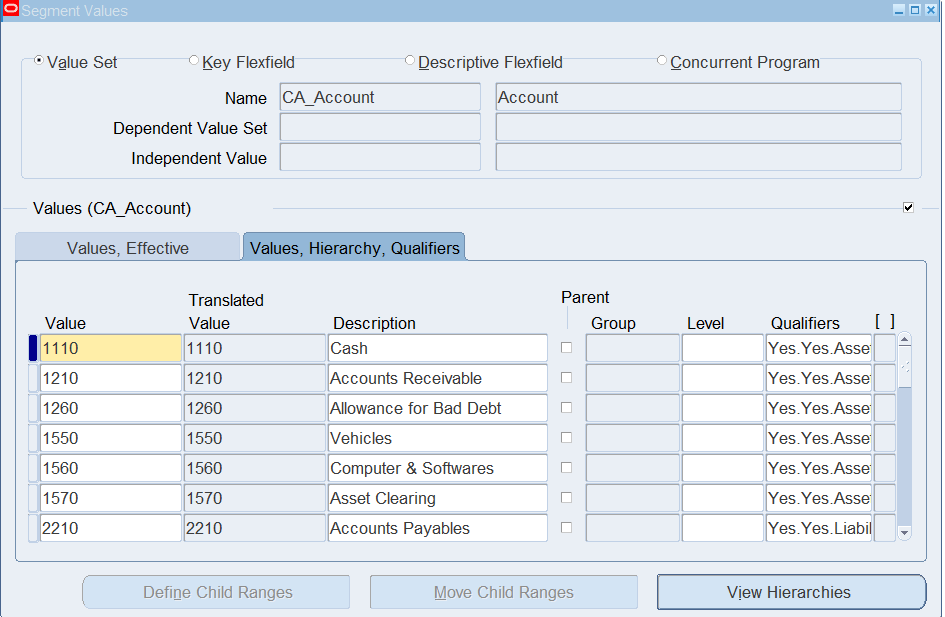
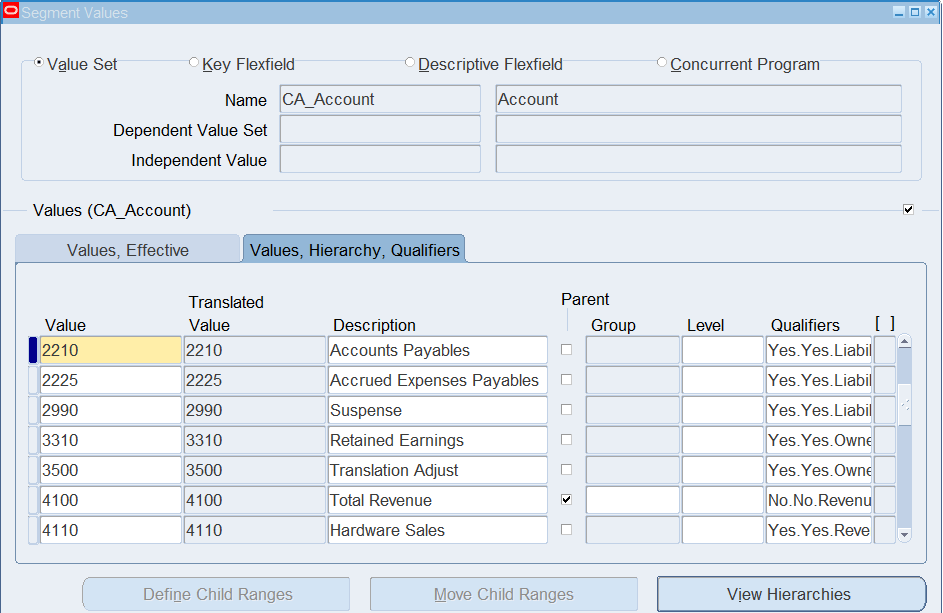
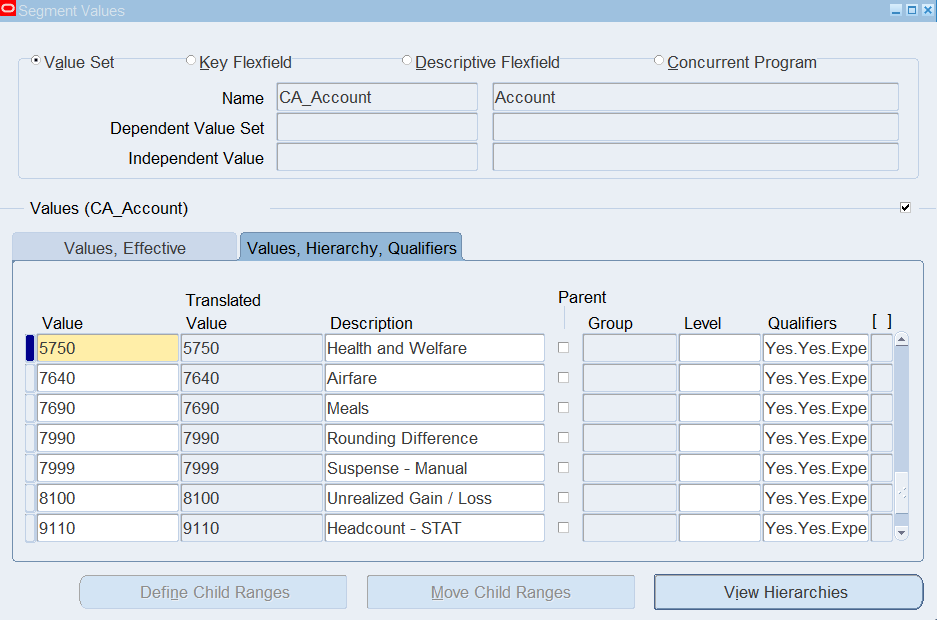
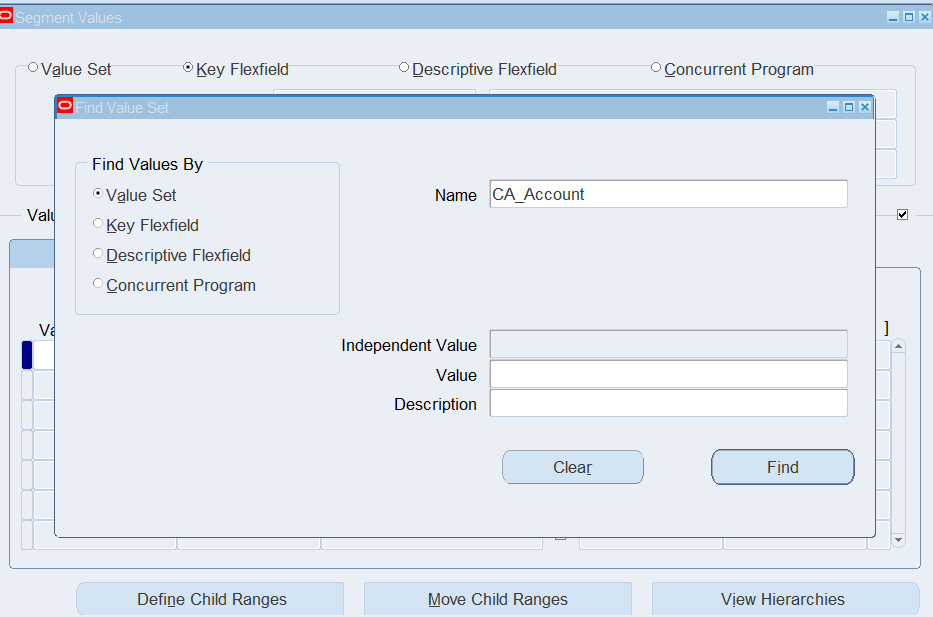
Define Child values for CA_Account

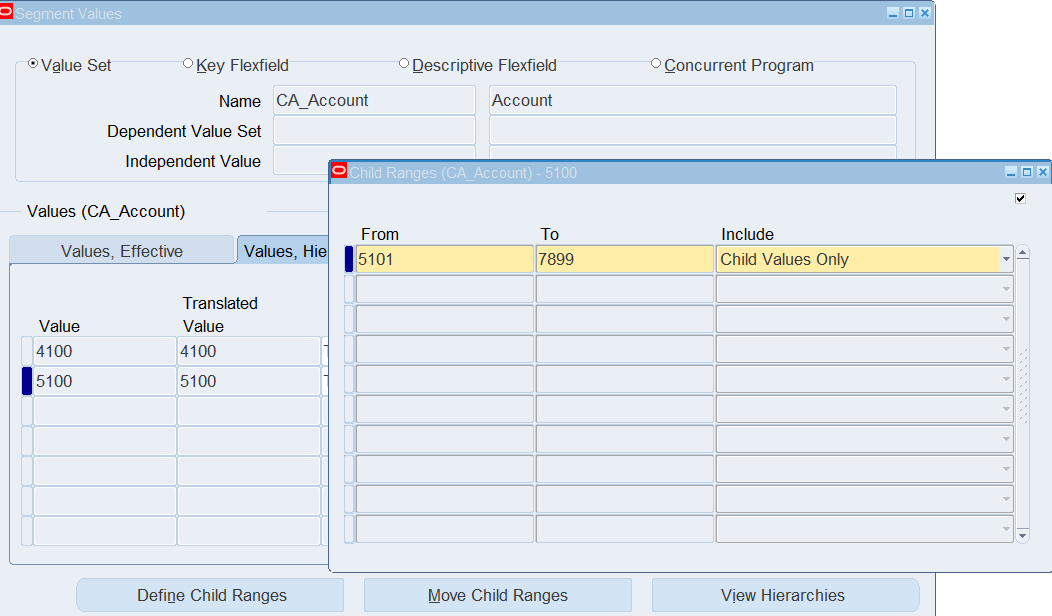
View Hierarchies
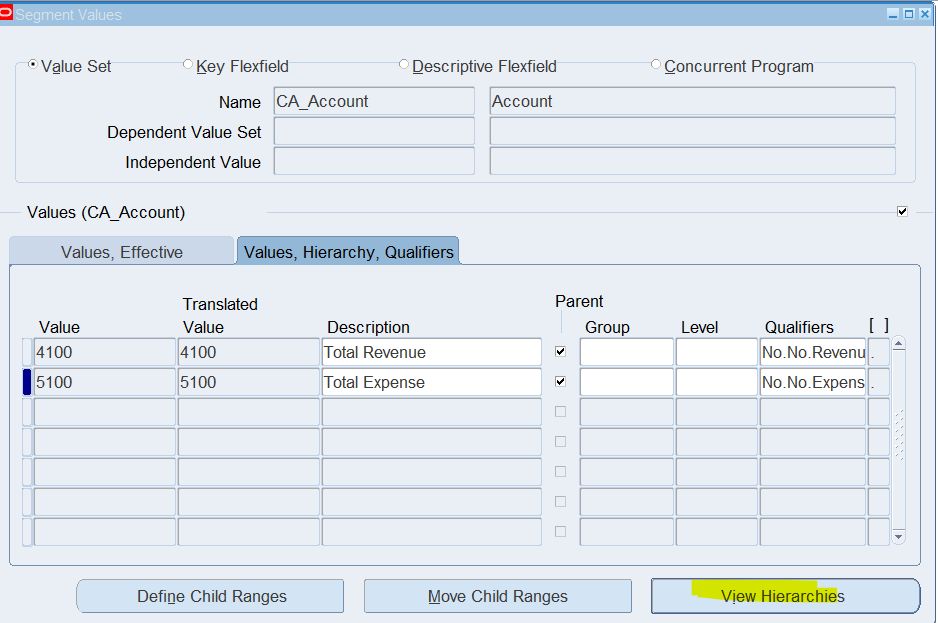
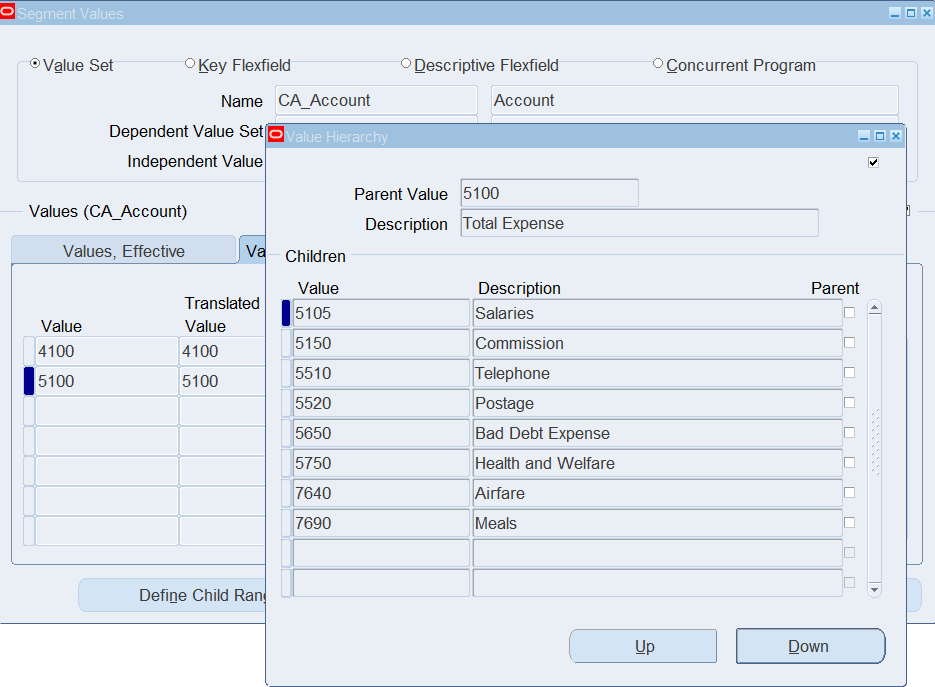
Verify the hierarchy compiles
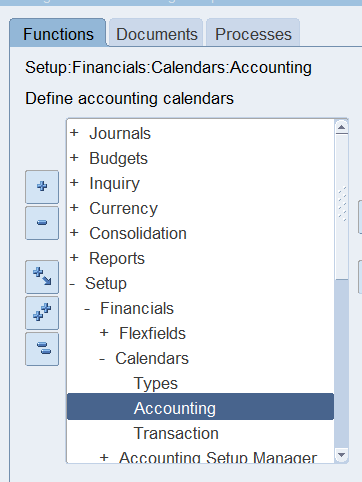
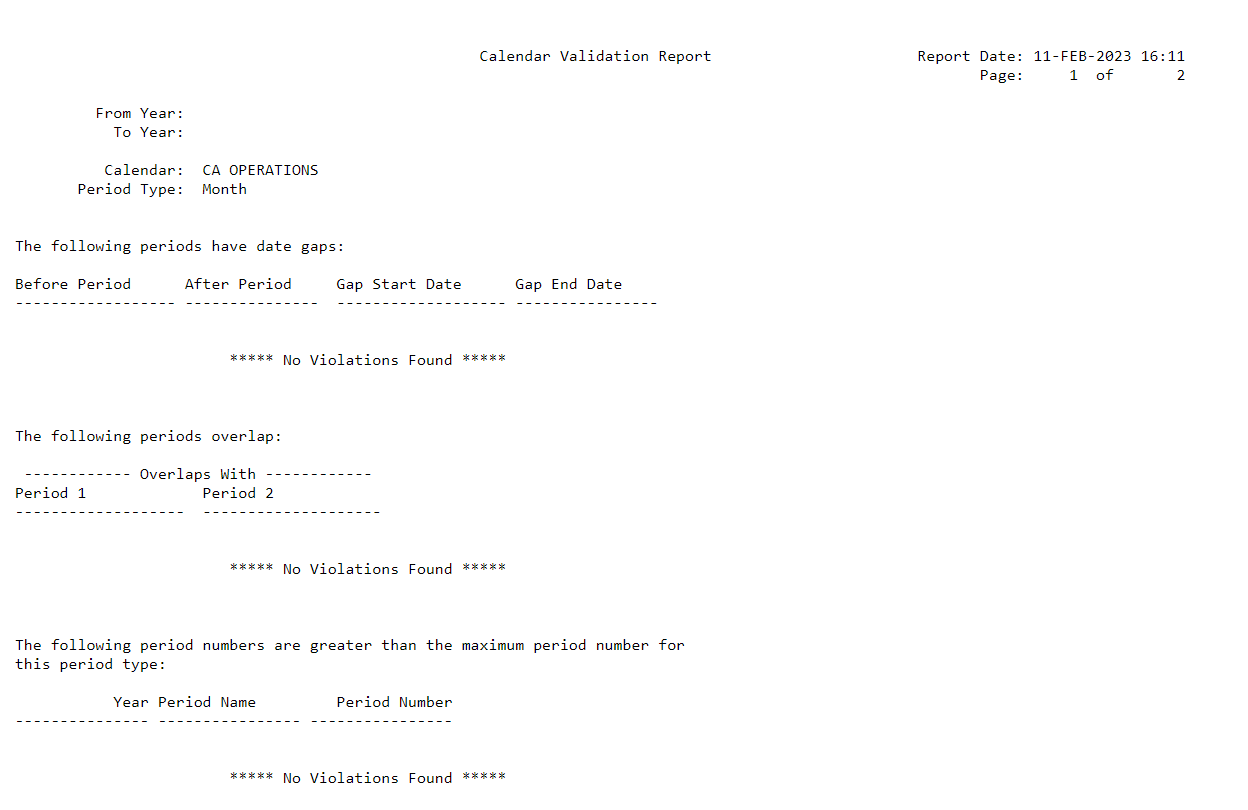
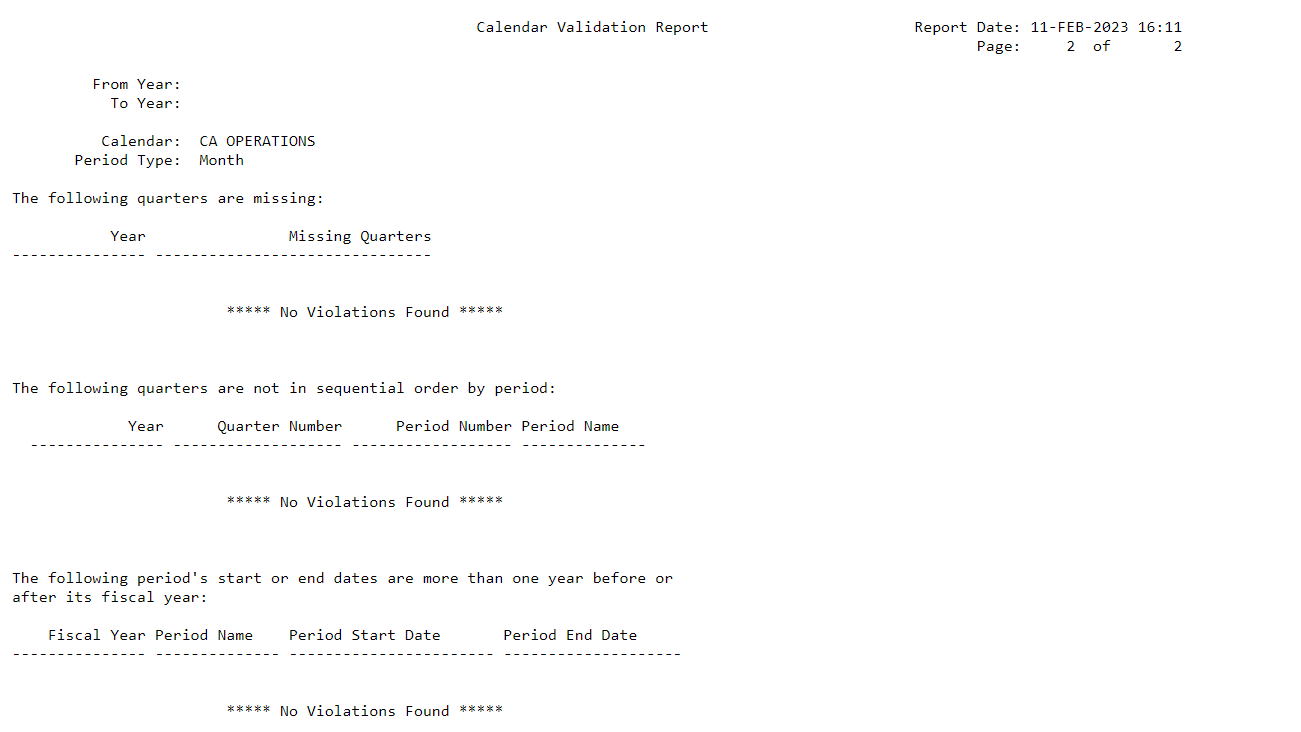
Setup Calendar
| Responsibility | General Ledger Super User |
| Navigation | (N) Setup 🡪 Financials 🡪 Calendars 🡪 Accounting |
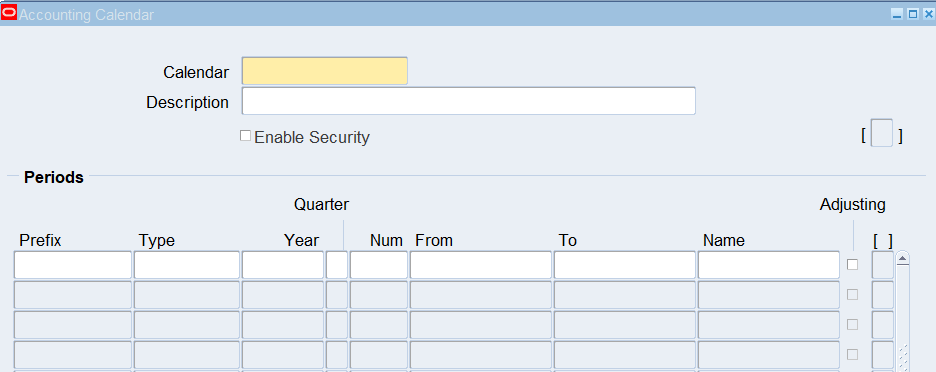
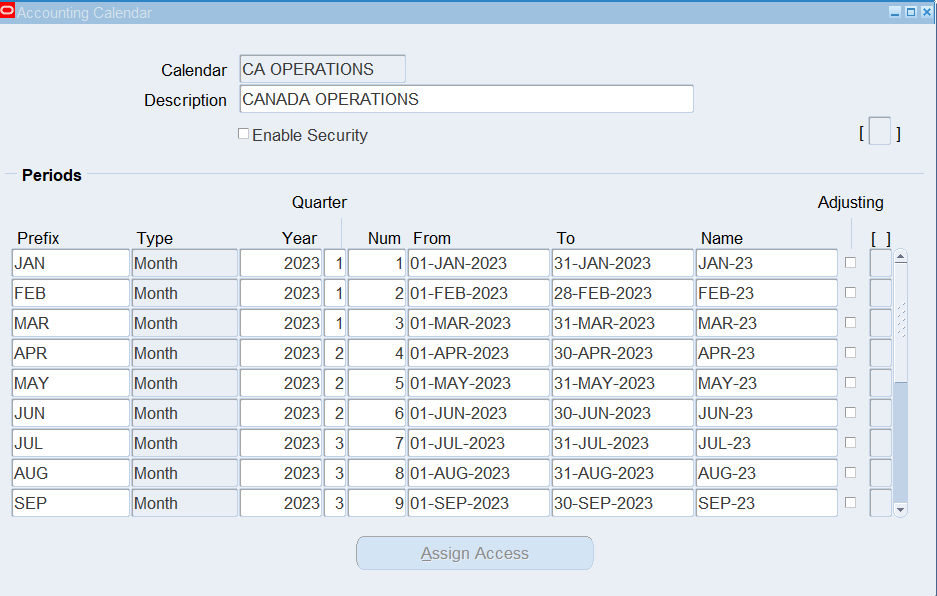
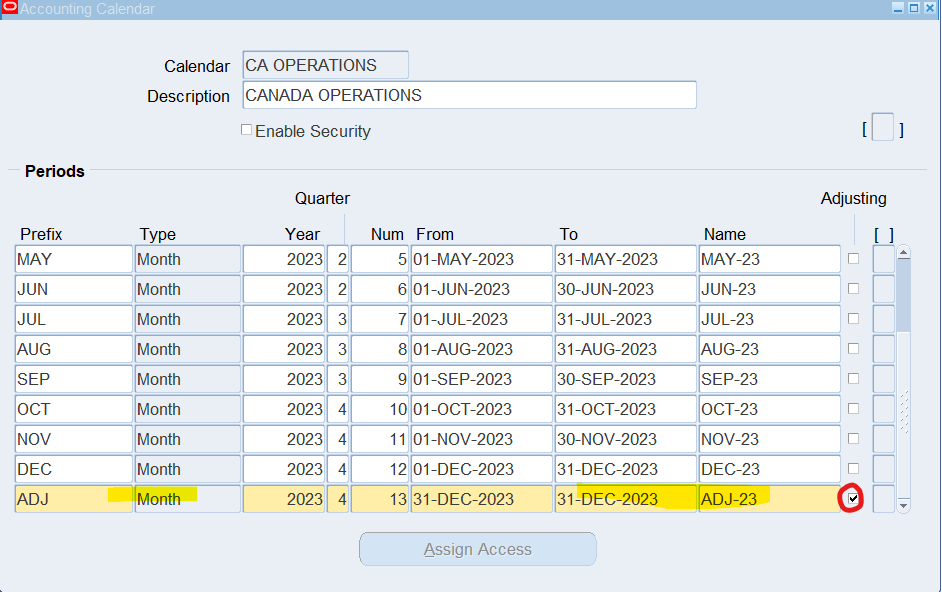
Setup ADJ period for charging all Adjustment entries after closing
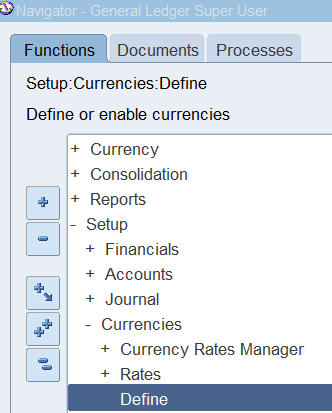
Verify Functional Currencies are enabled
(N) Setup 🡪 Currencies 🡪 Define


Define a Ledger
The primary ledger will act as the corporate representation or main bookkeeping ledger that uses the corporate chart of accounts, calendar, and accounting method. However, the parent company is located in the Canada, and therefore a reporting currency in CAD is required for consolidation purposes. The parent company wants the reporting currency to be a journal level reporting currency.
Tasks 1: Create a Legal Entity
| Responsibility | General Ledger Super User |
| Territory | Canada |
| Legal Entity Name | CA Operations |
| Organization Name | CA Operations |
| Legal Entity Identifier | CASYS1000 |
| EIN/TIN | CA123456 |
| Transaction Entity | Yes |
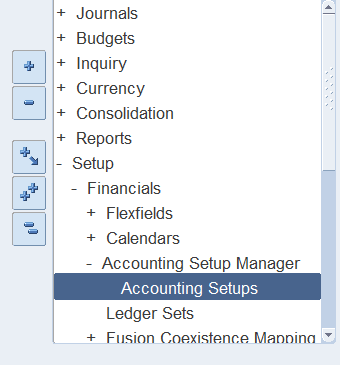
(N) Setup > Financials > Accounting Setup Manager > Accounting Setups.
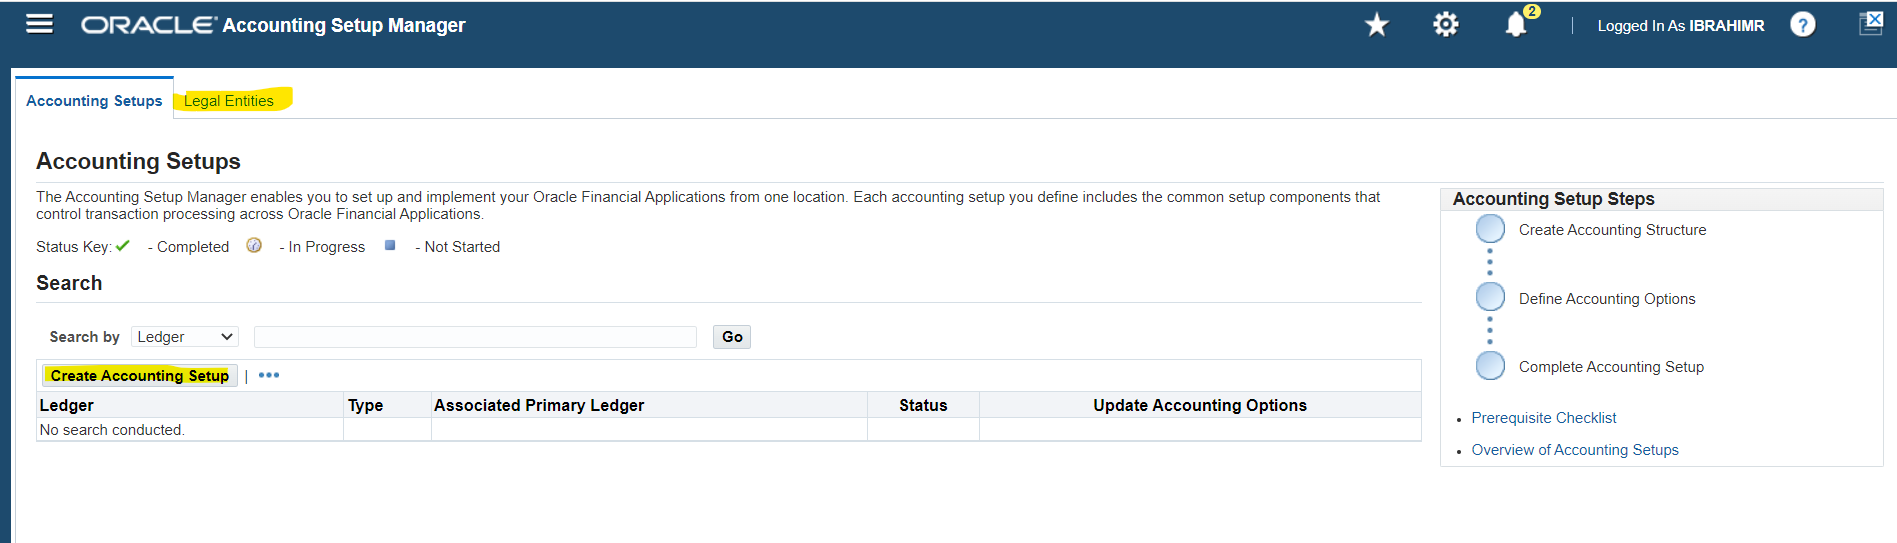
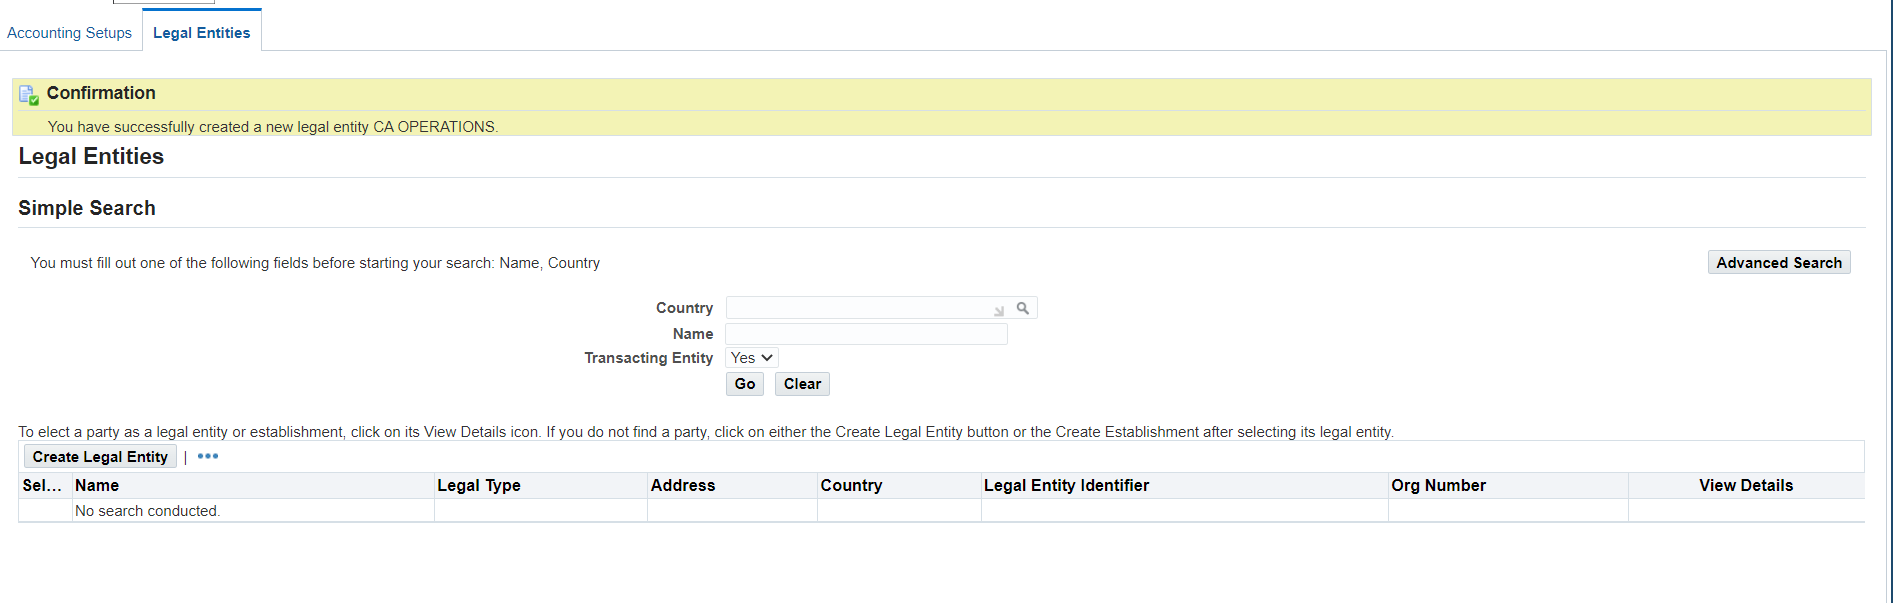
Select Tab “Legal Entities” and “Create Legal Entity”

| Territory | Canada |
| Legal Entity Name | CA OPERATIONS |
| Organization Name | CA OPERATIONS |
| Legal Entity Identifier | CASYS1000 |
| BIN | CA123456 |
| Transaction Entity | Yes |
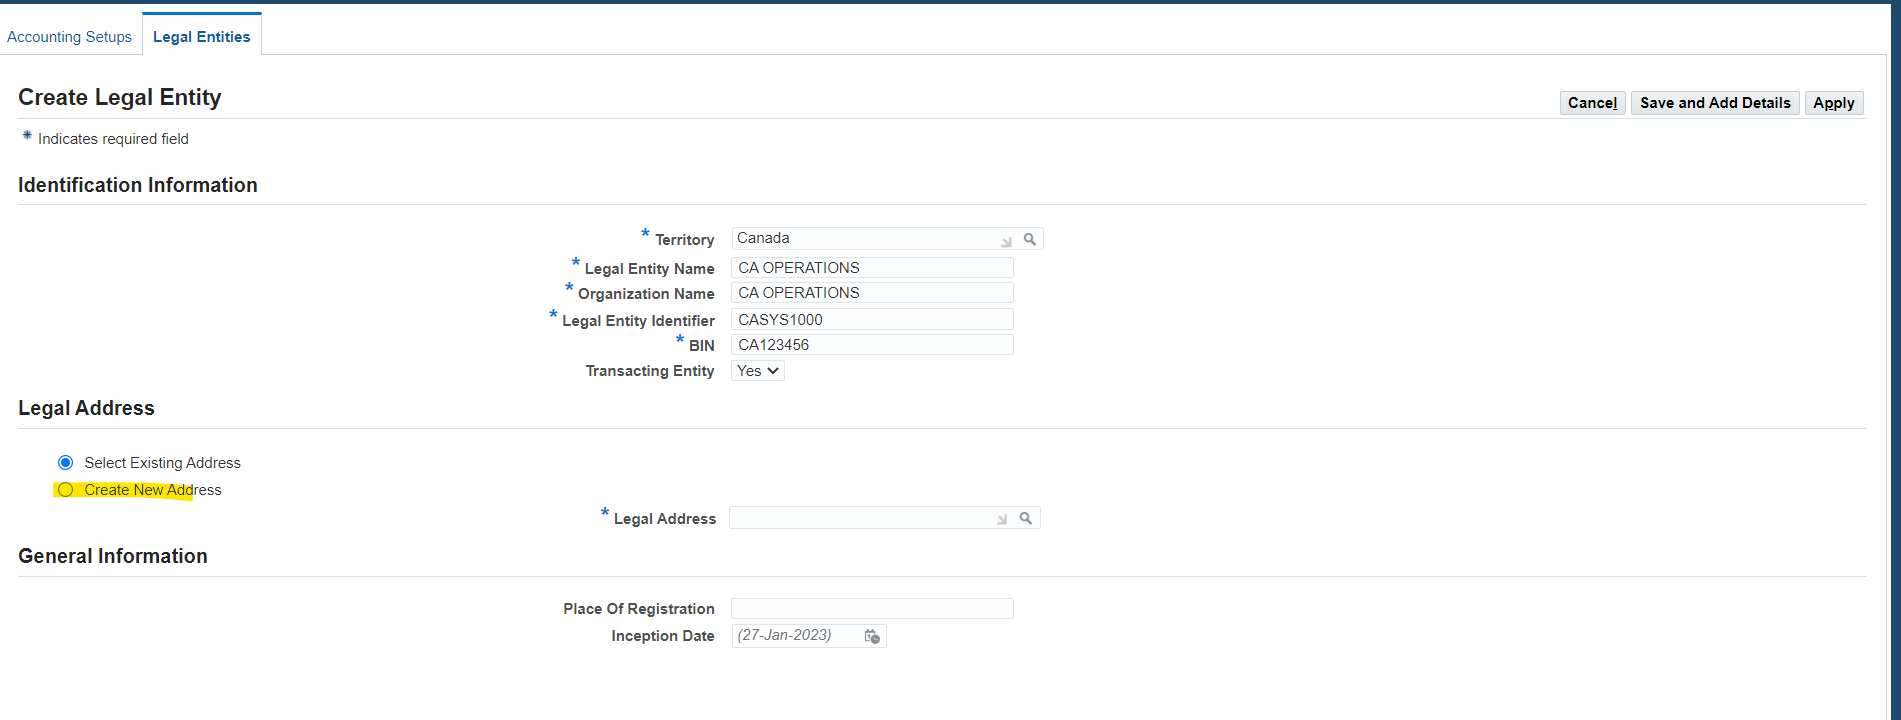
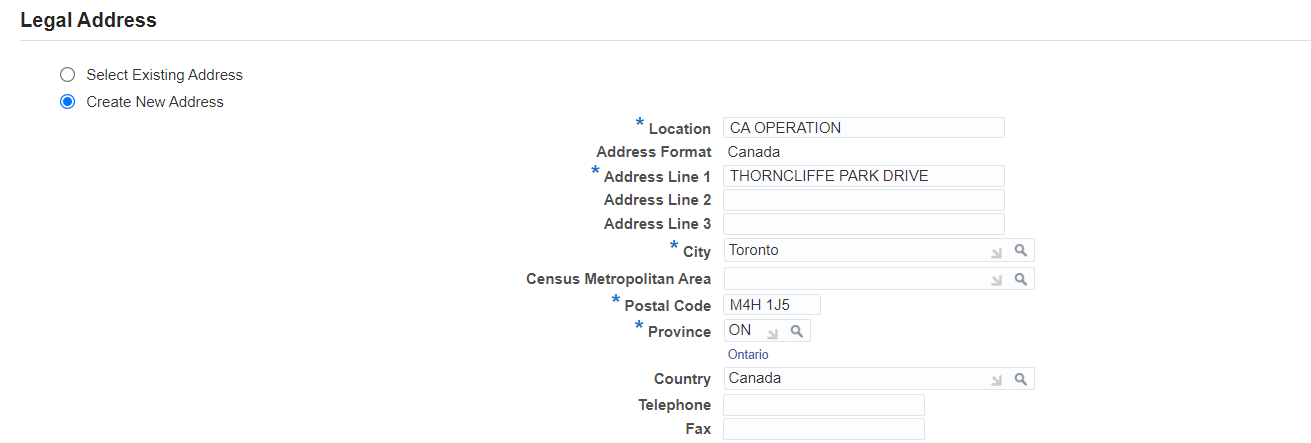
Create a New Address
Create Accounting Setup
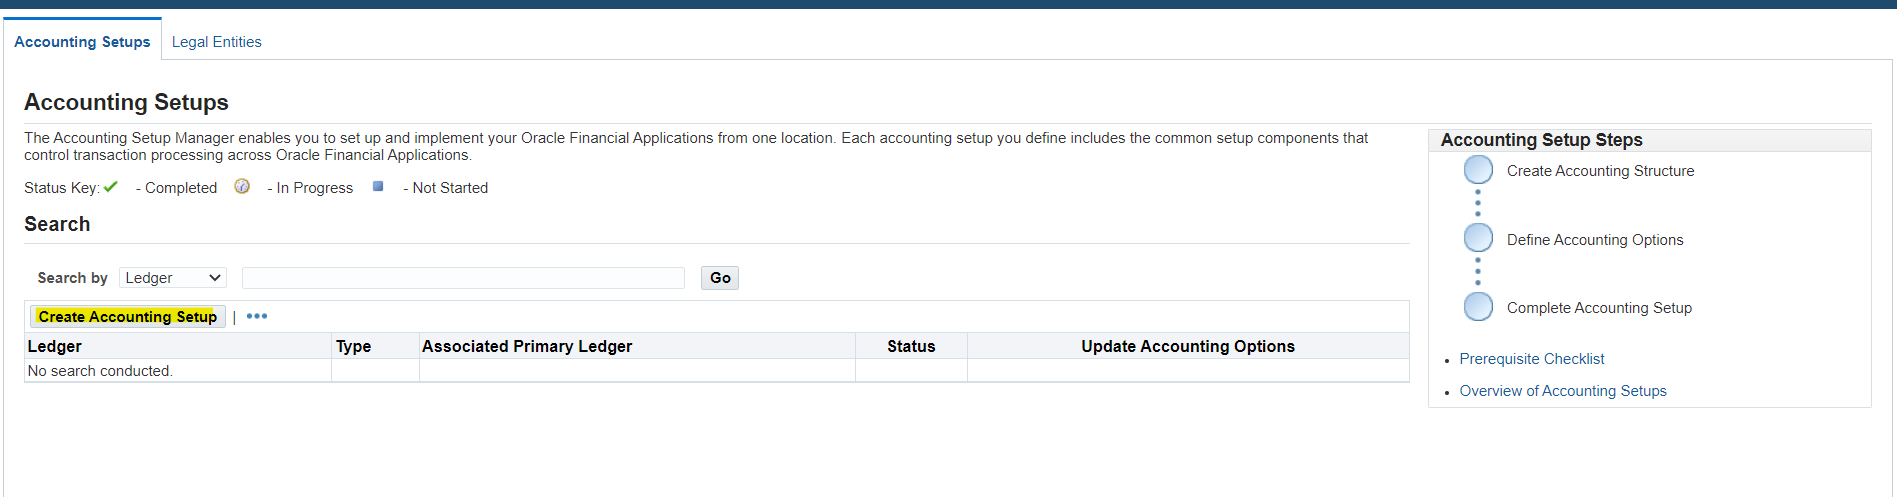
Select “Create Accounting Setup”
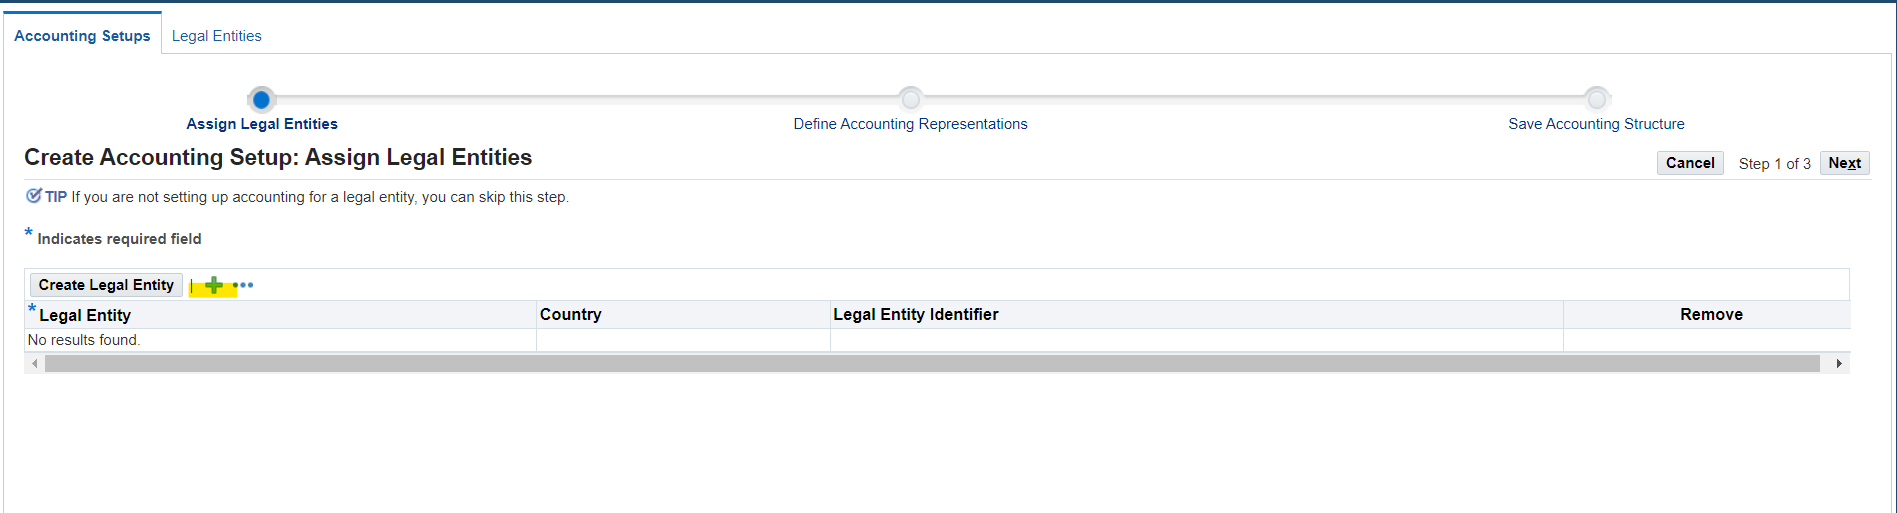
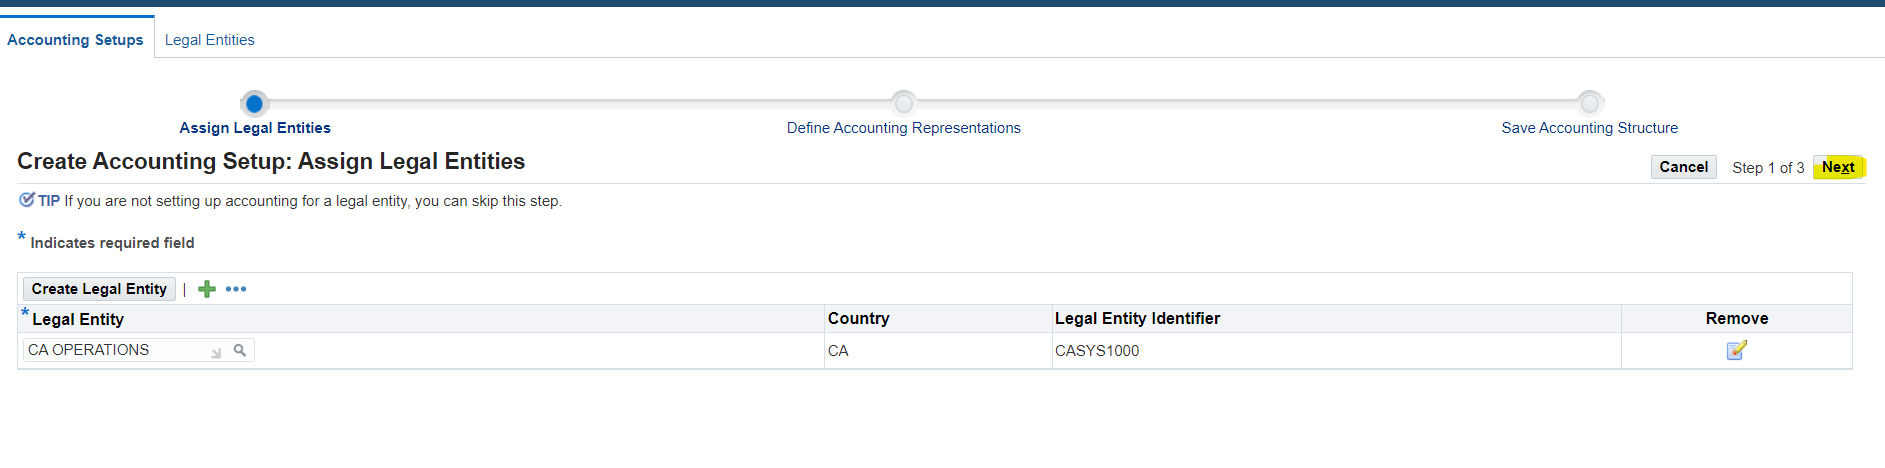
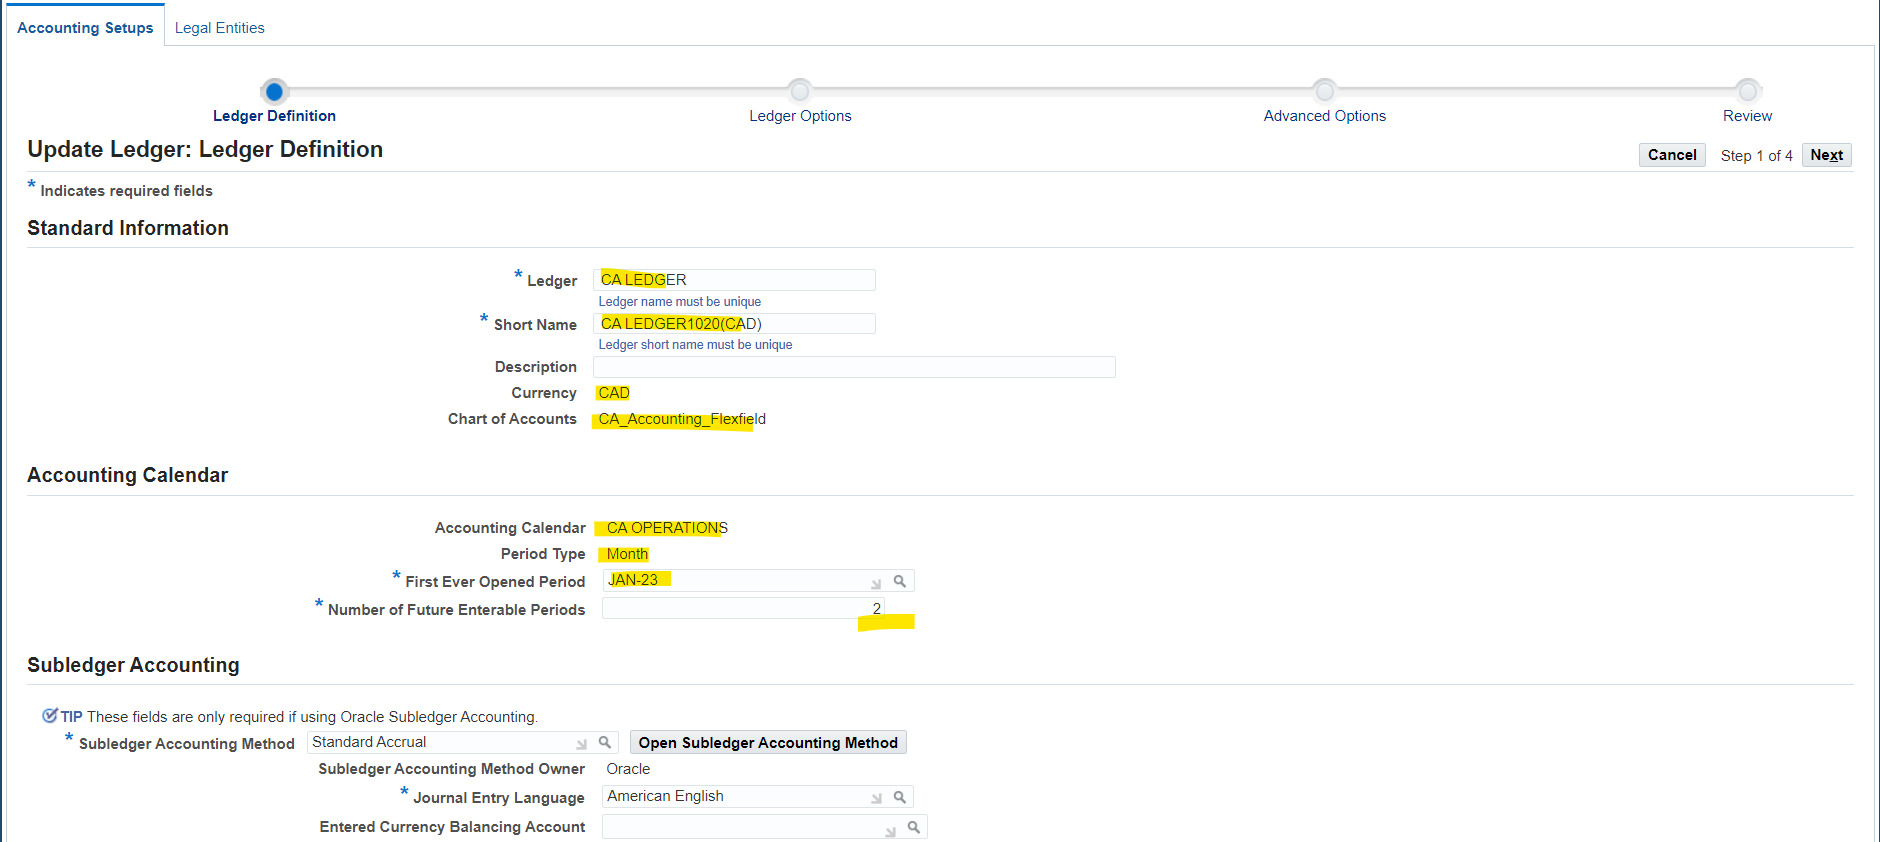
Add Legal Entity.
| Name | Chart of Accounts | Accounting Calendar | Currency | Sub-Ledger Accounting Method |
| CA OPERATIONS | CA_Accounting_Flexfield | CA OPERATIONS | CAD | Standard Accrual |
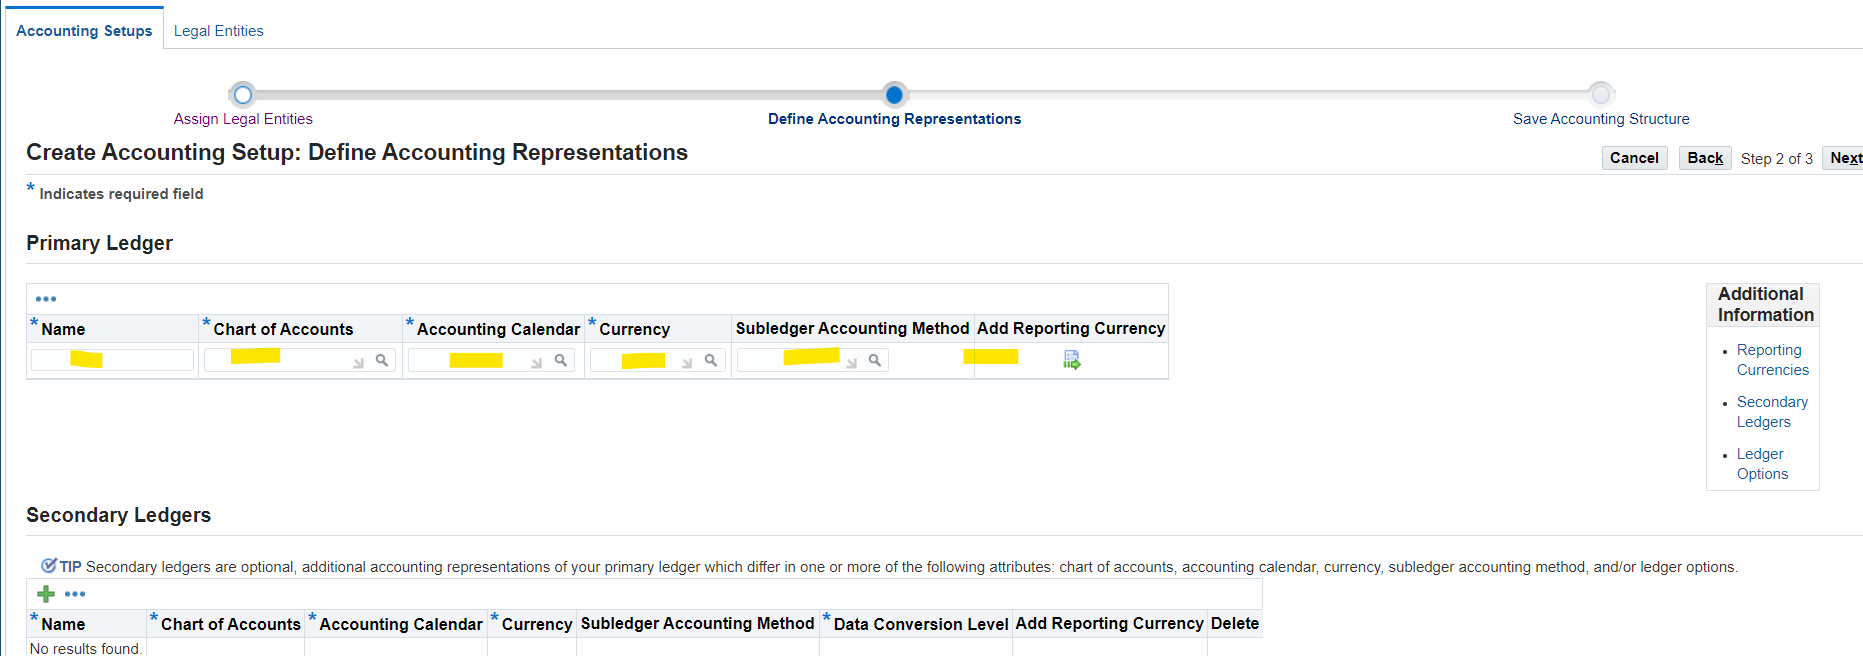
Assign Reporting Currency
| Currency | USD |
| Currency Conversion Level | Journal |


Apply
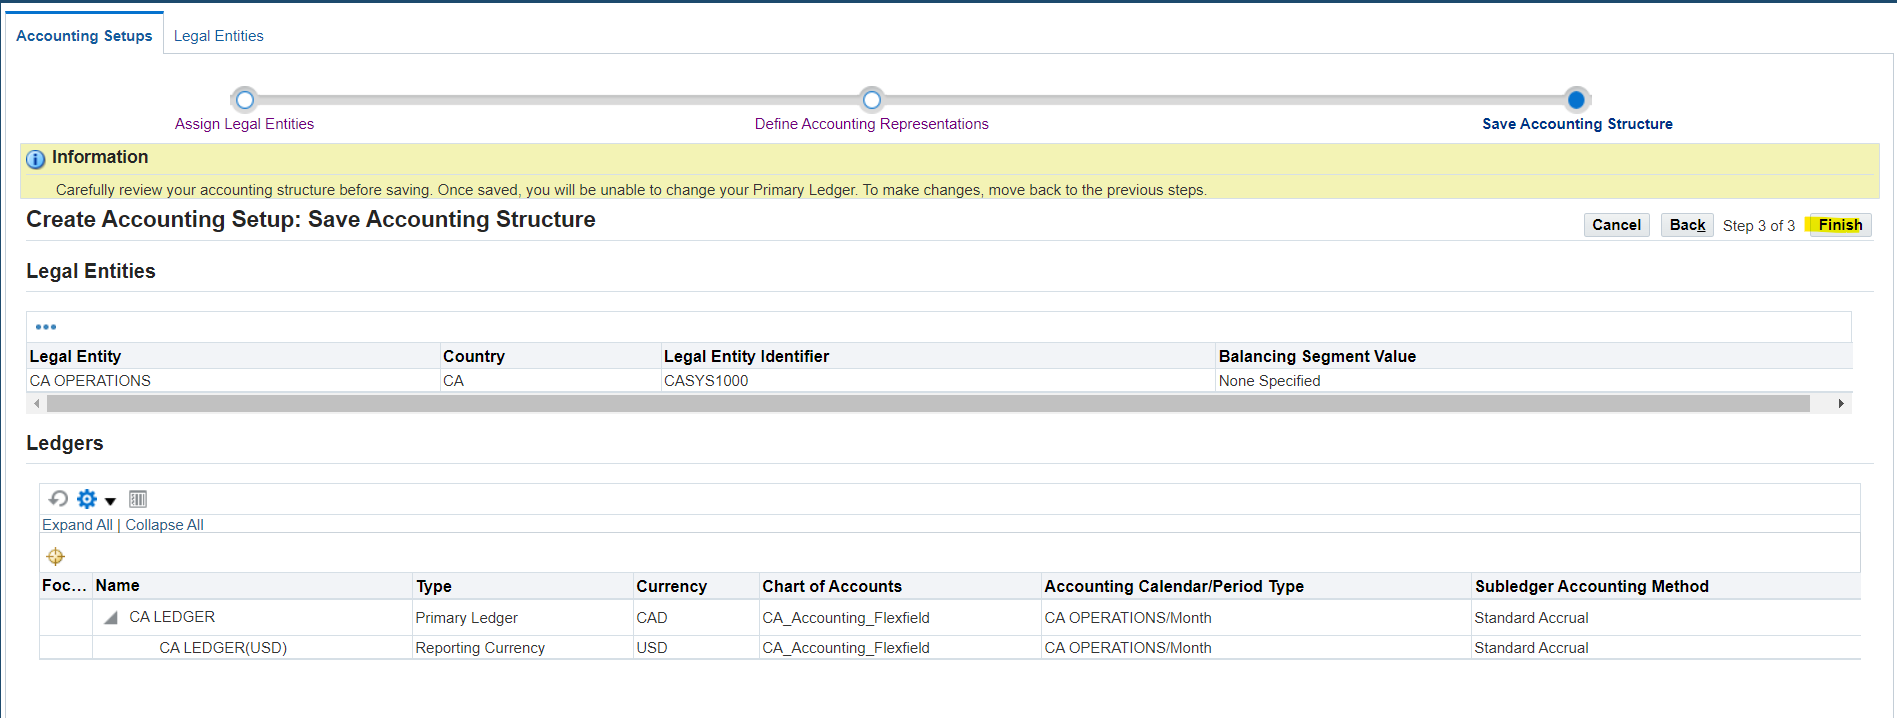

Finish
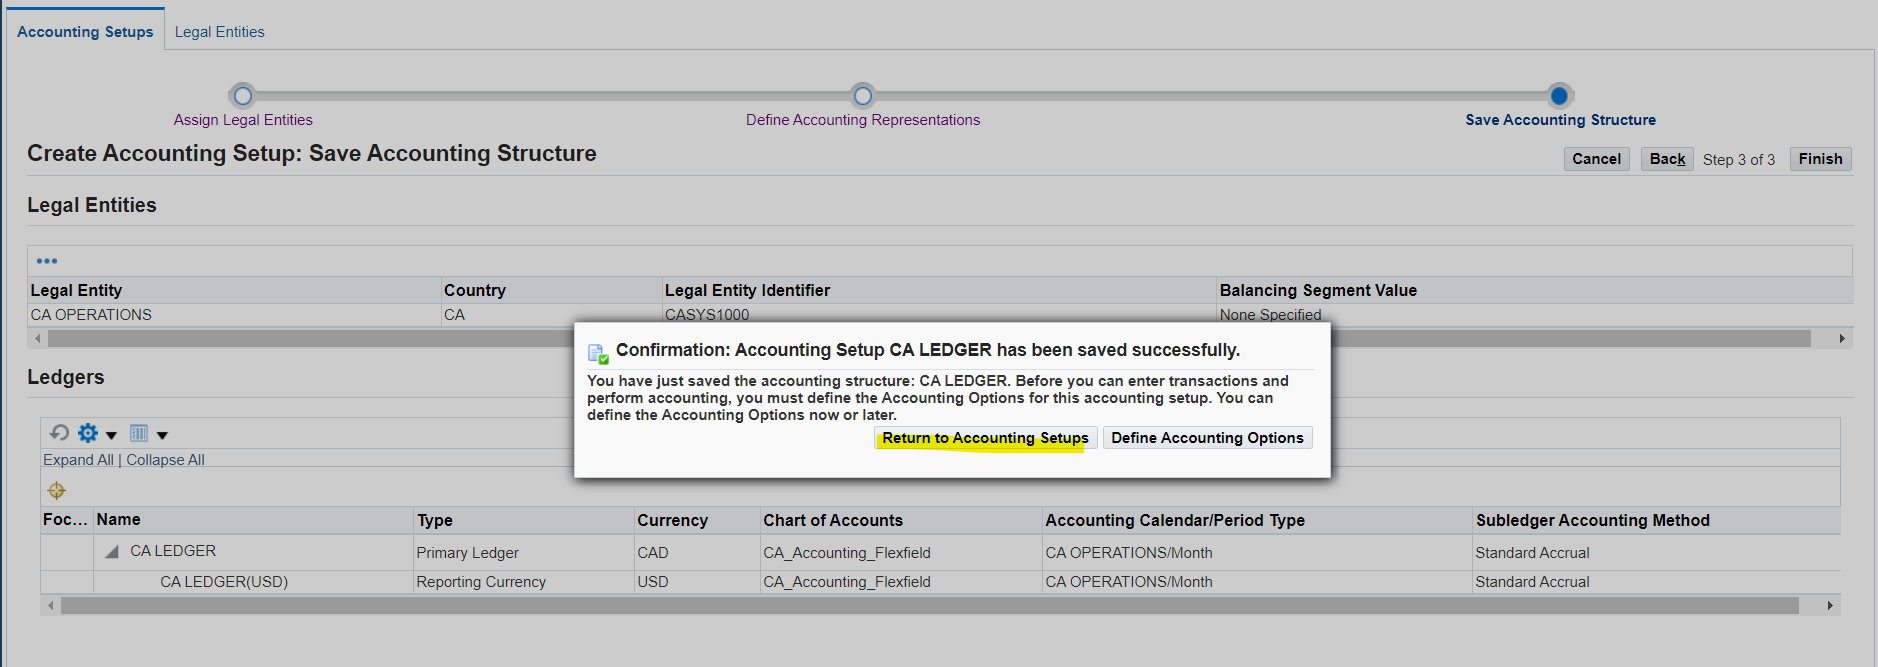
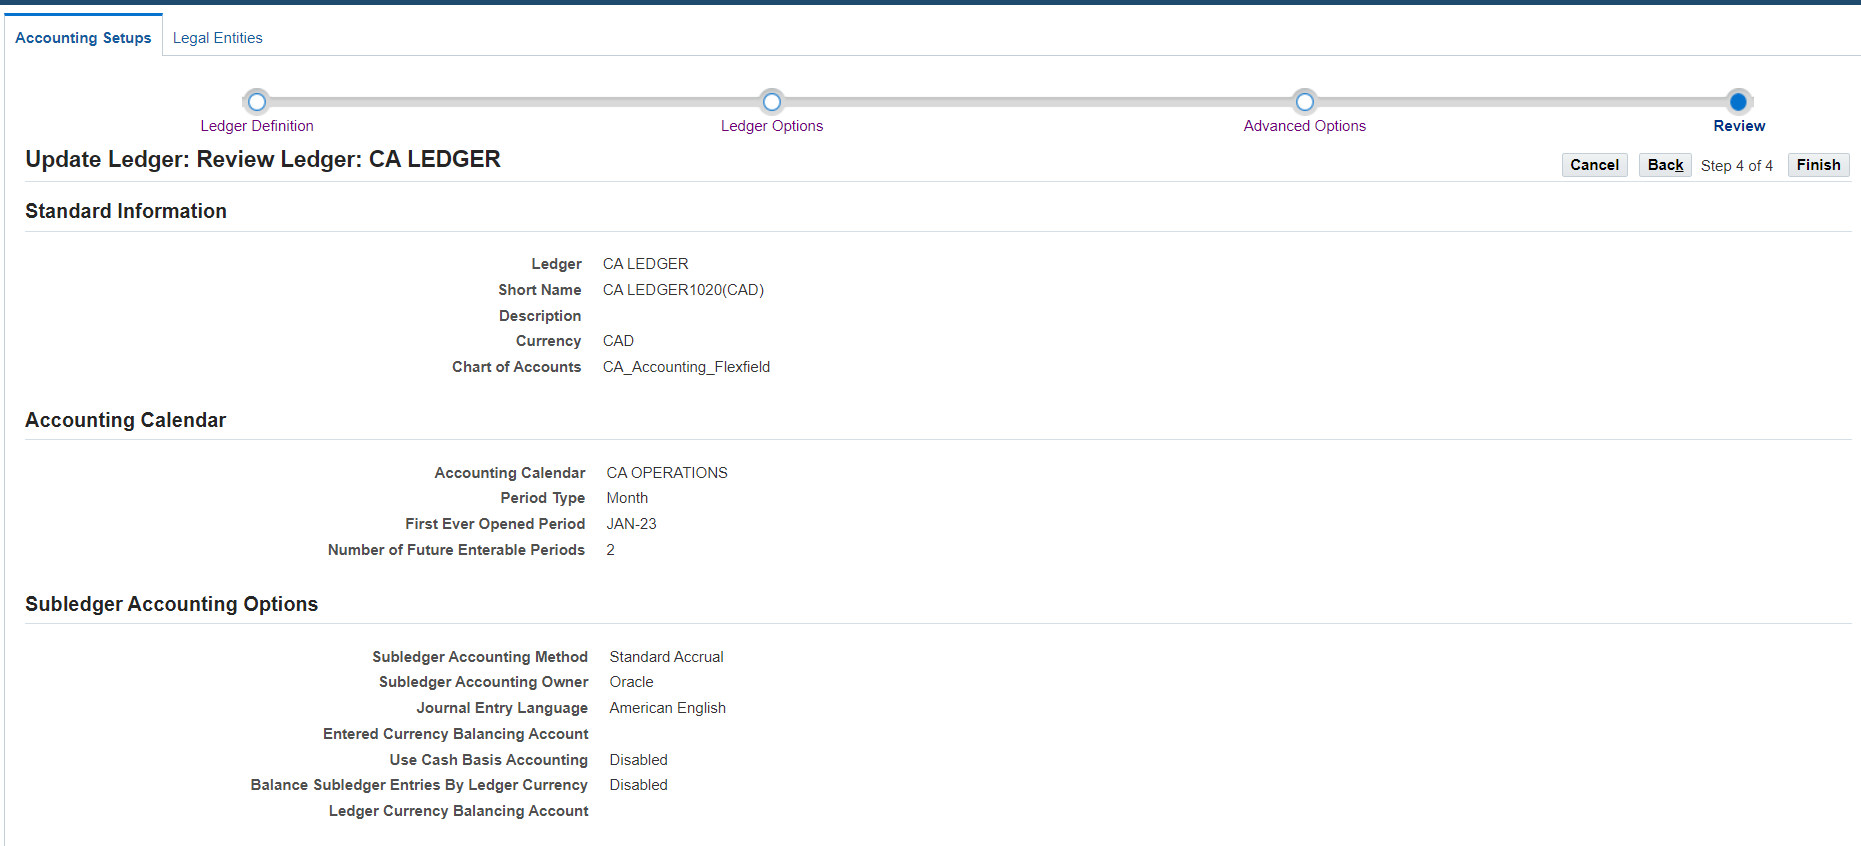
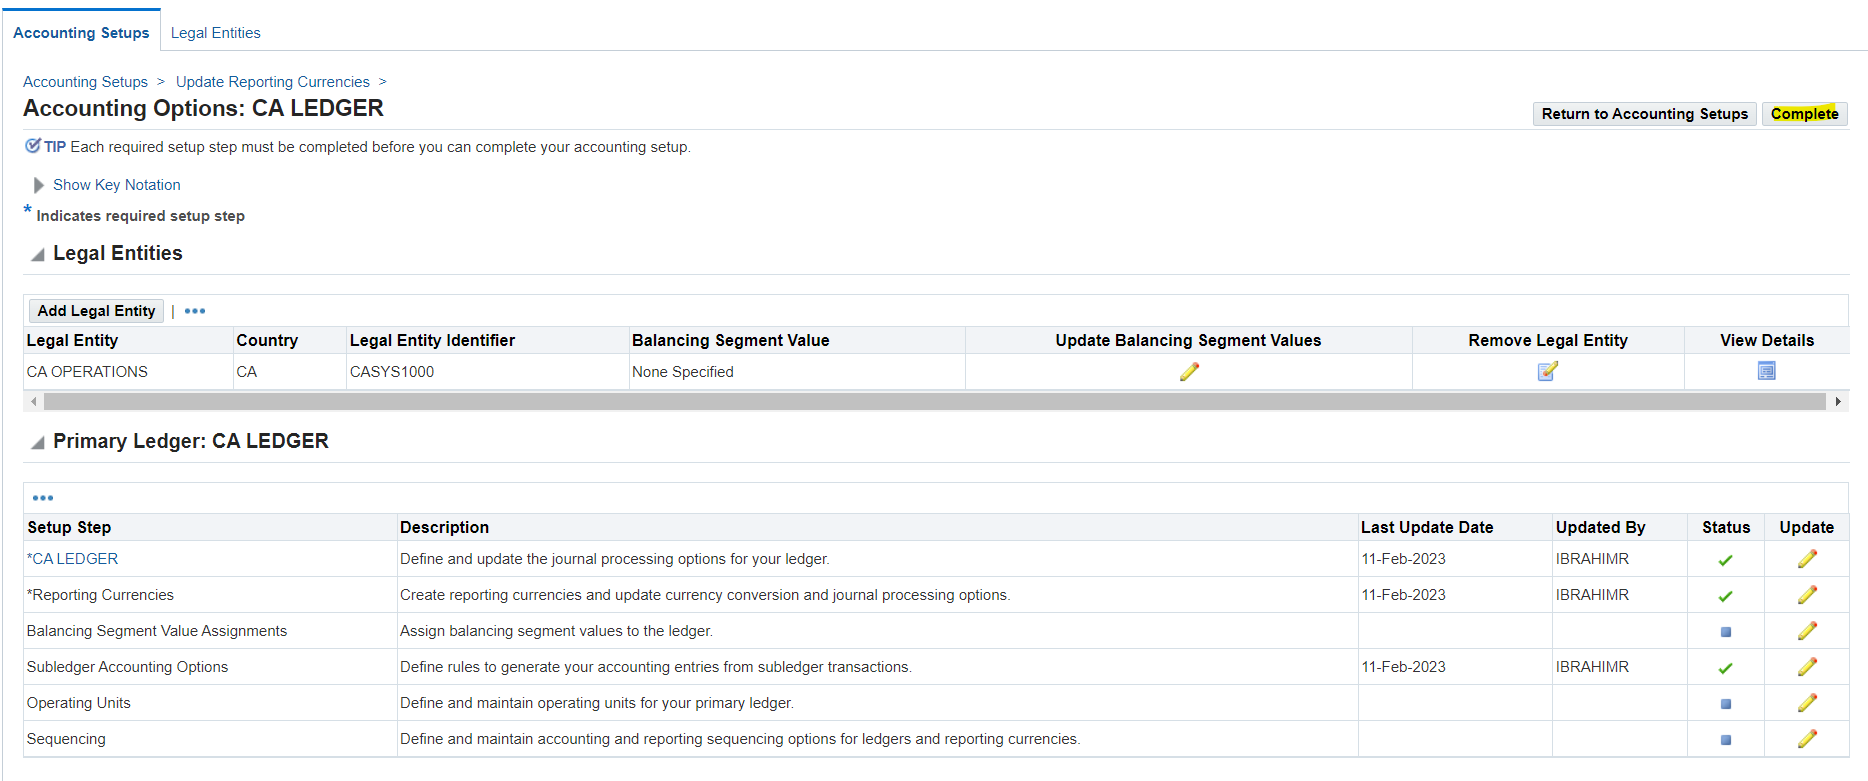
Complete Ledger Options
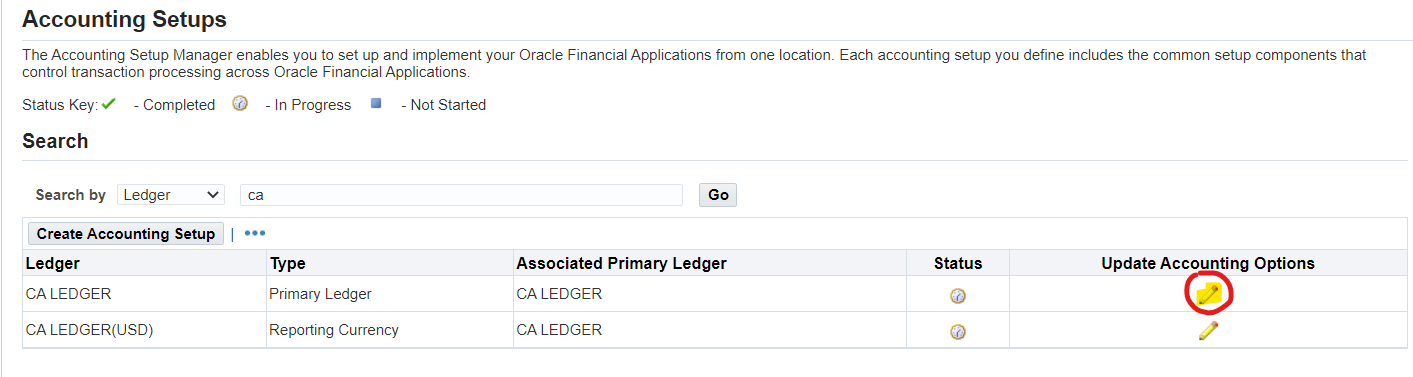
Define Accounting Options
Locate the Ledger Options setup step and select the Pencil Icon to update
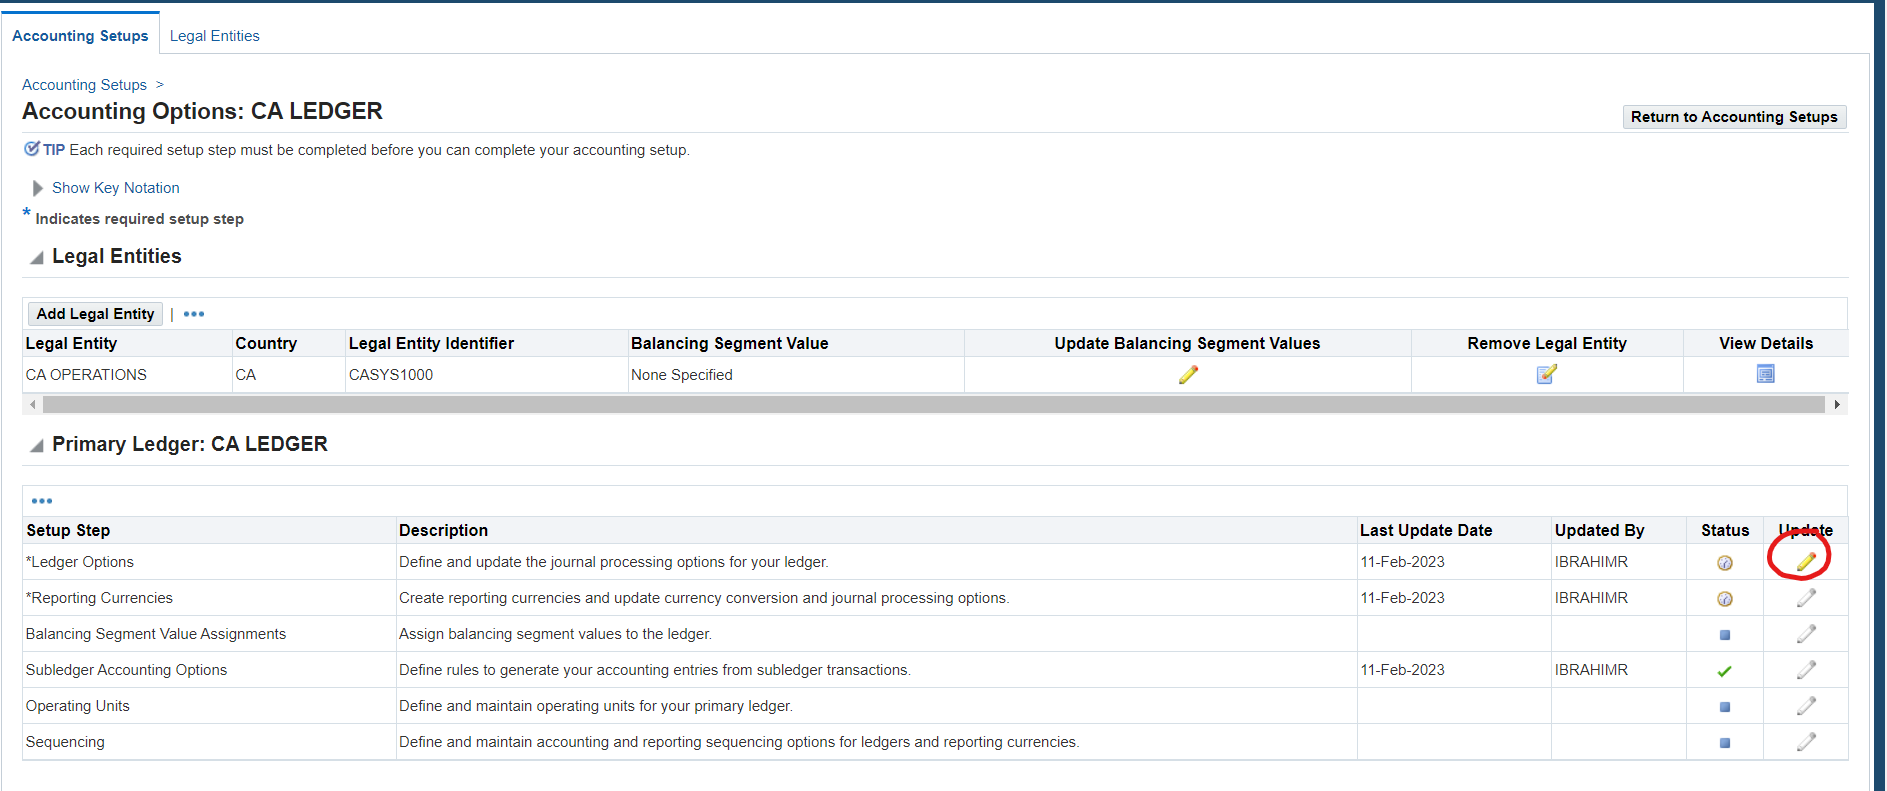
Next
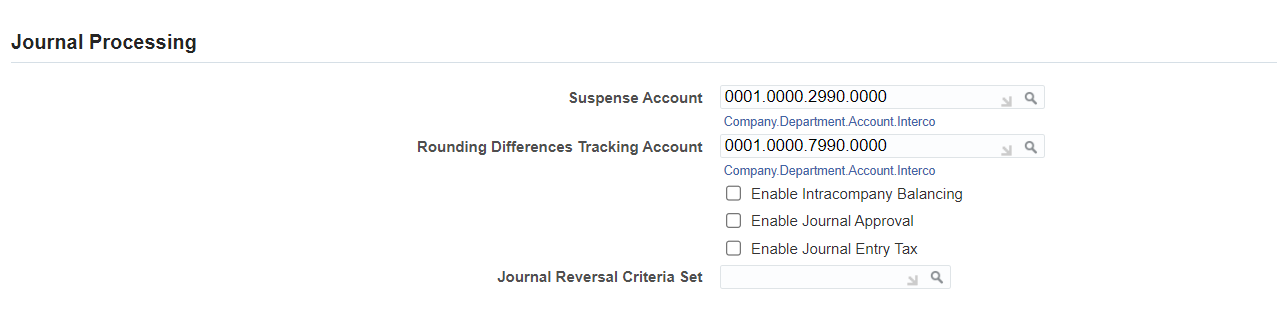
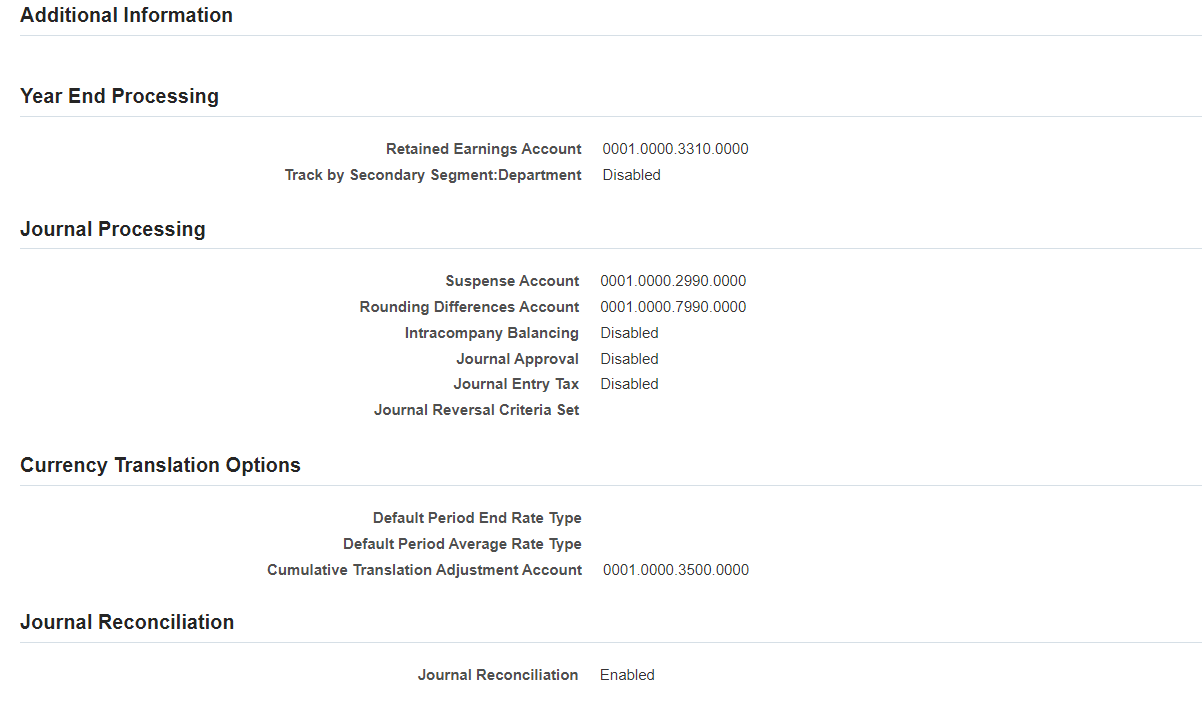
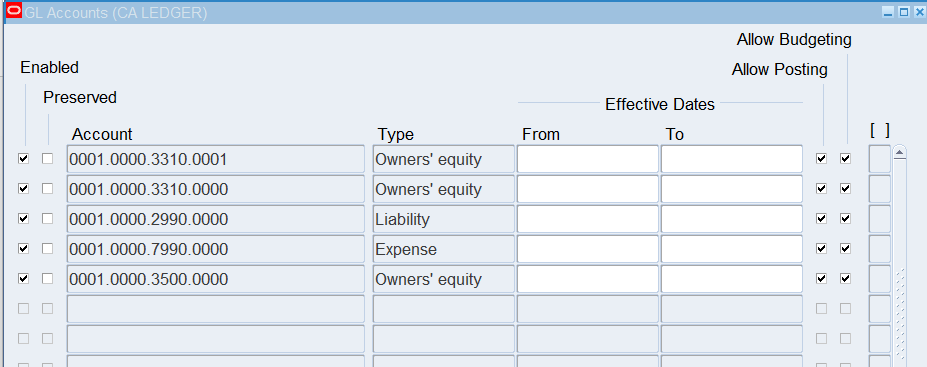
| Field Name | Value |
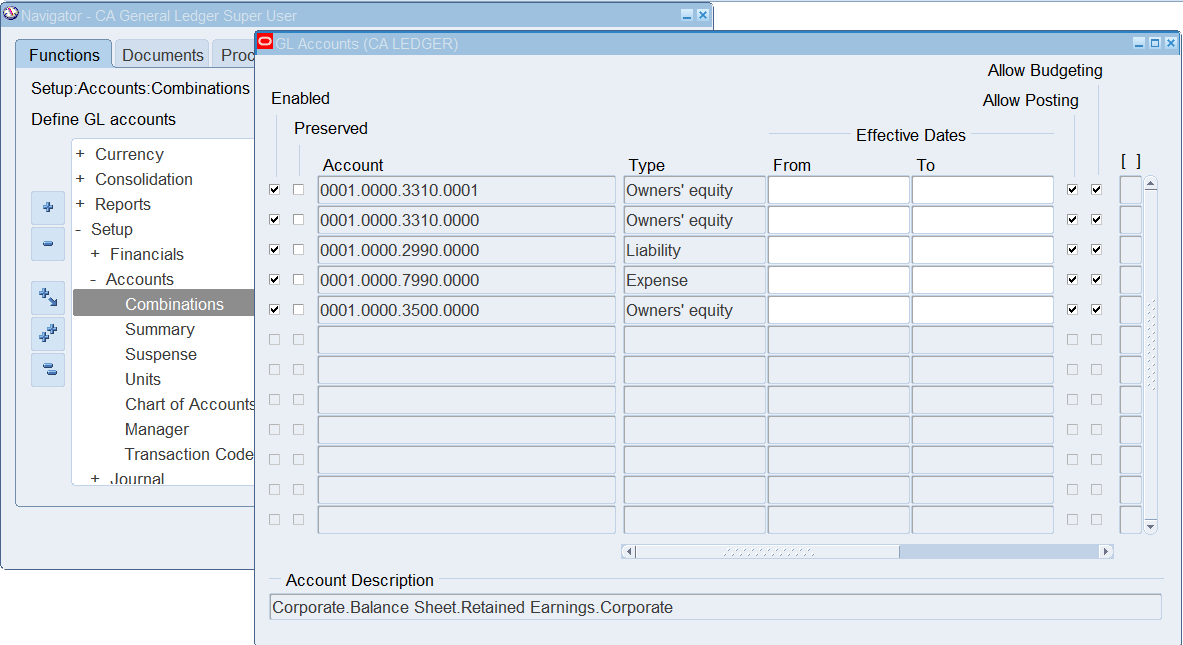
| Retained Earnings | 0001.0000.3310.0000 |
| Suspense Account | 0001.0000.2990.0000 |
| Rounding Differences Tracking Account | 0001.0000.7990.0000 |
| Cumulative Translation Adjustment Account | 0001.0000.3500.0000 |
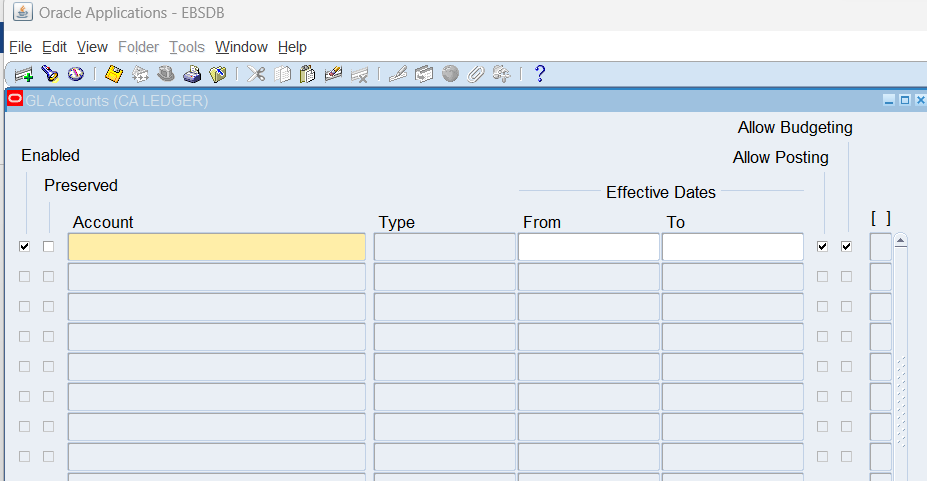
When you enter an account combination, click the Search button and then select the combination. If no combination is found, click the Create button to create the combination and then select it.
Retained Earnings


Complete Reporting Currencies
- Locate the Reporting Currencies setup step and click the Pencil icon to update your reporting currencies.
- Click the Pencil icon to update your reporting currency.
- Enter the following:
| Field Name | Value |
| Default Rate Type | Corporate |
| Retain Transaction Rate Type | Yes |


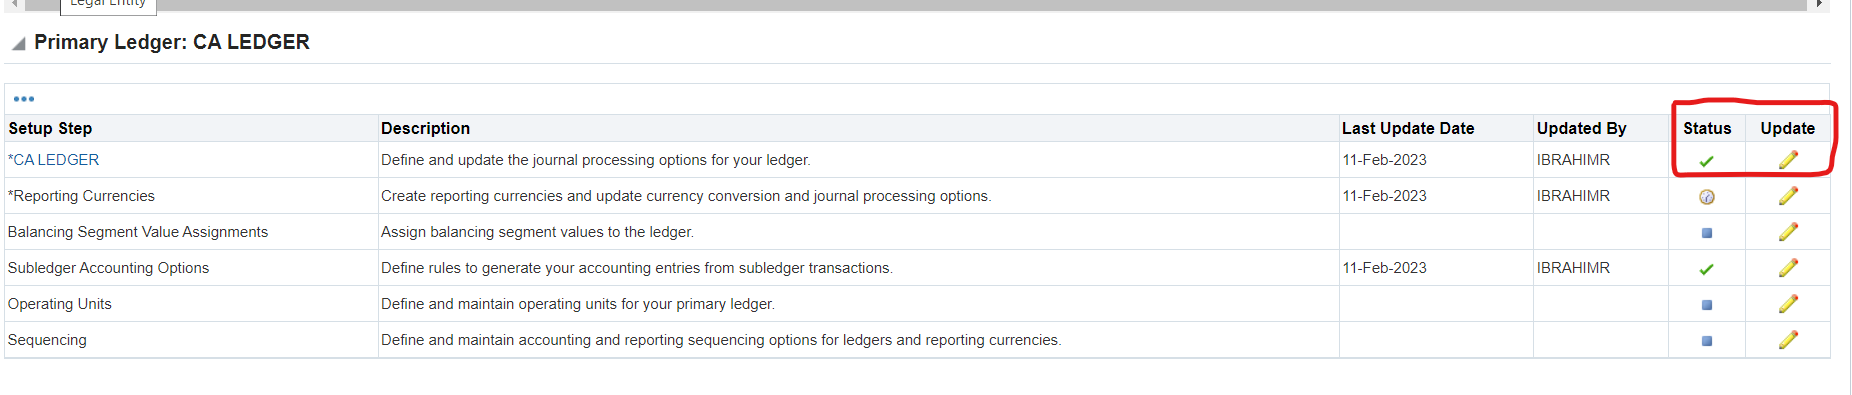
Ensure the Status has a green checkmark indicating the setup step is complete
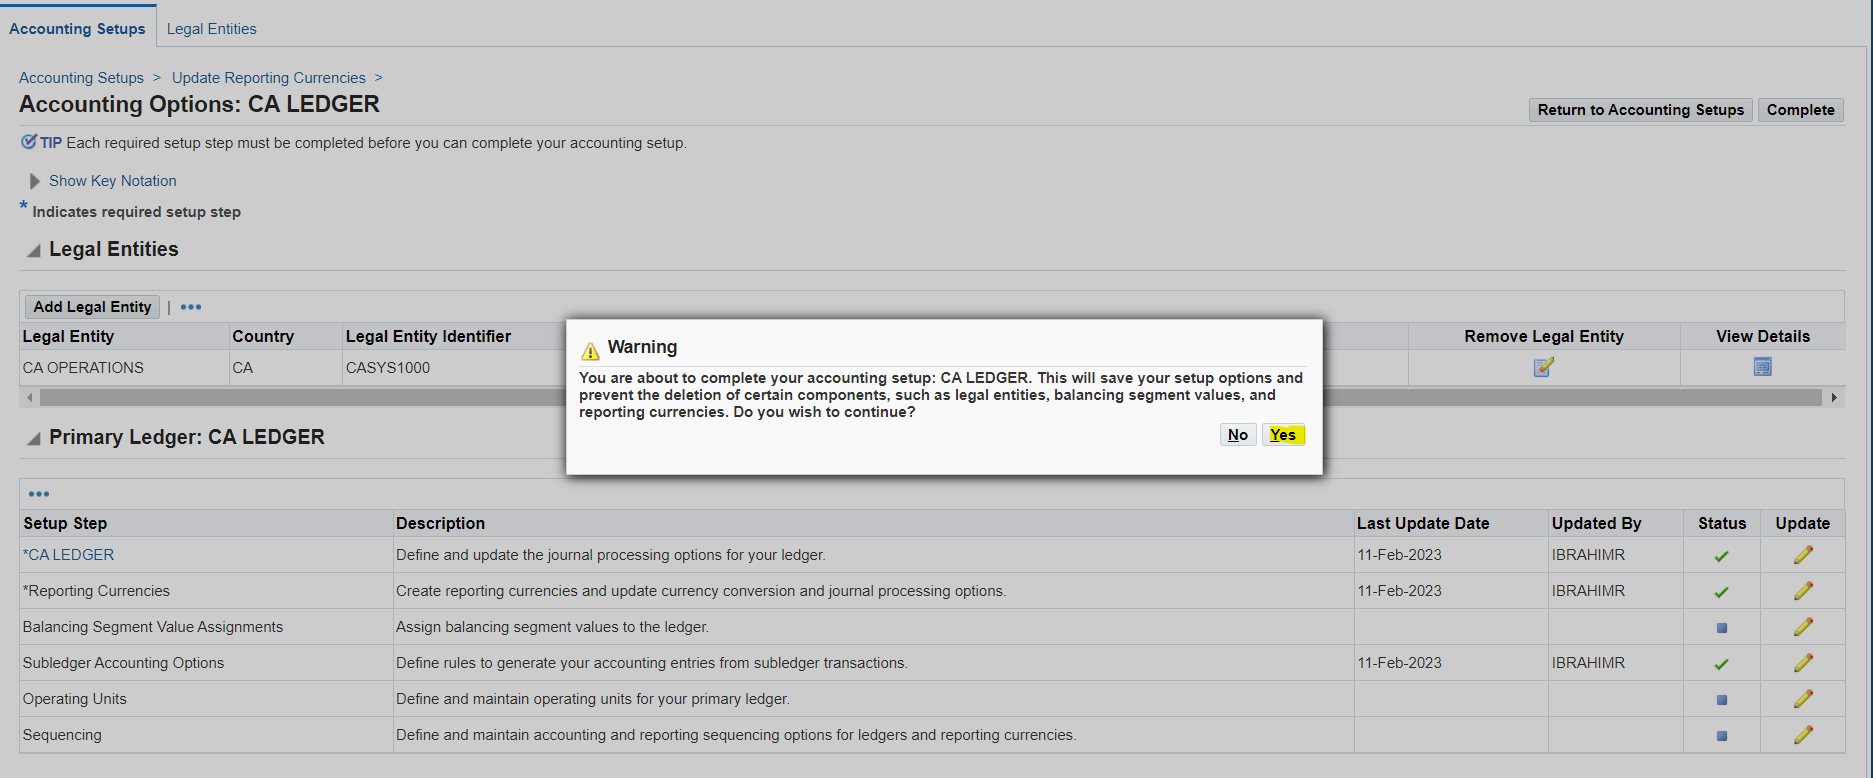
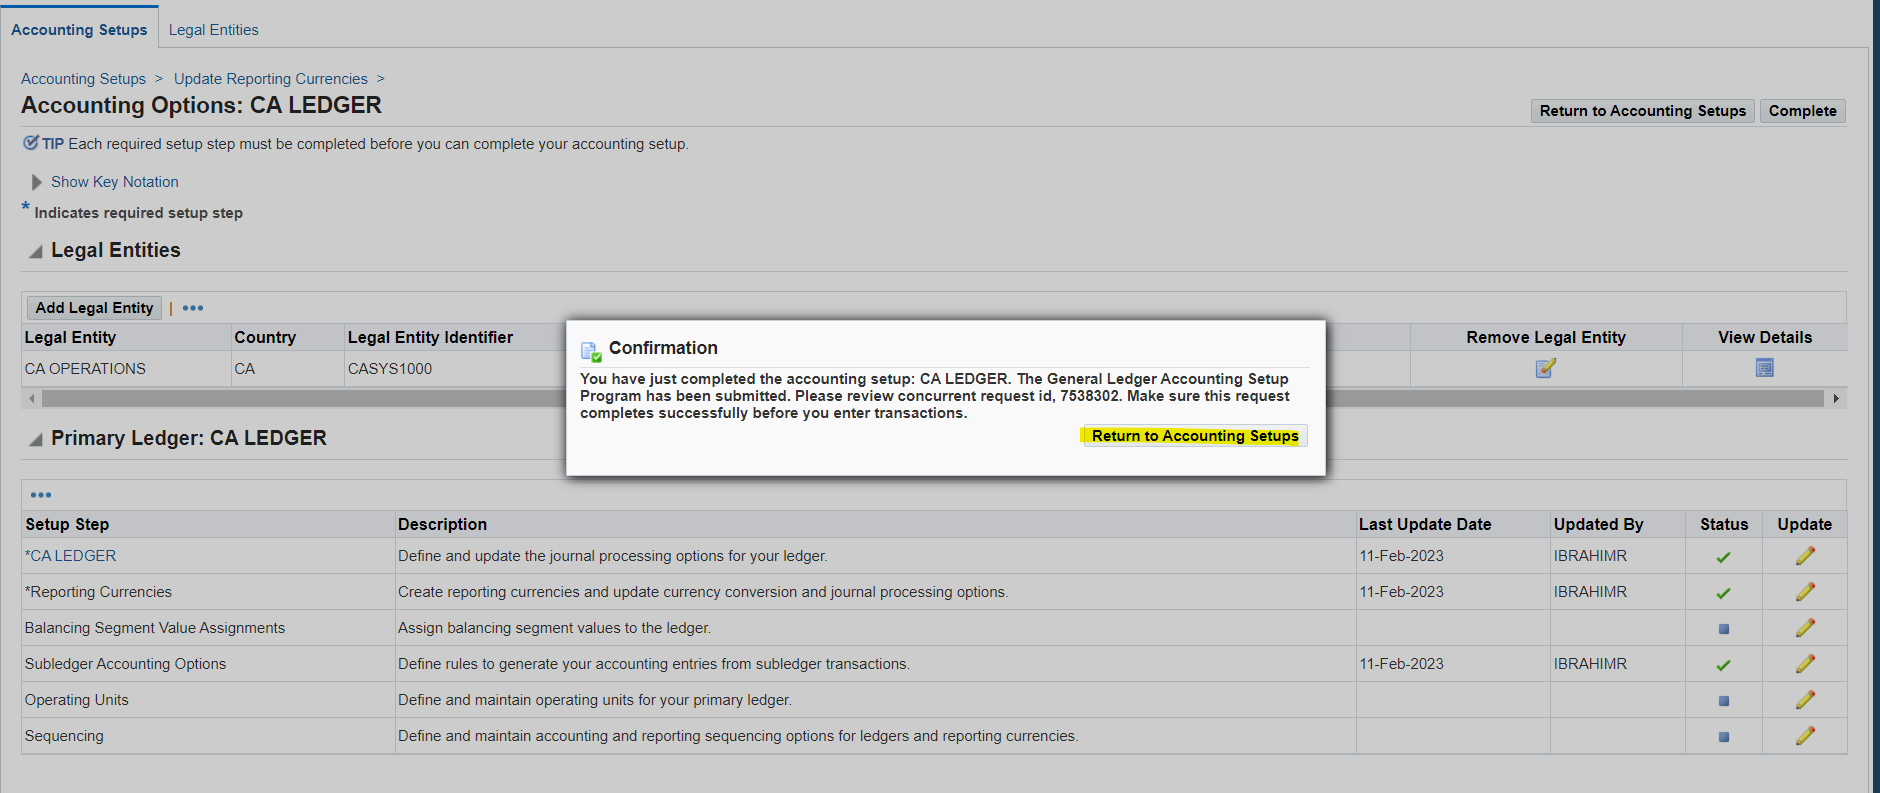
Complete Accounting Setup
- Complete
- Click YES to acknowledge the warning message.
- Click Home to return to the Navigator.
Create a Responsibility for the Controller
View System-Generated Data Access Sets
Responsibility: General Ledger Super User
Navigate to the Data Access Sets window
(N) Setup 🡪 Financials 🡪 Data Access Sets
Select Data Access Set Field and query all data access sets that start with “CA Ledger”
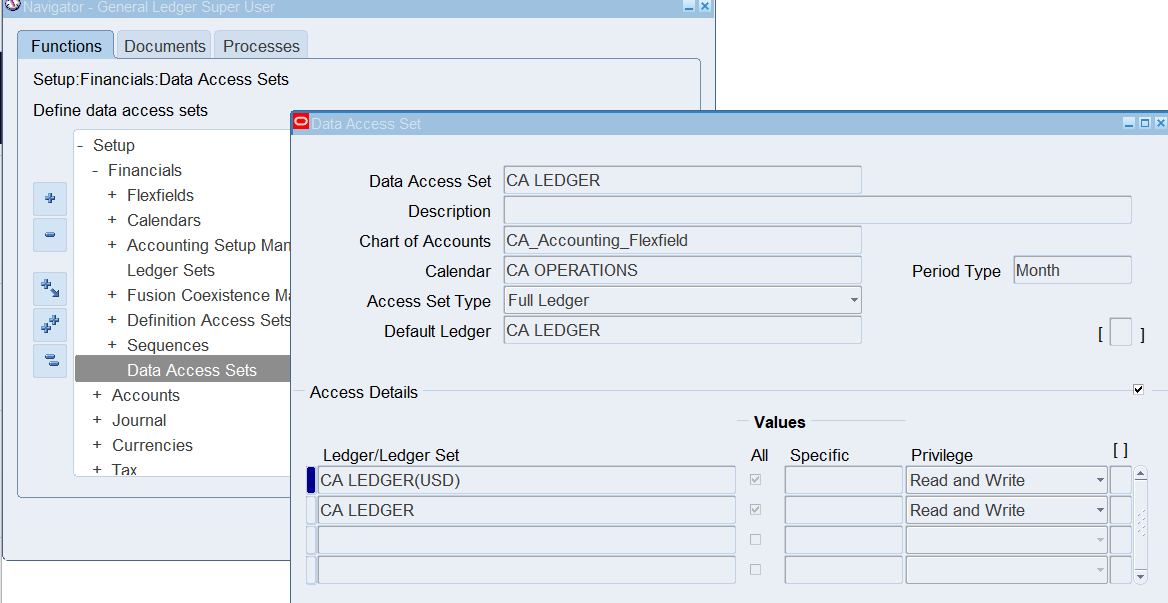
System generated data access sets are displayed as read only and provide full read and write access to the ledgers.
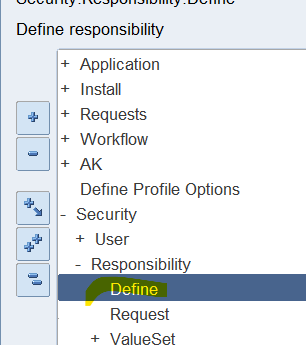
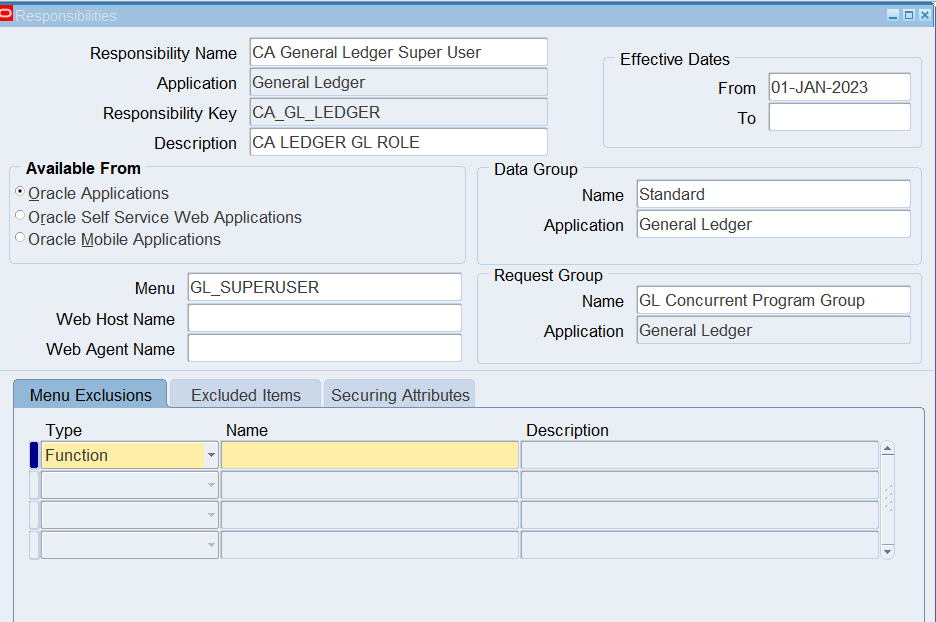
Create a New Responsibility
Responsibility: System Administrator
(N) Security 🡪 Responsibility 🡪 Define
Responsibility: CA General Ledger Super User
Application: General Ledger
Responsibility Key: CA_LEDGER
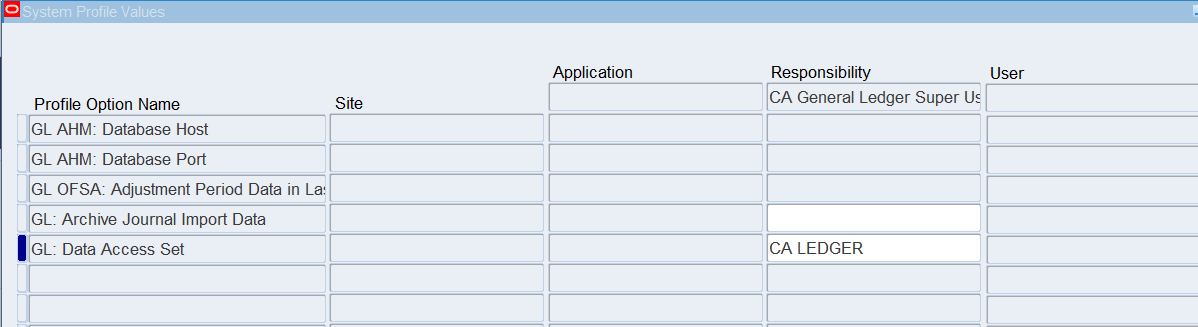
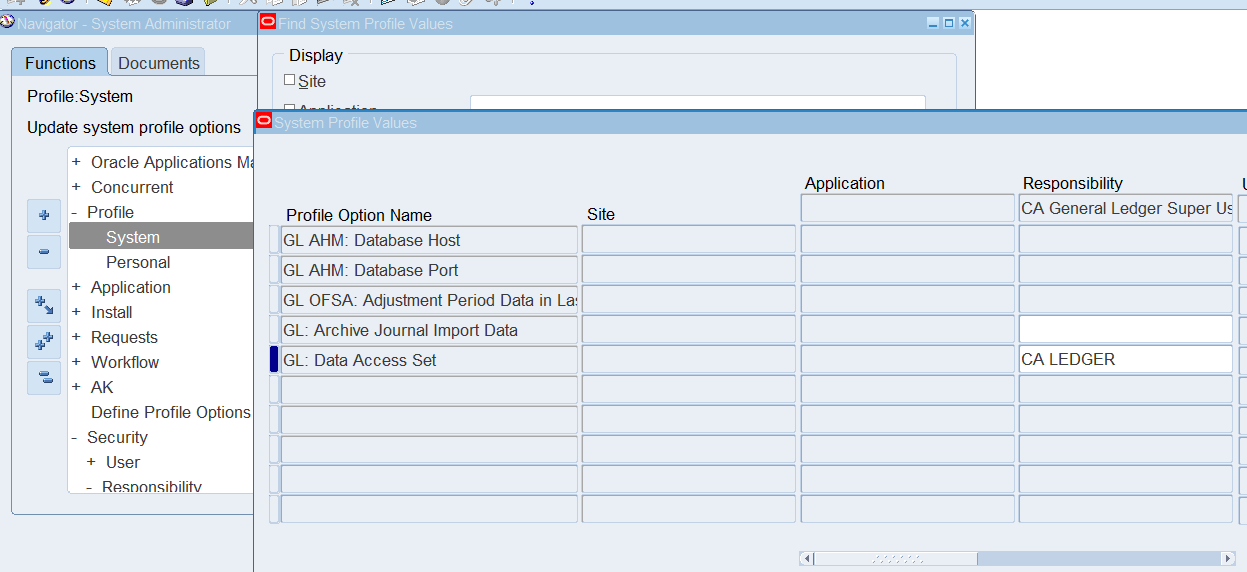
Assign Data Access Set to Responsibility
Associate new ledger CA Ledger to newly created responsibility
(N) Profile 🡪 System
Responsibility: CA General Ledger Super User
Profile: GL: Data Access Set

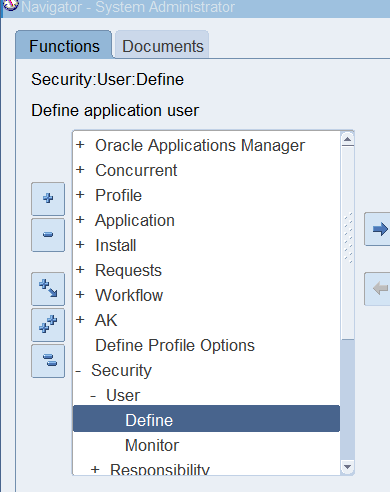
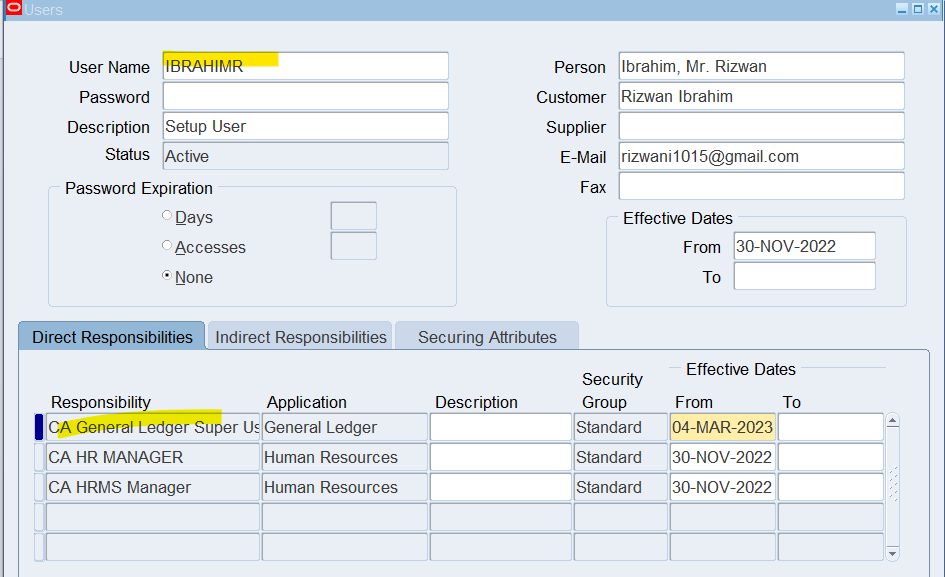
Assign new responsibility to user
Responsibility: System Administrator
Navigate to the Define Users Window
(N) Security 🡪 User 🡪 Define
Query user name and add new responsibility
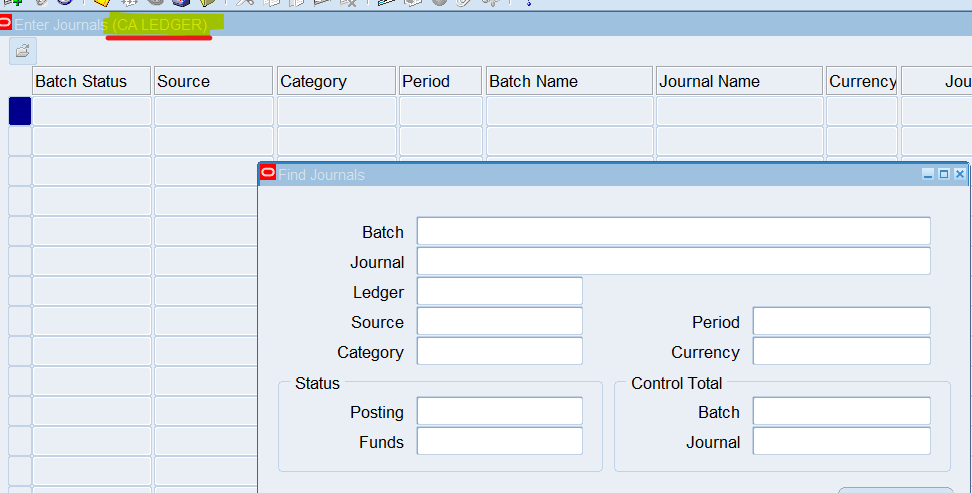
(M) File 🡪 Switch Responsibility
- Responsibility: CA General Ledger Super User
Note: When you have selected responsibility, the Enter Journals screen (N) Journals 🡪 Enter will display the data access set in parentheses in the title bar.
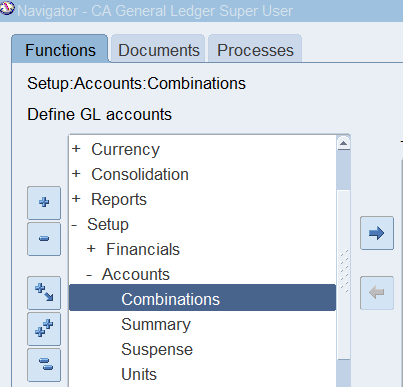
Practice: View Account Combinations created with Dynamic Insertion
Responsibility: CA General Ledger Super User
(N) Setup 🡪 Accounts 🡪 Combinations
Note: If dynamic insertion is not enabled, you will have to define your account combinations
Prior to being able to use them. One option is to temporarily turn dynamic insertion on and load a 0 amount journal entry using Web ADI with all account combinations you plan to use. Dynamic insertion will create the account combinations for you; you can then turn dynamic insertion off. The journal entry can be deleted if desired.
If you work with Oracle Applications that generate a lot of new account combinations (e.g. Oracle Assets), consider your decision to use (or not use) dynamic insertion carefully.
Also, if you will be using Oracle Projects or Grants, dynamic insertion must be turned on. The Auto Accounting feature used in Oracle Projects and Oracle Grants checks to verify that dynamic insertion is on. If it is not, you will not be able to create journal entries from PA.
Open the Account Combinations window
(N) Setup 🡪 Accounts 🡪 Combinations
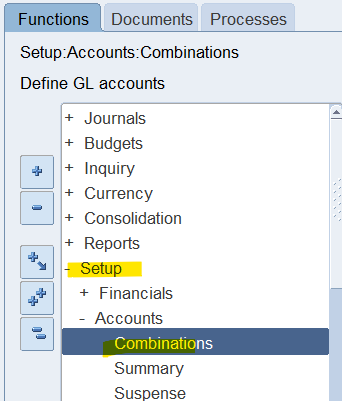
Note: Account combinations were dynamically created.
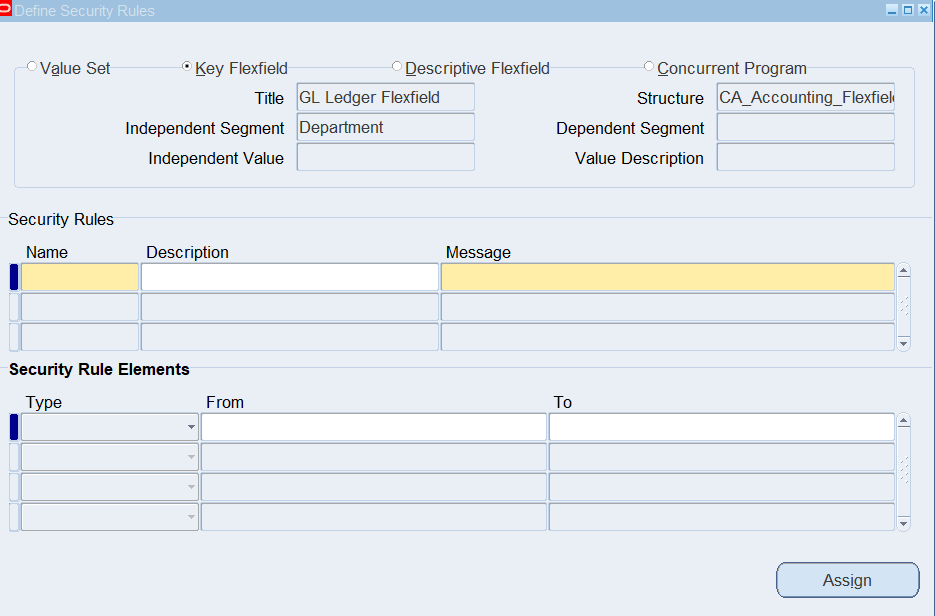
Create a Security Rule
Segment Value Security Rules restrict access to specific segment values based on the user’s responsibility. Define a rule that removes the use of Department 2100, and attach the rule to responsibility.
Responsibility: CA General Ledger Super User
(N) Setup 🡪 Financials 🡪 Flexfields 🡪 Key 🡪 Security 🡪 Define
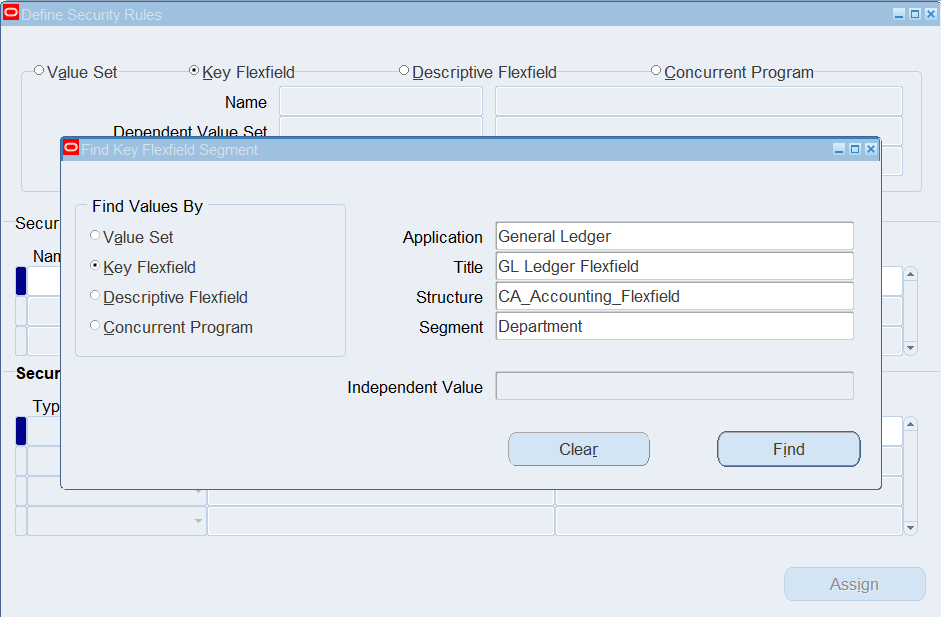
Define Security Rules
Name: CA DEPT Security Rule1
Description: Department 2100 Restricted Rule
Message: Dept 2100 is not valid for this responsibility
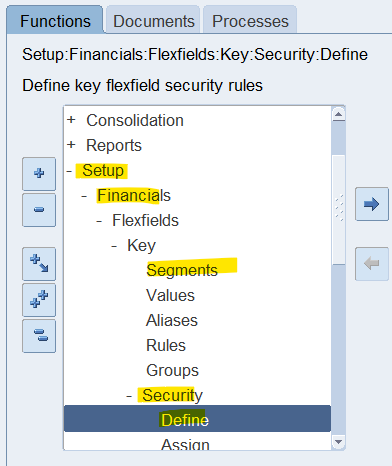
(N) Setup 🡪 Financials 🡪 Flexfields 🡪 Key 🡪 Security 🡪 Define
Find Values by Key Flexfield
Title: Accounting Flexfield
Structure: CA_Accounting_Flexfield
Segment: Department

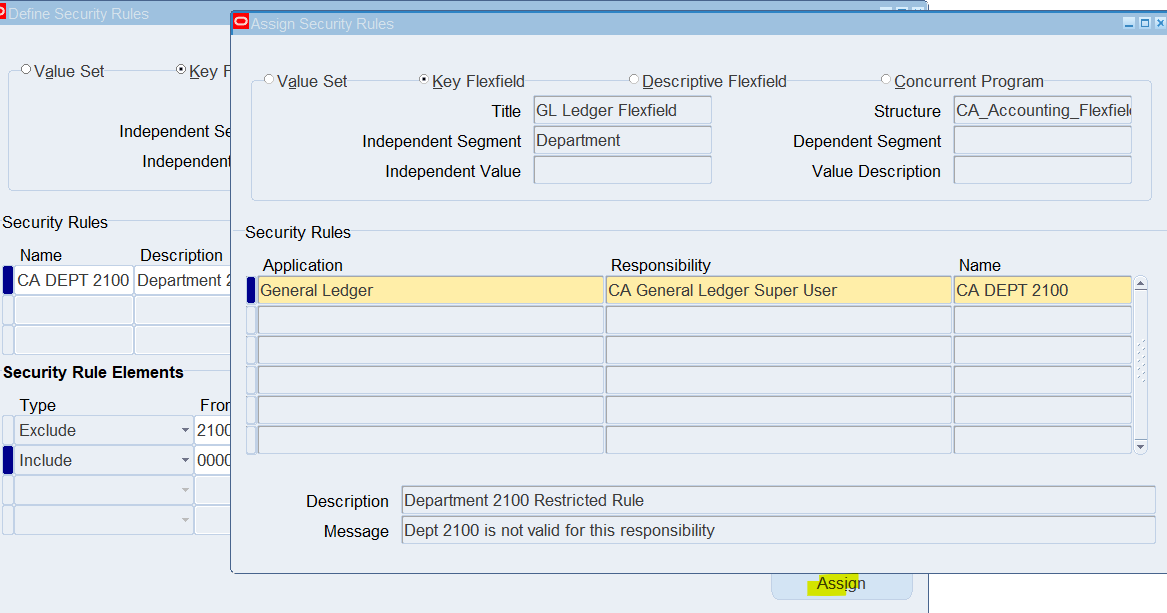
Assign the Rule to a Responsibility
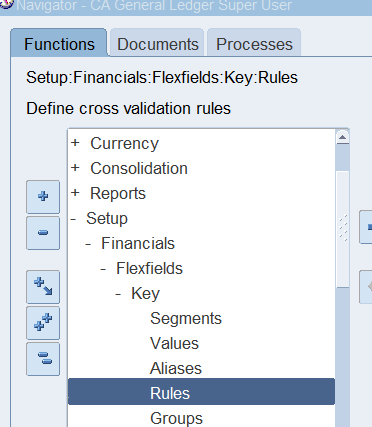
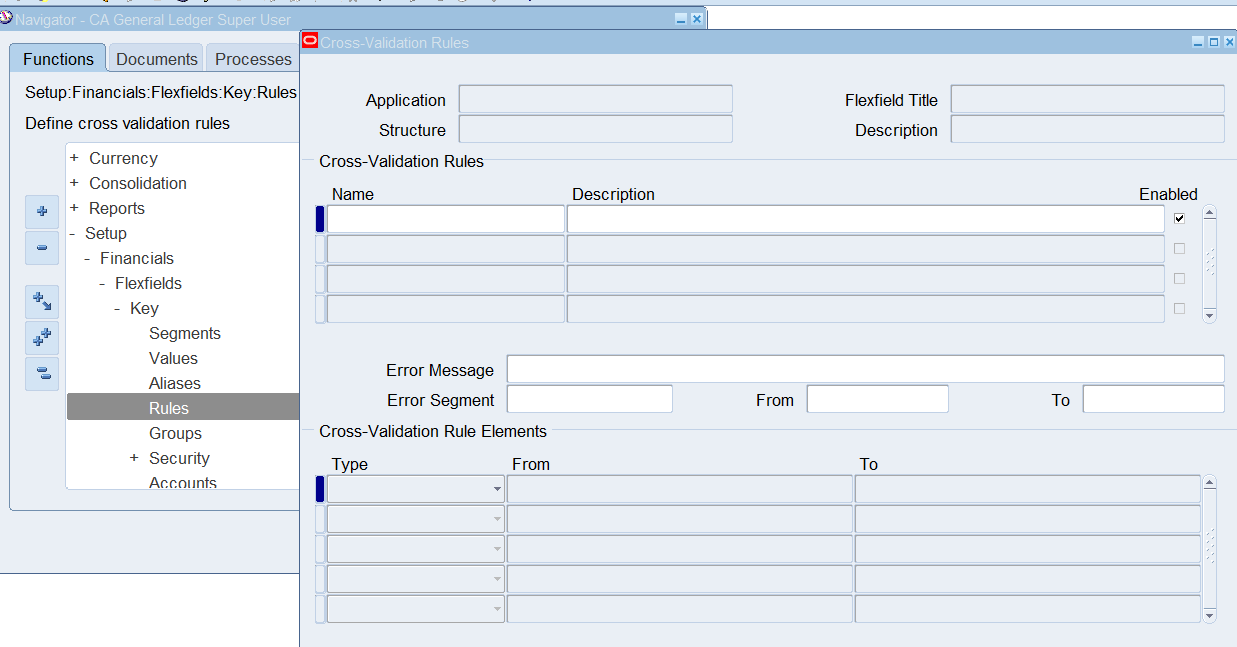
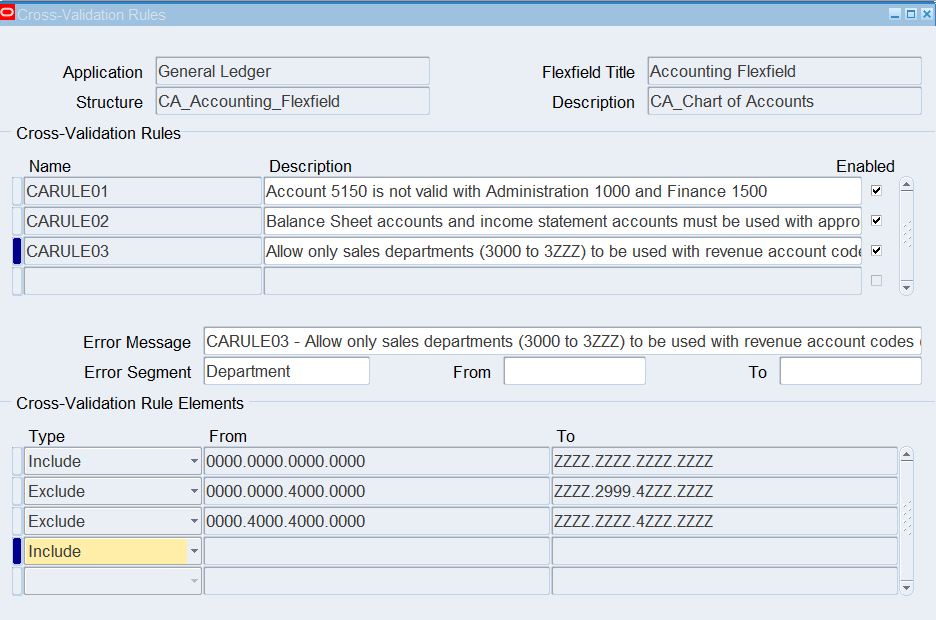
Define Cross Validation Rules
Overview
Cross Validation Rules determine which combinations of valid segment values are invalid, regardless of the user’s responsibility because cross validation rules are defined at the chart of accounts level. It is a good idea to use combinations of several simple rules rather than a few “all encompassing” rules. Keep in mind that Cross Validation rules are linked to a flexfield structure (chart of accounts); security rules are linked to a responsibility. In this practice, you will define cross validation rules.
- Responsibility: CA General Ledger Super User
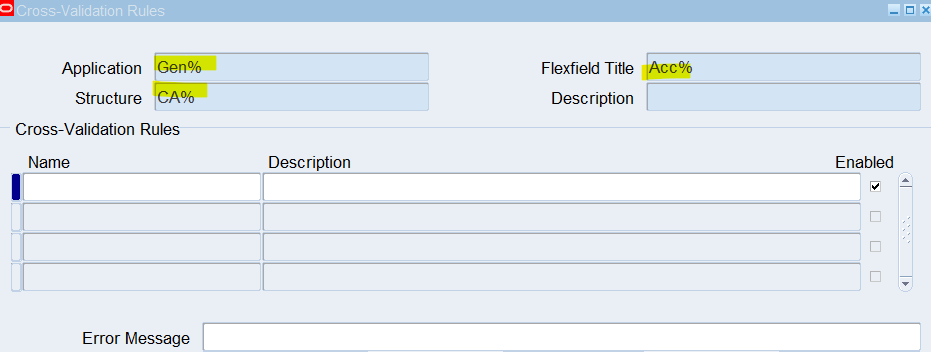
- Navigate to the Key Rules window
- Query flexfield structure
Define the Commission Rule
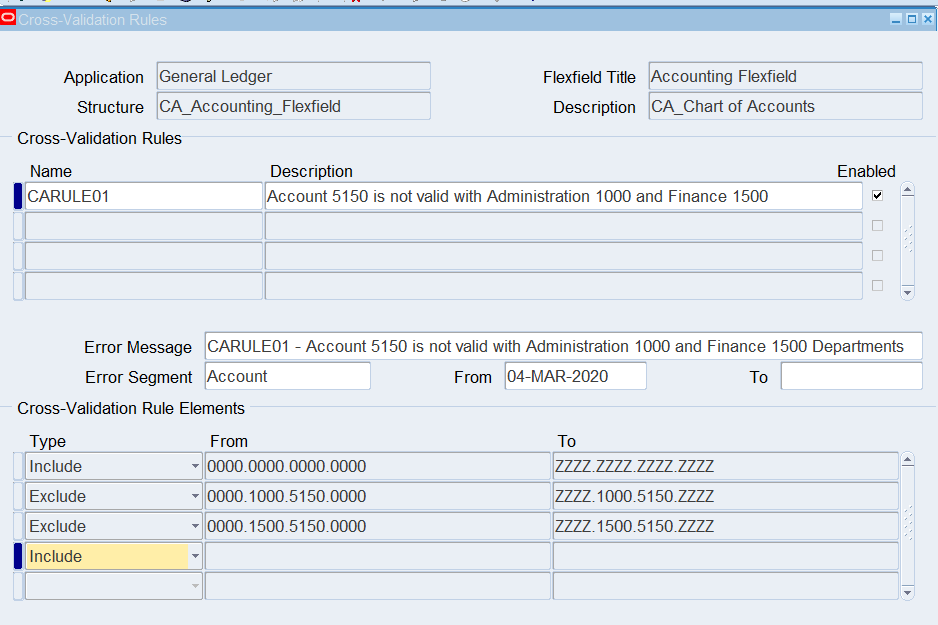
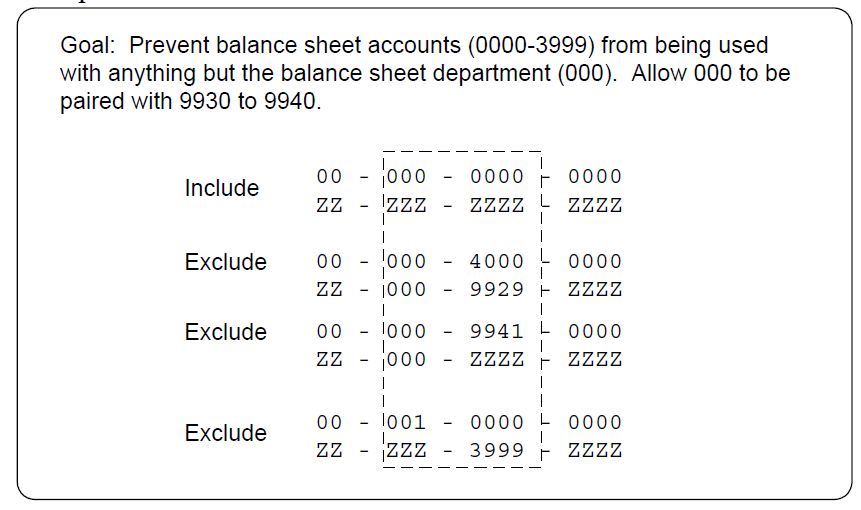
Define the Balance Sheet Rule
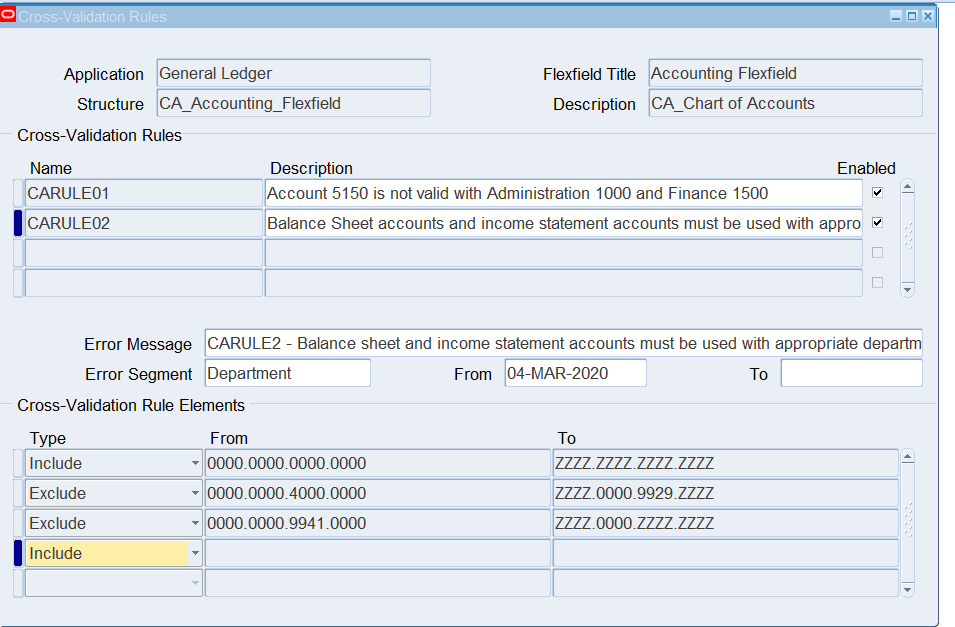
Define the Revenue Rule
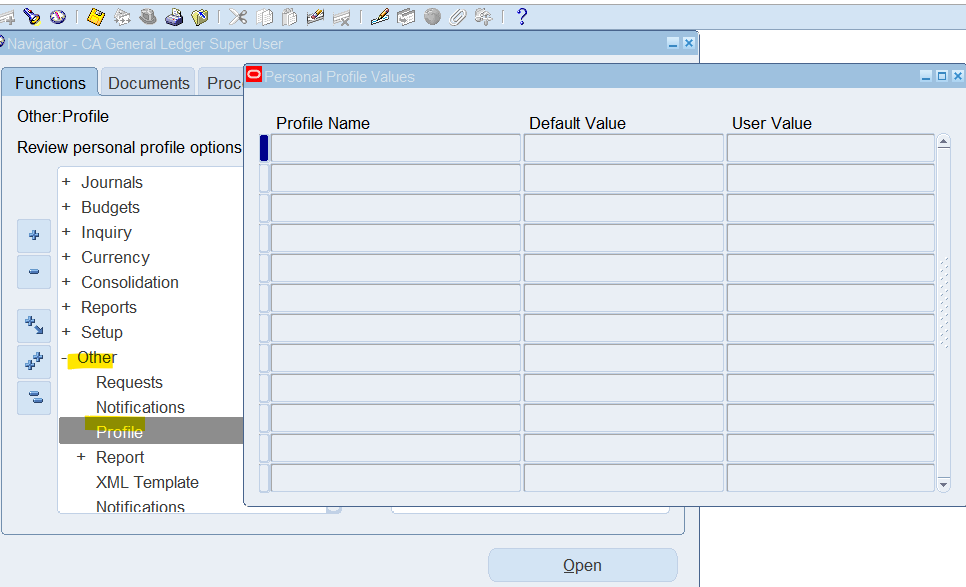
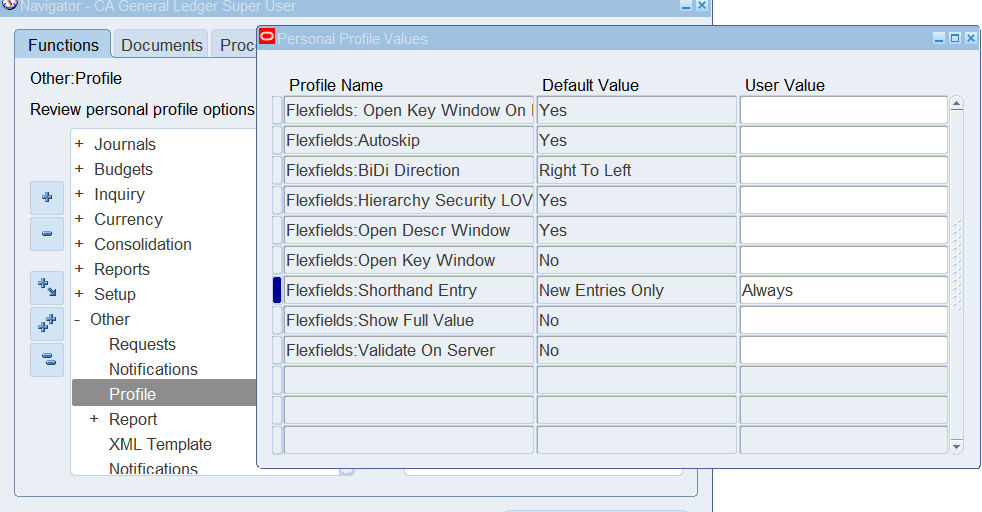
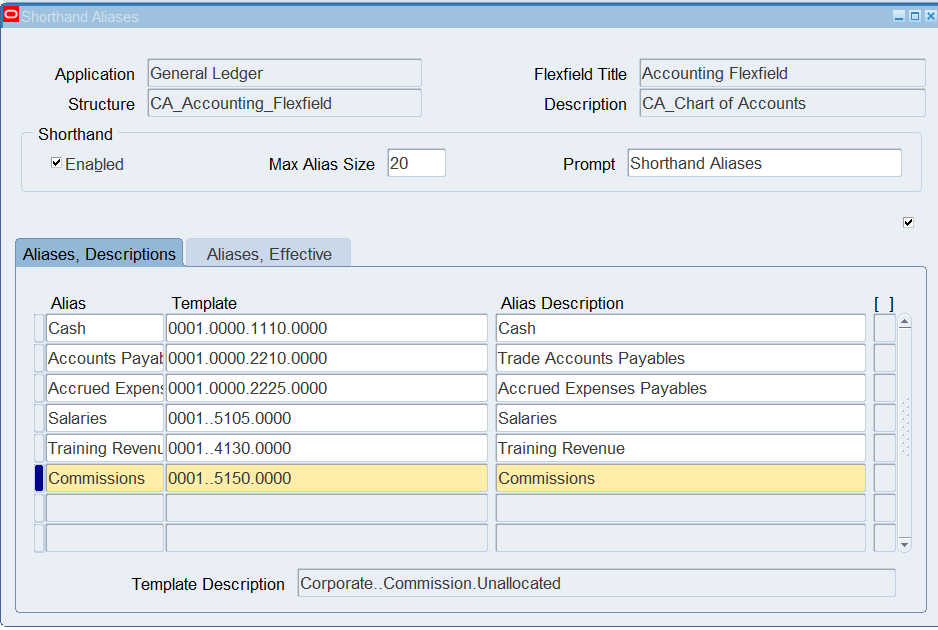
Define and Test Shorthand Aliases
Responsibility: CA General Ledger Super User
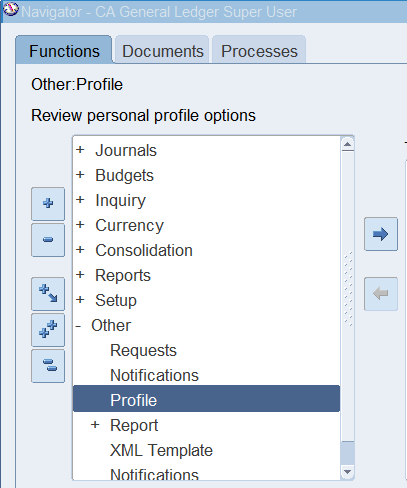
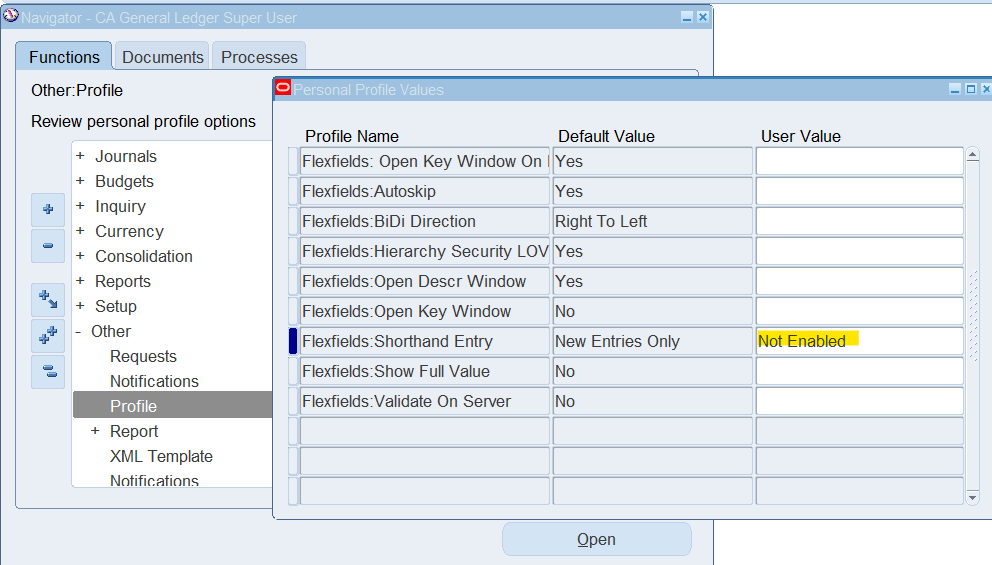
Navigate to the Profile window
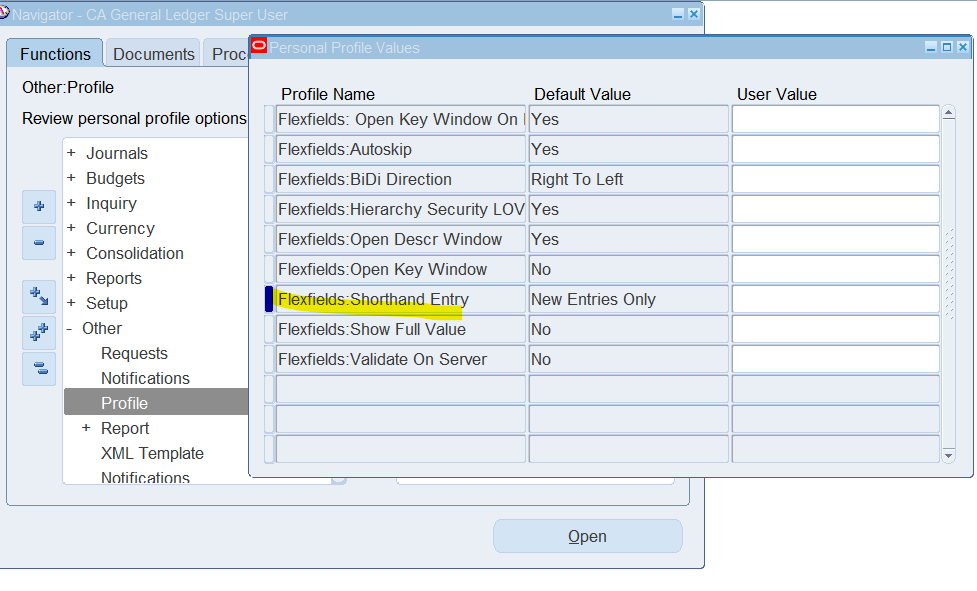
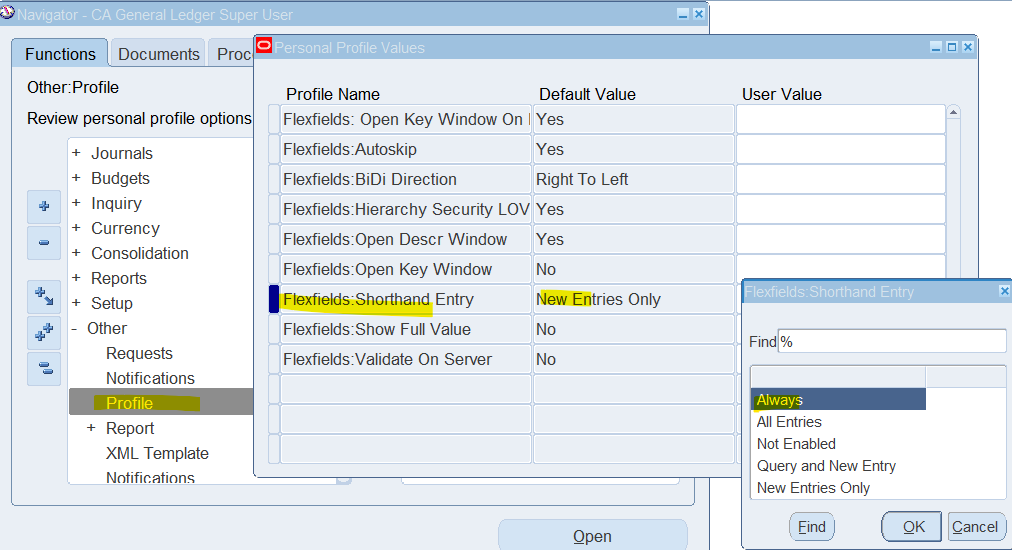
Query the Flexfields: Shorthand Entry Profile Option
User Value = Always
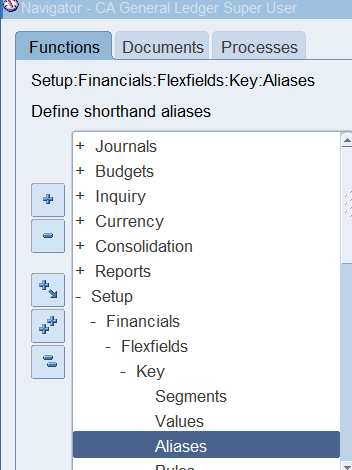
Query the Flexfield Structure
Navigate to the Shorthand Aliases window
(N) Setup 🡪 Financials 🡪 Flexfields 🡪 Key 🡪 Aliases
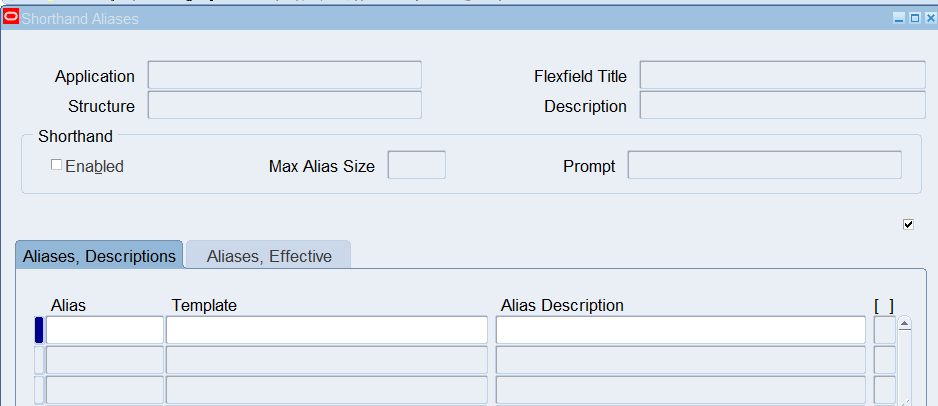
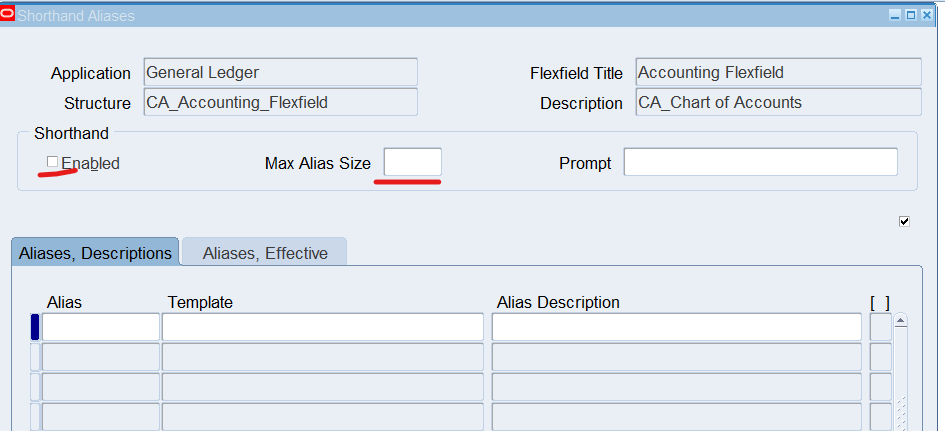
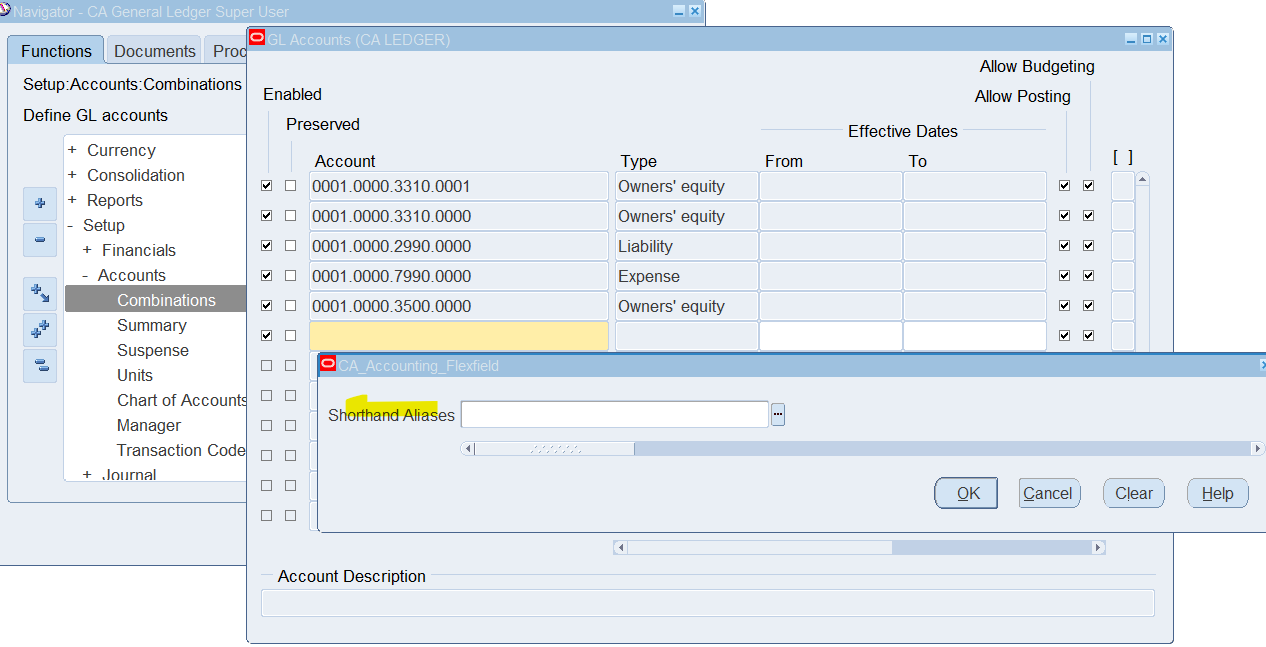
Define Shorthand aliases:
- Enabled = Checked
- Max Alias Size = 20
- For the prompt, type “Shorthand Aliases”
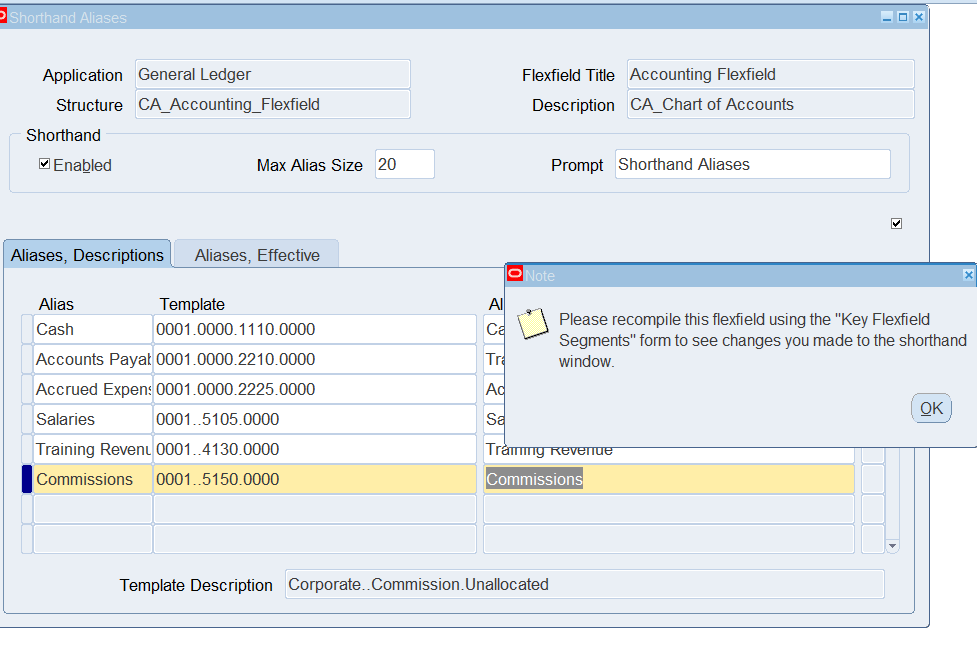
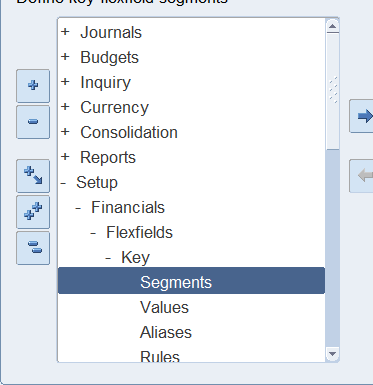
Recompile the Flexfield
Navigate to the Key Segments window
(N) Setup 🡪 Financials 🡪 Flexfields 🡪 Key 🡪 Segments
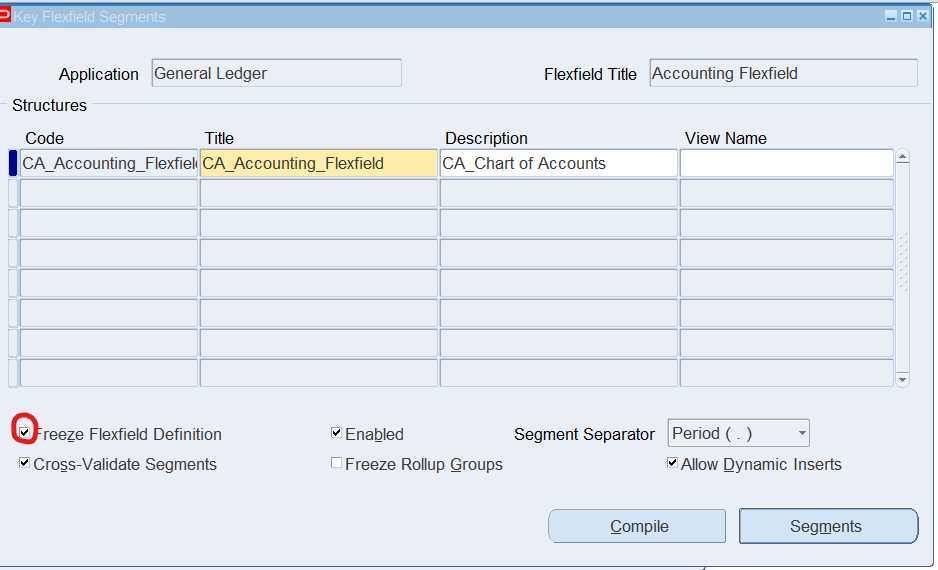
- Query CA_Accounting Flexfiel structure
- Deselect the Freeze Flexfield definition checkbox
- Click (B) OK in the caution window
- Save
- Verify the Freeze Flexfield Definition box is checked
- Click (B) OK in the Caution window
- (B) Compile
- Click (B) OK in the (2) Note windows
- Close windows
Test the Account Aliases
(N) Setup 🡪 Accounts 🡪 Combinations

Disable Account Aliases for Your User
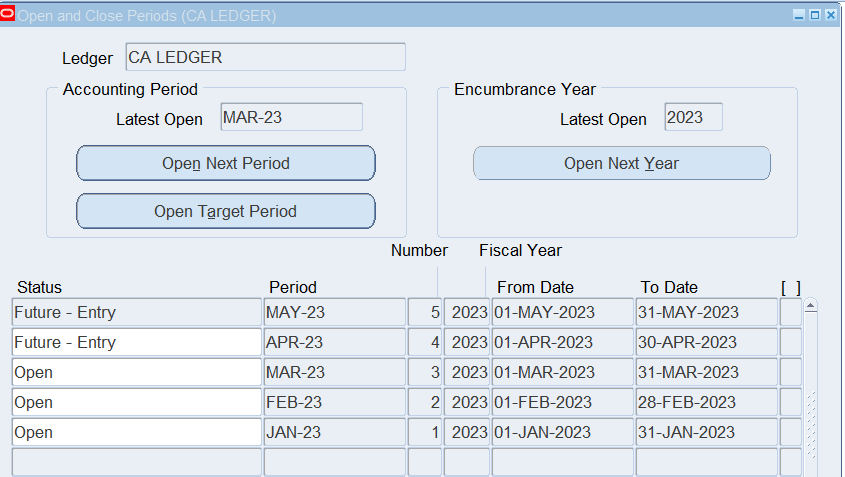
Open the First Accounting Period (Required)
Overview
You will open the first accounting period for primary ledger and its reporting currency.
You will convert summary balances into December of the prior accounting year and detail balances for each period until cutover. The cutover period will be the current calendar month. Open the appropriate periods for both the primary ledger and its reporting currency
Note: Translation cannot be performed in the first open period.
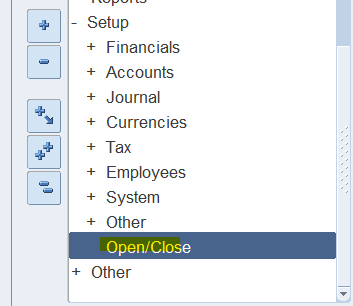
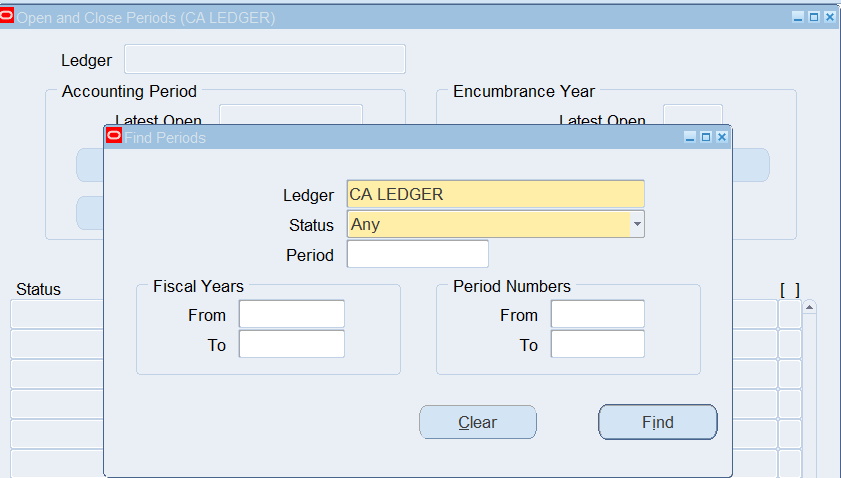
- Responsibility : CA General Ledger Super User
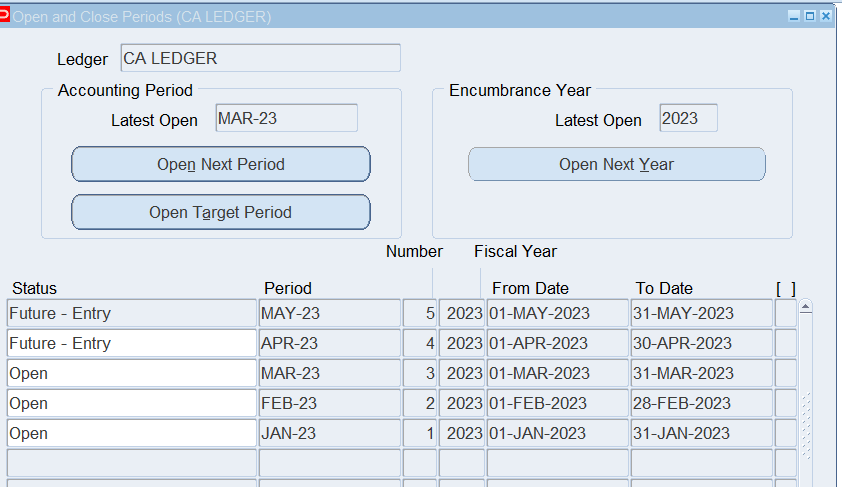
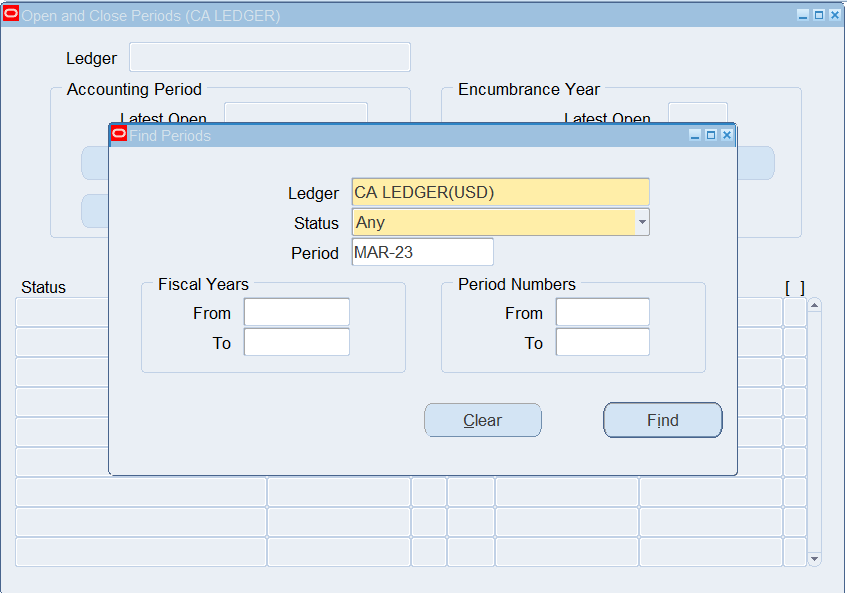
- Navigate to : Open and Close Periods window
Note: This is the journal level reporting currency. In order to prevent problems during posting, you should keep the periods for both the source ledger and its reporting currency in sync.
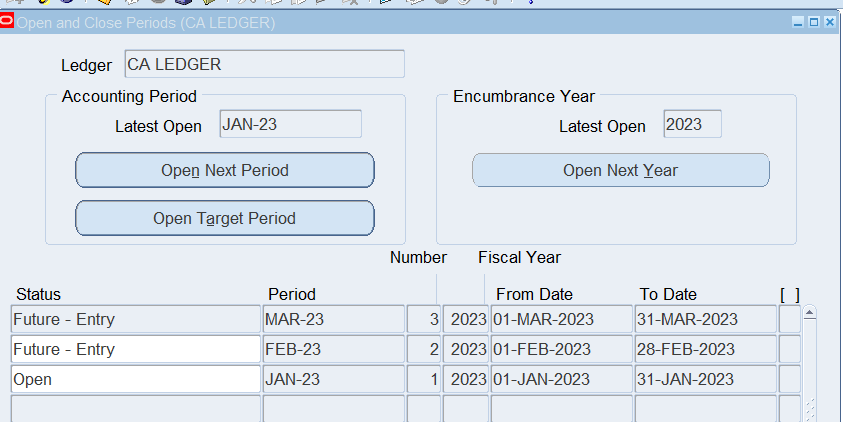
- First Period = The First Ever Opened Period defined for your primary ledger will default.
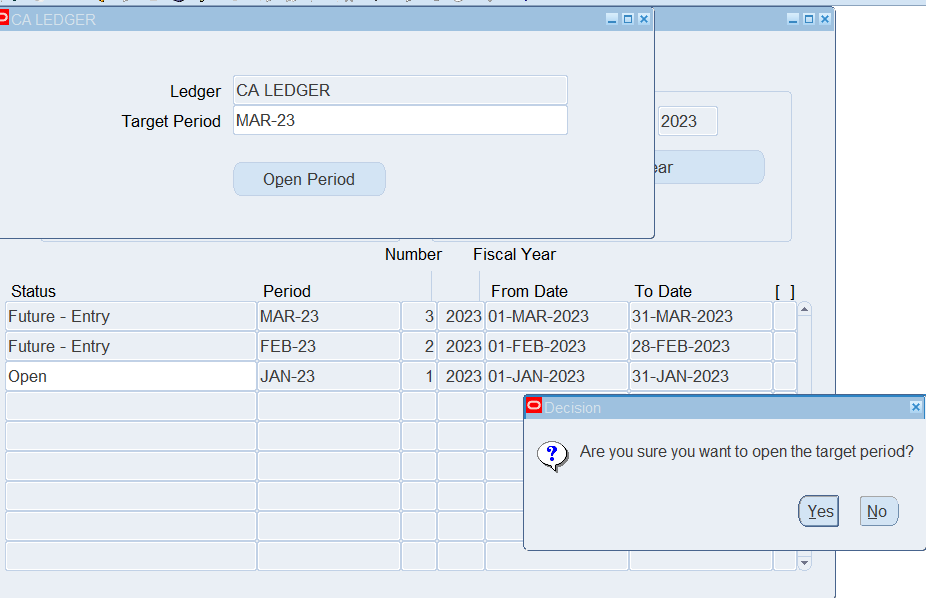
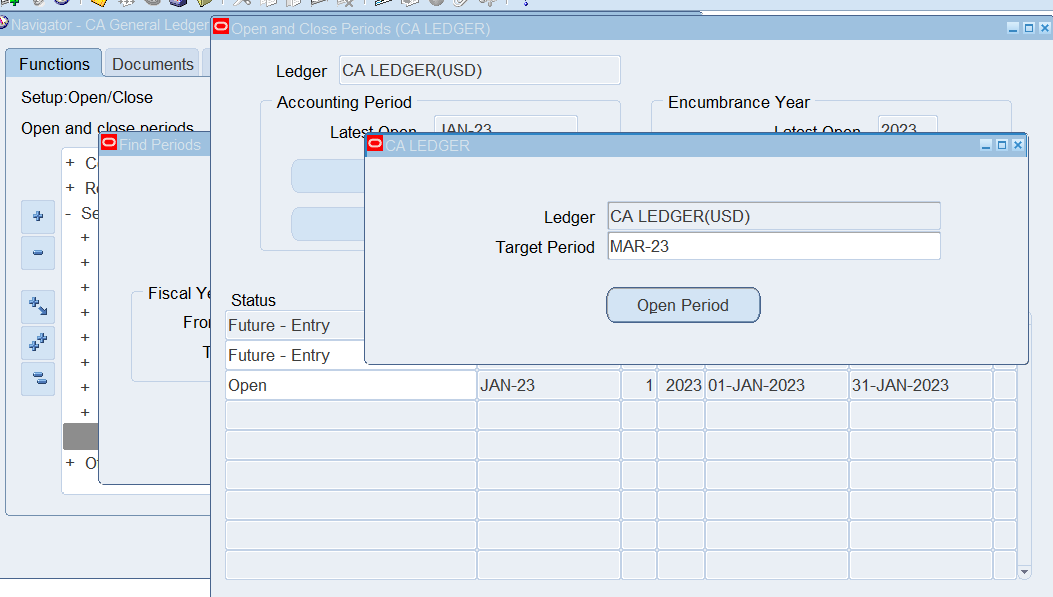
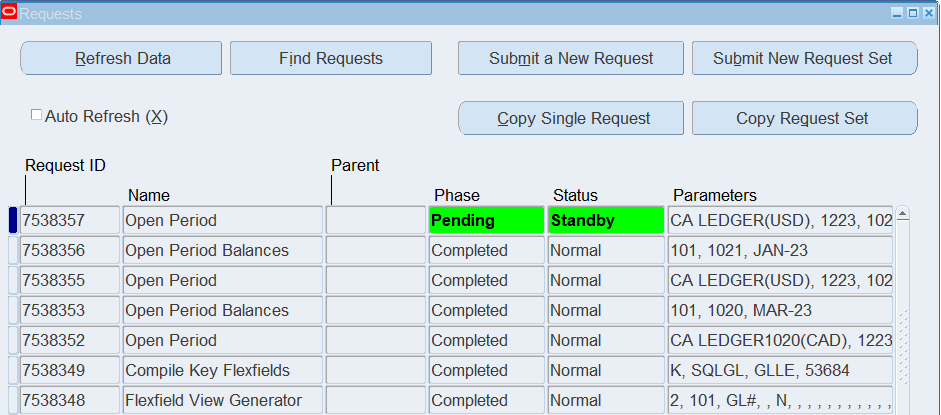
Note: After specifying the Target Period and selecting (B) Open Period, all periods up to and including the Target Period will be open. This is a change from prior versions of Oracle Applications where each period had to be opened individually and consecutively
Note: You should limit the number of periods you have open in order to improve posting performance. This is particularly useful during implementations when you are uploading balances from a legacy system. Instead of having a year’s worth of periods open as you are uploading and posting to each period, open a couple of periods and have a high number of future-enterable periods defined for your ledger.
Note: The number of future-enterable periods can be changed at any time in the Ledger Options window in Accounting Setup Manager. After you have uploaded the balances for all the periods, post the journals, then close older periods.
Open Report Period

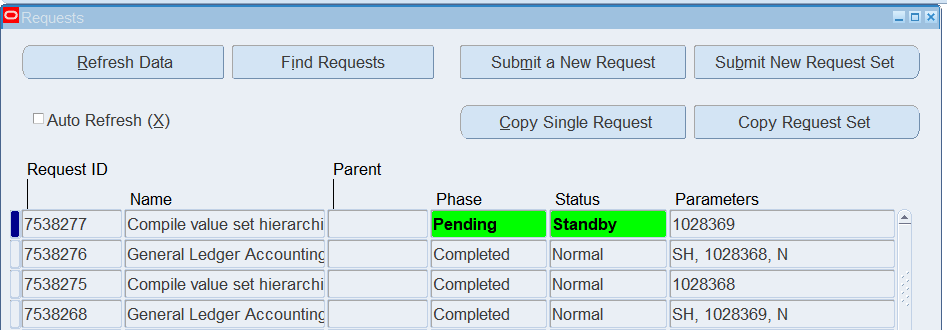
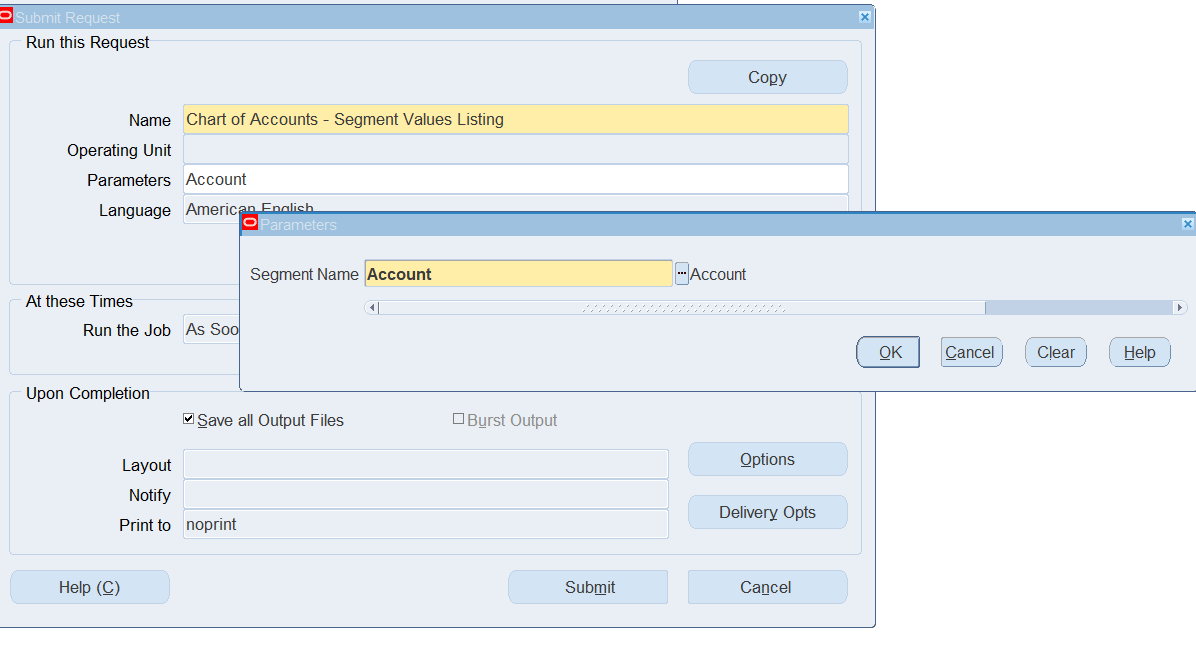
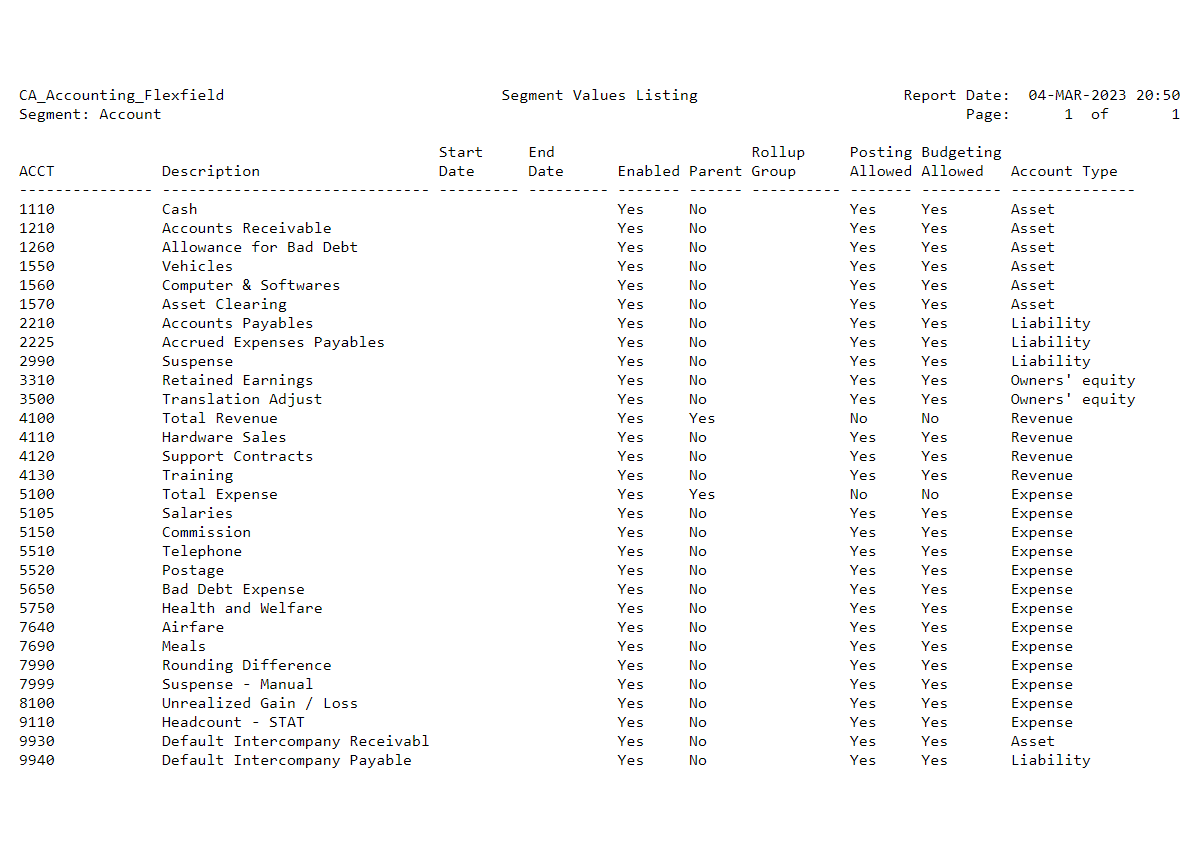
Run General Ledger Reports
Navigate to the Standard Request Submission screen.
(N) Reports 🡪 Request 🡪 Standard

Account Hierarchy Manager
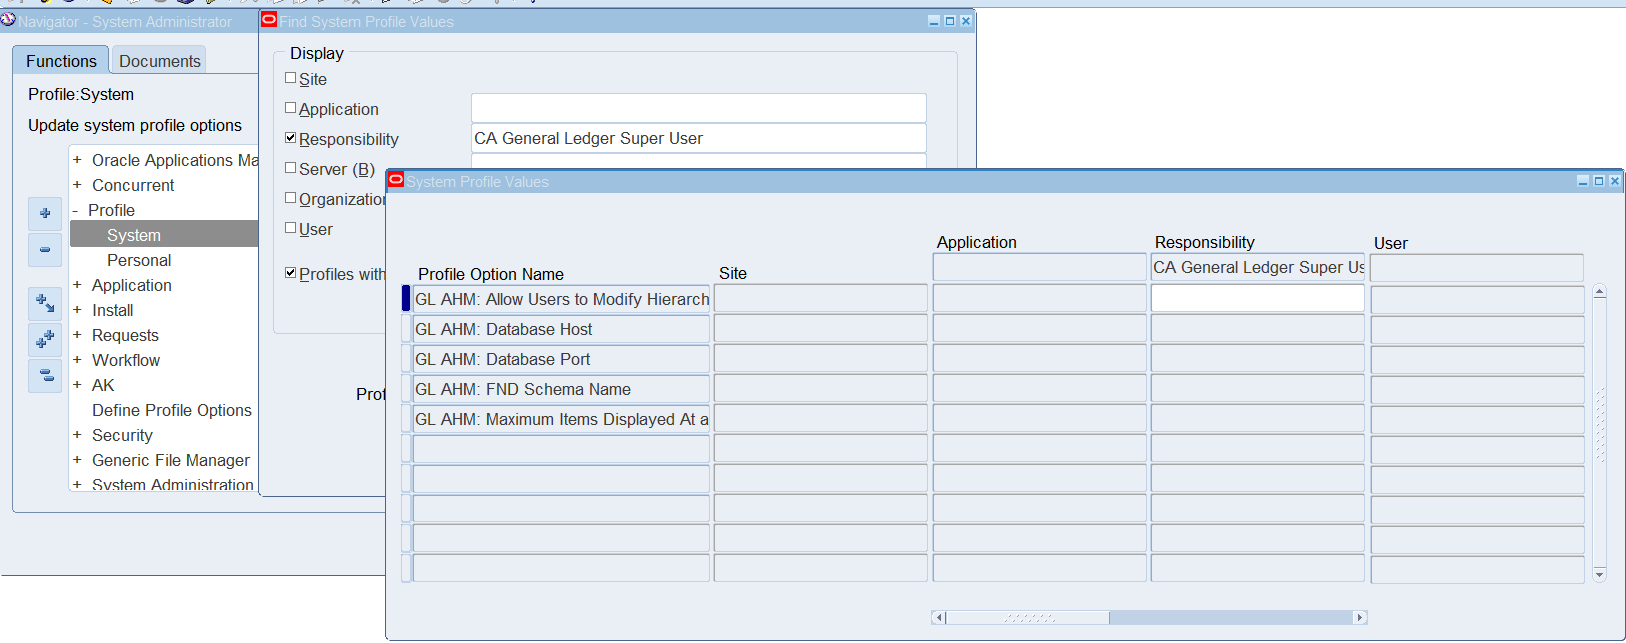
Modify the Profile Option
- Responsibility : System Administrator
- (N) Profile 🡪 System
- Profile : GL AHM: Allow Users to Modify Hierarchyy
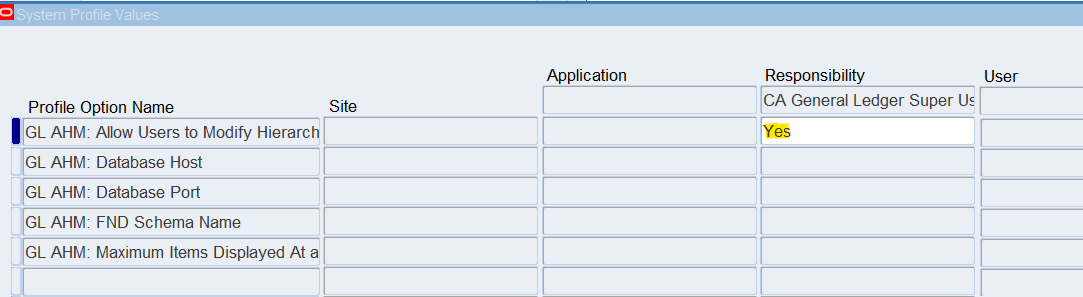
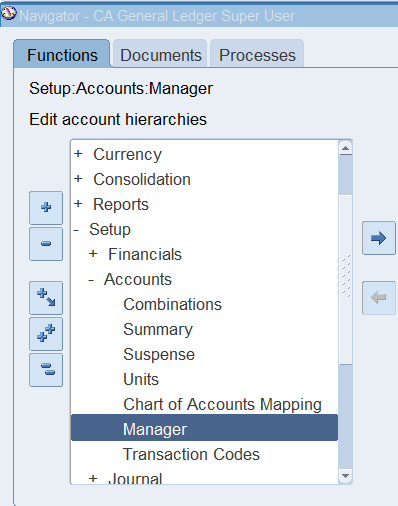
Open the Account Hierarchy Manager
(N) Setup 🡪 Accounts 🡪 Manager
Note: Select “Yes” in the Confirm window asking if the changes are to be saved.
- Minimize the window to keep the Account Hierarchy Manager active
- Expand the CA_Accounting_Flexfield
- Select Department
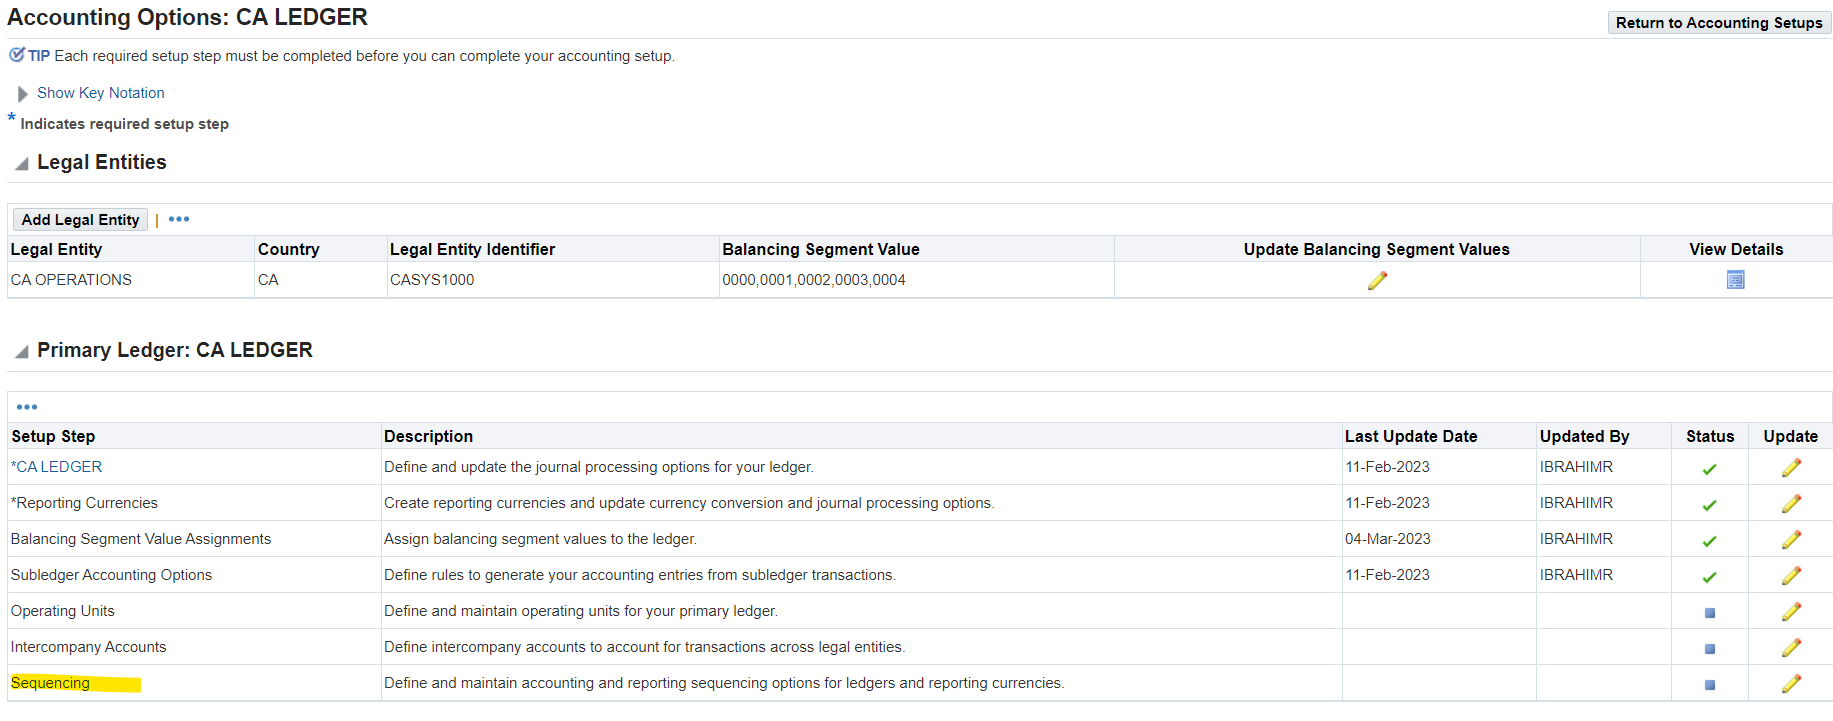
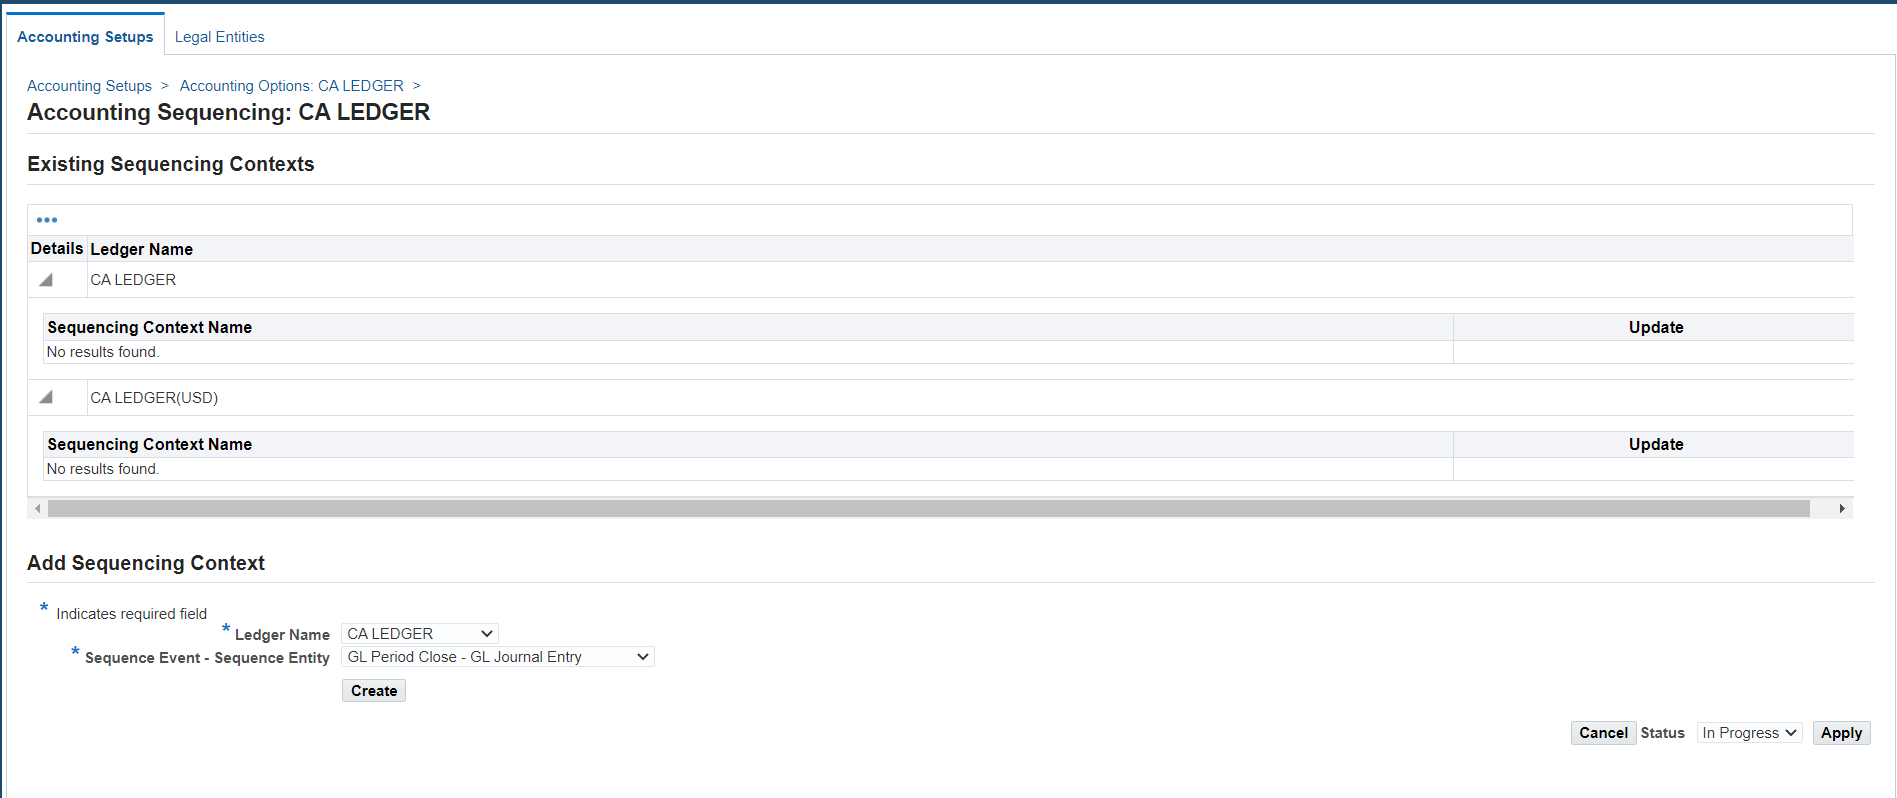
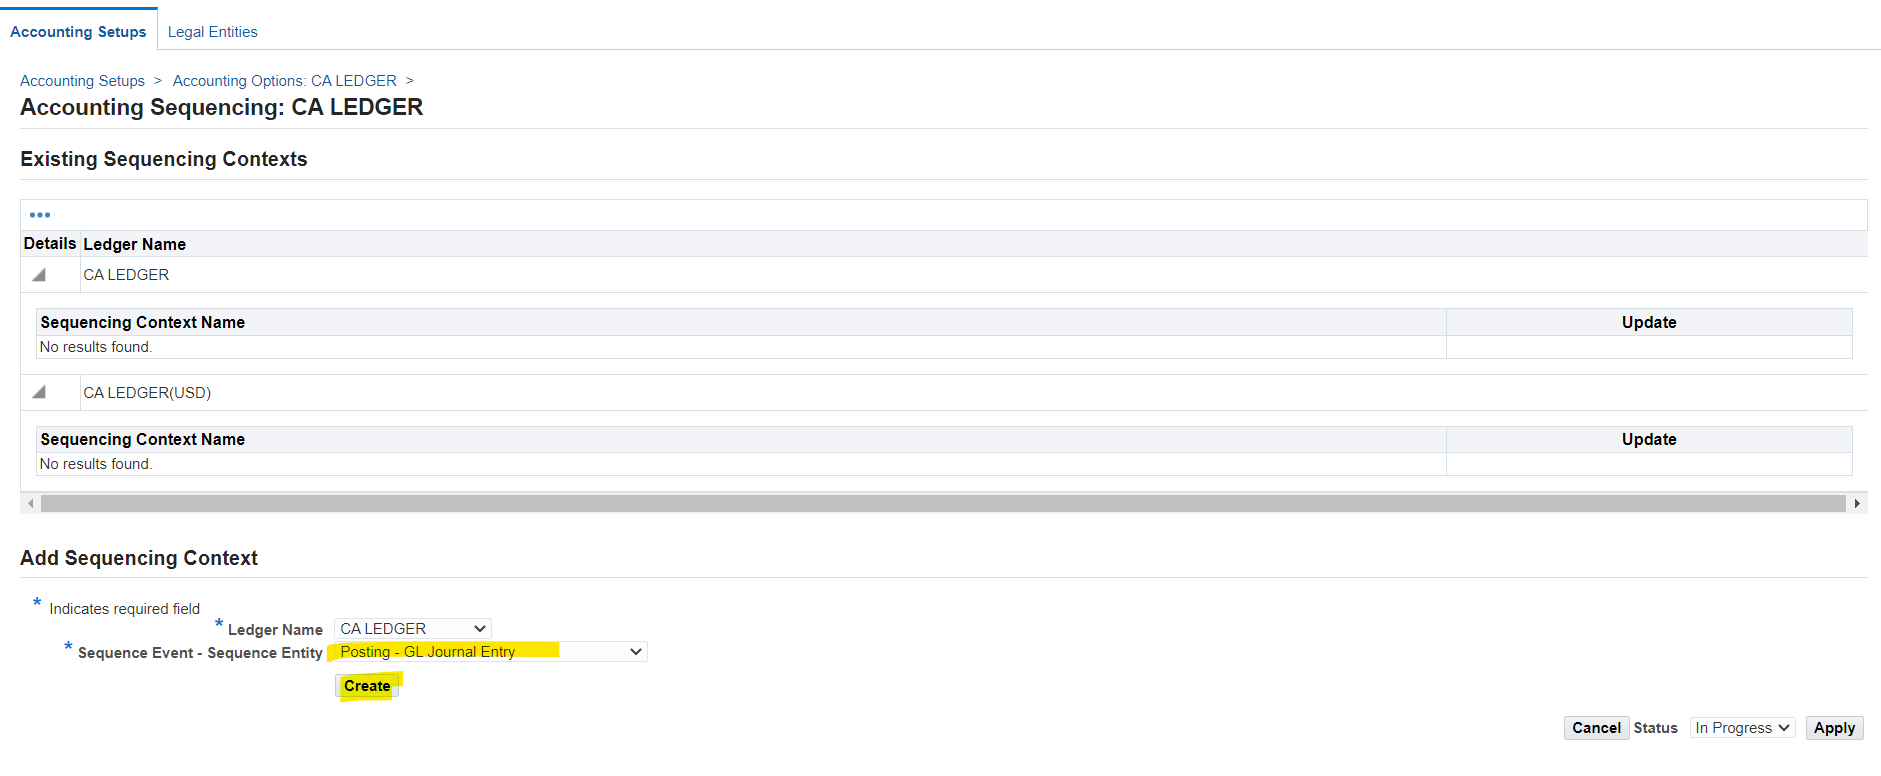
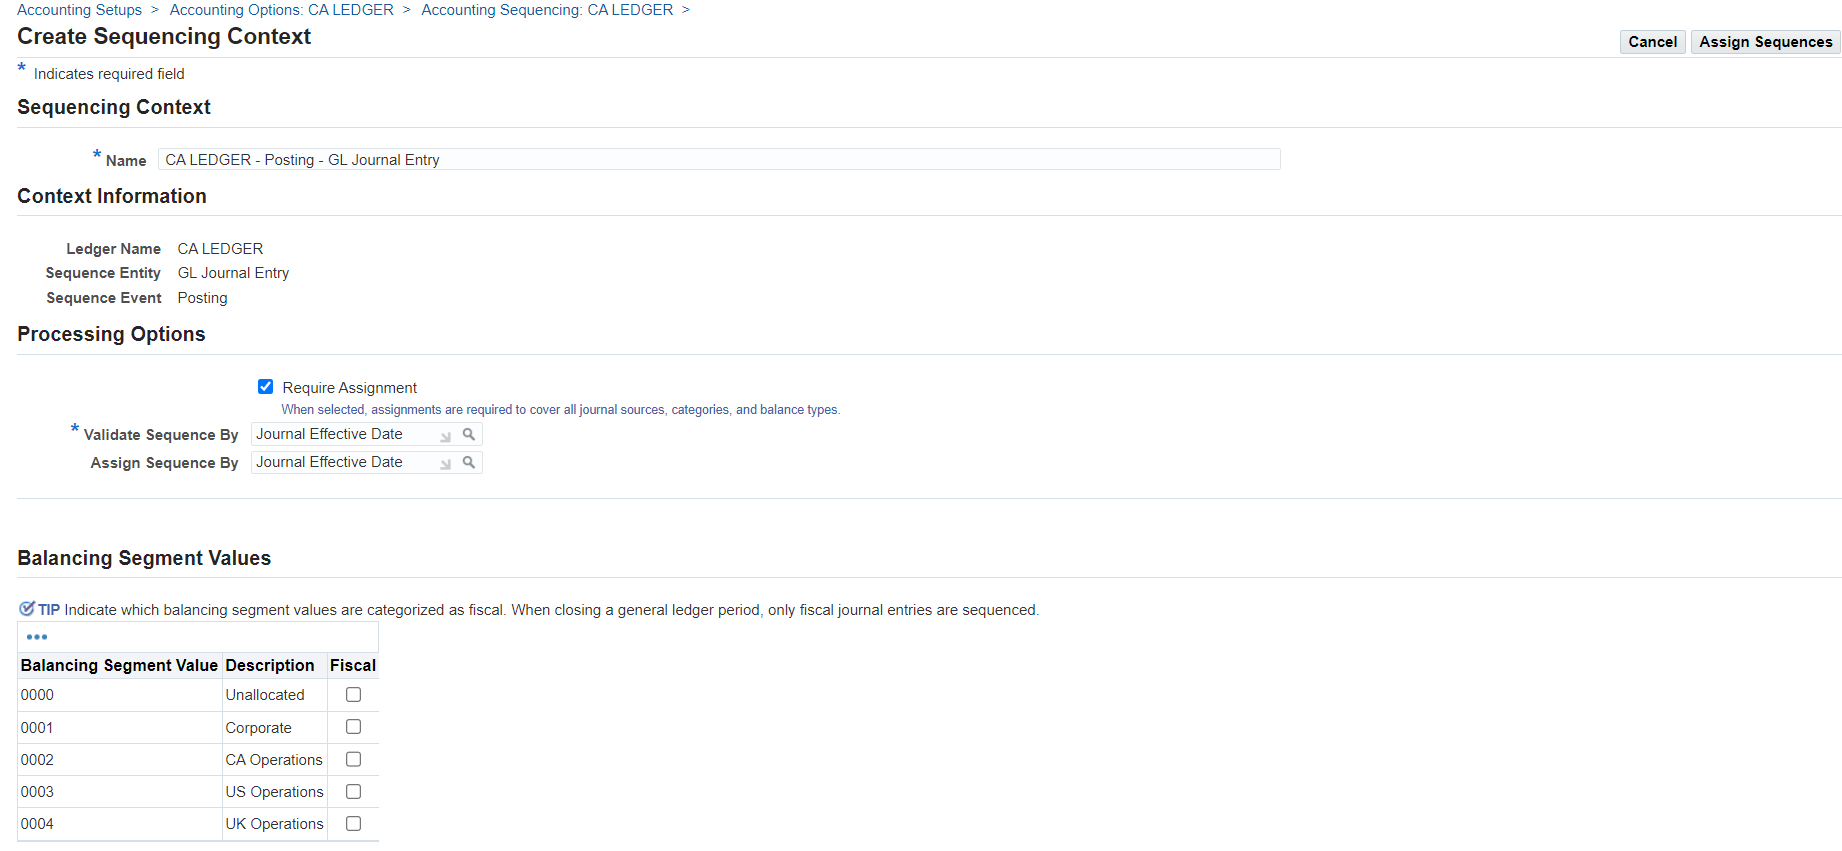
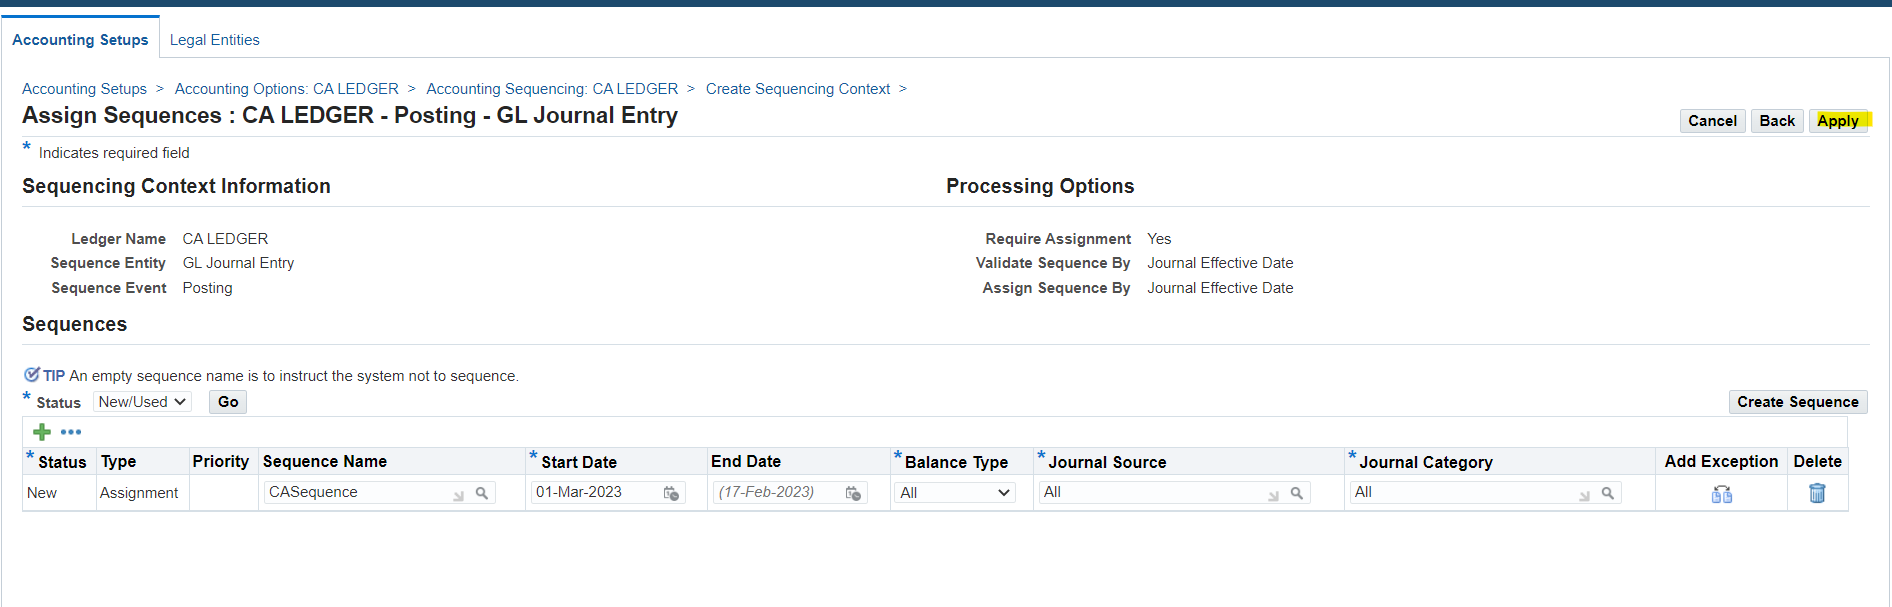
Define Sequencing – Setup Accounting Sequencing
Responsibility : CA General Ledger Super User
Navigate : Accounting Setup Manager
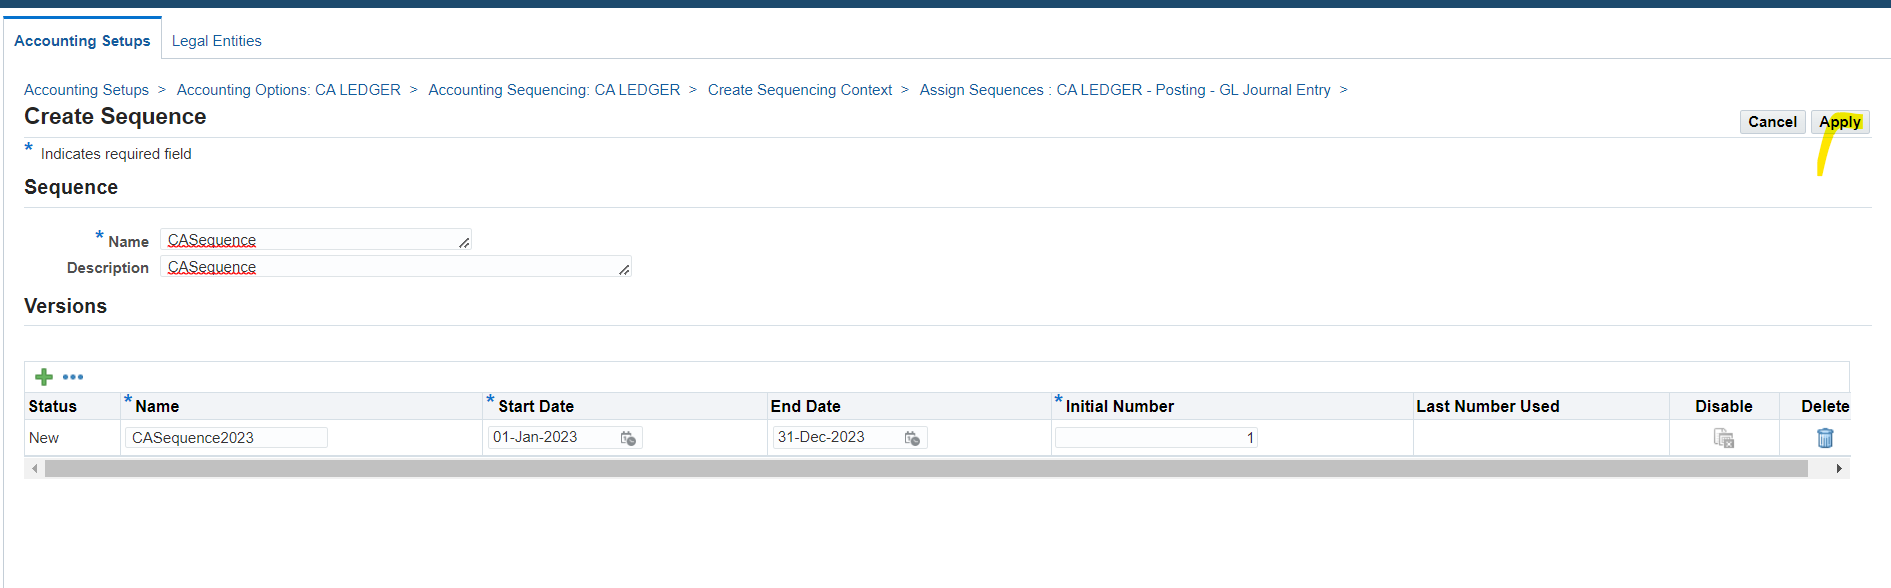
- Create a new sequence CA_Sequence
- Create a new sequence version CASequence20YY (YY is the current year) starting on January 1, 20YY – December 31, 20YY; with the initial number 1
- Assign the sequence CASequence starting on January 1, 20YY to sequence journal entries for all balance type, all journal source and all categories solution – Define Sequencing
(N) Setup 🡪 Financials 🡪 Sequences 🡪 Accounting 🡪 Define
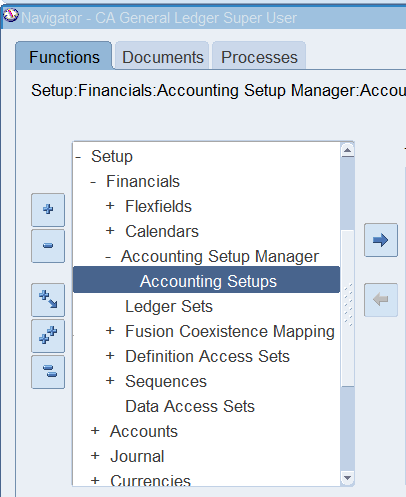
Navigate to Accounting Setup Manager
(N) Setup 🡪 Financials 🡪 Accounting Setup Manager 🡪 Accounting Setups
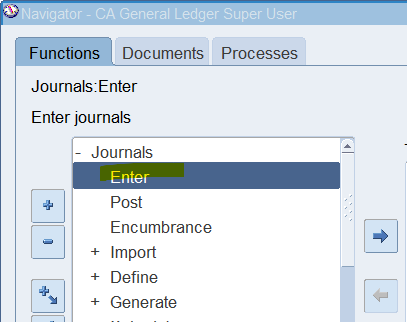
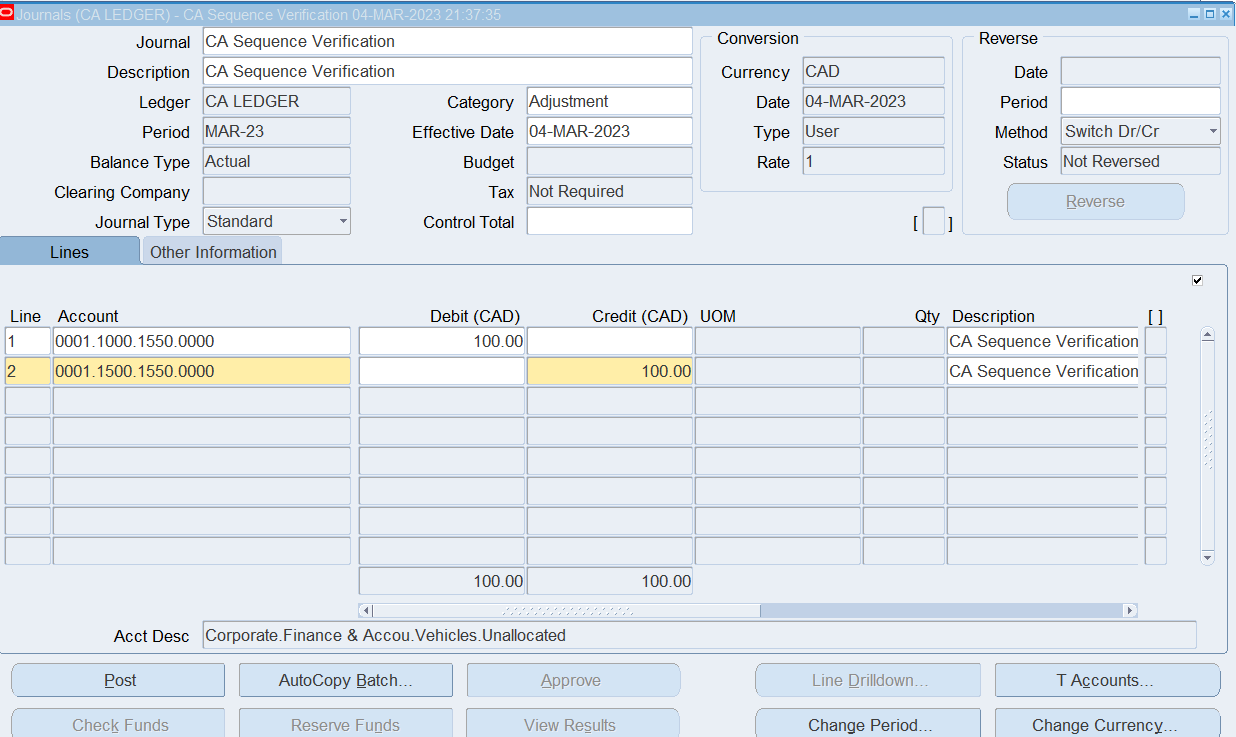
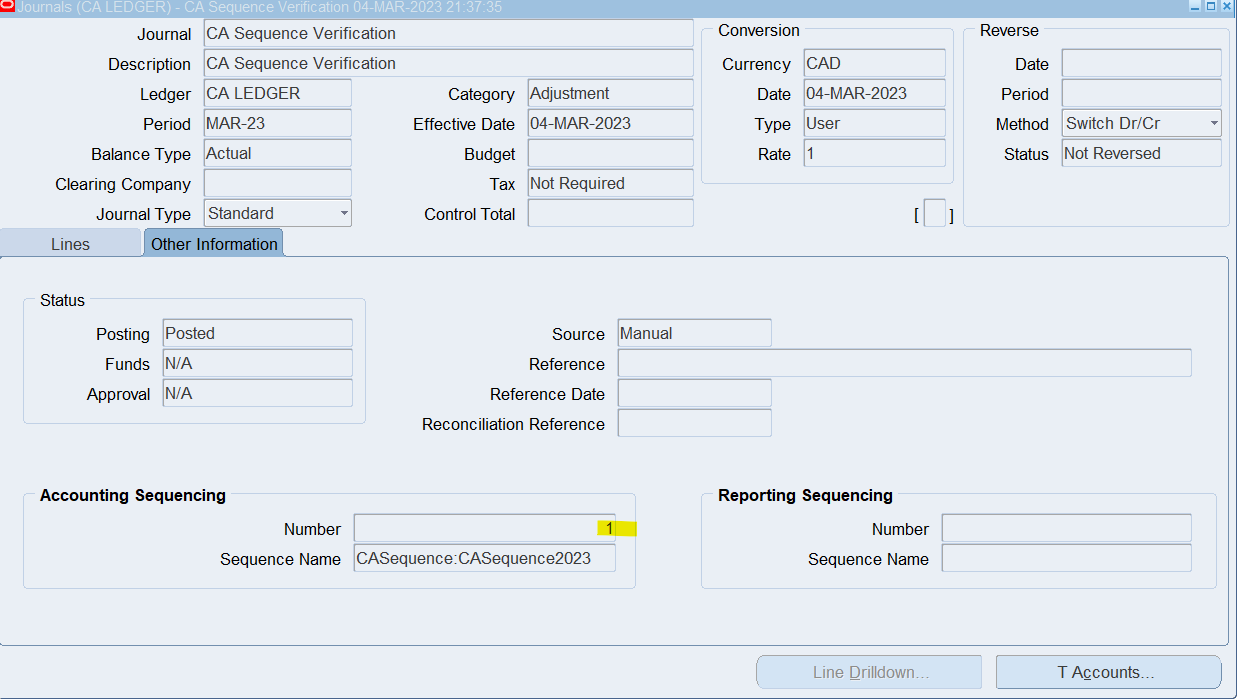
Enter Journal and View Sequences
(N) Journals 🡪 Enter 🡪 New Journal